
Craft Your Own Stunning Geometric Origami Paper Bowls: A Step-by-Step Guide with Free Template
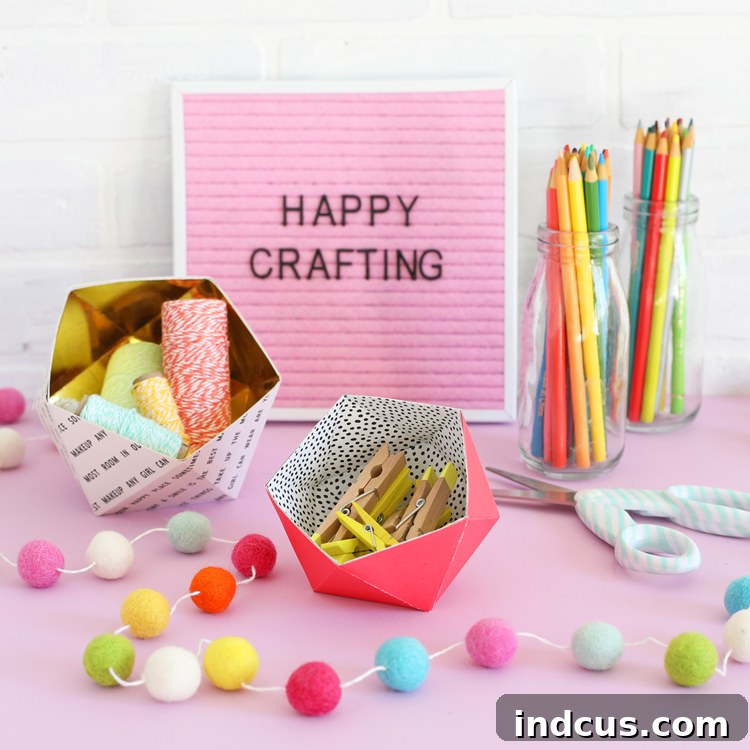
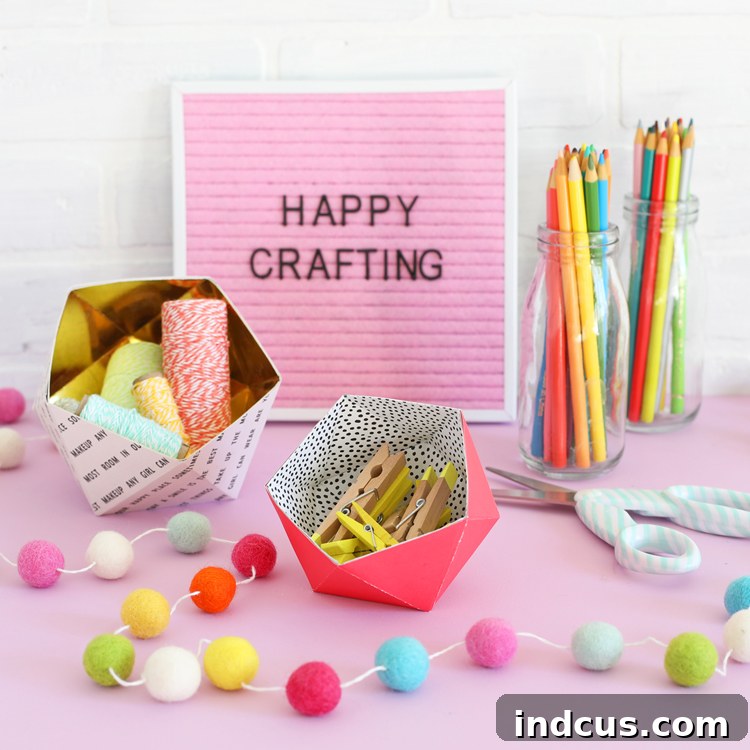
Are you looking for a fun, easy, and incredibly stylish way to organize your space? Dive into the world of paper crafting with these captivating geometric origami paper bowls! Not only are they simple to create, but they also transform ordinary scrapbook paper into functional, decorative pieces. With just a few folds and a touch of glue, you can craft your very own collection of cute organizers that add a personal, artistic flair to any room. Whether you’re a seasoned crafter or just starting out, this project offers a rewarding experience, culminating in beautiful, bespoke storage solutions. The best part? We’ve provided a free printable folding template to guide you every step of the way!
The Allure of Paper Crafts: Transforming Simple Sheets into Sculptural Storage
Like many craft enthusiasts, I confess to owning an extensive collection of scrapbook paper – truly, a ton! Its irresistible patterns and textures often lead to impulse buys, even though my scrapbooking days are mostly behind me. Fortunately, the versatility of scrapbook paper extends far beyond albums, making it a fantastic medium for countless other creative endeavors. If you’re eager to explore more innovative uses for your paper stash, consider exploring our paper crafts archives for a wealth of inspiring project ideas. These charming origami paper dishes stand as a testament to the endless possibilities. They offer a wonderfully unique and visually appealing method for organizing an array of small office supplies such as paper clips, thumbtacks, colorful washi tape rolls, erasers, and other desk essentials you want to keep neatly arranged and within easy reach.
Beyond the desk, these geometric bowls can declutter a myriad of spaces. Imagine them tidying up your craft room, adding elegance to a vanity, or serving as a chic catch-all on an entryway table. The intricate folds create a striking three-dimensional effect that belies their humble origins, making them fantastic gifts or decorative accents.
Ready to transform your paper into functional art? Let’s gather our supplies and begin this exciting crafting journey!
Essential Materials for Your Geometric Paper Bowls
This project requires minimal tools and materials, making it accessible and budget-friendly. Here’s what you’ll need to get started on your beautiful paper bowls:
- Scrapbook Paper: Two sheets of 12×12 inch scrapbook paper are ideal. Look for designs that inspire you! Consider different patterns or complementary solid colors for the interior and exterior to create visual interest. Heavier cardstock (around 65-80 lb) works best for durability, but standard scrapbook paper is also perfectly fine.
- Sharp Scissors: A good pair of sharp scissors will ensure clean, precise cuts, which are crucial for crisp folds.
- Craft Glue: A reliable craft glue, such as a white school glue (PVA glue) or a quick-drying tacky glue, will work perfectly. Make sure it adheres well to paper and dries clear. A glue stick can also work for some steps but liquid glue offers a stronger bond.
- Free Folding Template: This is your key to success! You’ll need to print this template directly onto your scrapbook paper. (Details on accessing it are in the instructions below.)
Optional Materials for Customization: While not strictly necessary, consider having a ruler and a bone folder on hand. A ruler can help achieve perfectly straight cuts, and a bone folder can create incredibly sharp creases, giving your bowls a more polished, professional finish. You might also consider decorative elements like glitter, stickers, or even a clear sealant spray to protect your finished bowls, though they are lovely as is!
Step-by-Step Instructions: Folding Your Way to Functional Elegance
Follow these detailed steps to construct your stunning geometric paper bowls. Precision and patience are your best friends in origami-inspired crafting!
1. Prepare Your Paper: Begin by cutting two pieces of 12×12 inch scrapbook paper down to the standard 8 1/2 x 11 inch paper size. This is a common paper dimension that fits most home printers and ensures compatibility with our template. One piece will serve as the attractive outside of your bowl, showcasing its pattern, while the other will form the structural and often contrasting inside. Taking the time to measure and cut accurately now will pay dividends in the final symmetry of your bowl.
2. Print the Folding Template: Access the essential folding template by clicking HERE. Once you have it open, carefully load both of your pre-cut 8 1/2 x 11 inch pieces of scrapbook paper into your printer. It’s crucial that the template prints on the back (the non-patterned side) of each piece. This ensures that your beautiful patterns remain visible on the finished bowl, while the printed lines provide discreet guides for folding and cutting. Double-check your printer’s paper tray orientation to confirm it prints on the correct side.
3. Cut Along Lines: With the template successfully printed, it’s time to make your cuts. Carefully cut around the outside edge of the hexagon shape on both pieces of paper. Next, follow along all the dotted lines extending from the hexagon’s perimeter towards its center. The photo below illustrates these specific cutting lines, often highlighted in red for clarity. Precision here is paramount; neat cuts will lead to cleaner, more professional-looking folds and a crisper final form for your geometric bowl.
4. Master the Folds: Now for the magic of origami! Begin folding along every single printed line on both of your paper pieces. Pay close attention to the direction of your folds: for the interior piece, fold towards the patterned side of the paper (creating a ‘mountain fold’ if you visualize it). Conversely, for the exterior piece, fold away from the patterned side (a ‘valley fold’). This difference in folding direction is crucial for how the two pieces will interlock and form the bowl’s structure, as depicted in the reference image. Press firmly along each fold to create sharp creases; a bone folder can be incredibly helpful here for truly crisp lines, which are essential for a polished geometric look.
5. Begin Assembling with Glue: Take one of your pieces (either interior or exterior to start). Apply a thin, even layer of glue across the entire surface of the first numbered triangle (e.g., triangle #1). Carefully slide the adjacent triangle over it, ensuring the two triangles overlap completely and align perfectly. Press down firmly for several seconds to allow the glue to set. This precise alignment and secure adhesion are key to forming the sturdy, defined segments of your bowl. Work systematically around the hexagon.
6. Complete Assembly and Combine Pieces: Continue step 5, repeating the gluing process with all of the numbered triangles for the interior piece until it forms a complete, solid inner bowl. For the exterior piece, follow the same gluing method, but consciously leave two adjacent sections (two pairs of overlapping triangles) unglued. These unglued sections will create an opening, providing the necessary space to snugly insert the interior piece later. Once both pieces are prepared, spread a generous, even layer of glue across the white (non-patterned) side of the completed interior bowl. Carefully fit this glued interior piece into the exterior piece through the opening you left. Press firmly along all surfaces and smooth out any wrinkles to ensure a strong bond and a clean finish. Finally, glue the remaining two exterior flaps closed, sealing the bowl.
7. The Finishing Touch: Trim Edges: For a truly polished and professional look, carefully inspect the opening of your newly formed bowl. Trim any uneven edges or slight overlaps along the top rim so that they are perfectly flush with one another. This final step ensures a clean, crisp finish, giving your geometric paper bowl a refined appearance that belies its handmade nature.
Unleash Your Creativity: Uses and Customization
And just like that, you’ve created these incredibly versatile and attractive little storage dishes! The beauty of these geometric paper bowls lies not only in their ease of creation but also in their adaptability to various organizational needs and decorative styles. I currently employ them on my craft room desk to neatly sort office supplies, but their potential extends far beyond.
Imagine using them to organize small bathroom items like cotton balls, hair ties, or makeup sponges, adding a touch of personalized charm to your vanity. They are also perfect for holding jewelry on a dresser, keeping earrings, rings, or delicate necklaces from getting tangled. Place one on a nightstand as a stylish catch-all for loose change, earplugs, or reading glasses, or position it by your entryway as a designated spot for keys and small essentials. They even make delightful packaging for small gifts or party favors!
Don’t be afraid to experiment with different types of scrapbook paper. My personal favorite among the ones I’ve created is the bowl lined with elegant gold foil paper. The subtle shimmer and luxurious shine are simply captivating! It’s almost hard to believe such a sophisticated piece is crafted entirely from paper. Consider papers with metallic accents, textured finishes, or bold, contrasting patterns to truly make your bowls pop.
You can also embellish your bowls further with small decorative elements like faux pearls, rhinestones, or even a personalized monogram. A clear craft sealant spray can also be applied to provide a light protective layer against dust and moisture, although they are generally intended for dry storage.
Tips for Crafting Success
- Precision is Key: For the sharpest, most defined geometric shapes, take your time with cutting and folding. Use a ruler to guide your cuts if desired, and a bone folder to create crisp creases.
- Glue Wisely: Use a thin, even layer of glue. Too much glue can make the paper soggy and create bumps, while too little won’t hold. Press firmly after applying glue to ensure a strong bond.
- Let it Dry: Allow ample drying time for the glue at each stage, especially when combining the interior and exterior pieces. This prevents shifting and ensures a durable bowl.
- Experiment with Paper: Don’t limit yourself to just one type of scrapbook paper. Explore different weights, textures, and finishes (like metallic or glitter) to see how they impact the final look and feel of your bowls.
This is truly such a fun and satisfying project, perfect for an afternoon of creative crafting. I sincerely hope you’ll give it a try and discover the joy of making these unique paper organizers. What are you waiting for? Isn’t it time to add some adorable and functional geometric dishes to your life and home? Get ready to impress your friends and elevate your organization game!
For those who prefer a visual guide, or just want to see the folding in action, we’ve got you covered! Watch this comprehensive video tutorial to ensure you know exactly how to fold the paper perfectly. It makes the process even easier to follow. Enjoy!







