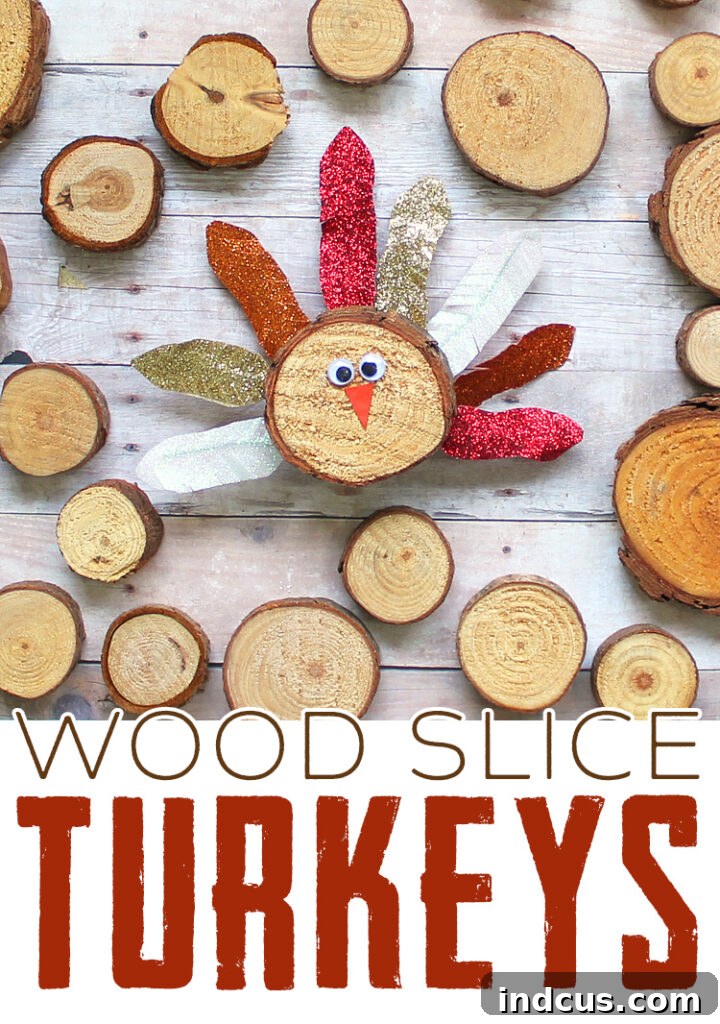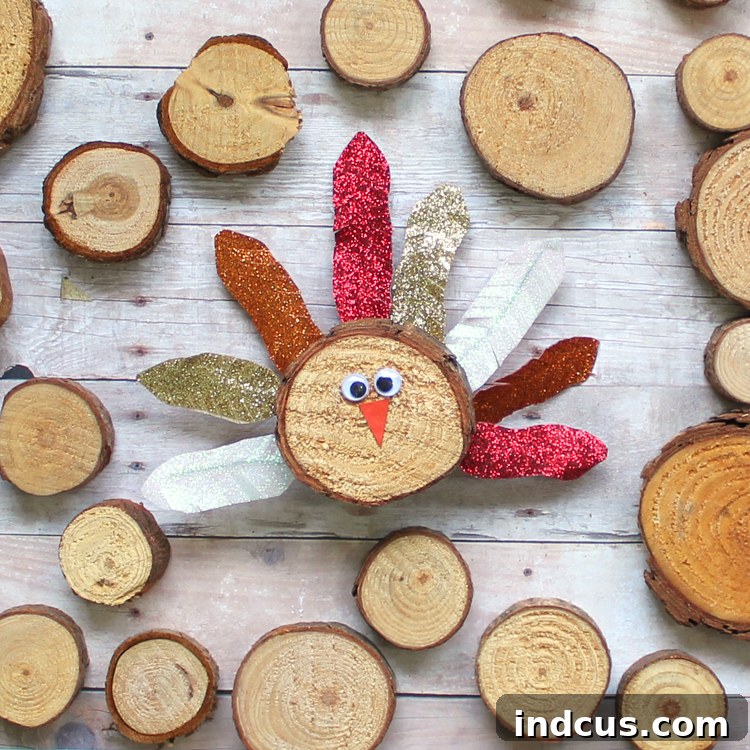
Crafting Joy: Adorable Wood Slice Turkeys with Glittering Washi Tape Feathers for Thanksgiving
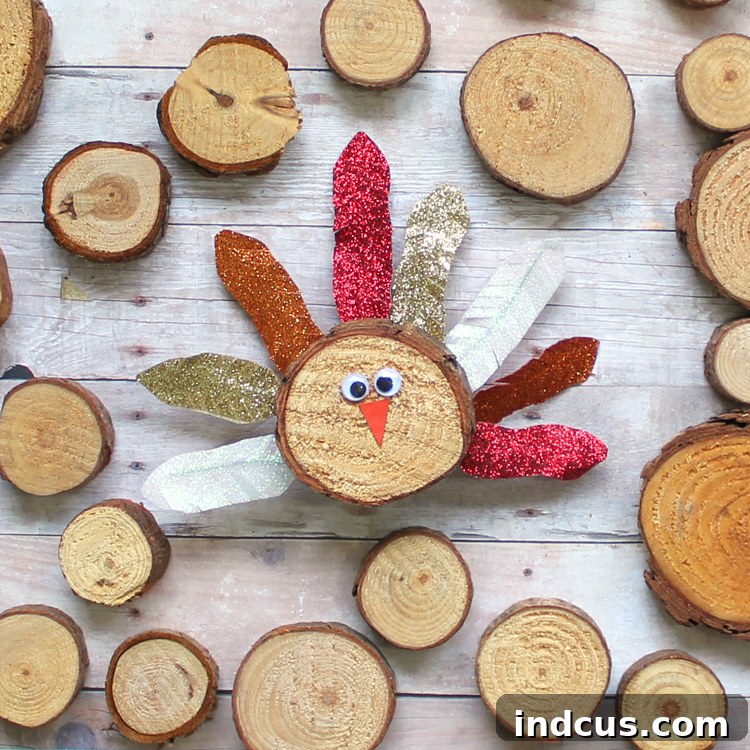
As the crisp autumn air settles and the last echoes of Halloween fade, our thoughts naturally turn to the season of gratitude and warmth: Thanksgiving. It’s a time for family, delicious food, and, of course, charming holiday crafts that bring a touch of handmade joy to your home. Today, we’re thrilled to share an exceptionally delightful and easy Thanksgiving craft that promises to become a cherished part of your festive decor: adorable wood slice turkeys!
These unique turkeys offer a rustic yet whimsical appeal, perfect for adding a cozy touch to your Thanksgiving table or mantelpiece. What makes them truly stand out is their charming construction from mini wood slices, combined with dazzling, glittery feathers crafted from washi tape. And here’s the best part for all craft enthusiasts: it’s the kind of glitter that stays put, meaning all the sparkle without any of the mess! Get ready to embrace the festive spirit with a craft that’s simple enough for children to join in, yet elegant enough to impress your holiday guests.
Whether you’re looking for a fun family activity, a unique centerpiece, or personalized place card holders, these wood slice turkeys are incredibly versatile. They can be scaled to any size, allowing for endless creative possibilities. Let’s dive into creating these charming little guys and add a sparkle to your Thanksgiving celebration!
Gather Your Crafting Essentials: Materials for Your Wood Slice Turkeys
To embark on this delightful Thanksgiving crafting adventure and bring your cute turkeys to life, gather the following simple yet impactful materials. Most of these can be found at your local craft store or conveniently ordered online, ensuring you have everything you need for a smooth and enjoyable crafting experience.
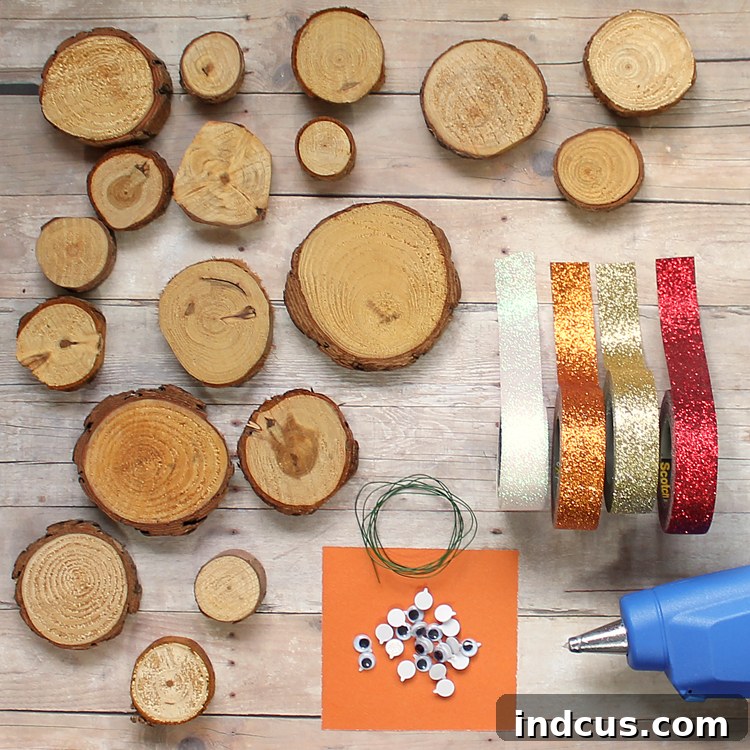
- Mini Wood Slices: These form the body of your turkey. Choose slices that are smooth and relatively uniform in size for a cohesive look.
- Glitter Washi Tape: Opt for festive colors like red, white, gold, and orange to mimic autumn foliage and traditional Thanksgiving hues. The glitter adds a beautiful shimmer without the mess of loose glitter.
- Googly Eyes: These will give your turkeys their playful and adorable personalities. Various sizes are available, so pick ones that best fit your wood slices.
- Florist Wire: A thin, flexible wire used to give structure to your washi tape feathers. It helps them stand upright and hold their shape.
- Orange Cardstock: For cutting out the iconic turkey beak. A sturdy cardstock ensures the beak maintains its shape.
- Hot Glue Gun + Glue Sticks: Essential for securely attaching all components. Always supervise children when using a hot glue gun due to its high temperature.
- Craft Scissors: Sharp scissors are needed for precise cutting of washi tape and cardstock.
Having all your materials organized before you start will make the crafting process much more enjoyable and efficient.
Step-by-Step Instructions: Crafting Your Rustic Thanksgiving Turkeys
Follow these detailed steps to create your charming wood slice turkeys. Each instruction is designed to be clear and easy to follow, ensuring a successful and fun crafting session for everyone.
STEP 1: Crafting Your Glittery Washi Tape Feathers
Begin by preparing the dazzling feathers for your turkey. Unroll a strip of your chosen glitter washi tape, aiming for a length of approximately 4-5 inches. This length will give you enough material to create a nicely sized feather. Next, cut a piece of florist wire about 3-4 inches long. Carefully place the florist wire horizontally across the center of the sticky side of your washi tape, positioned roughly halfway up the tape strip. The wire acts as the central spine of your feather, providing necessary support and shape.
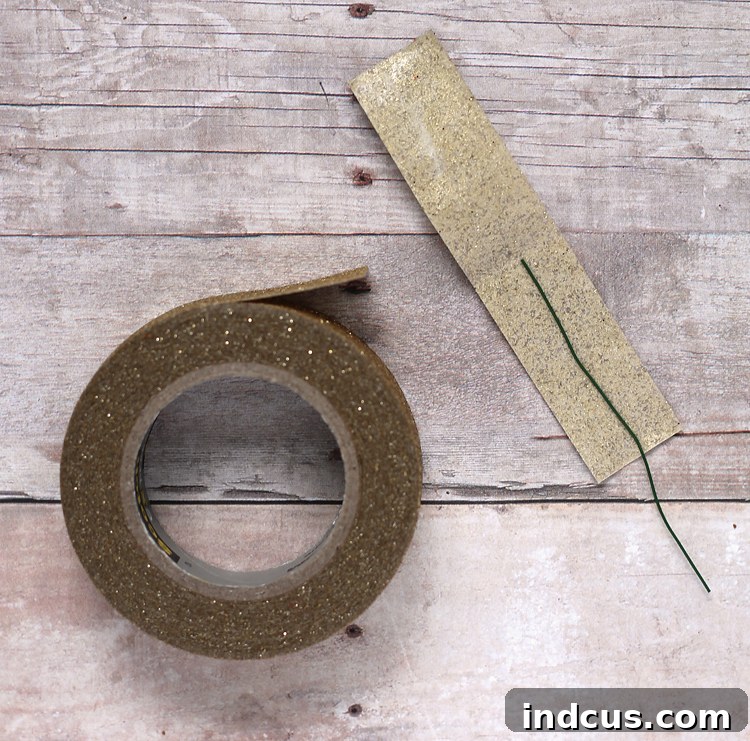
STEP 2: Shaping the Feathers with Precision
With the florist wire securely in place, carefully fold the washi tape strip over onto itself, ensuring that the wire is perfectly sandwiched between the two sticky sides. Press firmly along the length of the tape to create a strong bond and flatten out any air bubbles. Now, it’s time to transform this strip into a feather. Using your craft scissors, meticulously cut the folded washi tape into the desired feather shape. You can opt for a traditional rounded top or a more pointed design. Once the basic shape is formed, make small, evenly spaced slits along all the edges of the feather. These delicate cuts will give your washi tape feathers a more realistic and textured appearance, enhancing their visual appeal.
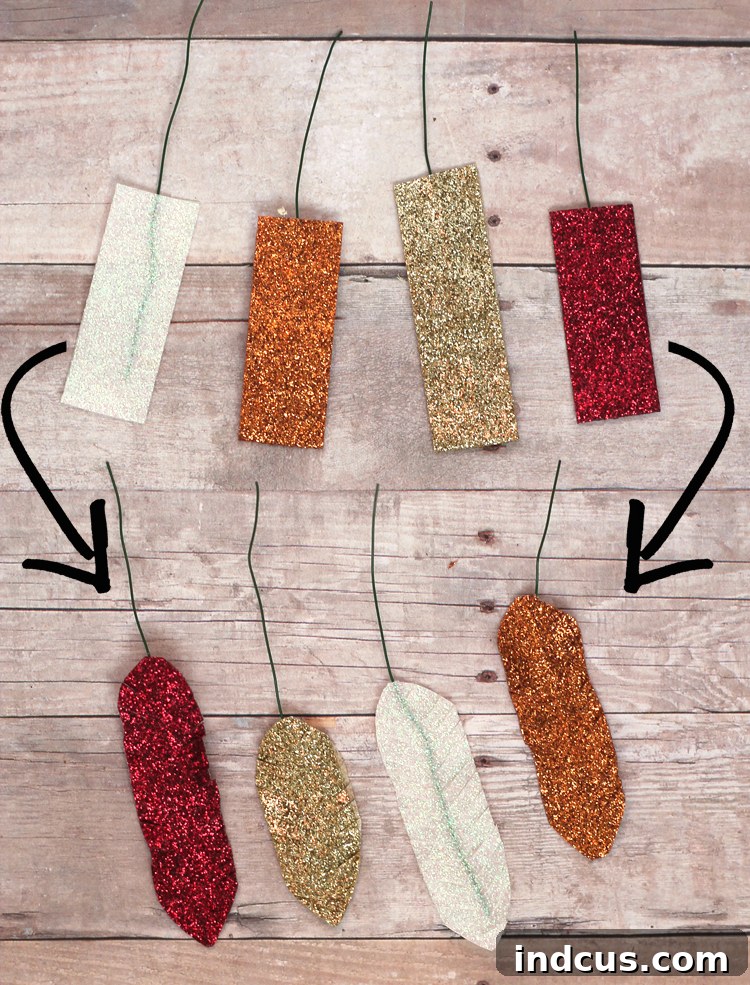
STEP 3: Bringing Your Turkey to Life with Eyes and Beak
Now, let’s give your turkey its personality! Take one of your mini wood slices, which will serve as the body and face of your turkey. Apply a small dab of hot glue to the back of two googly eyes and carefully attach them to the upper half of the wood slice. Position them relatively close together to create an endearing expression. For the beak, take your orange cardstock and cut a small, triangular shape. A tiny dab of hot glue on the back of the cardstock triangle will secure it firmly to the wood slice, just below and between the googly eyes. This simple addition instantly transforms your wood slice into the cute face of a Thanksgiving turkey.
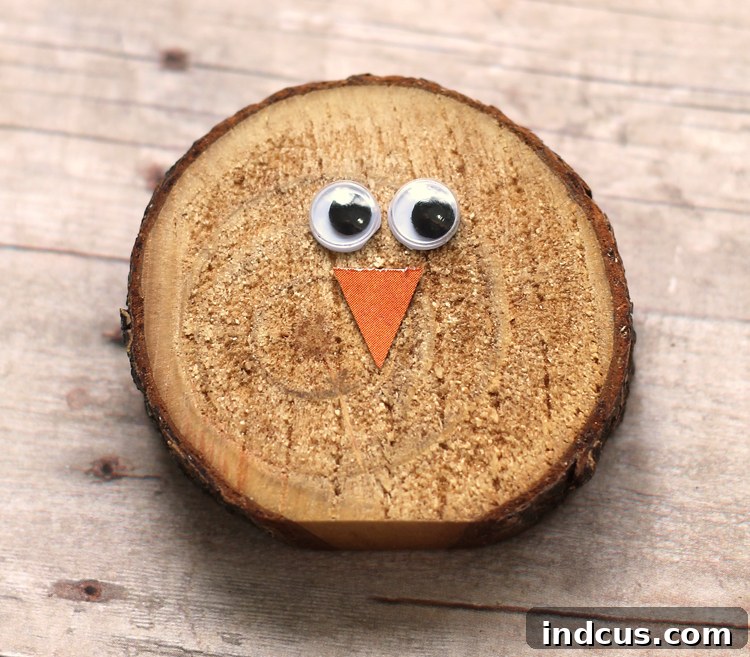
STEP 4: Attaching the Glittery Feathers
With the turkey’s face complete, it’s time to add its magnificent tail feathers. Flip the wood slice over so you are working on the back side. Arrange your prepared washi tape feathers in an arc, fanning them out slightly to mimic a turkey’s tail. Once you are happy with the arrangement, apply a generous amount of hot glue along the wired base of each feather and firmly press them onto the top-back edge of the wood slice. Hold each feather in place for a few seconds to ensure the glue sets properly. You can use varying colors of feathers to create a vibrant, multi-colored display.
STEP 5: The Finishing Touch: Ensuring Stability and Aesthetics
To complete your turkey and ensure it stands proudly upright, take a slightly smaller wood slice (or one of similar size) and hot glue it to the backside of your turkey. Position this second wood slice over the area where you attached the feathers. This step serves two crucial purposes: first, it neatly covers up the visible ends of the feather wires and glue, giving your turkey a clean and finished look. Second, and perhaps most importantly, it acts as a stable base, preventing your turkey from tipping over and allowing it to stand firmly on any flat surface. This thoughtful addition elevates the craftsmanship of your turkey, making it not only adorable but also highly functional for display.
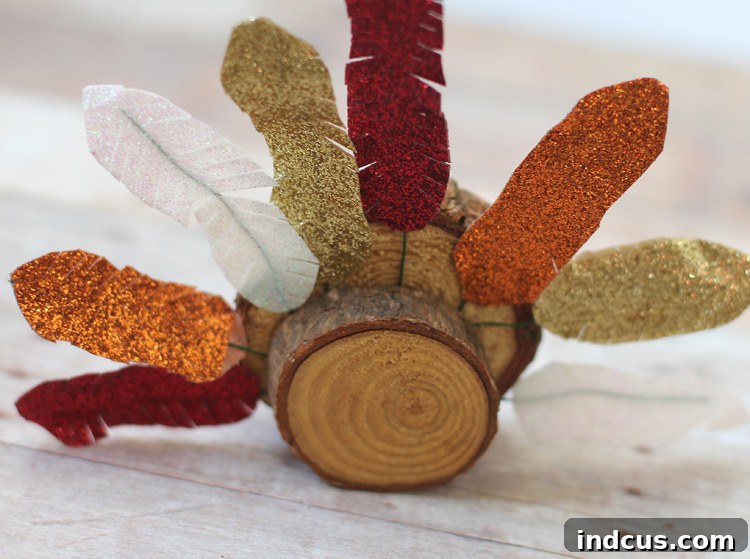
And there you have it! With these simple yet engaging steps, you’ve created a charming and unique Thanksgiving craft. Isn’t this little guy absolutely adorable? The combination of rustic wood and sparkling washi tape makes for a truly captivating piece that embodies the spirit of the season.
Creative Display Ideas for Your Wood Slice Turkeys
Once your charming wood slice turkeys are complete, the fun doesn’t stop there! These versatile little figures can be incorporated into your Thanksgiving decor in numerous creative ways, adding a personalized and festive touch to your home. Here are some inspiring ideas to showcase your handmade creations:
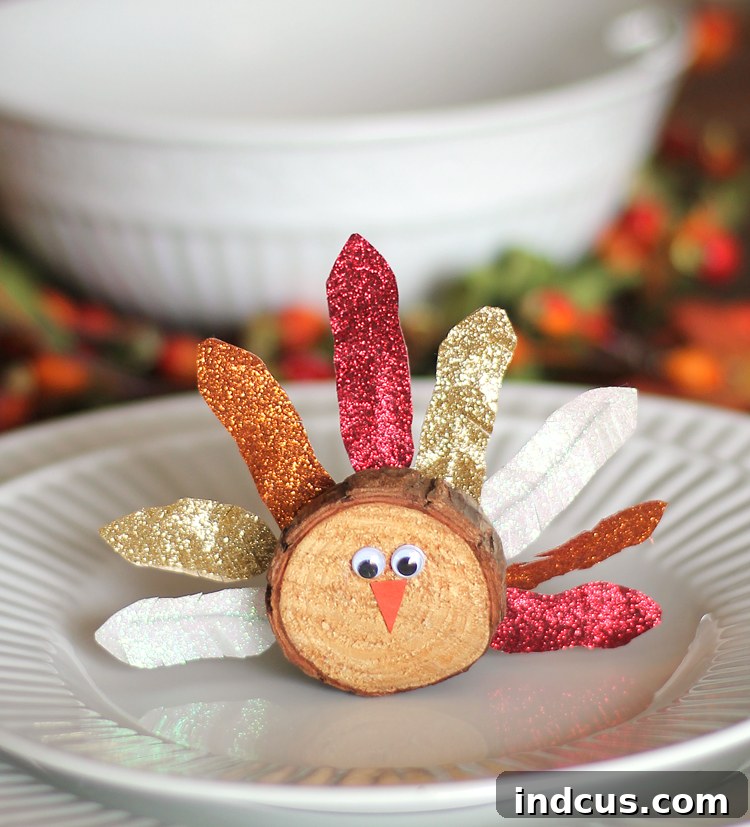
1. Enchanting Place Card Holders for Your Thanksgiving Table
Elevate your Thanksgiving feast by using these turkeys as delightful place card holders. Imagine each guest arriving to find a personalized turkey greeting them at their seat! It’s incredibly simple to execute: just print your guests’ names onto small strips of cardstock, cut them out neatly, and then hot glue each name card to a toothpick. Carefully insert the toothpick into the back or side of the small wood slice that forms the turkey’s base, ensuring it stands upright. This thoughtful detail not only helps guide your guests to their seats but also doubles as a charming favor they can take home.
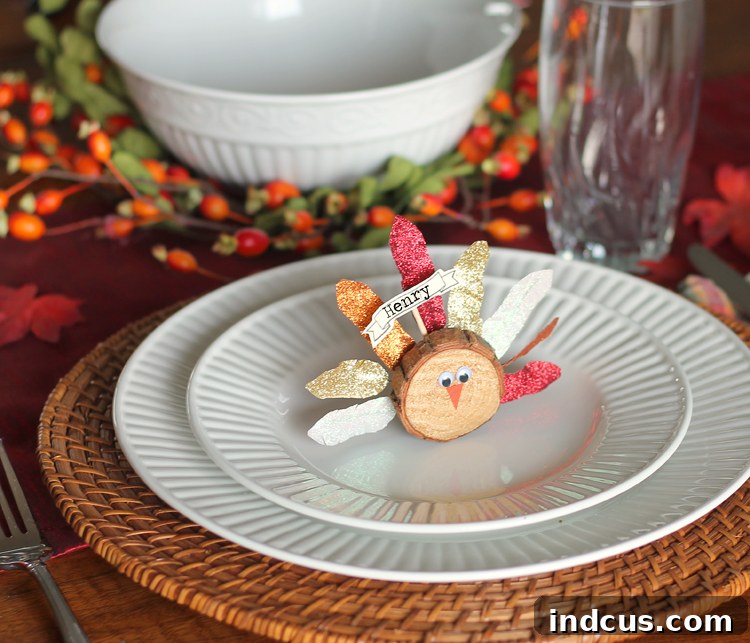
2. Adorable Thanksgiving Napkin Rings
Transform ordinary table settings into extraordinary ones with these turkeys as festive napkin rings. Simply create a small loop from ribbon or another strip of washi tape to form a ring. Hot glue this loop to the back of your wood slice turkey, ensuring it’s secure enough to hold a rolled napkin. Tada! You’ve created the cutest Thanksgiving napkin ring you ever did see, adding a touch of handmade elegance and whimsy to each place setting. Your guests will undoubtedly be impressed by this thoughtful detail.
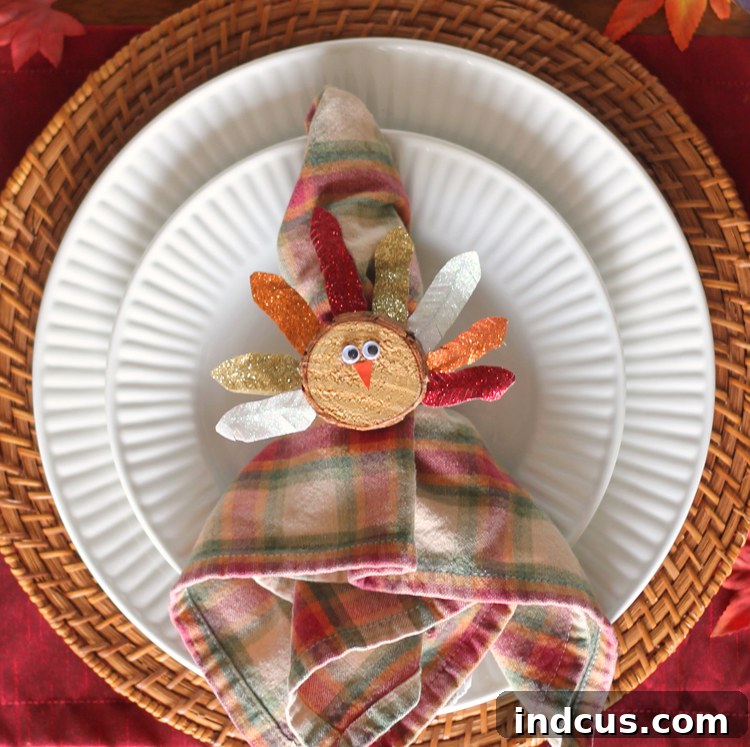
3. Charming Centerpiece Elements
Group several turkeys of varying sizes or colors together to create an eye-catching centerpiece for your dining table or coffee table. Surround them with fall foliage, mini pumpkins, candles, or other seasonal elements to create a rustic and inviting display. The glittering feathers will catch the light beautifully, adding a festive glow to your gathering.
4. Festive Mantel Decor
Line your mantelpiece with a procession of these little turkeys, perhaps interspersed with garlands, string lights, and autumn leaves. They add a touch of handcrafted warmth and holiday cheer to any fireplace area, becoming a focal point of your seasonal decor.
5. Thoughtful Gift Toppers
If you’re bringing a hostess gift or sharing Thanksgiving treats, attach one of these small turkeys to the top of the package. It’s a sweet, personal touch that shows extra effort and thoughtfulness, making any gift feel even more special.
6. Classroom or Party Favors
These easy-to-make crafts are perfect for school projects or as party favors for a kids’ Thanksgiving party. Children will love creating their own turkeys and taking them home as a memento of the festive occasion.
Making Thanksgiving Memories Through Crafting
Beyond their decorative appeal, these wood slice turkeys offer a wonderful opportunity to create lasting Thanksgiving memories. Crafting together is a fantastic way to bond with family, engage children in creative activities, and instill a sense of accomplishment. The process of selecting materials, carefully cutting the feathers, and bringing these little characters to life fosters creativity, fine motor skills, and patience in young crafters. For adults, it’s a relaxing and rewarding activity that allows for personal expression and adds a heartfelt touch to holiday preparations. Imagine the joy of seeing your handmade turkeys adorning your Thanksgiving table year after year, each one a tangible reminder of precious moments spent together.
Found this project inspiring? Pin it now so you can easily find it later or share it with fellow craft enthusiasts!