
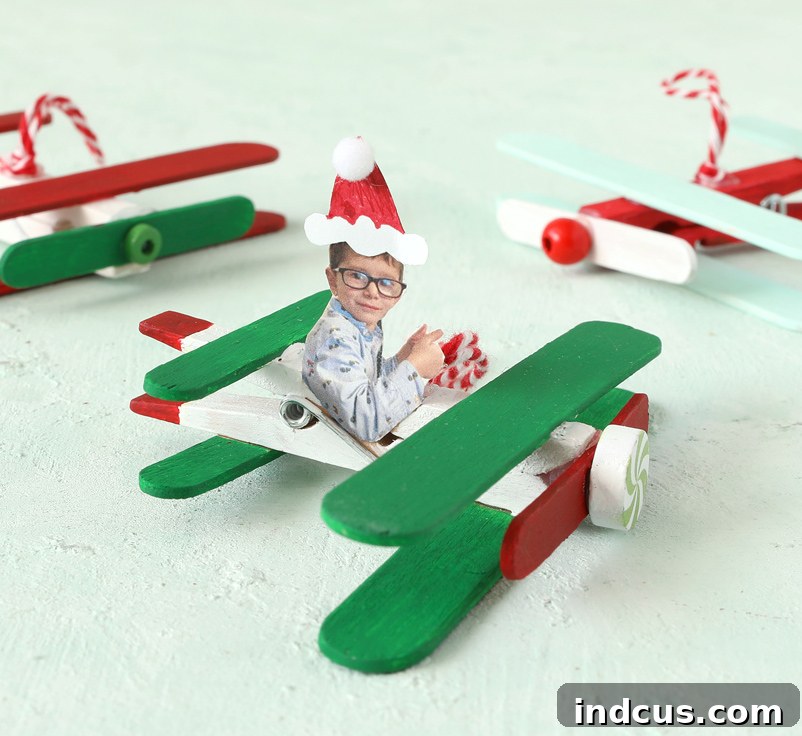
DIY Popsicle Stick Airplane Christmas Ornament: A Personalized Keepsake
Transform simple craft supplies into a treasured holiday memory! This guide will show you how to create an absolutely adorable and surprisingly simple airplane Christmas ornament using popsicle sticks, a wooden clothespin, and a sweet photo of your child. Imagine pulling out this handmade gem year after year, instantly transported back to cherished crafting moments and the joyous face of your little pilot.
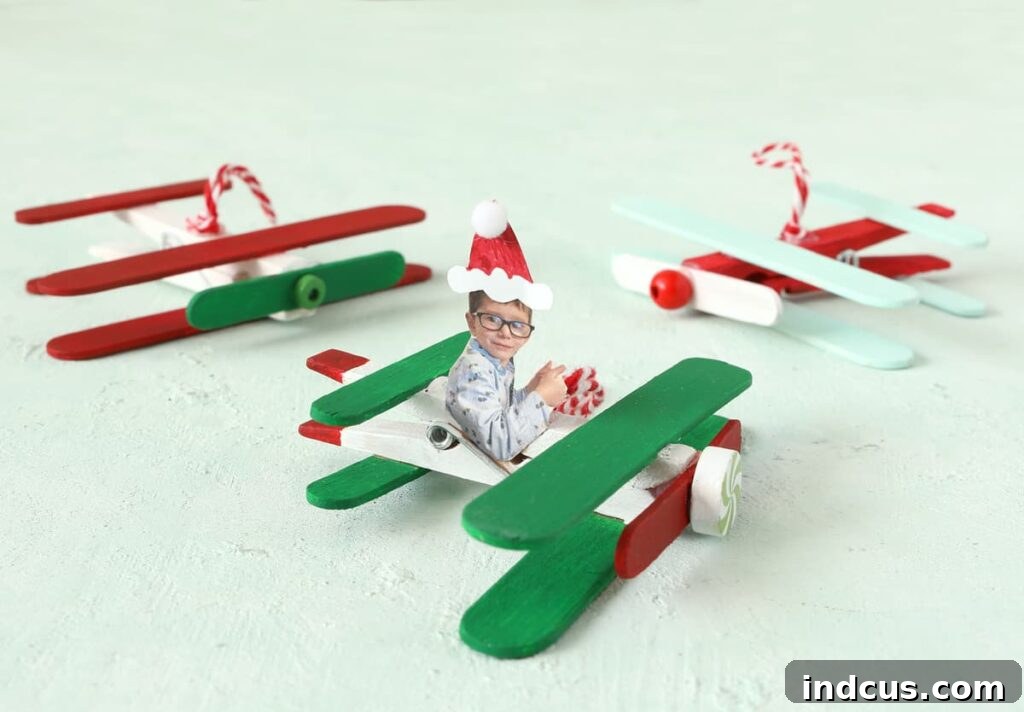
Why This Personalized Airplane Ornament is a Must-Do Craft
Christmas is a time for making memories, and what better way to do that than with a craft that combines creativity, personal touch, and endless charm? This popsicle stick airplane ornament isn’t just another decoration; it’s a miniature time capsule. Each year, as you hang it on your tree, you’ll be reminded of your child’s joyful contribution, their tiny hands helping create something truly special. The addition of your child’s photo, making it appear as if they’re soaring through the skies as the pilot, adds an irresistible touch of whimsy and sentimentality that will bring a smile to everyone’s face.
It’s a fantastic project for several reasons:
- Personalized & Unique: Unlike store-bought ornaments, this one carries a piece of your family’s story.
- Simple & Accessible: Uses readily available and inexpensive craft supplies.
- Engaging for Kids: Children can actively participate in painting and assembly (with adult supervision).
- Lasting Keepsake: A durable ornament that will be cherished for many Christmases to come.
- Wonderful Gift Idea: Grandparents, aunts, and uncles will adore receiving an ornament featuring their favorite little one.
Disclosure: This post may contain affiliate links, meaning we may earn a small commission if you make a purchase through them, at no extra cost to you.
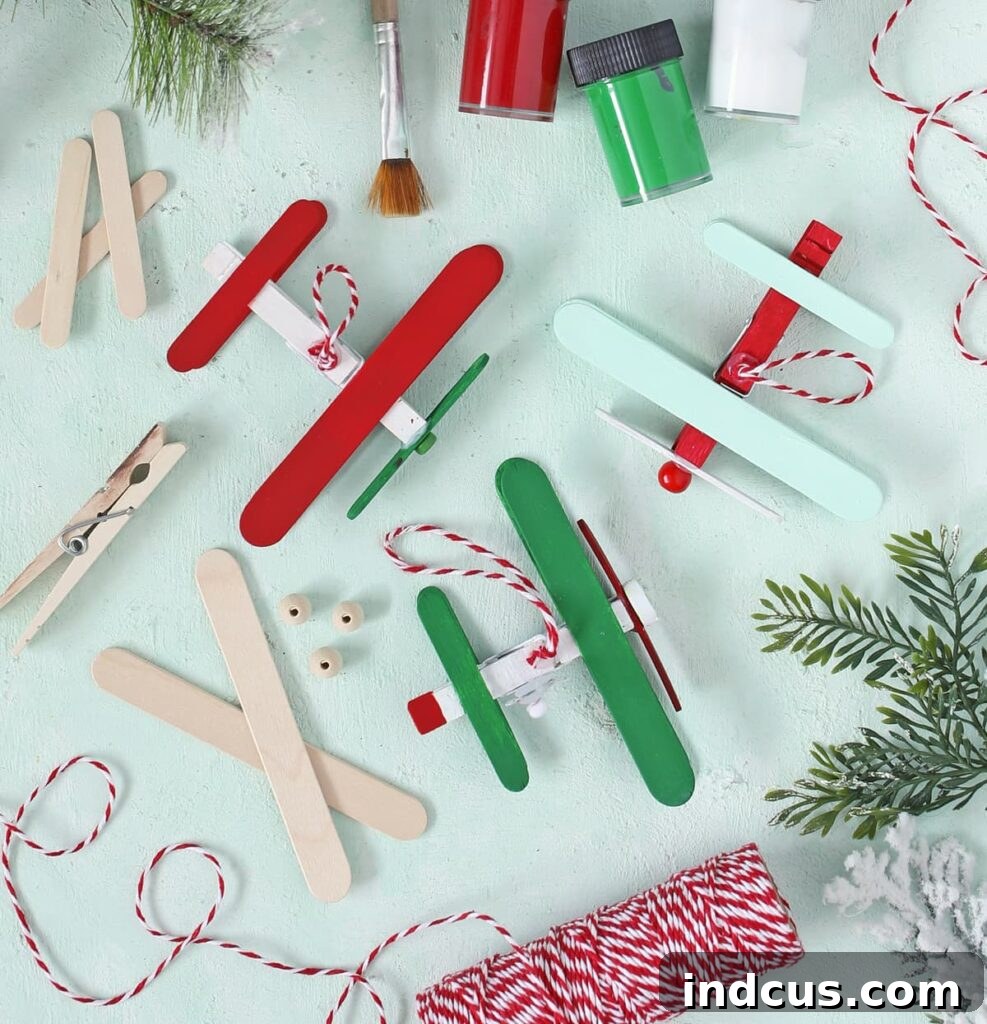
Gather Your Supplies: Everything You Need for Your Airplane Craft
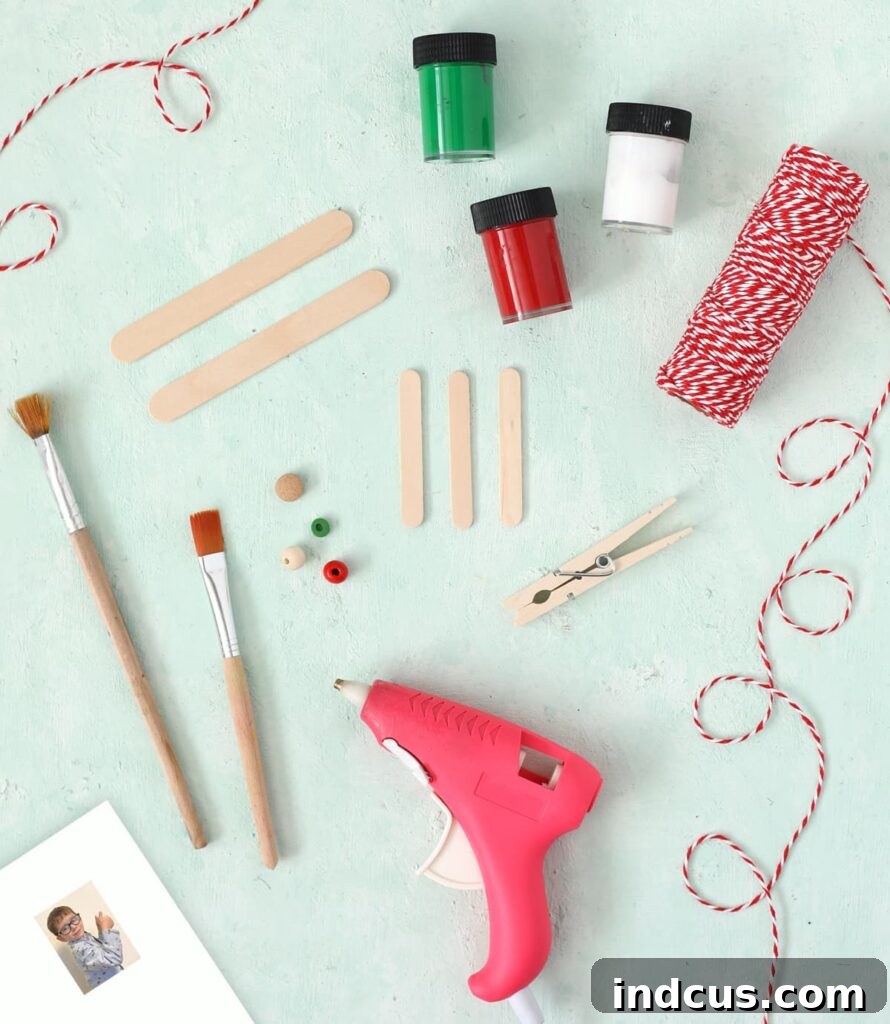
Before you embark on your crafting adventure, ensure you have all your materials ready. Having everything laid out will make the process smoother and more enjoyable, especially when crafting with little ones. For each airplane ornament you plan to create, you will need the following:
Essential Materials List:
- Wide Popsicle Sticks (Craft Sticks): You’ll need two (approximately 4.5″ length x .5″ width) for the main wings. While wider sticks offer a bolder look, standard craft sticks (often slightly narrower) work perfectly fine, resulting in a slightly skinnier front wing, which is equally charming. Avoid jumbo sticks, as they tend to be too large for this specific design.
- Small Popsicle Sticks (Craft Sticks): You’ll need three (approximately 2.5″ length). These will form the tail wings and the propeller at the front.
- Wooden Clothespins: One standard wooden clothespin (around 3.25″ length) will serve as the body of your airplane. The split design is ideal for attaching the wings.
- Wood Bead, Button, or Bobble: One small wooden bead (or a decorative button/bobble) for the propeller’s center. This adds a nice finishing touch.
- Craft Glue: A craft glue pen is excellent for kids due to its precision and ease of control for small hands. For quicker assembly, especially for the propeller and hanging loop, a hot glue gun (used by an adult) is highly recommended for its fast-drying and strong hold.
- Craft Paint: Acrylic craft paint in your desired colors. This is where the ornaments truly come to life!
- Baker’s Twine or Ribbon: A short length for creating a loop to hang your ornament.
- Your Child’s Photo: A small, roughly 1-inch photo of your child, preferably posed sideways with their head turned, smiling, and giving a thumbs-up.
- Scissors: For cutting the photo.
- Optional: Heavyweight cardstock or photo paper for printing the picture, scrap paper for extra embellishments (like a tiny Santa hat!).
A little tip about craft stick sizes: While I found some perfectly wide sticks at Michaels, most common craft sticks will work just fine. The key is to avoid the very large ‘jumbo’ sticks, as they can overwhelm the small clothespin body.
Step-by-Step Guide: Crafting Your Airplane Ornament
Follow these easy instructions to create your charming airplane ornament. Remember, adult supervision is key, especially when using hot glue.
Step 1: Personalize with Color
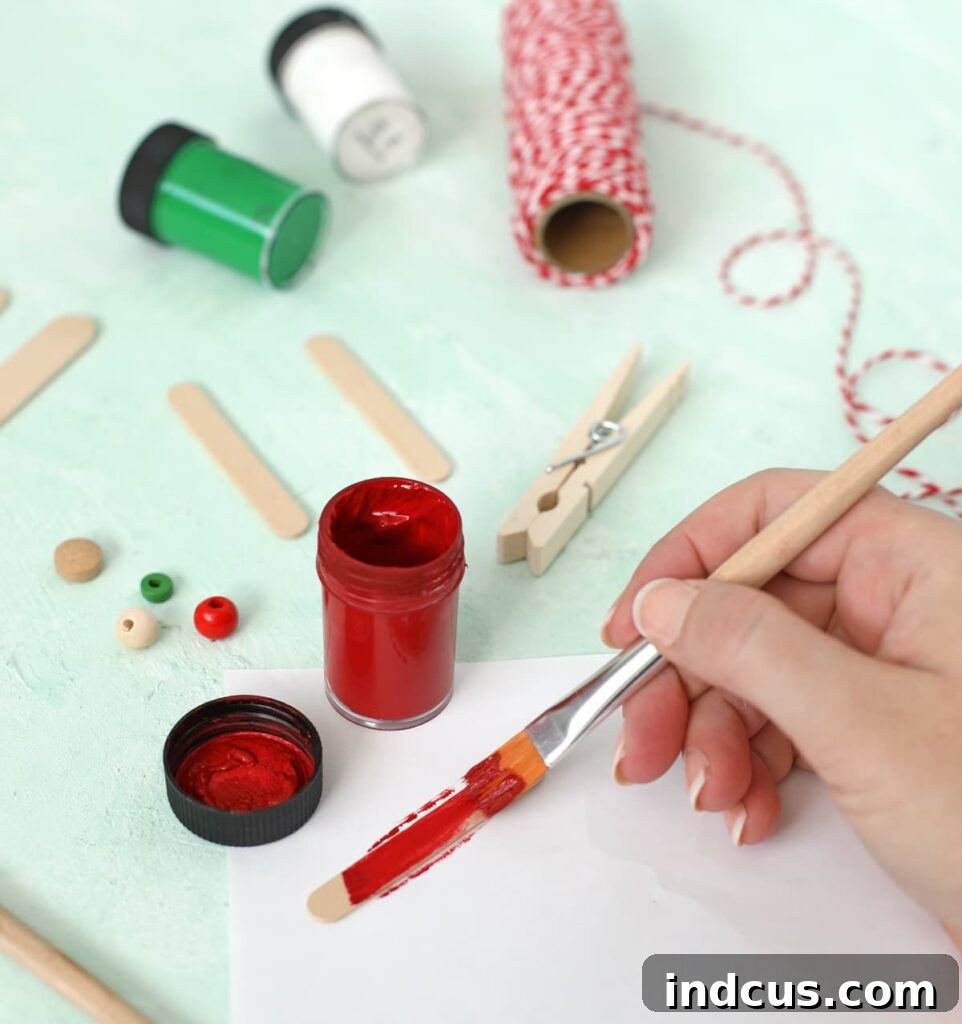
Begin by painting your craft sticks and the wooden clothespin in your favorite colors. This is a fantastic step for kids to express their creativity! Lay them out on a protected surface (like newspaper or a craft mat) and allow them to dry completely. Patience here ensures your colors won’t smudge during assembly.
Don’t want the mess of paint? No problem! Here are some mess-free alternatives:
- Pre-colored Craft Supplies: Purchase pre-colored craft sticks and pre-colored clothespins. This is a brilliant shortcut for busy parents or those who prefer a less messy option.
- Washable Markers: Let your child color directly on the wood with washable markers. The vibrant colors will still shine through, and clean-up is a breeze.
- Washi Tape Decor: Cover the wood with festive washi tape for patterns and colors. This method worked beautifully for these popsicle stick sled ornaments and can add a unique texture to your airplane.
The most important thing is to enjoy the process, so don’t let the thought of a little paint stop you from making this delightful craft!
Step 2: Assemble the Main Wings
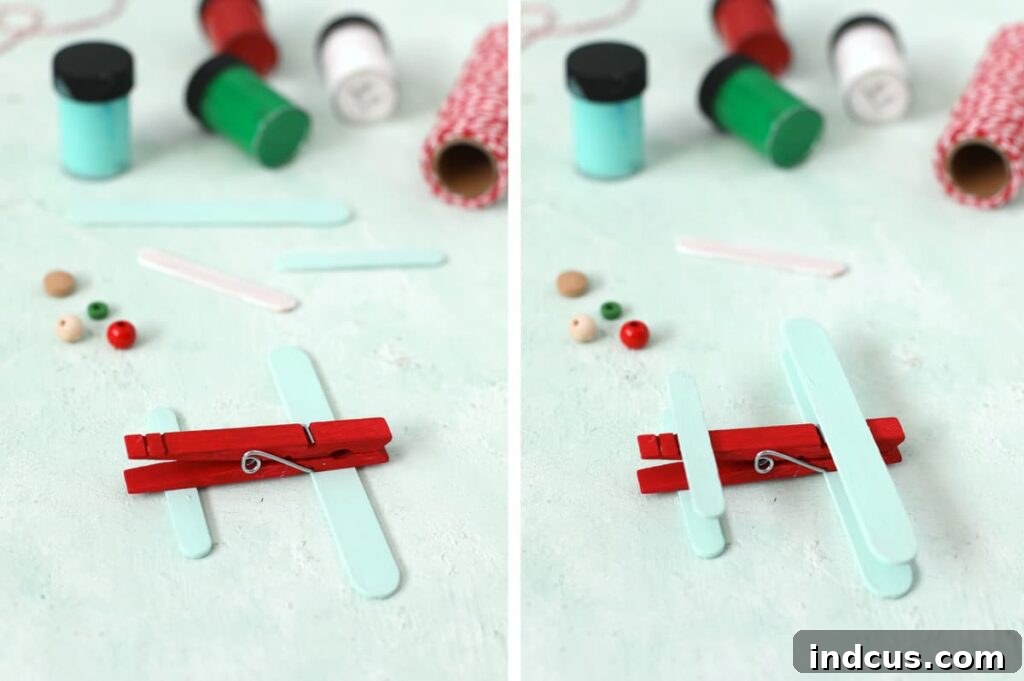
Once your painted craft sticks are dry, it’s time for assembly. This part is like building a miniature model plane! You’ll attach the two wide craft sticks to the clothespin to form the wings. Gently open the clothespin and apply glue to the bottom side, then press one wide craft stick firmly into place. Repeat this on the top side of the clothespin with the second wide craft stick. This creates the upper and lower wings of your airplane.
For younger children, using a craft glue pen can be very helpful for precise application, as it’s easy for small hands to control. However, if you’re looking for a faster craft time and a stronger hold, an adult can use hot glue for this step. Hot glue sets almost instantly, eliminating waiting time for the glue to dry, which is often a big win when crafting with impatient little ones!
Step 3: Add the Propeller and Tail Fins
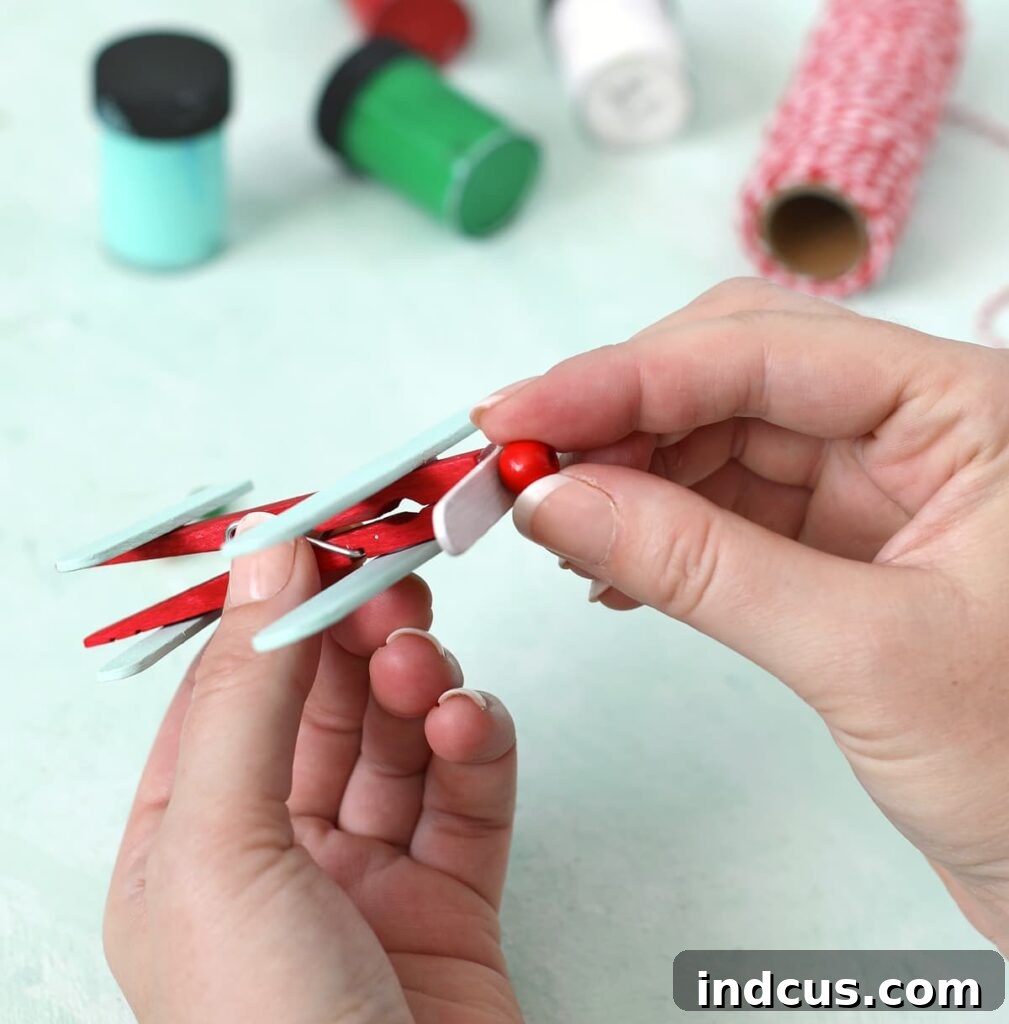
Now, let’s complete the airplane’s structure. Take two of the small craft sticks and glue them to the back of the clothespin, forming the tail fins. One goes on top and one on the bottom, just like the main wings, but at the rear. Next, take the last small craft stick and glue it to the very front of the clothespin. This will be your propeller. Finally, glue the small wood bead (or button/bobble) right in the center of this propeller stick. This small detail truly brings the propeller to life!
For this step, especially for attaching the wood bead and the propeller stick, using hot glue is highly recommended. School glue might not provide enough immediate hold, and these smaller pieces can easily fall off before drying properly. Adult supervision is crucial here.
Step 4: Create the Hanging Loop
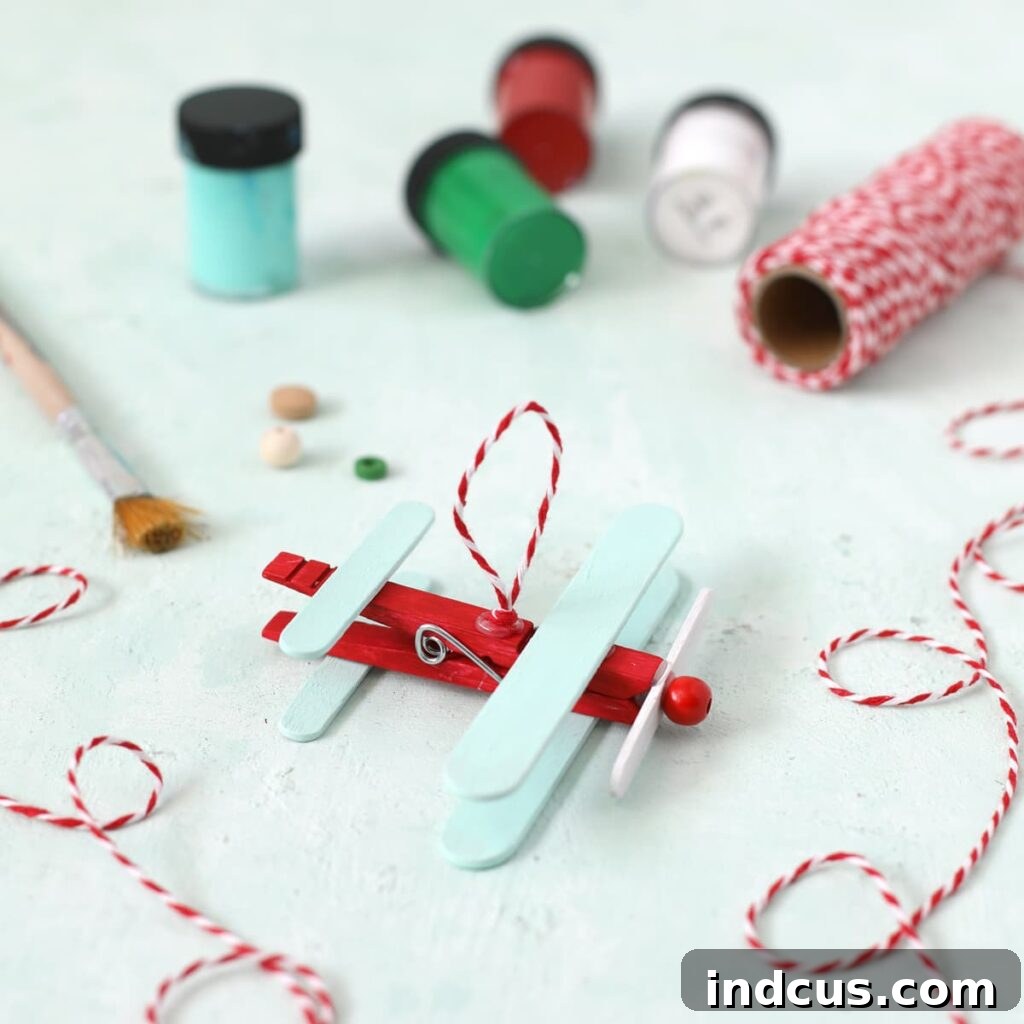
Every ornament needs a way to hang proudly on the Christmas tree! Take a length of baker’s twine (or a thin ribbon) and form it into a loop. Securely hot glue the ends of this loop to the top of the clothespin, just behind the front wing. Make sure the loop is strong and centered so the ornament hangs evenly. Double-check that it’s firmly attached before moving on.
Step 5: The Personalized Pilot Photo
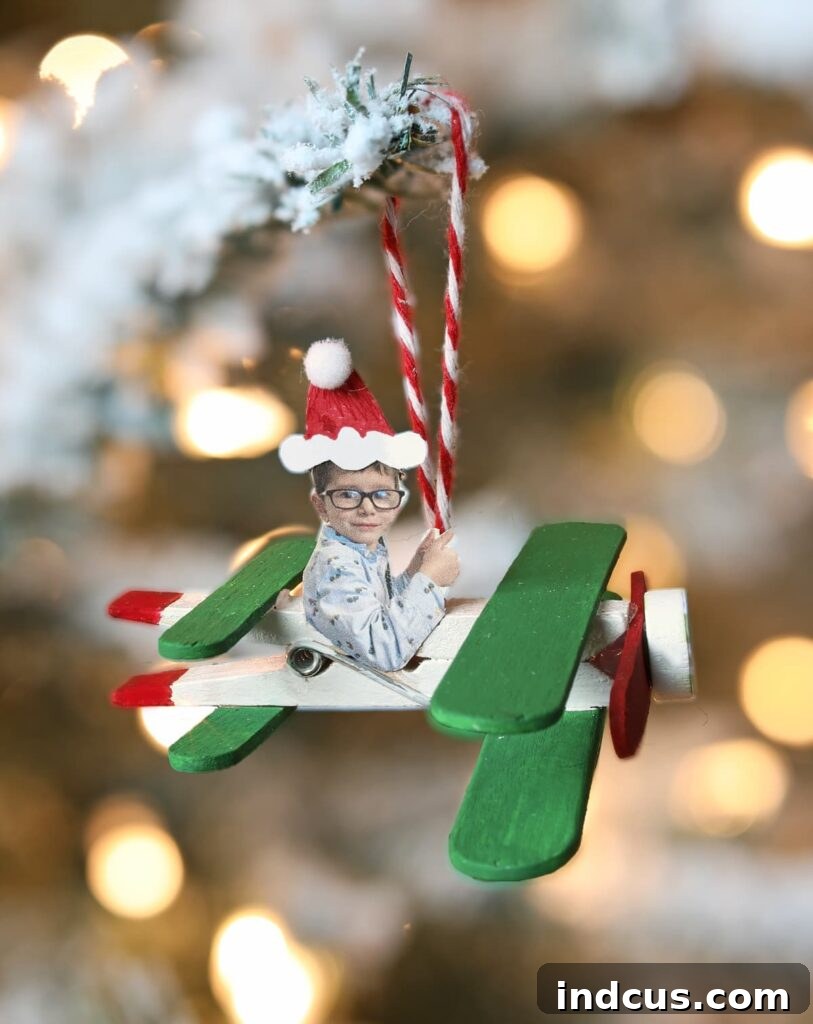
This is the most heartwarming part of the craft! Take a picture of your child against a plain background. For the best effect, have them stand sideways, then turn their head towards the camera, offering a big smile and a cheerful thumbs-up. This pose creates the illusion that they are peeking out from the cockpit.
Print the photo onto heavyweight cardstock or photo paper for durability. Aim for a photo size of approximately 1 inch. Carefully cut out your child’s image, focusing on their head and shoulders. Now, gently glue the photo in between the wings of the airplane, positioning it so your child looks like the brave pilot. For an extra touch of festive fun, you can even draw a tiny Santa hat on scrap paper and glue it onto their head in the photo!
This personal touch is what truly transforms a simple craft into a cherished family heirloom.
Tips for Success and Creative Variations
Making It Easy for All Ages:
- Toddlers: Focus on painting the sticks. An adult can handle all the gluing.
- Preschoolers: Can help with painting, choosing colors, and applying glue with a craft glue pen for the wings (with guidance).
- Older Children: Can manage most of the steps, including careful hot glue application under strict adult supervision.
Beyond Christmas:
While perfect for Christmas, these airplane ornaments aren’t limited to the holidays! You can adapt them for:
- Birthday Party Favors: Customize with each guest’s photo.
- Room Decor: Hang them in a child’s bedroom or play area.
- Travel-themed Gifts: A fun memento for a trip or for aviation enthusiasts.
Customization Ideas:
- Glitter & Embellishments: Add glitter glue, small stickers, or tiny rhinestones to the wings for extra sparkle.
- Different Photos: Use baby photos, pet photos, or even small drawings by your child.
- Messages: Write the year or a special message on the bottom of a wing with a fine-point permanent marker.
- Themed Paints: Use camouflage colors for a military plane look, or bright, whimsical colors for a fantasy plane.
Frequently Asked Questions About This Craft
- Q: What kind of glue works best for this project?
- A: For general stick-to-stick adhesion, a craft glue pen is excellent for kids. However, for the propeller, bead, and hanging loop, hot glue (applied by an adult) provides the strongest and quickest bond, preventing pieces from falling off easily.
- Q: How long does this craft take to complete?
- A: The active crafting time is relatively short, perhaps 15-30 minutes per ornament. However, you’ll need to factor in drying time for the paint (1-2 hours) if you choose to paint, and potentially for craft glue if you’re not using hot glue for assembly.
- Q: Can I use different sizes of craft sticks?
- A: Yes, you can. Standard-width craft sticks will work, resulting in slightly narrower wings. Just avoid the very large ‘jumbo’ craft sticks, as they can make the airplane look disproportionate.
- Q: How can I make the ornaments more durable for long-term storage?
- A: After the glue and paint have fully dried, you can apply a thin coat of clear craft sealant or Mod Podge to protect the paint and reinforce the structure. Store them in a box with tissue paper or bubble wrap to prevent damage.
- Q: What if I don’t have a wooden bead for the propeller?
- A: No problem! A small button, a tiny pom-pom, or even a small piece of rolled-up paper or clay can serve as a substitute for the propeller’s center.







