
Transform Your Old T-Shirts: A Complete Guide to Sewing a Custom Upcycled Hoodie
There’s an undeniable joy that comes from transforming something old into something wonderfully new, especially when it’s for someone you love. This project is exactly that – a delightful journey of upcycling and creativity that results in a unique, custom-fitted hoodie. I was absolutely thrilled with the outcome of this endeavor, dancing around my living room to show it off! I’ve meticulously documented each step with photos to guide you through creating your own personalized hoodie from humble beginnings. Get ready to embark on a sustainable and deeply satisfying sewing adventure!
Upcycling old clothing isn’t just a trend; it’s a fantastic way to reduce waste, save money, and create truly one-of-a-kind garments. Instead of letting those beloved but outgrown or worn-out t-shirts gather dust in your closet, give them a new lease on life. This comprehensive guide will walk you through turning two ordinary t-shirts into an extraordinary, custom-fitted hoodie, perfect for a child or even an adult with some size adjustments. Let’s gather our materials and dive into the world of creative refashioning!
Gathering Your Essential Materials and Tools
Before we begin our creative transformation, it’s crucial to gather all the necessary supplies. A well-prepared workspace makes any sewing project smoother and more enjoyable. For this upcycling project, you’ll need two t-shirts and a selection of basic sewing tools. Choosing the right shirts is key:
- First T-Shirt (Main Body): This will form the core of your hoodie. Select a shirt that is a comfortable fabric, perhaps a solid color or a subtle pattern that you love. Ideally, it should be slightly larger than the intended recipient’s current size, allowing room for adjustments. For instance, if you’re making a child’s hoodie, an adult’s small or medium t-shirt often works perfectly.
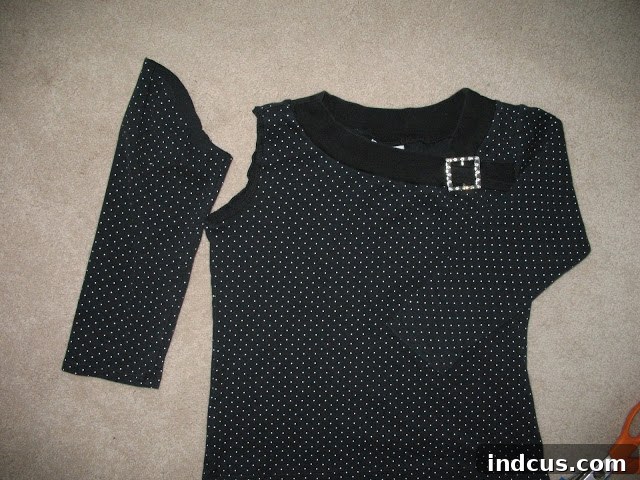
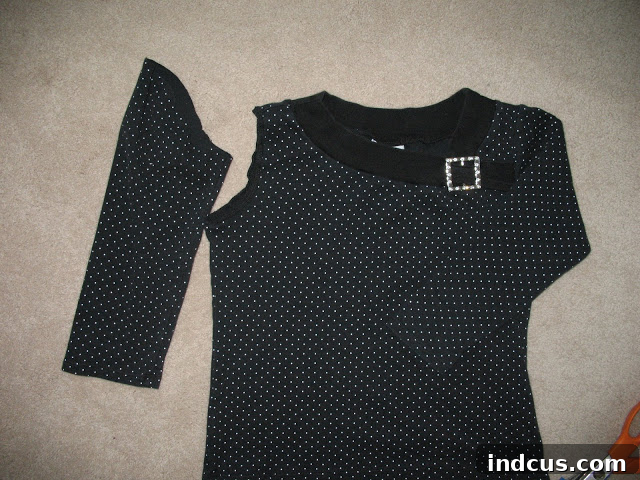
- Second T-Shirt (Sleeves, Pocket, Hood): This shirt will provide the contrasting or complementary elements. A patterned shirt, like the black polka-dotted one I used, adds a wonderful touch of character. Ensure it’s also a comfortable, washable fabric, compatible with your first shirt. The size of this shirt can be smaller, as you’ll only be harvesting specific sections.
Beyond the shirts, here’s a list of essential tools:
- Sewing Machine: A standard domestic sewing machine will suffice for all stitches.
- Matching Thread: Choose a polyester all-purpose thread that complements the colors of your chosen shirts.
- Fabric Scissors: Sharp scissors are essential for clean, precise cuts.
- Fabric Chalk or Marker: For marking cutting and sewing lines directly onto your fabric.
- Pins: To hold fabric pieces together securely before sewing.
- Iron and Ironing Board: Crucial for pressing seams flat and creating crisp edges, which makes for a more professional finish.
- Measuring Tape: For accurate measurements, especially when sizing the hood and neck opening.
- Seam Ripper: Every sewer needs one for those inevitable “oops” moments.
- Scratch Paper: For drafting the pocket pattern.
Having everything at hand will ensure a seamless (pun intended!) crafting experience. Now, let’s prepare our starting garments!
Step 1: Preparing the Body of Your Hoodie
We’ll begin by dissecting our first t-shirt, which will become the main body of our hooded sweatshirt. The goal here is to carefully separate the front and back panels while preserving the shoulder seams. This gives us a flat canvas to work with for custom fitting.
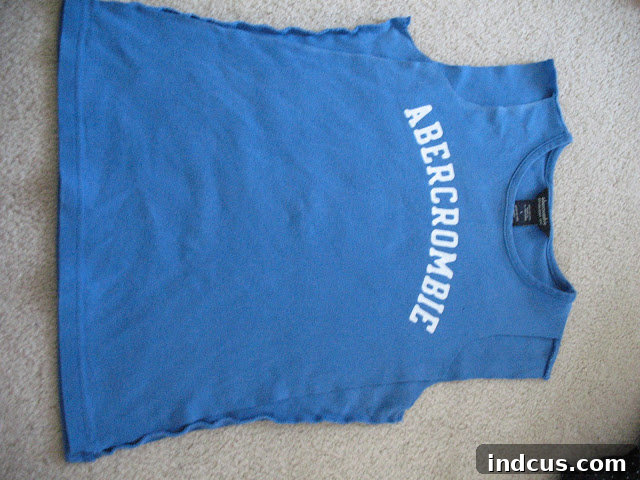
Take your chosen main t-shirt – in my case, a vibrant blue one. Lay it flat on your work surface. Locate the side seams that run from the bottom hem up to the armhole. Using your fabric scissors, carefully cut along these existing side seams. You want to sever the front panel from the back panel along these lines. Continue cutting around the sleeve, following the original sleeve seam on both sides, being careful not to cut into the shoulder seam itself. The aim is to detach the sleeves and open up the sides of the shirt, leaving the front and back panels connected only across the shoulder seams. This will make the shirt resemble a vest or a very open top. Once these cuts are made, gently flip the back part of the shirt up and out of your way, exposing the front panel.
This initial step transforms the t-shirt from a closed garment into a more adaptable piece of fabric, ready for the crucial fitting adjustments that will ensure your upcycled hoodie fits perfectly.
Step 2: Customizing the Fit for a Perfect Silhouette
Achieving the right fit is paramount for any custom garment. Since we’re likely working with a shirt that wasn’t originally sized for the intended wearer, we need to tailor it down. This step involves carefully marking and cutting new seams to reduce the size of the shoulders, armholes, and body for a snug and comfortable fit.
With the back panel still flipped out of the way, take the front part of the shirt. The best way to get an accurate fit is to try it on the person for whom you are making the hoodie. Drape the front panel over their head, centering it as best as possible. Using your fabric chalk, carefully mark a new seam line along one front side of the shirt. This line should define how much smaller the shoulder needs to be, how deep the armhole should be, and how much narrower the body should become. The goal is to create a line that gives a comfortable, yet tailored fit. Don’t be afraid to make small adjustments until you’re happy with the shape.
Once you have a satisfactory chalk line on one side, carefully remove the shirt. Lay it flat on your workspace. Cut along this newly drawn chalk line. Now, fold the shirt precisely in half, aligning the shoulder seams and the center front. Use the newly cut side as a template to cut the exact same shape on the other front side of the shirt. This ensures symmetry and a balanced fit.
Now, bring the back panel down and lay it flat, aligning it with the front. Use the newly cut front pieces as your guide to trim the back panel’s sides and armholes to match perfectly. Once all the cutting is done, turn the shirt inside out, ensuring the right sides of the fabric are facing each other. Pin the newly defined side seams from the bottom edge of the shirt up to where the armhole begins on both sides. Stitch these seams securely with your sewing machine. Remember to backstitch at the beginning and end of each seam to prevent unraveling. These new side seams are the foundation of your resized hoodie body.
Step 3: Crafting and Attaching the Perfect Sleeves
Now that the body of our hoodie is taking shape, it’s time to add the sleeves. This is where our second t-shirt comes into play, offering an opportunity to introduce a complementary color or pattern, adding a unique design element to your upcycled hoodie.
Retrieve your second t-shirt – the one designated for sleeves, pocket, and hood. Following the original seam lines, carefully cut the sleeves off this shirt. For my project, I used a charming black shirt with white polka dots. Originally, it was a 3/4 sleeve shirt for a 12-year-old, but its length proved ideal for my 2.5-year-old’s hoodie, illustrating how versatile original garment sizes can be when repurposed.
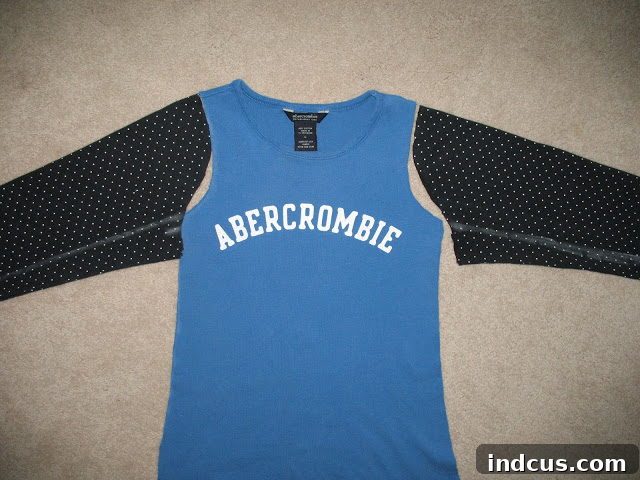
Lay the detached sleeves out flat next to the body of your blue shirt. You’ll notice that the armholes on the blue shirt might be a different shape or size than the sleeves you’ve just cut. This is perfectly normal and easily adjustable. To make them fit, lay one sleeve flat and align its top edge with the armhole of the blue shirt. Using chalk, draw a new seam line on the sleeve, tapering it down from the armhole’s curve to the existing cuffs of the sleeve. This line will narrow the sleeve slightly and ensure it fits smoothly into the armhole opening. Repeat this for the second sleeve. Stitch along your chalk lines on both sleeves and trim away any excess fabric, leaving a neat seam allowance.
Now, it’s time to attach the sleeves to the bodice. Turn the main hoodie body *inside out*. Take one of the prepared sleeves and turn it *right side out*. Carefully insert the right-side-out sleeve into the inside-out armhole of the hoodie body. Align the bottom seam of the sleeve with the side seam of the shirt body. This alignment is crucial for a smooth and continuous line. Pin the sleeve all the way around the armhole, easing the fabric gently to accommodate any slight differences in circumference. The sleeve will effectively be “sandwiched” inside the armhole, with right sides of the fabric facing each other at the seam line, as shown in the picture.
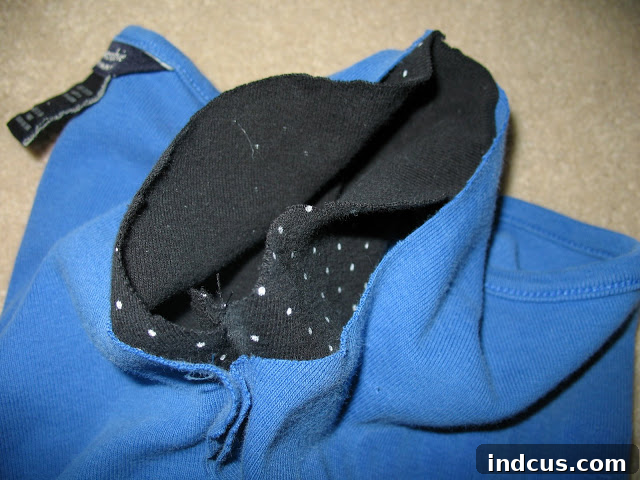
Sew all the way around the circular armhole, carefully removing pins as you go. Use a stretch stitch or a small zigzag stitch if your sewing machine has one, as this seam will experience tension. Trim any excess fabric close to your stitch line for a clean finish. Don’t worry if it’s not absolutely perfect; minor imperfections add character to handmade items. Repeat this process for the sleeve on the other side. With both sleeves securely attached, your hoodie is truly starting to look like a garment!
Step 4: Designing and Attaching the Functional Kangaroo Pocket
No hoodie is complete without a practical and cozy kangaroo pocket! This iconic feature is not only stylish but also perfect for keeping little hands warm or stashing tiny treasures. Creating the pocket involves a bit of pattern making, but it’s simpler than it sounds.
First, grab a piece of scratch paper – newspaper, a brown paper bag, or even an old envelope will do. Fold it in half to ensure symmetry. Now, freehand draw half of a rounded “U” shape along the folded edge, with the bottom flatter than the top. When you cut it out and unfold it, you’ll have a symmetrical, slightly curved shape with a flat top edge, resembling the base of a typical hoodie pocket.
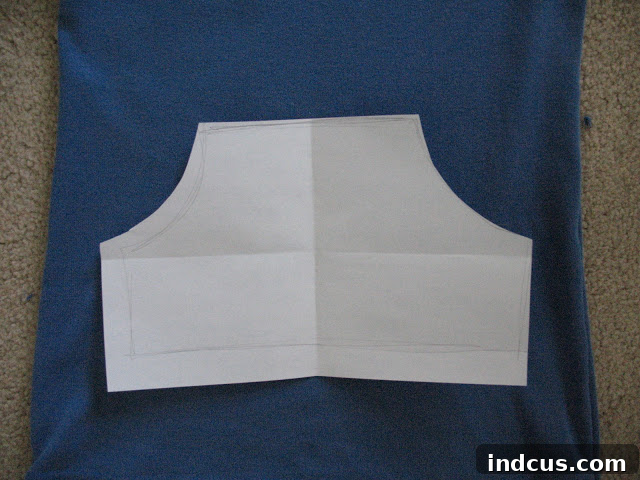
Lay your newly cut paper pattern onto the front of your hoodie body to ensure it’s the right proportion. There’s no secret formula here; trust your eye. Just make sure the pattern looks balanced and appropriately sized for your garment. It’s better to make it slightly larger than too small, as you can always trim fabric, but you can’t add it back! Once you’re happy with the size and shape, lay this pattern onto your second t-shirt (the polka-dot one in my case) and cut out TWO identical pieces of fabric for the pocket. Fun fact: while cutting these out, my daughter hilariously asked if I was making underwear! And honestly, I can totally see what she meant – they *do* look like undies at this stage!
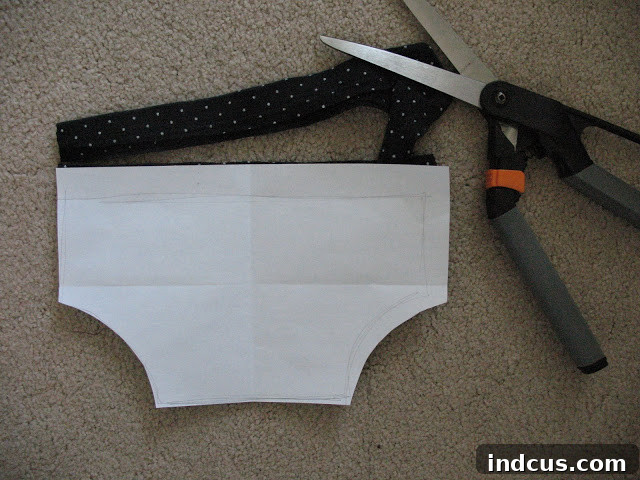
With your two pocket pieces cut, place them right sides together, ensuring all edges are perfectly aligned. Pin them securely. Stitch around the curved edges of the pocket, leaving a small opening (about 2-3 inches) along one of the straighter sides or the bottom flat edge. This opening is crucial for turning the pocket right side out. Before turning, carefully clip the corners and make small notches along the curved edges of the seam allowance. This step helps the pocket lay flat and smooth once turned. Now, reach into the opening and gently pull the entire pocket right side out. Use a point turner or a dull pencil to push out the curves and corners for a crisp shape. Finally, give the pocket a good press with an iron to flatten the seams and make it look truly professional. The iron will work wonders in making those corners sharp and the curves smooth.
Now, position the finished pocket onto the front of the hoodie. Ensure it’s centered and at a comfortable height for the wearer’s hands. Pin it securely in place. You will sew along the straight edges of the pocket – the top edge and the two side edges that curve slightly upwards. DO NOT sew along the two curved parts where the hands will enter the pocket. These openings need to remain unstitched for functionality. Stitch the pocket firmly to the hoodie, making sure to backstitch at the beginning and end of each seam. You’ve now added the signature kangaroo pocket, bringing even more character to your custom-made hoodie!
Step 5: Constructing the Cozy Hood
The hood is arguably the most defining feature of any hoodie, providing warmth and that classic casual style. Creating it involves precise measurements and careful stitching to ensure it fits comfortably around the neck and head.
Begin by accurately measuring the neck opening of your blue shirt (the main hoodie body). This measurement will determine the width of the hood’s base. Once you have this measurement, divide it by two. This figure will be the length of the bottom straight edge for each of your hood pieces.
Now, let’s create the hood pattern. You’ll need to cut two identical pieces of fabric from your second t-shirt. Each piece should resemble a “J” or a “boot” shape, as depicted in the image. The bottom straight edge of this “J” shape should be equal to half of your neck measurement. The curved top edge will form the top and back of the hood. Ensure the two pieces are mirror images of each other, so they can be sewn together symmetrically.
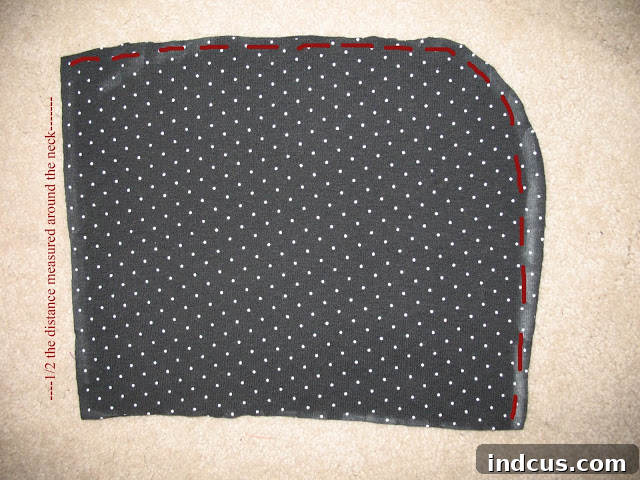
Once your two hood pieces are cut, place them right sides together, aligning all edges perfectly. Pin along the curved side – this is the seam that will go over the top of the head and down the back. Leave the straight front edge (where the face will be) and the straight bottom edge (where it attaches to the shirt) unstitched for now. Stitch carefully along the pinned curved seam, from one corner to the other. Backstitch at the start and end to secure the seam. After sewing, you can trim the seam allowance slightly and even make small notches along the curve to help it lay flatter when turned right side out.
Step 6: Creating and Applying the Hood Binding
To give the front edge of the hood a neat, finished look and to prevent fraying, we’ll create and apply a binding. This detail elevates the overall appearance of your handmade hoodie, giving it a professional touch.
For the binding, cut a strip of fabric from your second t-shirt. This strip should be approximately 2 inches wide and ideally long enough to go all the way around the entire opening of the hood (the part where the face will be). If your fabric isn’t long enough for a single continuous strip, don’t worry – I’ll provide an alternative method. Once you have your strip, fold it in half lengthwise, with wrong sides together, and press firmly with an iron to create a sharp crease. Then, open it up and bring each raw edge up to meet that middle crease line, pressing again. This will create a binding strip with neatly folded edges, as shown in the picture.
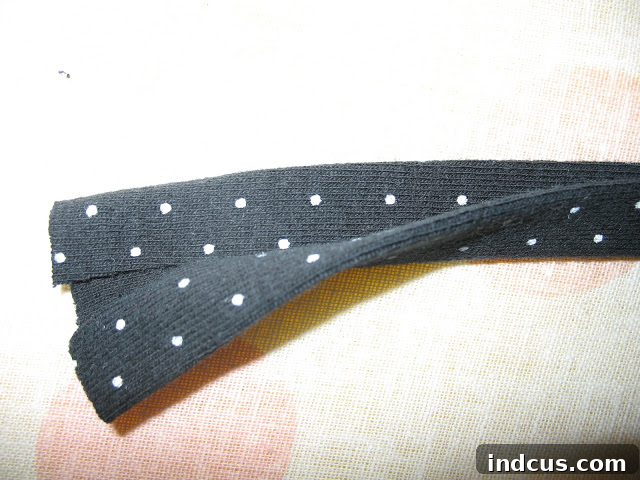
Now, take the raw front edge of your hood opening. Insert this edge inside the prepared binding strip so that it’s neatly sandwiched between the folded edges of the binding. Pin the binding all the way around the hood opening, ensuring it’s evenly distributed and securely holding the hood fabric. Once pinned, carefully stitch the binding in place, sewing close to the inner folded edge. This will create a clean, finished edge around the face opening of the hood.
*A Note on Binding Length: Ideally, you’ll have a single, long enough piece of fabric for your binding to go all the way around the hood opening in one continuous sweep. This provides the neatest finish. However, if, like me, you don’t have a piece of fabric that’s quite long enough, there’s a workaround. You can cut two separate, shorter pieces of binding. In this scenario, you would attach each binding piece to its respective side of the hood (the right side and the left side of the face opening) *before* sewing the two main hood pieces together along their curved seam. Here’s an image that might make this alternative approach clearer if you’re visualizing it:
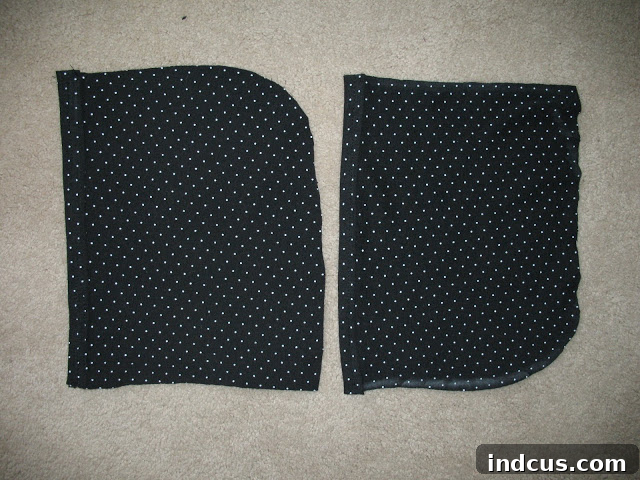
While the single continuous binding offers a more polished look, the two-piece method is perfectly functional and still yields a great result. Ultimately, the choice depends on your fabric availability. Once the binding is sewn, your hood is ready for its final attachment to the hoodie body.
Step 7: Final Assembly: Attaching the Hood to the Shirt Body
With the main hoodie body and the hood components complete, it’s time for the final union! Attaching the hood to the neckline requires careful alignment and even stitching to ensure it sits correctly and comfortably.
First, turn your hoodie body right side out. Take your finished hood and turn it right side out as well. Now, you need to align the hood with the neckline of the shirt. It’s crucial to ensure the hood is perfectly centered. A good way to do this is to align the back seam of the hood (the one you sewed in Step 5) with the center back of the shirt’s neckline. If your original shirt had a tag, aligning the hood seam with the middle of the tag can be a helpful guide. Pin the hood in place at the center back, then work your way around the neckline, pinning the hood evenly to the shirt. The raw bottom edge of the hood should align with the raw edge of the shirt’s neckline. Ensure there’s no pulling or gathering in the fabric and that the hood lies smoothly.
Once the hood is thoroughly pinned around the entire neckline, take it to your sewing machine. Starting at one side of the front neckline, stitch all the way around the circle, attaching the hood to the shirt. Use a sturdy straight stitch or a narrow zigzag stitch if your fabric has stretch, ensuring all layers are caught. Backstitch at the beginning and end of your seam for extra durability. After stitching, you can finish the raw edges of this seam with a serger or a zigzag stitch to prevent fraying and give it a cleaner, more professional interior.
Step 8: The Finishing Touches and Admiring Your Handiwork
You’re almost there! With the main construction complete, a few final touches will ensure your upcycled hoodie is perfectly polished and ready to wear. These small steps make a big difference in the overall quality and longevity of your handmade garment.
First, carefully go over your entire hoodie and snip any stray threads. Loose threads can make a garment look unfinished and can also get caught and unravel seams over time. Take your time to trim them closely and neatly. Next, inspect the bottom hem of the shirt. If your original t-shirt was too long, or if you prefer a different length, now is the time to adjust the bottom hem. You can simply fold the raw edge up twice and stitch it in place for a clean finish, or you could add a ribbed band for a more classic hoodie look (though this would require additional fabric and steps). In my case, the length of the blue shirt worked perfectly, so no hem adjustment was necessary.
Finally, give your entire hoodie a good press with the iron. Pressing all the seams flat and crisp will give your garment a professional, store-bought appearance. It helps to set the stitches and smooth out any wrinkles that accumulated during the sewing process. Step back and admire your handiwork! You’ve successfully transformed two old t-shirts into a custom-fitted, unique, and stylish hoodie – a testament to your creativity and sewing skills.
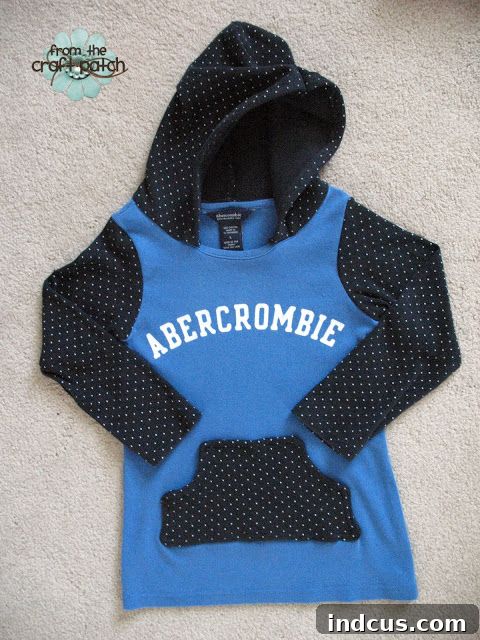
The true reward of any sewing project is seeing it put to good use and loved by its recipient. My little one’s reaction was priceless – I guess she likes it! The joy of seeing a child delight in a garment made with love is incredibly fulfilling. This project demonstrates that with a bit of imagination and some basic sewing skills, you can create wonderful, sustainable, and truly personal pieces that are cherished far more than anything bought off a rack.
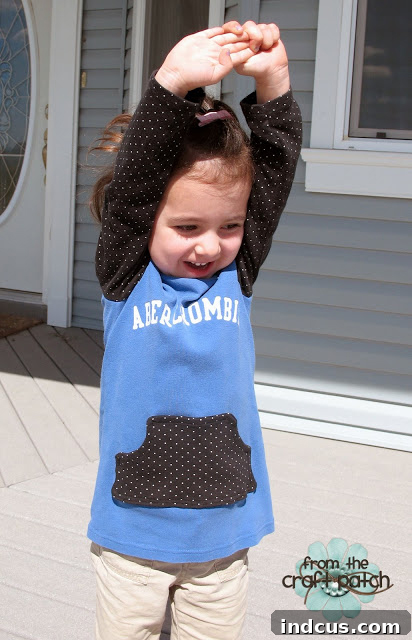
I hope this detailed guide has inspired you to look at your old t-shirts with new eyes and embark on your own upcycling journey. Happy sewing, and enjoy the satisfaction of wearing or gifting your very own handmade, eco-friendly hoodie!







