
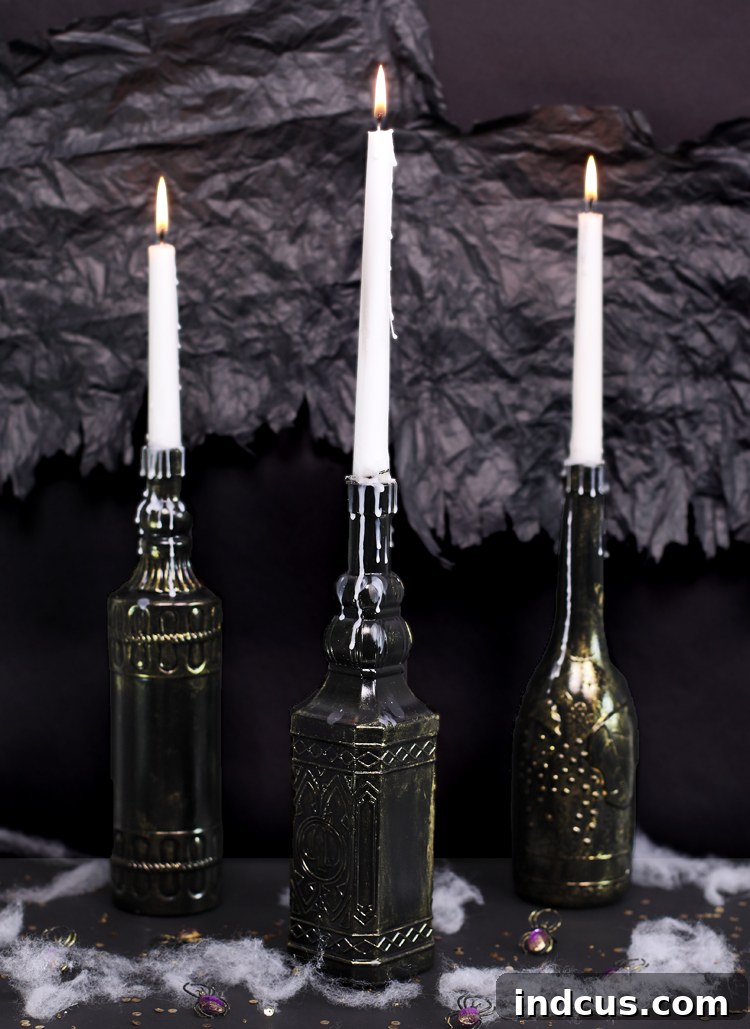
DIY Spooky Halloween Candle Holders: An Enchanting Dollar Store Craft
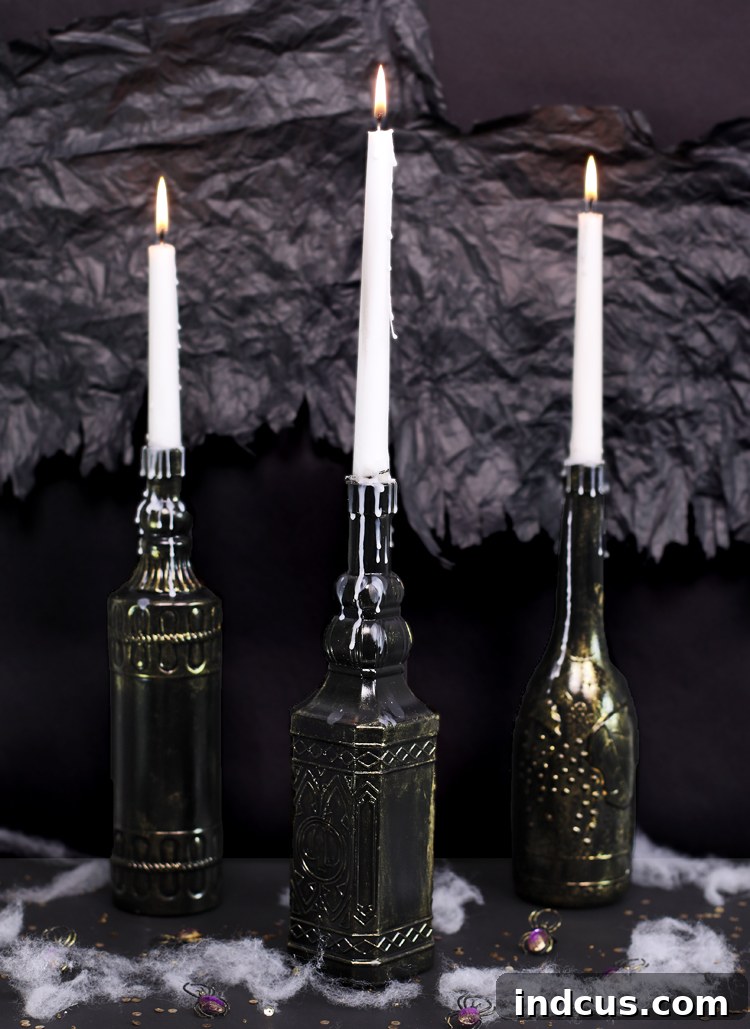
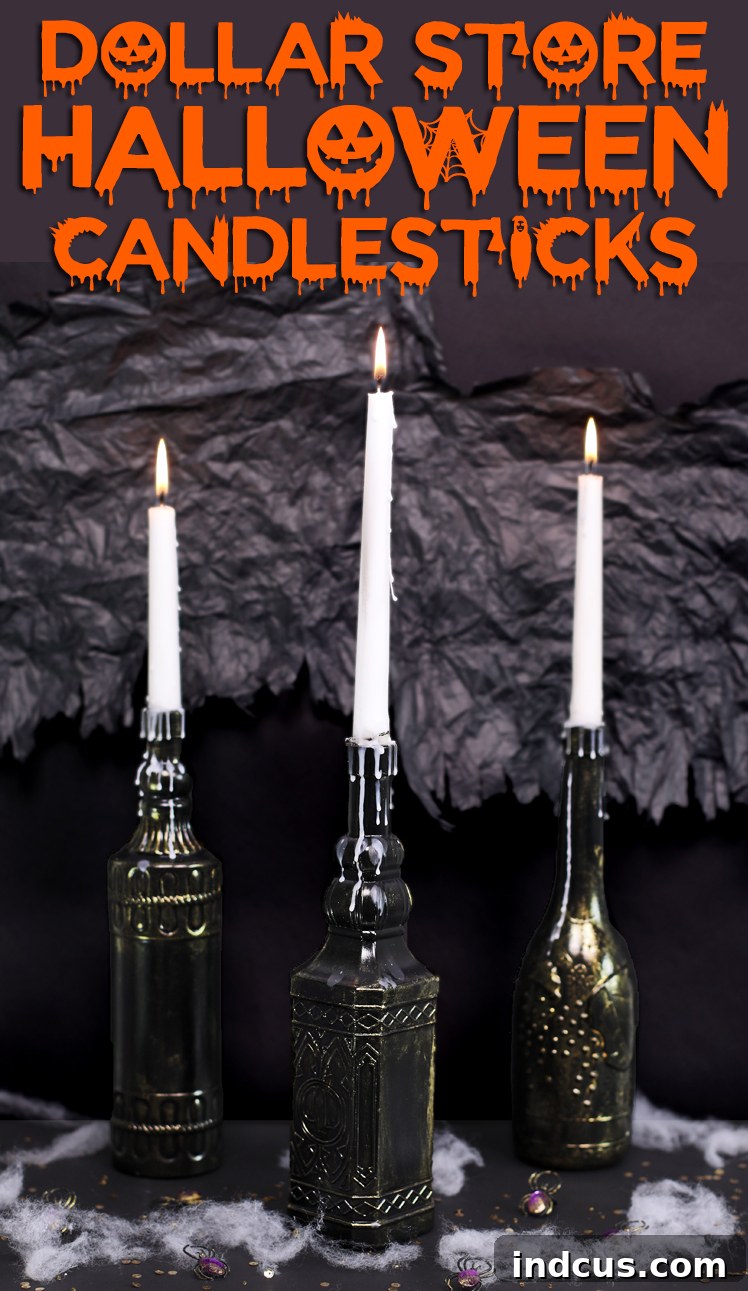
Are you ready to infuse your Halloween celebrations with a touch of eerie elegance and mysterious charm, all without breaking the bank? Look no further! These captivating and spooky Halloween candle holders are the quintessential party decoration or an enchanting centerpiece for your festive dinner. The best part? They’re ingeniously crafted from everyday items you can find at your local dollar store, proving that stunning, high-impact holiday decor doesn’t require a hefty budget.
If you’re on the hunt for a Halloween centerpiece that truly stands out, yet is surprisingly simple and quick to create, these DIY bottle candle holders are your perfect solution. They perfectly capture the aesthetic of something salvaged from an ancient witch’s potion collection, brimming with mystery and gothic allure. Imagine them adorning your dining table, casting flickering shadows across your walls, and adding an authentic haunted vibe to your home. Who doesn’t absolutely love a fantastic, inexpensive Halloween craft that delivers such impressive and bewitching results?
Why Choose DIY for Your Halloween Decorations?
Crafting your own Halloween decor offers a multitude of benefits that extend far beyond simple cost savings. It’s a wonderful opportunity to inject personal style, creativity, and a unique touch into your holiday setup, resulting in one-of-a-kind pieces that you simply can’t find in stores. Embracing DIY projects like these spooky candle holders allows you to:
- Save Money: High-quality, themed Halloween decor can often come with a hefty price tag. By utilizing affordable dollar store items, you can achieve a sophisticated, high-end look for a fraction of the cost, making your budget stretch further.
- Unleash Creativity: Customizing your decor lets your imagination run wild. You’re not limited to mass-produced items; instead, you create pieces that perfectly match your personal vision and theme.
- Enjoy the Process: Crafting can be a deeply relaxing and rewarding activity, perfect for solo enjoyment or a fun, interactive group project with family and friends, making memories along with decor.
- Create Unique Pieces: Your handmade decor will be truly one-of-a-kind, adding character and a personal touch that store-bought items simply can’t replicate, making your home stand out.
- Reduce Waste & Repurpose: By transforming simple, often overlooked items into something beautiful and functional, you’re engaging in a sustainable approach to decorating, giving new life to old or inexpensive goods.
This project is a prime example of how simple, accessible materials can be transformed into something truly magical, memorable, and impactful for all your Halloween festivities.
Watch the Transformation: Spooky Halloween Decor Video Tutorial
Sometimes, seeing a project come to life makes all the difference! For a quick, visual guide to crafting these bewitching candle holders, watch our step-by-step video tutorial. It meticulously breaks down each stage of the process, ensuring you can follow along with ease and confidence, helping you achieve perfect results on your first try.
Click here to watch the Spooky Halloween Decor Video Tutorial
(Note: The original embed was a dynamic video player. This link provides direct access to the video content for your convenience.)
Essential Materials You’ll Need for Your Potion Bottle Holders
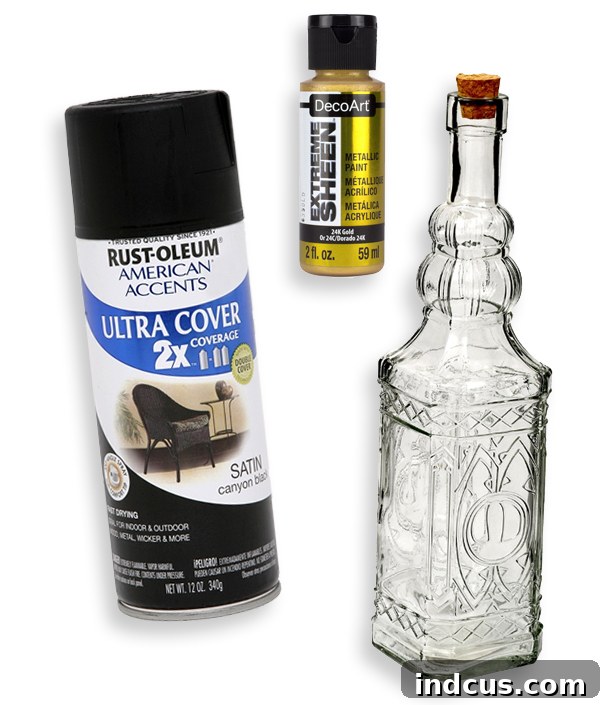
Gathering your supplies is the first exciting and straightforward step in any DIY project. For these spooky Halloween candle holders, you’ll be pleased to know that everything is readily available and wonderfully budget-friendly. Here’s a detailed list of what you’ll need to begin your magical transformation:
- Glass Bottles with Raised Designs: The magic truly begins with selecting the right bottles. Look for glass bottles of varying shapes and sizes, especially those featuring interesting textures, embossed patterns, or unique silhouettes. These raised designs are absolutely key to achieving that aged, gothic, and mysterious look once painted. Dollar Tree often stocks fantastic options, some even complete with cork stoppers, which significantly enhance the authentic apothecary aesthetic.
- Black Spray Paint (Matte or Satin Finish Recommended): A good quality black spray paint will serve as the dark, mysterious base for your bottles. Matte or satin finishes are highly recommended over glossy options, as they tend to give a more authentic, aged, and non-reflective appearance, perfectly suited for a truly spooky vibe.
- Metallic Gold Craft Paint: This will be your secret weapon for highlighting those beautiful raised designs and giving your bottles an ancient, almost glowing touch. A small tube or bottle is usually more than sufficient, as a little goes a very long way with this technique. For alternative effects, consider silver or copper metallic paints!
- Paper Towel or Soft Cloth: Essential for the application and precise wiping away of the metallic paint, ensuring it settles perfectly into the raised details of the bottles without smearing.
- Tapered Candlesticks: Classic tapered candles are ideal for this project, contributing significantly to the traditional, elegant, and spooky look. White candles offer a stark contrast against the black bottles, while black or deep red tapers can further enhance a dramatic gothic atmosphere.
- Lighter (for securing candles and creating wax drips): A standard lighter or a utility lighter will be an indispensable tool for safely melting wax to secure your candles and to create those coveted, authentic wax drips.
Step-by-Step Instructions: Crafting Your Spooky Potion Bottles
Follow these detailed instructions carefully to bring your vision of enchanting, haunted candle holders to life. Remember, patience and attention to detail are key for achieving the most impressive and professional-looking results!
-
Prepare and Spray Paint Your Bottles
Begin by thoroughly cleaning your glass bottles and removing any existing corks or labels. If the bottles come with corks, set them aside for later use. It is absolutely crucial to spray paint your bottles black in a well-ventilated area, ideally outdoors. Lay down a protective barrier like a large cardboard box, an old sheet, or newspaper on your grass or concrete surface to prevent paint from getting on unintended areas. Apply two to three light, even coats of black spray paint. This layering technique is far more effective than attempting one thick coat, as it prevents drips, ensures smooth, consistent coverage, and allows for superior adhesion to the slick glass surface. Make sure to rotate the bottles between coats to cover all angles for a truly consistent and professional finish.
-
Allow for Complete Drying
This step is often rushed, but it is unequivocally vital for a professional-looking and durable finish. Let the spray paint dry completely, which typically takes a minimum of four hours, or even longer depending on local humidity levels and the specific type of paint used. Spray paint can remain tacky for quite some time, and touching it too soon will inevitably leave unsightly fingerprints, compromise the smooth finish, or even cause the paint to peel. Exercising patience here will pay off immensely, ensuring a resilient, pristine, and perfectly smooth black base for your accent details.
-
Apply Metallic Gold Detailing for an Aged Effect
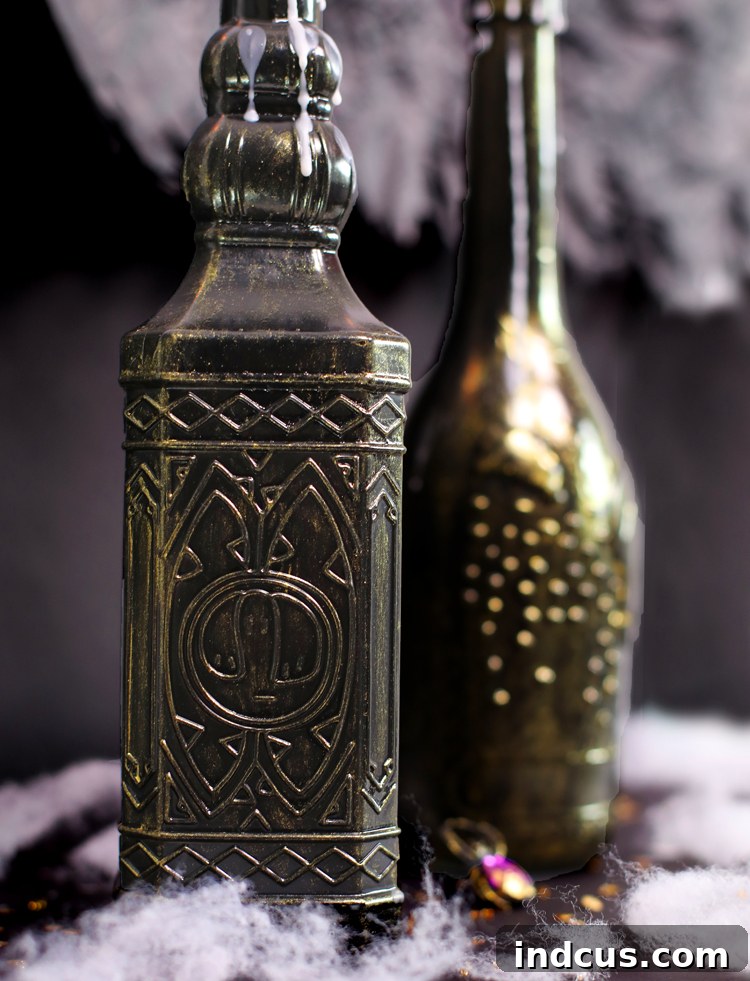
Once your black paint is thoroughly and completely dry to the touch, it’s time to add that mystical, aged effect. Squirt a very small amount of metallic gold craft paint onto a crumpled paper towel or a soft, lint-free cloth. The key here is to employ a “dry brush” or “rubbing” technique. Gently rub the paint over the black bottles, focusing specifically on pushing the metallic paint into the raised designs, textured areas, and embossed patterns. As you rub, lightly wipe away any excess paint that settles on the flat, smooth surfaces of the bottle. This technique will dramatically highlight the intricate patterns, giving the bottles an antique, weathered, or ancient artifact appearance, strikingly reminiscent of old apothecary jars, alchemist’s vessels, or magic potion bottles. Always start with a very small amount of paint; you can always add more if needed, but it’s considerably harder to remove excess once applied.
-
Secure Your Tapered Candles in Place
To ensure your tapered candles stand upright and securely in the bottle openings, you’ll use a simple yet effective trick. Carefully light the bottom end of a tapered candlestick with your lighter. Allow a small amount of wax to melt and pool at the base. Once a small pool of molten wax forms, quickly extinguish the flame and immediately insert the melted end of the candle firmly into the opening of the glass bottle. Hold it steady and upright for a few moments as the melted wax cools and solidifies, effectively creating a natural seal and securely anchoring the candle in place. This method creates a stable base, preventing your candles from wobbling, leaning, or potentially falling over during your Halloween festivities.
-
Add Dramatic Wax Drips (Optional, but Highly Recommended!)
For an extra layer of spooky authenticity and a truly gothic, haunted aesthetic, consider adding dramatic wax drips cascading down the sides of your bottles. This step significantly elevates the “spook factor.” Light a separate tapered candle (or carefully use one of the secured ones if you prefer). Turn the lit candle upside down and hold it at various points along the rim and neck of your bottle, allowing the melting wax to drip down the sides. Experiment with holding it at different angles and heights to create varied, organic, and realistic drip patterns. These cascading wax drips mimic years of use in a haunted mansion, an ancient castle, or a witch’s mysterious lair, adding incredible depth, texture, and character to your project. While this step is technically optional, it is highly recommended for achieving that perfect, authentic finishing touch.
This ingenious spooky technique isn’t limited to just candle holders! You can confidently apply the same black-and-metallic-rub effect to other Halloween decorations. For instance, learn how to paint a really awesome Halloween pumpkin using a similar method, transforming it into a sophisticated and unique piece of seasonal art for your home.
Creative Variations & Personalization for Your Spooky Decor
While the classic black and gold combination creates an undeniably spooky and elegant vibe, don’t hesitate to personalize your candle holders to perfectly match your unique Halloween theme. Here are a few creative ideas to spark your imagination and help you customize your bewitching creations:
- Alternate Color Palettes: Instead of black, try painting your bottles in dark purple, deep blood red, forest green, or even distressed white for a ghostly or spectral feel. For the metallic accent, silver, copper, or bronze craft paints can create different antique and ethereal effects, each adding a distinct character.
- Experiment with Textures and Shapes: Beyond raised designs, experiment with different bottle shapes, sizes, and inherent glass textures. Ribbed, etched, smooth, or even uniquely shaped bottles can all yield distinct and fascinating results with this painting and rubbing technique.
- Add Authentic Potion Labels: For an extra layer of authenticity and fun, print out vintage-style “poison,” “elixir,” “witch’s brew,” “eye of newt,” or “bat’s blood” labels. Adhere these to your finished bottles once the paint is fully cured. You can find numerous free printable labels online with a quick search.
- Embellish with Themed Accents: Drape delicate faux spiderwebs around the bottles, attach small plastic spiders or bats, or tie rustic twine, ribbon, or raffia around the bottle necks for added texture and creepiness. Small charms or keys can also enhance the antique look.
- Opt for Flameless LED Candles: For ultimate safety and peace of mind, especially in households with children, pets, or in areas prone to drafts, consider using battery-operated LED tapered candles. They offer a realistic flicker and warm glow without the risks associated with an open flame.
Beyond the Centerpiece: Displaying Your Bewitching Creations
These spooky candle holders are incredibly versatile and can enhance almost any area of your home during the Halloween season. Their unique aesthetic allows them to blend seamlessly into various decor schemes, from subtly eerie to overtly haunted. Here are some inspired ideas for showcasing your newly crafted masterpieces:
- Dining Table Centerpiece: Group them elegantly together in the middle of your dining table, perhaps surrounded by plastic spiders, faux raven feathers, or a dark, textured table runner for a truly haunted dinner party atmosphere.
- Mantlepiece Decor: Line them up gracefully on your fireplace mantel, complementing them with faux skulls, dusty spellbooks, cobwebs, or other gothic curios for a sophisticated yet spooky display.
- Entryway Table: Place a cluster of these potion bottles on your entryway table to warmly (or eerily) welcome guests with a subtle yet impactful touch of Halloween spookiness as soon as they walk through the door.
- Bookshelves and Cabinets: Nestle them amongst your collection of books or inside glass-front cabinets to create unexpected moments of Halloween charm and mystery throughout your living space.
- Covered Porch or Patio: If protected from direct elements, these candle holders can add a mysterious and inviting glow to your outdoor Halloween setup, perfect for trick-or-treaters.
- Window Sills: Arrange them on window sills, allowing them to cast long, eerie shadows as the natural light fades outside, creating a captivating silhouette against the evening sky.
Safety First: Important Tips for Using Real Flame Candles
While these DIY candle holders are designed to be beautiful and captivating, safety should always be your absolute top priority when incorporating real flame candles into your decor. To ensure a safe and enjoyable Halloween, please keep the following essential tips in mind:
- Never Leave Unattended: This is the golden rule of candle safety. Always extinguish candles before leaving a room, going to sleep, or stepping away from your home.
- Keep Away from Flammable Materials: Ensure your candle holders are placed far away from curtains, paper decorations, tablecloths, dried foliage, clothing, or any other easily flammable materials that could catch fire.
- Stable and Heat-Resistant Surface: Always place your candle holders on a stable, flat, and heat-resistant surface where they cannot be easily knocked over by pets, children, or accidental bumps.
- Out of Reach of Children and Pets: Position candles in locations that are well out of reach of curious young children and active pets to prevent accidental burns or tip-overs.
- Trim Wicks Regularly: Trim candle wicks to approximately 1/4 inch before each use. This simple practice helps prevent excessive smoking, soot buildup, and ensures a cleaner, more controlled flame.
- Consider Flameless Alternatives: As mentioned previously, battery-operated LED candles are an excellent, safe, and worry-free alternative, especially if you have an active household, are hosting a party, or are simply concerned about potential fire hazards.
Unleash Your Inner Witch with This Easy Halloween DIY!
Crafting these spooky Halloween candle holders is a delightful, rewarding, and incredibly simple project that brings significant character, charm, and a touch of ancient mystery to your seasonal decor. With just a few inexpensive items readily available from your local dollar store, you possess the power to transform ordinary glass bottles into captivating, mysterious centerpieces that look like they belong in a haunted apothecary or a wizard’s secret lair. This DIY not only saves you money but also provides a fantastic outlet to express your creativity and create truly unique pieces that will undoubtedly impress your guests and elevate your Halloween atmosphere to enchanting new heights.
So, gather your supplies, put on your favorite spooky playlist, and get ready to conjure up some magic! These potion-inspired candle holders are more than just decorations; they’re conversation starters, mood setters, and key elements for crafting an unforgettable and bewitching Halloween experience this year. Happy crafting!
Like this bewitching project? Don’t let the spirits carry it away! Pin it now so you don’t forget this fantastic dollar store Halloween craft for years to come!







