
Elevate Your Gifting: Custom Magnetic List Pads from the Dollar Store
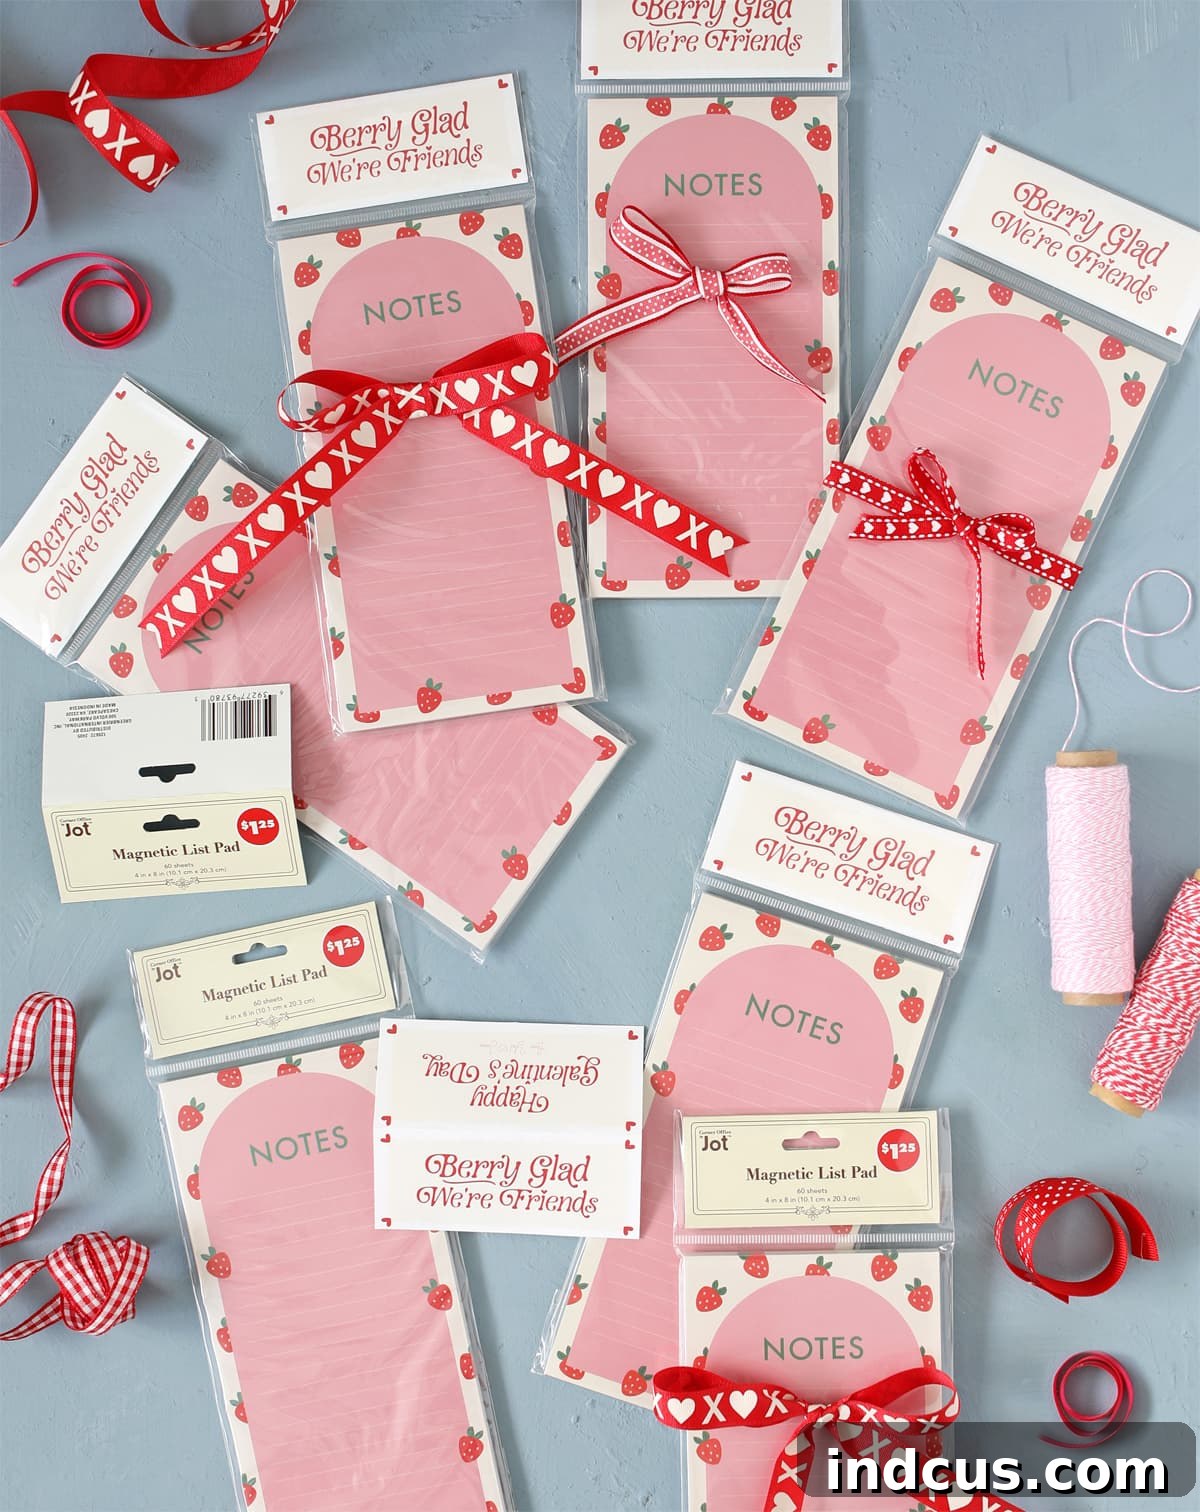
Add your own tag to a magnetic list pad from the dollar store for a cute and custom gift for Galentine’s Day or a friend’s birthday.
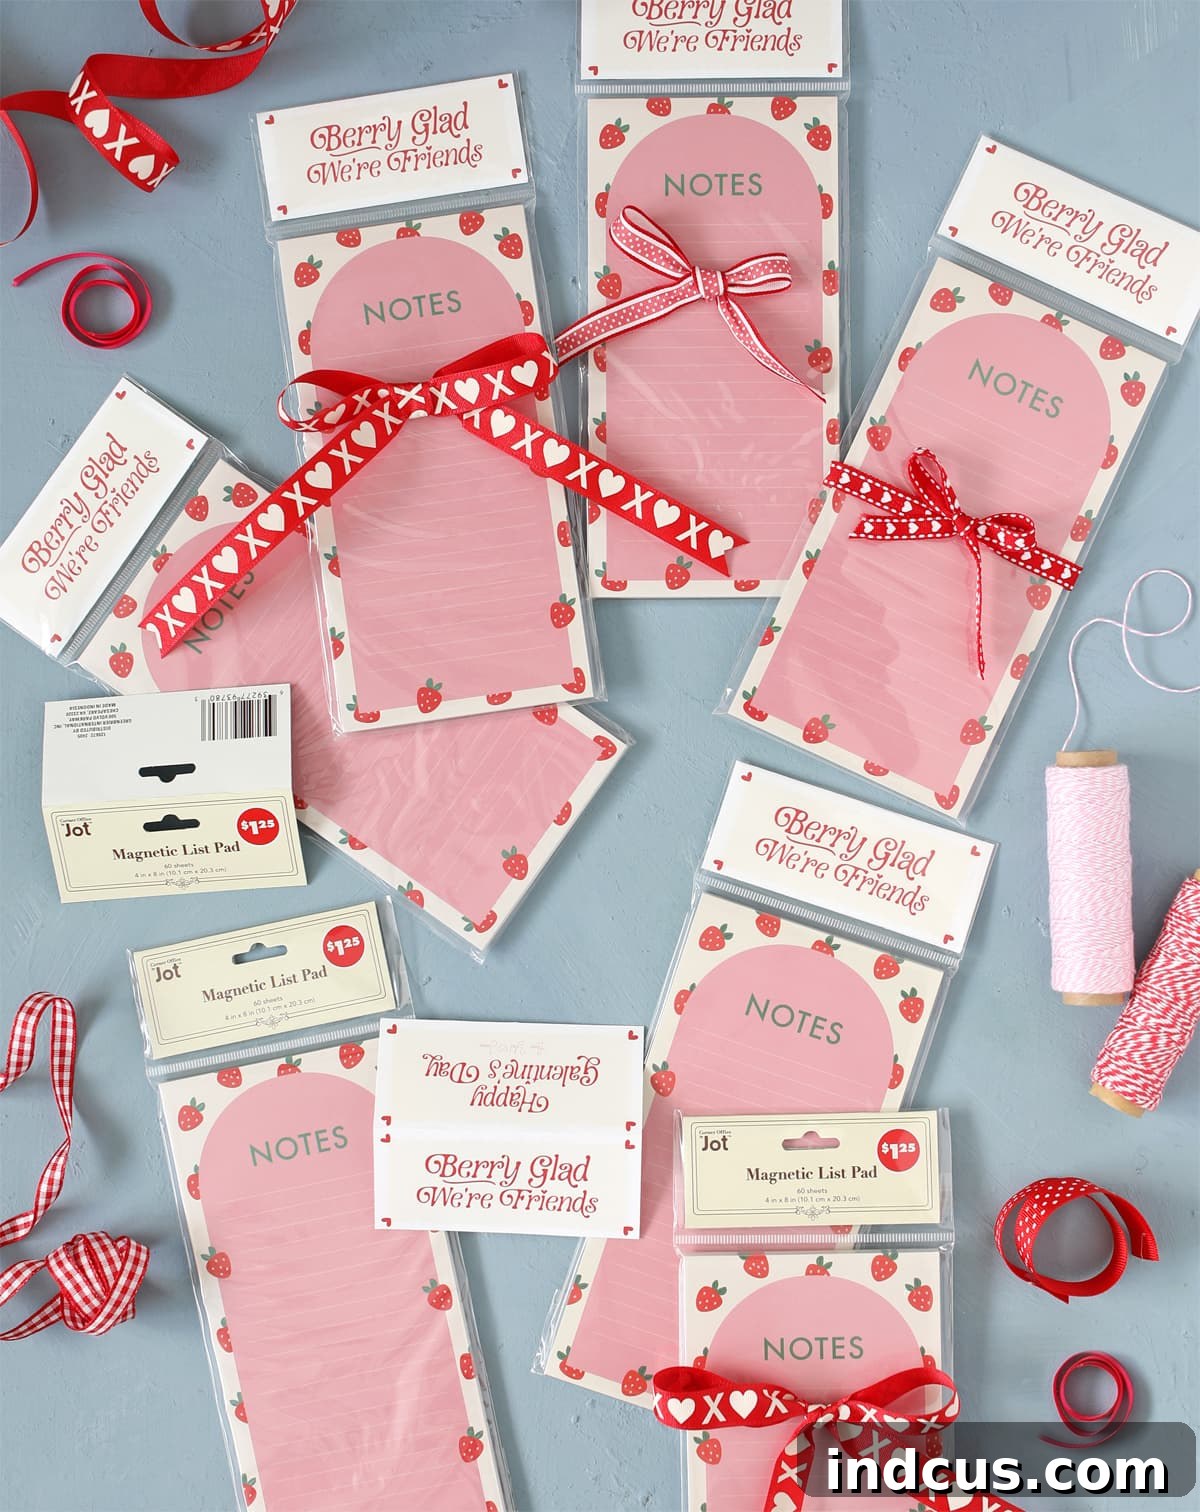
In a world bustling with grand gestures and often expensive presents, sometimes the most meaningful gifts are the simplest – those that truly reflect thought and personal touch without requiring a significant investment. Today, I’m thrilled to share a delightful, incredibly easy, and budget-friendly DIY gift idea that transforms an everyday dollar store item into a charming, personalized present. This project is perfect for any occasion, especially Galentine’s Day, a friend’s birthday, or simply as a thoughtful “thinking of you” gesture.
Imagine finding an item that is both immensely practical and boasts immense potential for creative customization. That’s exactly what happened when I recently stumbled upon these adorable magnetic list pads at my local Dollar Tree. Their inherent usefulness – everyone needs a list! – coupled with their incredibly affordable price point, immediately sparked an idea: wouldn’t these make fantastic, heartfelt gifts for my beloved gal pals and friends? The answer, I quickly realized, was a resounding yes!
The Dollar Store Dilemma and Its Ingenious Solution
As wonderful as dollar store finds can be, they sometimes come with a minor aesthetic caveat. In this particular instance, the top part of these otherwise cute magnetic list pads featured a rather generic, store-branded label that, frankly, was “killing the vibe” of a truly personalized gift. My vision was to elevate these practical pads from a utilitarian item to a chic, custom-made present. However, upon closer inspection, I discovered the genius of their design: that somewhat unappealing label was conveniently tucked inside its own resealable, clear pouch at the very top of the pad. This crucial detail meant one thing – it was easily removable!
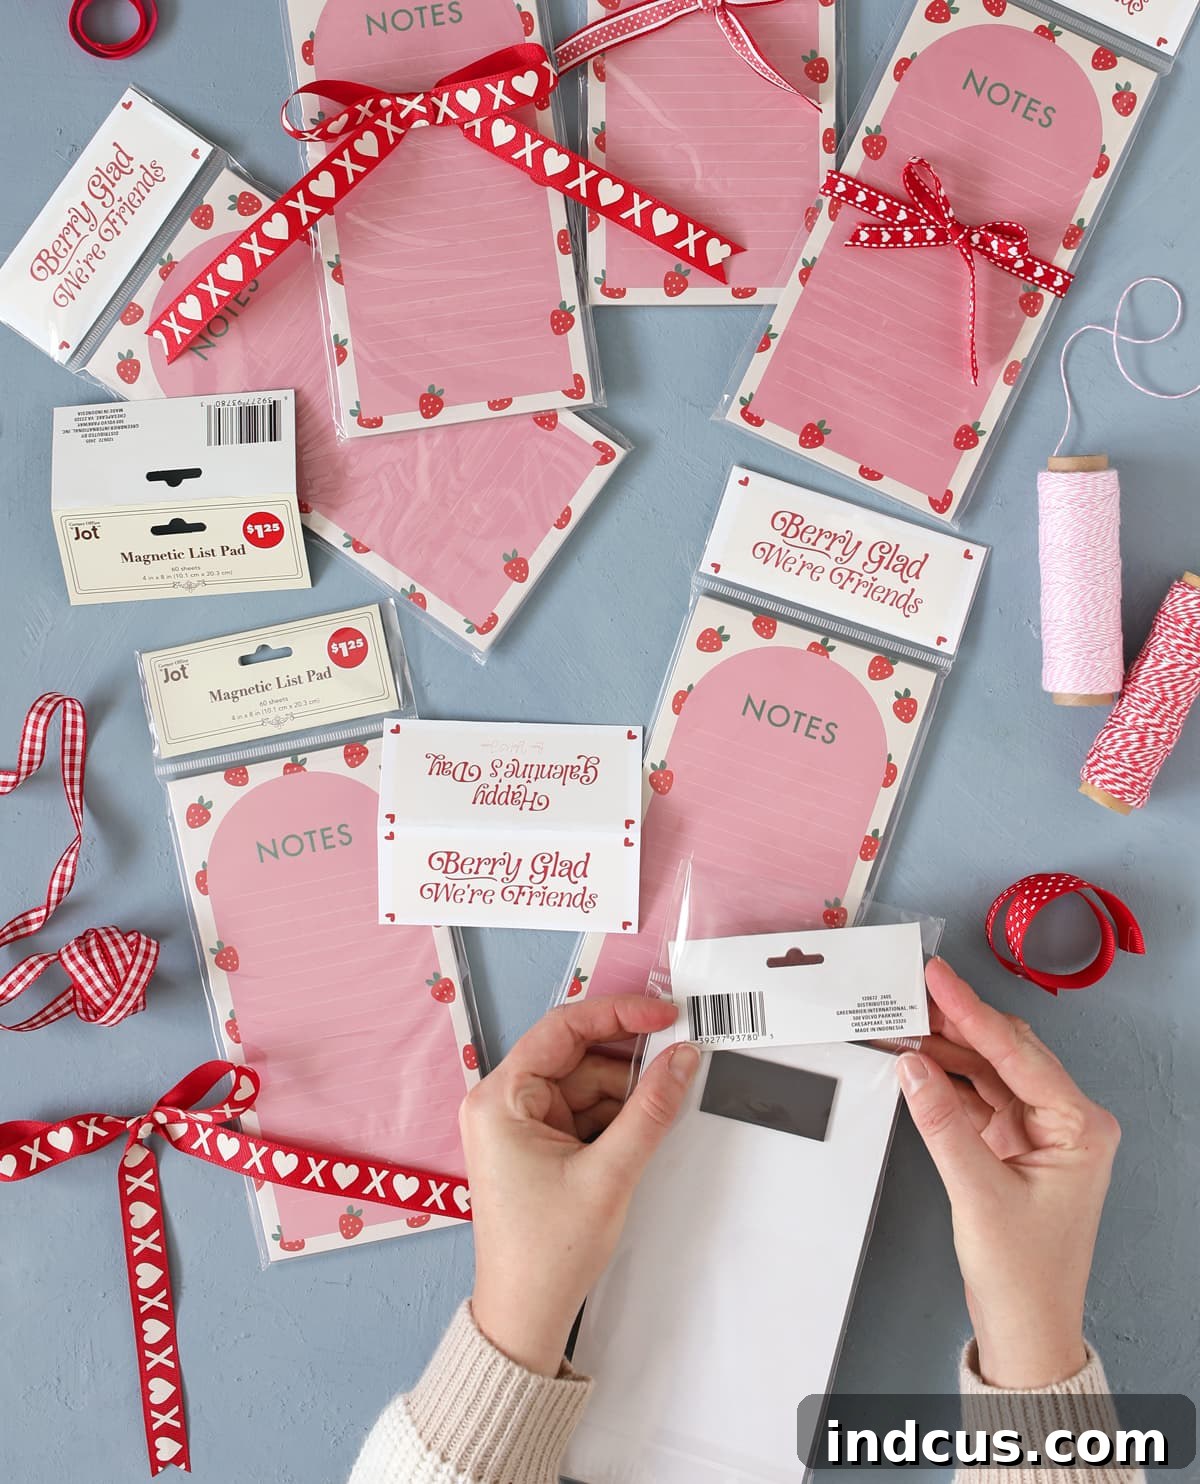
This discovery was an absolute game-changer. Suddenly, the potential for personalization became limitless. I realized I could design my own cute, custom tag to effortlessly replace the original, instantly transforming a simple dollar store purchase into a unique and thoughtful present. The entire process turned out to be incredibly quick and satisfying. I designed a lovely double-sided tag, printed it on sturdy white cardstock for durability, carefully cut out the tags, and then – *voilà!* – swapped out the generic store label for my custom creation. The result was a charming little gift, clearly made with love, that perfectly conveys “I’m thinking of you” to a friend, without any fuss or major expense.
Finding Your Perfect Base: Sourcing Magnetic List Pads
These versatile magnetic list pads are typically found in the office supply or stationery section of major dollar stores, such as Dollar Tree. My personal experience involved a bit of a delightful treasure hunt; I actually visited two different stores to gather enough pads to gift to all my friends. In one store, they were neatly hung on pegs, making them easy to spot, while in another, I found them charmingly nestled in a box alongside various other designs and colors. Don’t be discouraged if you don’t find them immediately; a quick scan of the relevant aisles or even a friendly inquiry with a store associate can usually lead you to these surprisingly versatile and affordable gems.
Unleashing Your Creativity: Designing Your Own Custom Tags
The true magic of this DIY project lies in the endless possibilities for customization. Designing your own tags allows you to tailor each gift specifically to the recipient’s personality, your unique relationship, and the particular occasion. Whether you’re crafting a playful message for Galentine’s Day or a heartfelt wish for a birthday, your personal touch will undeniably shine through, making the gift truly memorable.
Brainstorming Tag Themes and Heartfelt Messages:
- For Galentine’s Day: Consider messages like “Berry Glad We’re Friends,” “You’re on My List of Favorite People,” “My Love for You is Infinite,” or simply “Happy Galentine’s Day!” You can incorporate playful puns or inside jokes.
- For Birthdays: Try “Happy Birthday to a List-Maker Extraordinaire,” “Wishing You the Best Year Yet,” “Another Year, Another List of Adventures,” or a deeply personalized message incorporating the recipient’s name or a special memory.
- For Thank You Gifts: Simple yet sincere messages such as “So Glad You’re on My Team,” “Thanks for Everything,” “Grateful for You,” or a direct “Thank You.”
- For Housewarming Gifts: “Welcome Home,” “New Home, New Lists to Conquer,” or even practical, cheerful reminders for a new homeowner.
- For Teacher Appreciation: Messages like “Best Teacher on Our List,” “Thanks for Helping Me Grow,” or “Making a List, Checking it Twice, Thanks for Being So Nice!”
- For Everyday Appreciation / Just Because: “Just Because,” “Thinking of You,” “You’ve Got This,” or an inspiring motivational quote that resonates with your friend.
Essential Tools and Practical Tips for Design Success:
You absolutely don’t need to be a professional graphic designer to create stunning and beautiful tags. There are numerous free and user-friendly online tools available, such as Canva, PicMonkey, or Adobe Express, which offer countless templates, an extensive library of fonts, and a wide array of graphics to get you started. Even a basic word processor like Microsoft Word or Google Docs can be effectively utilized to create elegant, text-based designs using carefully chosen fonts. Consider these expert tips for achieving a polished, professional look:
- Prioritize Legibility: Always choose fonts that are clear and easy to read, especially if your tag includes smaller text. Avoid overly decorative fonts that might hinder readability.
- Harmonious Color Palette: Select colors that beautifully complement the recipient’s personal style, the specific occasion, or even the existing design of the list pad itself.
- Opt for Double-Sided Design: This thoughtful detail adds a truly polished and premium finish to your gift. It also provides more creative space – you can have a main message on one side and a charming pattern, a personal note, or an additional small graphic on the other.
- Precision in Sizing: Before you finalize your design and hit print, meticulously measure the dimensions of the original label that came with your list pad. This ensures that your custom tag will fit absolutely perfectly within the clear resealable pouch, giving it a professional, factory-finished look.
Step-by-Step Guide to Crafting Your Custom List Pad Gift
This project is designed to be simple and enjoyable. Follow these steps to create your personalized magnetic list pad:
- Gather Your Essential Supplies: You will need the magnetic list pad(s) from the dollar store, your thoughtfully designed custom tags (printed on sturdy cardstock), a reliable pair of sharp scissors or a precise paper trimmer, and access to a working printer.
- Remove the Original Tag: Carefully locate and gently open the resealable clear pouch at the top of each list pad. With steady hands, slide out the generic store label. It’s a good idea to keep this original label nearby for reference, especially if you want to perfectly match its dimensions for your custom design.
- Print Your Custom Tags: For the best results and a durable finish, print your custom designs on white cardstock. A weight of 65-80 lb is ideal, as it offers durability without being too thick for the pouch. If you’ve designed a double-sided tag, ensure your printer settings are correctly aligned for two-sided printing.
- Precisely Cut Out Your Tags: This step is crucial for a professional look. Use very sharp scissors for clean, crisp edges. For an even more refined and perfectly straight finish, a paper trimmer is highly recommended. If your tag design incorporates rounded corners, a corner punch can be used to achieve that flawless, uniform curve.
- Insert Your New Tag: With your beautifully cut custom tag in hand, carefully slide it into the clear resealable pouch on the list pad. Take your time to ensure it is perfectly centered and straight. Gently smooth out any potential air bubbles or creases to achieve a pristine appearance.
- Add Optional Embellishments for Extra Charm: To further enhance your gift, consider adding a small, decorative touch. You could tie a delicate ribbon, a piece of natural twine, or even a charming little charm around the top of the pad. For a complete and highly functional gift package, pair the custom list pad with a stylish pen or a coordinated pencil set.
Beyond Galentine’s & Birthdays: More Occasions to Gift
While this custom list pad project is absolutely ideal for showing appreciation on Galentine’s Day and celebrating birthdays, its remarkable versatility means it’s suitable for a multitude of other occasions throughout the year. Don’t limit your creativity; think outside the traditional gift-giving box and consider these additional ideas:
- Hostess Gifts: A thoughtful and practical token of appreciation for someone who has hosted you, far more personal than a generic bottle of wine.
- Teacher Appreciation: A highly practical and genuinely useful gift for educators at any point in the school year, a welcome change from typical classroom supplies.
- New Parent Gifts: Invaluable for helping new parents keep track of baby’s feeding schedule, sleep patterns, doctor’s appointments, and their seemingly endless list of daily to-dos.
- Student Care Packages: Perfect for college students to help them keep their dorm rooms, study areas, or class notes organized amidst a busy academic life.
- Small Business Owners: A custom-branded or inspiringly-tagged pad for their office, client notes, or daily task management.
- “Just Because” Moments: Sometimes, the very best gifts are given for no particular reason other than to simply show you care, brighten someone’s day, or acknowledge their presence in your life.
The profound beauty of this gift lies not just in its undeniable affordability, but primarily in the genuine effort, creativity, and personal touch you invest in its creation. It stands as a testament to the powerful idea that thoughtful gifts do not need to be extravagant or expensive to be deeply cherished and truly appreciated by the recipient.
Ready to Create Your Own Masterpiece?
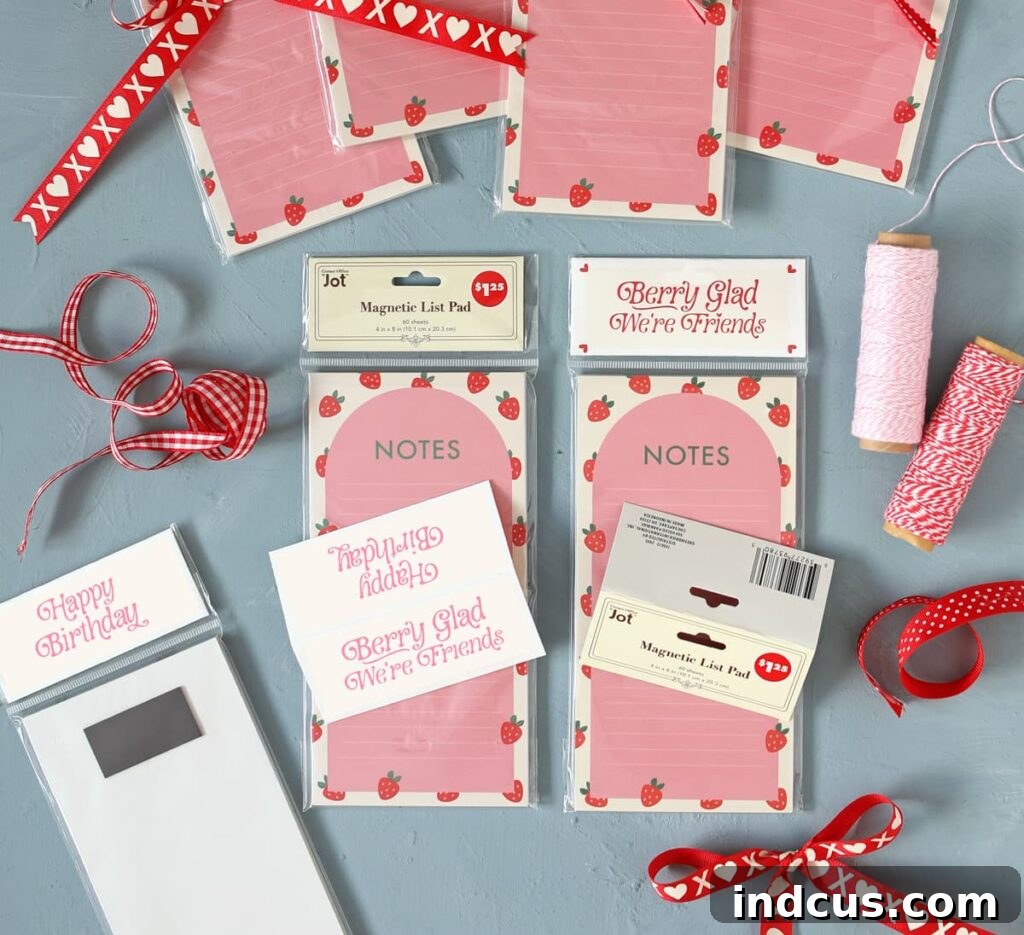
If you’re eager to dive into this delightful DIY project and want a helpful head start, you’re in luck! I’ve already designed two absolutely charming versions of printable tags for you: a special Galentine’s Day version that’s full of friendship, and a versatile Happy Birthday version suitable for any age. These designs are conveniently ready to be downloaded, printed, and customized to your heart’s content, making your gifting experience even smoother and quicker.
Both versions of these convenient and beautiful printables can be found here:
I sincerely hope this quick, easy, and incredibly rewarding DIY project inspires you to add a truly personal and heartfelt touch to your next gift. It’s a wonderful and creative way to show your friends, family, and loved ones just how much you appreciate them, proving once again that the most memorable and treasured presents are often those made with a little bit of creativity, a dash of effort, and a whole lot of heart.
Enjoy crafting and spreading joy to those around you!







