
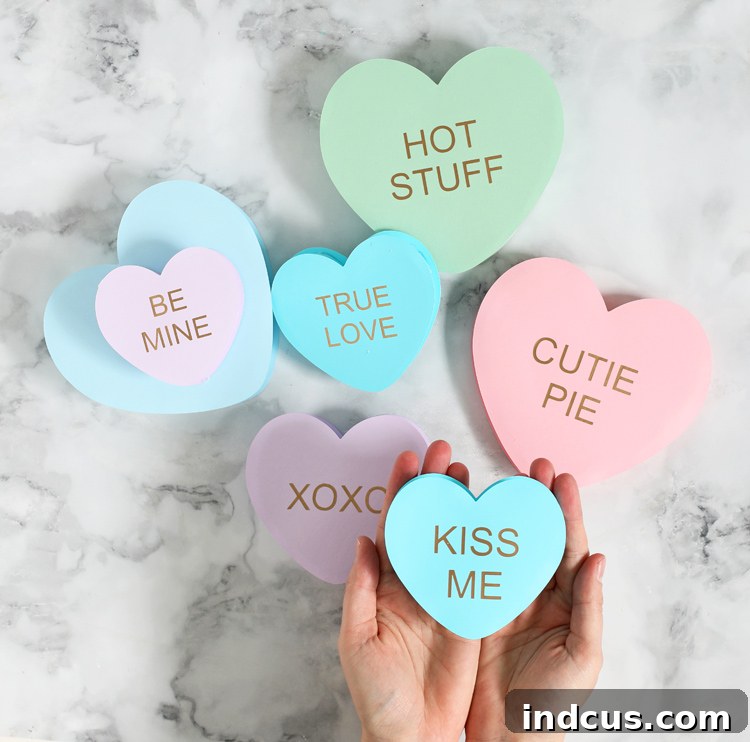
Craft Sweet Messages: Create Charming 3D Paper Conversation Hearts for Valentine’s Day
Dive into the heartwarming world of DIY Valentine’s Day decorations with this easy-to-follow tutorial on crafting adorable 3D paper conversation hearts. Perfect for adding a touch of personalized sweetness to your home, these versatile hearts are a delightful way to celebrate love and friendship.
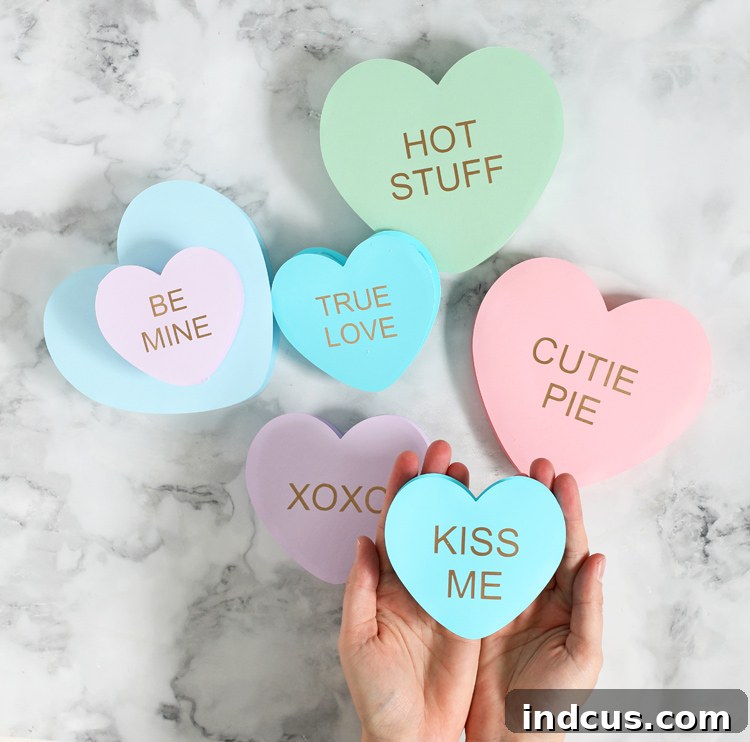
Valentine’s Day is a time for sharing love, and what better way to express your affection than with handmade treasures? Today, we’re embarking on a delightful journey to create enchanting 3D paper conversation hearts. These aren’t just any hearts; they’re vibrant, dimensional, and brimming with personalized charm, reminiscent of those classic candy messages we all adore. Whether you’re a seasoned crafter or just starting, this project offers a rewarding experience with stunning results.
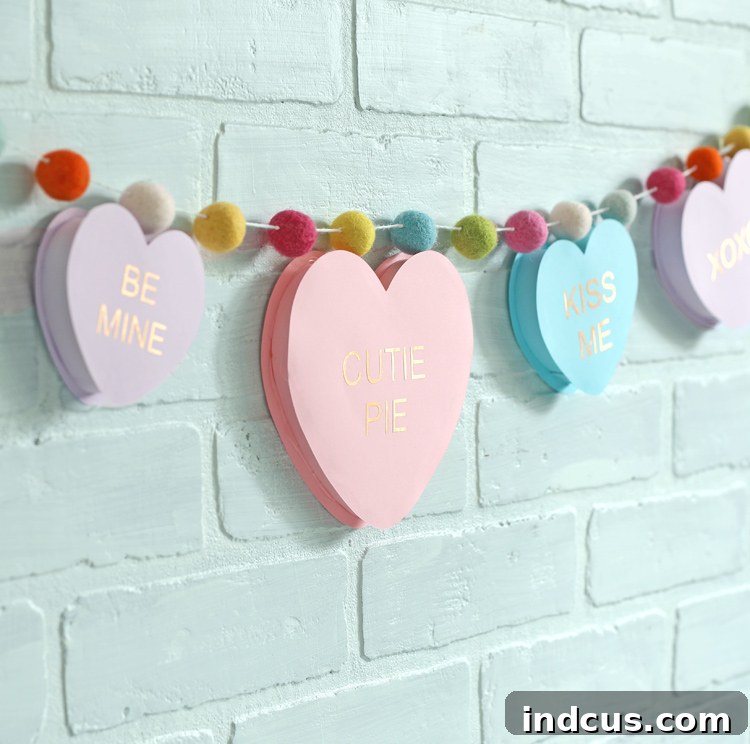
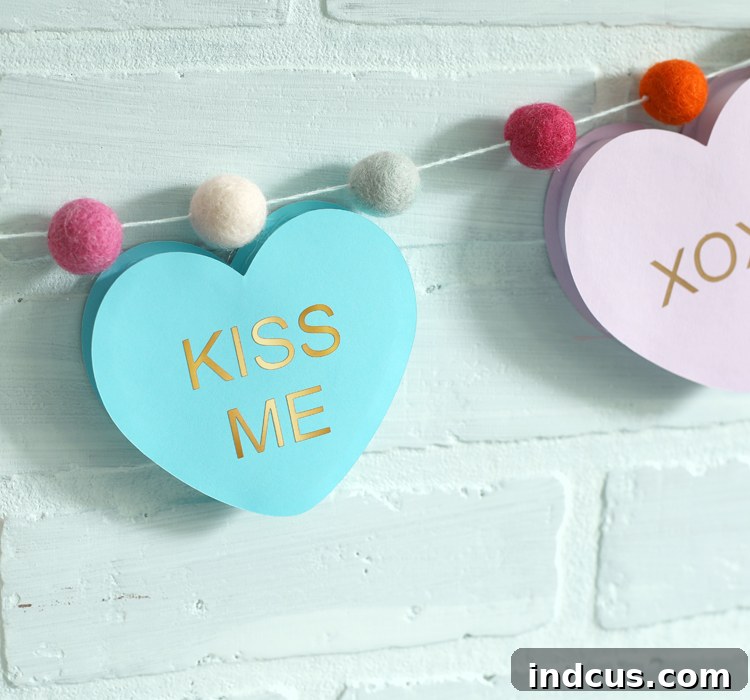
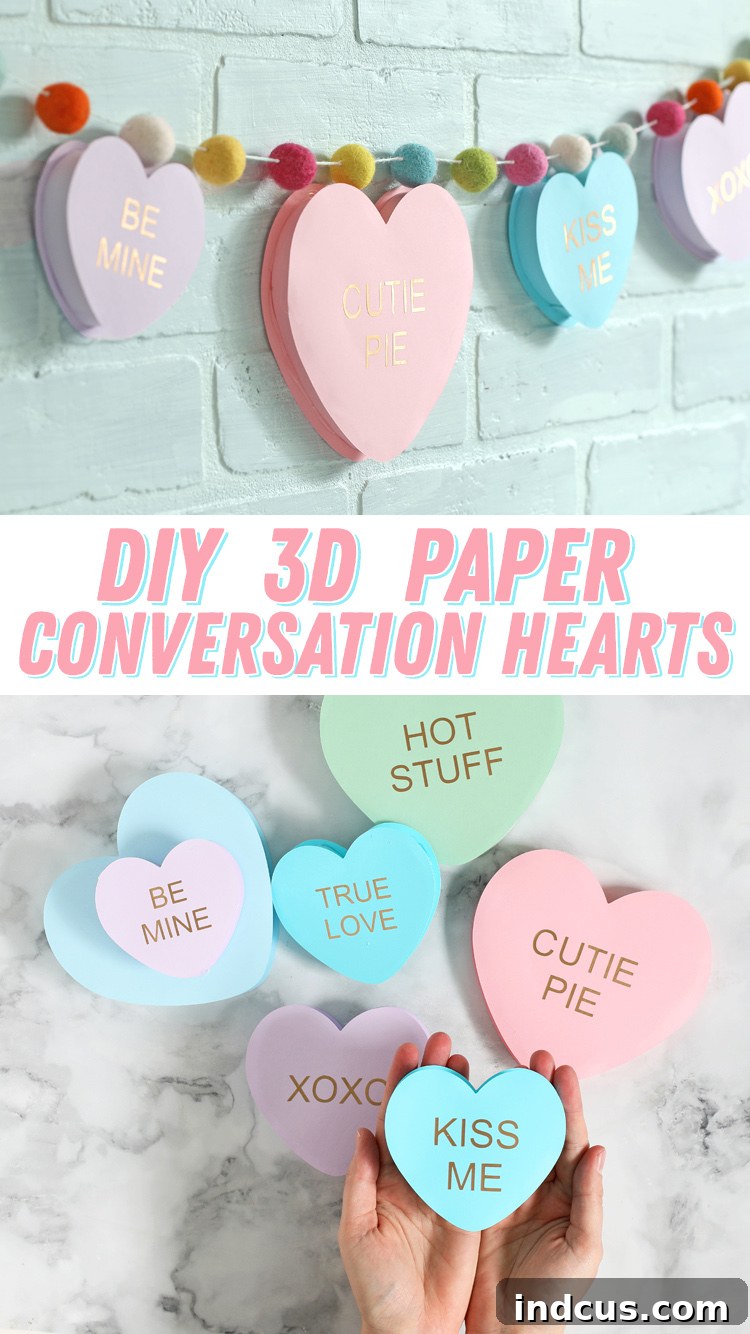
The beauty of these DIY 3D paper hearts lies in their versatility. While I’ve transformed mine into a festive Valentine’s Day banner – a perfect focal point for any room – the possibilities are truly endless. Imagine them as whimsical shelf decor, nestled elegantly in a glass vase, or scattered across a festive table. They can serve as unique gift tags, embellishments for cards, or even components in a larger Valentine’s display. Crafting these beauties is surprisingly simple, especially with the assistance of a cutting machine like a Silhouette, and requires only a few basic supplies readily available at any craft store.
This creative endeavor is proudly brought to you in partnership with Expressions Vinyl, my absolute favorite source for premium craft vinyl that brings every project to life!
Why You’ll Adore Crafting These 3D Paper Hearts
Beyond their undeniable cuteness, there are numerous reasons why this 3D paper conversation heart craft is an ideal project for Valentine’s Day and beyond:
- Personalization at Its Best: Unlike store-bought decorations, these hearts allow for complete customization. Choose your favorite pastel cardstock, select meaningful words, and even add extra embellishments to truly make them your own.
- Budget-Friendly Decor: Achieve high-end decorative results without breaking the bank. Paper and vinyl are cost-effective materials, making this an accessible craft for everyone.
- A Relaxing and Rewarding Activity: The process of cutting, weeding, and assembling these hearts is incredibly meditative and satisfying. It’s a wonderful way to unwind and express your creativity.
- Versatile for Any Occasion: While perfect for Valentine’s Day, these hearts can be adapted for anniversaries, birthdays, bridal showers, or simply to add a touch of love to your everyday decor.
- Perfect for All Skill Levels: With clear instructions and the aid of a cutting machine, even beginners can achieve professional-looking results.
Essential Materials You’ll Need
Gathering your supplies is the first exciting step in any craft project. Here’s a detailed list of what you’ll need to create your own collection of beautiful 3D paper conversation hearts:
- Pastel Colored Cardstock: Opt for a variety of soft, romantic pastel shades like pink, lavender, mint, and yellow. A cardstock weight of 65lb to 80lb (176gsm to 216gsm) is ideal, providing enough sturdiness to hold its shape while still being flexible enough to work with.
- Adhesive Vinyl: This is where your messages come to life! I highly recommend using a metallic vinyl, such as THIS Gold Chrome Brushed metallic vinyl, for a sophisticated and eye-catching finish. Standard permanent adhesive vinyl in white, black, or complementary colors also works beautifully.
- Transfer Tape: An indispensable tool for cleanly and accurately transferring your delicate vinyl words onto the cardstock hearts. Choose a medium-tack transfer tape for best results.
- Scissors: A sharp pair of craft scissors will be handy for any minor trimming or adjustments.
- Hot Glue Gun + Glue Sticks: A low-temperature hot glue gun is recommended for safety and to prevent excessive heat transfer to the paper. Hot glue provides a strong, fast-drying bond crucial for building the 3D structure.
- A Silhouette Cutting Machine (or similar digital craft cutter): While technically you *could* hand-cut, a Silhouette machine (or Cricut, etc.) is highly recommended for precision and ease, especially for the intricate heart shapes and small vinyl lettering.
Step-by-Step Instructions to Craft Your 3D Hearts
Let’s get crafting! Follow these detailed steps to bring your charming 3D paper conversation hearts to life. Precision and patience are your best friends here, but remember, the process should be enjoyable and allow for your personal touch.
Step 1: Prepare Your Files and Materials with Precision
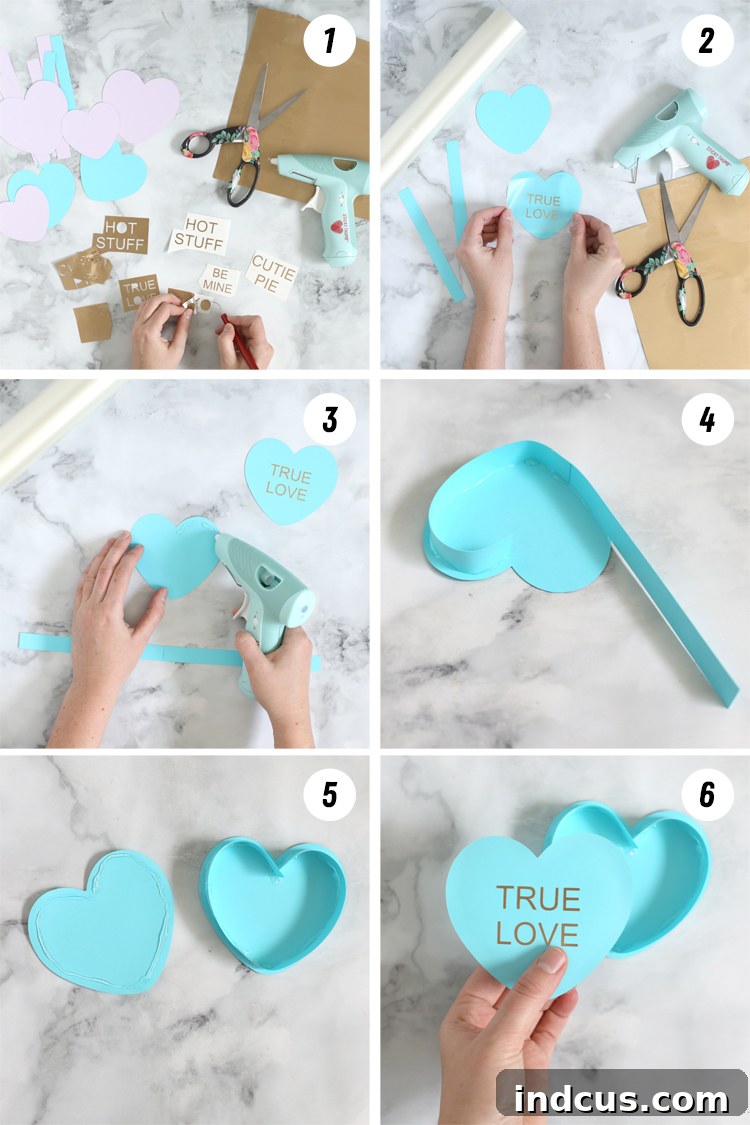
Begin by downloading the free cut files provided at the bottom of this post. Once downloaded, open these files within your Silhouette Studio software (or your preferred cutting machine’s software). Take a moment to review the layout, resizing the hearts and paper strips as needed to achieve your desired final heart dimensions. Ensure the placement is optimized to conserve your cardstock. Load your cardstock into your cutting machine and cut out all the heart shapes and the accompanying paper strips. Next, load your chosen adhesive vinyl and cut out all your desired words or phrases. Once the cutting is complete, carefully “weed” the excess vinyl from around your words. This involves removing all the vinyl that isn’t part of your design, leaving only the pristine lettering on the backing sheet. Take your time during this step, especially with smaller, more intricate fonts.
Step 2: Adorn Your Hearts with Sweet Messages
Now it’s time to add those iconic conversation heart messages! Take a piece of transfer tape, larger than your vinyl word, and firmly press it over the weeded vinyl design. Use a scraper tool or a credit card to burnish the transfer tape onto the vinyl, ensuring a strong adhesion. Carefully peel the transfer tape, bringing the vinyl word along with it. Position the vinyl word precisely onto one of your cut paper hearts. Gently press down and then burnish the vinyl onto the cardstock. Slowly peel back the transfer tape, leaving the vinyl word securely on your heart. For each completed 3D heart, you will need two paper heart shapes and two paper strips. Only apply the vinyl message to one of these paper hearts; the other will serve as the plain backing.
Step 3: Construct the Inner Framework
To create the robust inner structure of your 3D heart, you’ll need to join the two paper strips together. Apply a small bead of hot glue along one end of a paper strip and carefully press the end of the second paper strip onto it, creating one continuous, longer strip. This combined strip will form the “side wall” of your 3D heart. Once the strip is prepared, take one of your paper hearts (preferably the one without the vinyl message for this initial step). Run a thin, consistent bead of hot glue about 1/4 inch in from the edge, tracing the entire perimeter of the heart. Work in small sections if your glue dries quickly, or if you’re using a high-temp glue gun.
Step 4: Attach the First Side of the Heart
Beginning at the top indentation of the heart (the “V” shape), carefully press one end of your combined paper strip into the bead of hot glue you just applied. Slowly and meticulously work your way around the entire perimeter of the heart, gently bending the paper strip to follow the curves of the heart shape. Apply light, consistent pressure as you go, ensuring the strip adheres firmly to the glue. The goal is to create a neat, standing edge around the heart. Once you reach the starting point, trim any excess paper strip and glue the ends together to complete the continuous side wall.
Step 5: Prepare the Second Half
Now, take your second paper heart (the one with the vinyl message, if you’re making a banner or front-facing decor). Apply another steady bead of hot glue around the back side of this heart, again about 1/4 inch from the edge. Ensure this bead of glue aligns with where the paper strips will meet, forming a secure connection.
Step 6: Complete Your 3D Masterpiece
Carefully align the second heart (with the glue bead) directly on top of the paper strips that are already attached to the first heart. Press firmly and evenly, ensuring the paper strips are sandwiched securely between the two heart shapes. Hold the pieces together for a few moments as the hot glue sets. You’ve now successfully created a beautiful, dimensional 3D paper conversation heart! The paper strips form the lovely, raised “inside” wall, giving your heart its signature puffy look.
Once your hearts are assembled, the creative journey truly begins! As mentioned, I opted to attach mine to a charming pom-pom garland for a festive display, but the possibilities for these adorable creations are truly limitless. Let your imagination soar!
Cute. Easy. Absolutely delightful!
Beyond the Garland: Creative Ways to Use Your 3D Conversation Hearts
Your finished 3D paper conversation hearts are too charming to be confined to just one use. Here are some inspiring ideas to showcase your creations:
- Captivating Garlands & Banners: String them together with twine, ribbon, or even small pom-poms to create a festive banner for your mantel, doorway, or party backdrop.
- Enchanting Table Centerpieces: Arrange a collection of hearts in varying sizes within a decorative bowl or scattered elegantly across your dining table.
- Thoughtful Gift Tags & Embellishments: Attach a heart to a Valentine’s gift bag or box for a personalized touch. They can also adorn homemade cards or scrapbooking layouts.
- Whimsical Bouquets & Vase Fillers: Glue a heart to a floral wire stem and arrange several in a vase for a unique paper flower bouquet. Alternatively, simply fill a clear glass vase with a mix of colorful hearts.
- Charming Wall Art & Mobiles: Mount them directly onto a wall in a heart-shaped cluster, or hang them from varying lengths of string to create a delightful mobile.
- Memory Box Fillers: Use them to add dimension and sentiment to a shadow box filled with Valentine’s Day memories or keepsakes.
- Party Favors: Create smaller versions and offer them as sweet party favors for your guests.
- Window Decorations: Hang them individually or in clusters in a window to catch the light and share your festive spirit with passersby.
Personalizing Your Conversation Hearts: Make Them Uniquely Yours
The true magic of this craft lies in its endless customization options. Don’t be afraid to experiment and make each heart a reflection of your own style and sentiment:
- Messages that Matter: Go beyond traditional “BE MINE” or “XOXO.” Think of inside jokes, beloved pet names, uplifting affirmations, or specific dates. You can even use different fonts for each message to add visual interest.
- A Spectrum of Colors: While pastels are classic, consider a vibrant rainbow of colors for a more playful look, or a monochromatic palette of varying shades of pink and red for sophisticated elegance. Don’t forget the metallic vinyl for a touch of glamour!
- Embellish with Flair: Add a sprinkle of glitter to the edges before the glue dries, or adhere tiny rhinestones or pearl stickers for extra sparkle. You could even use specialty cardstock like glitter cardstock for some of your hearts.
- Varying Sizes: Create hearts in a range of sizes to add dynamic interest to your arrangements, especially for garlands or vase fillers.
Tips for Success & Troubleshooting
To ensure your crafting experience is as smooth as possible, keep these tips in mind:
- Hot Glue Handling: Use a low-temperature glue gun to prevent burns and give you a little more working time. Work quickly but carefully, as hot glue sets fast. If you’re struggling with too much glue, try a narrower nozzle or a lighter touch.
- Vinyl Application: For bubble-free application, apply vinyl starting from the center and smoothing outwards with your scraper tool. If bubbles appear, gently prick them with a fine needle and smooth them out.
- Cardstock Choice: Thicker cardstock (80lb+) will result in more robust hearts, which is great for items that will be handled more, like garland components. Lighter cardstock (65lb) is fine for less handled decor.
- Even Edges: When attaching the paper strips, take your time to align them perfectly with the edge of the heart. Any slight misalignment might become more noticeable in the final 3D form.
This project is a fantastic opportunity to infuse your Valentine’s Day celebrations with personal charm and handmade warmth. Whether you’re decorating your home, creating unique gifts, or simply enjoying a relaxing craft session, these 3D paper conversation hearts are sure to bring smiles and spread love.
Loved this project? Don’t forget to pin it to your Valentine’s Day or DIY Craft boards so you can easily find it again and inspire others!
This post was thoughtfully created and sponsored by Expressions Vinyl, ensuring you have access to the best materials for your crafting adventures. All ideas and opinions expressed here are my own, born from a genuine love for crafting.







