Crafting the Perfect Diaper Cake: Your Ultimate DIY Guide with Expert Tips and Decoration Inspiration
Welcome to your comprehensive guide for creating a memorable and practical diaper cake!
Diaper cakes are more than just an assembly of diapers; they are a cherished tradition and a wonderfully practical gift for any expectant or new parent. Imagine a beautiful, multi-tiered “cake” that doubles as a stunning centerpiece for a baby shower and then transforms into a much-needed supply of diapers! This dual functionality makes them one of the most appreciated gifts you can bring. They offer a fantastic opportunity to unleash your creativity, allowing you to match the cake’s decoration to the baby shower’s theme, nursery decor, or simply choose a design that reflects your personal style. Plus, let’s be honest, every new mom can use a generous stash of diapers!
If you’ve ever wanted to create a show-stopping diaper cake but felt intimidated by the process, this guide is for you. We’ll demystify every step, from selecting the right supplies to mastering the art of rolling and assembling, and finally, transforming your creation into a decorative masterpiece. With these detailed, easy-to-follow instructions and plenty of inspiration, you’ll gain the confidence to craft a beautiful and sturdy diaper cake that will impress everyone at the baby shower. Get ready to gather your materials, build a solid foundation, and then dive into the truly fun part: decorating!
Selecting the Best Diapers for Your Diaper Cake Project
Choosing the right diapers is the first crucial step in constructing a fantastic diaper cake. With the vast array of options available today, it can feel a bit overwhelming. Here are my top recommendations to ensure your diaper cake is both beautiful and highly functional for the new parents:
- Opt for Larger Sizes: This is perhaps the most valuable tip! Newborn and size 1 diapers are adorable but babies outgrow them incredibly fast. New parents often receive an abundance of these smaller sizes as gifts. To provide maximum utility, I strongly suggest purchasing diapers in size 2, 3, or even 4. This ensures the parents will have a supply of diapers for when the baby is a little older and truly needs them. It’s a thoughtful gesture that goes a long way.
- Consider Pattern and Color: While plain white diapers offer a clean canvas for any decoration theme, many brands now offer incredibly charming and trendy patterns. If you choose patterned diapers, select ones that either complement or can be discreetly hidden by your chosen color scheme and decorations. Sometimes, a subtle pattern can add an extra layer of visual interest and charm to your finished cake.
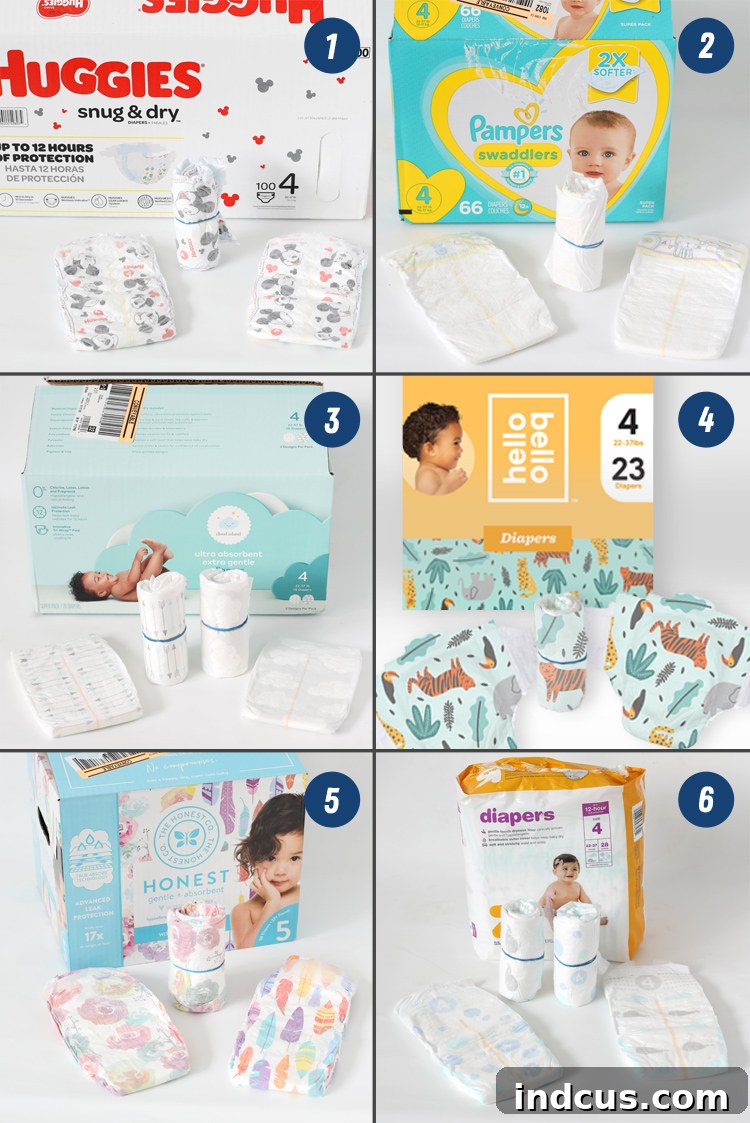
Here are a few of my favorite diaper brands that work wonderfully for crafting diaper cakes, offering a range of styles from solid white to stylish prints:
Choosing a Sturdy Foundation for Your Diaper Cake
A strong and stable base is essential for your diaper cake, especially if you plan to transport it to a baby shower or want the new parents to easily take it home. A good foundation ensures your creation holds together beautifully and doesn’t topple. Here are several excellent and affordable diaper cake base ideas:
- Metal Pizza Pan from Dollar Tree: This is an incredibly versatile and budget-friendly option. You can leave it as is for a minimalist look, spray paint it to match your theme, or cover it with a circle of decorative scrapbook paper. For an extra touch of elegance, hot glue some trim, lace, or ribbon around the edges. Its flatness and rigidity make it perfect for stability.
- Charger Plate: Whether plastic or melamine, a charger plate makes an excellent, pre-decorated base. These are readily available at craft stores, home goods stores, and even dollar stores. They come in a variety of colors and finishes, allowing you to easily find one that complements your baby shower theme. They add an instant touch of sophistication without much effort.
- Cake Board: Found in the cake decorating aisle of most craft stores, pre-cut cardboard rounds are designed for building actual cakes and work perfectly for diaper cakes too. They are sturdy, come in various sizes, and are specifically designed to hold weight. You can easily wrap them in decorative paper or fabric if you wish to conceal the cardboard.
- Tiered Cake Stand: While this option offers the most impressive presentation at the party, it’s typically used for display rather than as a permanent base for transport. If you want the diaper cake to be transportable in one piece after the party, it’s best to build the cake on a separate cake board first and then place the entire assembly onto the tiered stand. This allows for easy removal and gifting.
How Many Diapers Do You Need for a Diaper Cake?
The number of diapers required for your diaper cake depends primarily on its desired size and the number of tiers you envision. Naturally, a larger cake with more layers will necessitate a greater quantity of diapers. However, to help you plan effectively and estimate your purchase, here’s a practical diaper cake sizing guide based on common configurations.
For a standard three-tier diaper cake, where the bottom tier typically measures around 12-14 inches in diameter, you can expect to use the following approximate numbers:
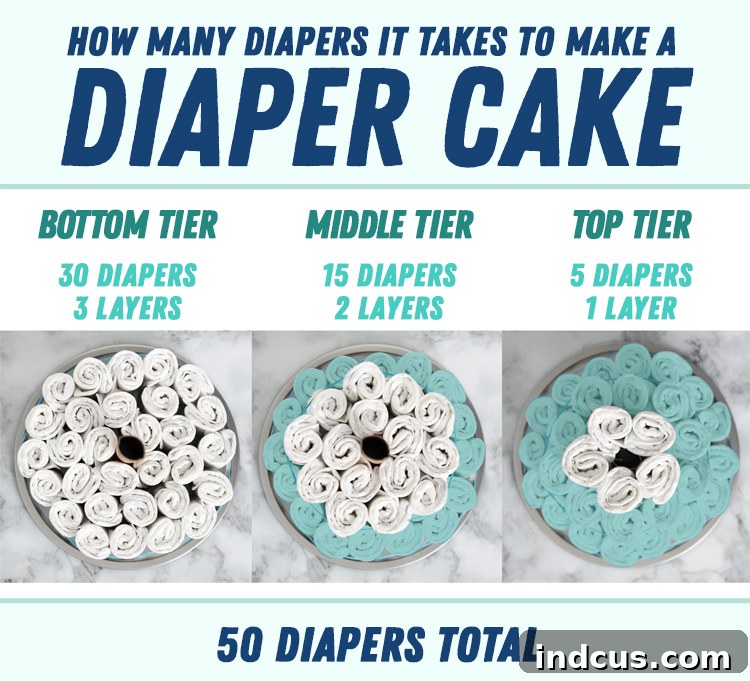
It’s important to note that the size of the diapers you use will also slightly influence the final dimensions of your cake. For instance, the diaper cakes featured in this guide were all constructed using size 4 diapers. If you opt for smaller sizes, such as newborn or size 1 diapers, you might need to add one or two extra diapers to each round to achieve the same diameter and fullness for your tiers, compensating for their slightly smaller individual dimensions. Always err on the side of having a few extra diapers, as it’s better to have too many than to run short during assembly.
Essential Diaper Cake Supply List
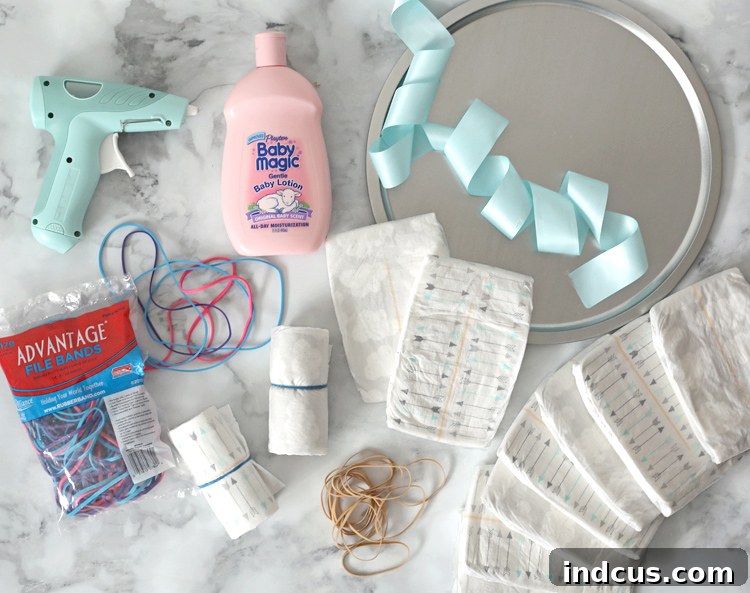
Gathering all your supplies before you begin will make the assembly process smooth and enjoyable. Here’s a detailed list of everything you’ll need to create a beautiful and stable diaper cake:
- 50 Diapers: This is a good general estimate for a robust three-tier cake. Adjust up or down based on your desired cake size and the diaper size you choose.
- 51 Regular Sized Rubber Bands: You’ll need one for each individual rolled diaper to keep it secure, plus one extra for wrapping around the smallest, top tier of the cake.
- 2 Extra Large Rubber Bands (File Bands): These are crucial for holding the larger bottom two tiers firmly together. Their greater circumference provides the necessary tension without damaging the diapers.
- 1 Cake Base: Refer to our “Choosing A Base” section for ideas like a pizza pan, charger, or cake board. This provides stability.
- 1 Large Bottle of Lotion or a Paper Towel/Wrapping Paper Cardboard Tube: This forms the central core of your cake, providing essential structural support. A full bottle of lotion adds weight and can be another practical gift for the new mom!
- Wide Ribbon: This is your primary decorative element to cover the rubber bands and define each tier. Consider satin, grosgrain, or even textured fabrics.
- Embellishments: These are the decorative accents that will bring your diaper cake to life. See our “Diaper Cake Decorating Ideas” section below for a comprehensive list of inspiration!
- Hot Glue Gun + Glue Sticks: Indispensable for securely attaching ribbons and embellishments to your diaper cake without damaging the diapers.
Step-by-Step Diaper Cake Assembly Instructions
Now that you have all your supplies, let’s dive into the fun part: assembling your diaper cake! Follow these steps carefully to ensure a sturdy and beautifully structured creation.
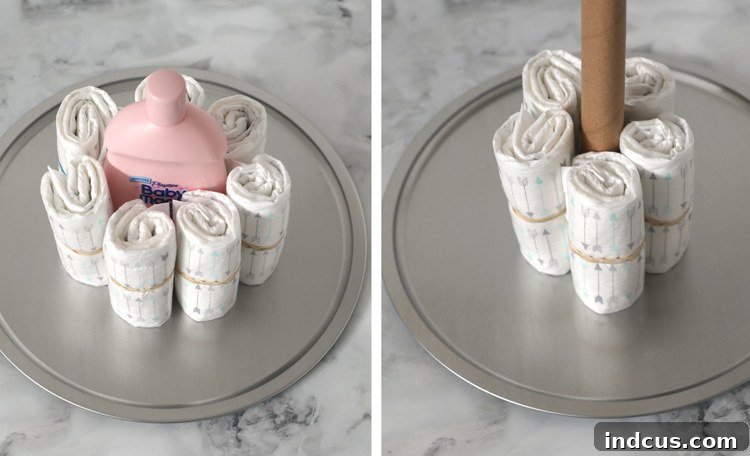
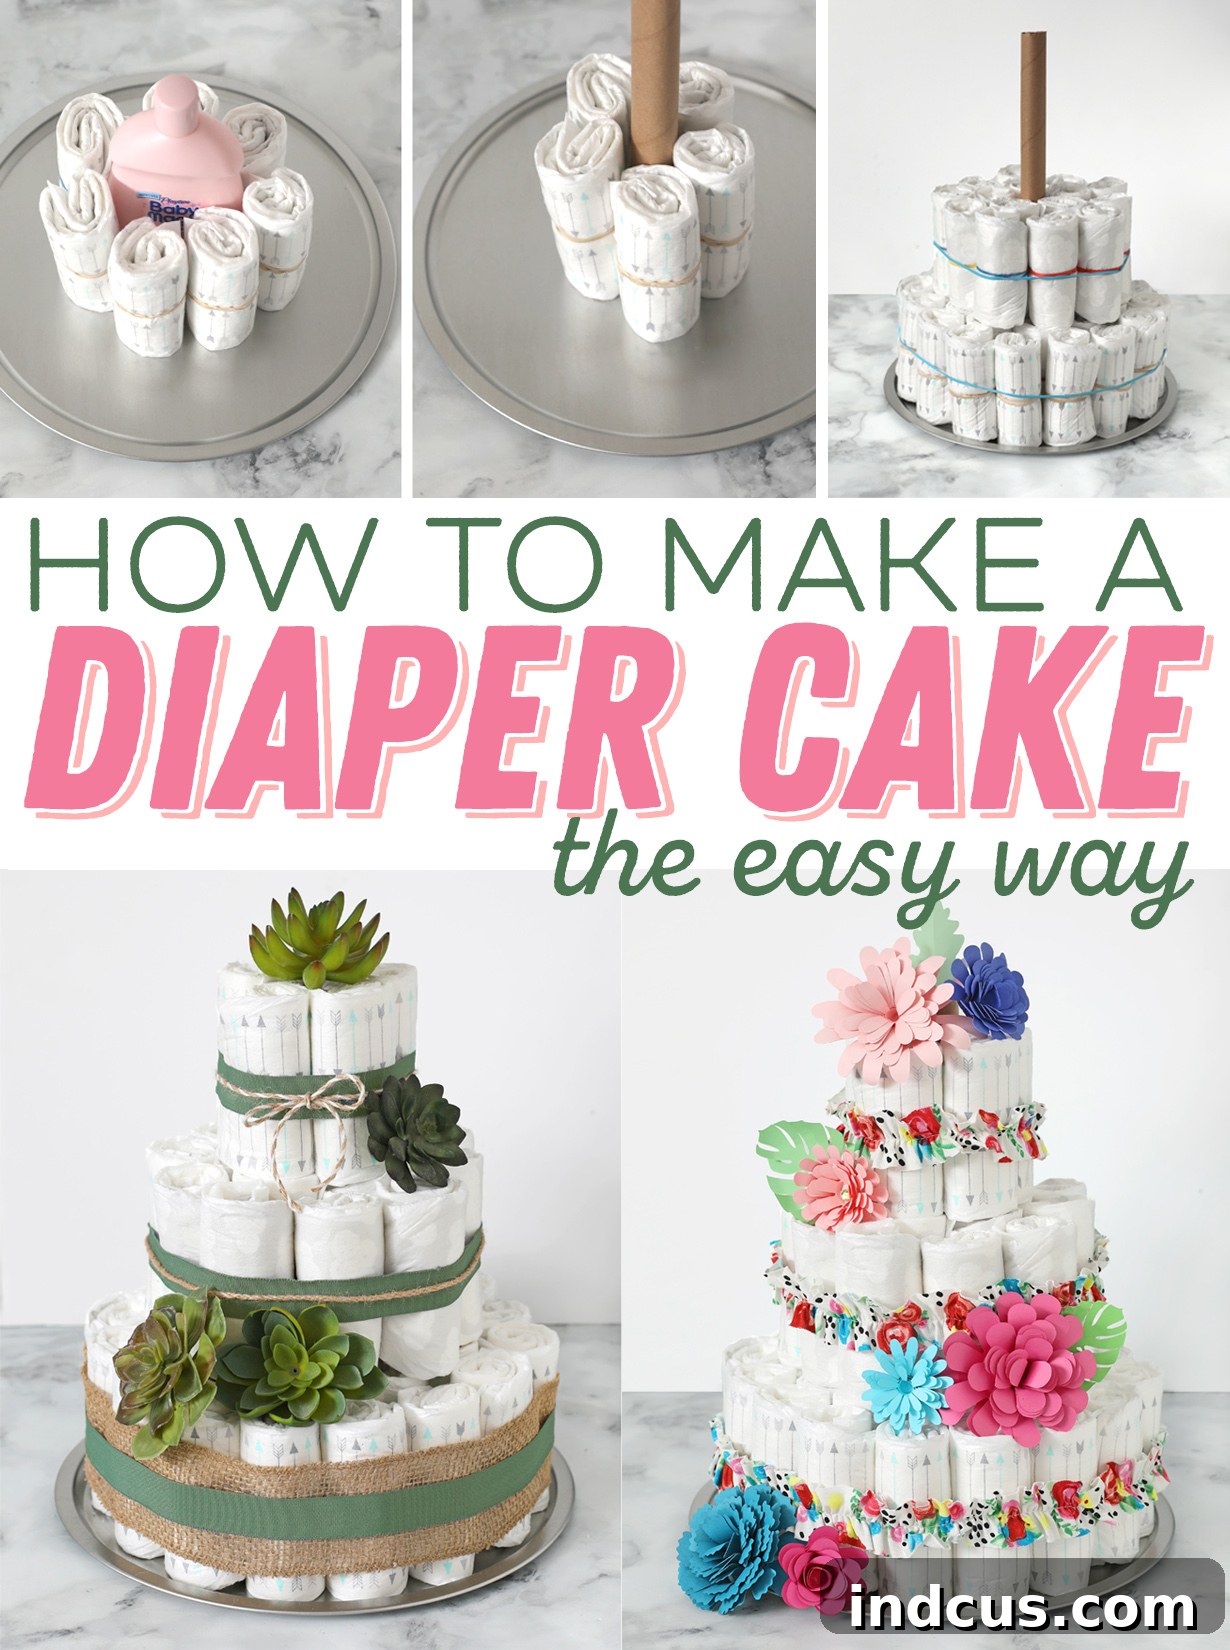
- Roll Individual Diapers: Take one diaper and lay it flat. Starting from the folded end (the waist or top part), tightly roll the diaper towards the open, bottom end. Once rolled, secure it firmly with a small, regular-sized rubber band around its center. Repeat this process for all your diapers. Consistency in rolling will result in a neater cake.
- Establish Your Central Core: Place your chosen central support (either a heavy bottle of baby lotion, baby shampoo, or an empty paper towel/wrapping paper tube) directly in the center of your cake base. This core is critical for the cake’s stability.
- Construct the Bottom Tier: Begin arranging your individually rolled diapers around the central bottle on the cake base. Stand them upright and close together. Form a tight circle, then create additional concentric circles until you’ve filled your entire cake base evenly. This bottom layer should be approximately three diapers deep (meaning three rows of rolled diapers around the core). Once you’ve arranged all the diapers for this tier, use one of your extra-large rubber bands to wrap tightly around the entire outside circumference of the tier, holding all the diapers securely in place.
- Build the Second Tier: Directly on top of the first tier, begin forming your second layer of rolled diapers around the central core. This tier should be noticeably smaller in diameter than the base tier, usually by at least one full ring of diapers. Again, stand the diapers upright and pack them closely. Secure this tier with a regular-sized rubber band wrapped firmly around its outer edge.
- Create the Top Tier: For the final, smallest tier, repeat the process on top of the second layer. This tier will be the smallest in diameter, often consisting of just one or two rings of diapers around the central core. Secure it with another regular-sized rubber band. If you desire a taller or more dramatic cake, you can add additional tiers, always decreasing the diameter with each subsequent layer.
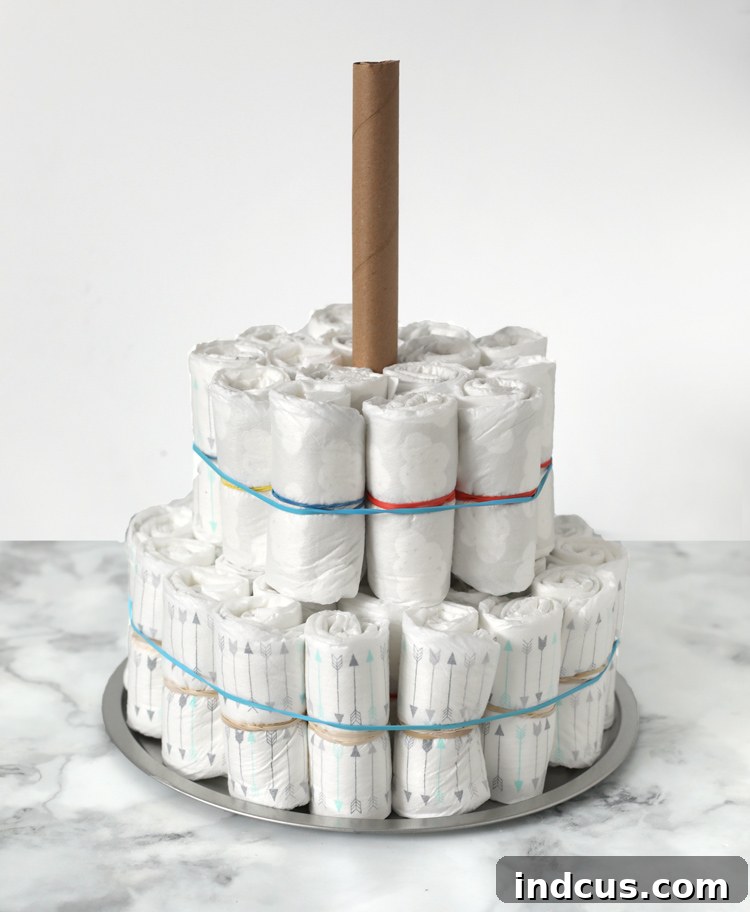
Once your rolled diapers are stacked in the desired tiered cake shape, congratulations! The structural work is complete, and you’re ready to move on to the most exciting part: bringing your diaper cake to life with beautiful decorations!
Creative Diaper Cake Decorating Ideas to Impress
Decorating is where your diaper cake truly transforms from a stack of diapers into a stunning focal point for any baby shower. Every successful diaper cake relies on three key decorative elements to achieve that “wow” factor:
- Ribbon (or Creative Alternatives): The primary purpose of the ribbon is to conceal the rubber bands holding your tiers together, giving your cake a clean, polished look. Wide ribbon is the most common choice, offering a vast array of colors, patterns, and textures (satin, grosgrain, sheer, wired). Wrap a length of ribbon snugly around the base of each tier and secure it with a small dab of hot glue on the back. For a unique touch, consider these alternatives:
- Tulle: Adds a soft, ethereal touch, especially lovely for princess or fairy-tale themes.
- Rolled Up Receiving Blankets or Swaddles: A wonderfully practical and decorative option. Roll them neatly and wrap them around the tiers instead of ribbon.
- Wrapping Paper or Scrapbook Paper Strips: Cut into wide strips, these can offer vibrant patterns or textures that perfectly match your theme. Laminate them for extra durability.
- Fabric Strips: Burlap for a rustic look, patterned cotton for a playful theme, or lace for elegance.
- A Charming Cake Topper: The topper is essential for two reasons: it provides a finished look to the cake and cleverly conceals the top opening of your central core (the lotion bottle or paper towel tube). The possibilities here are endless and should align with your baby shower theme.
- Small Plush Animal: A classic and adorable choice, often a future nursery favorite.
- Baby Bottle or Sippy Cup: Practical and cute, perhaps filled with small candies.
- Baby Shoes or Booties: Sweet and sentimental.
- Decorative Sign: A “It’s a Boy/Girl,” “Welcome Baby,” or the baby’s name (if known) sign on a stick.
- Faux Flowers or Greenery: Especially beautiful for a garden or woodland theme.
- Small Toys: Rattles, teethers, or bath toys can be both decorative and functional.
- Baby Blocks or Letters: Spell out the baby’s initial or name.
- Thoughtful Embellishments: These are the smaller decorative accents that truly personalize your diaper cake and give it that extra “wow” factor. They fill in gaps and add visual interest. Secure them with hot glue (applied carefully to the ribbon, not the diapers directly) or decorative pins.
- Paper or Silk Flowers: Create bouquets or scatter individual blooms.
- Paper Shreds or Crinkled Paper: Fill the spaces between the base and the bottom tier for a finished look.
- Curling Ribbon: Adds texture and whimsy, especially when cascaded down the sides.
- Small Baby Items: Pacifiers, small combs, nail clippers, baby spoons, or socks (rolled into rosebuds).
- Bows: Made from coordinating ribbon, strategically placed.
- Floral Picks: Small decorative items on sticks that can be easily inserted.
- Faux Succulents or Greenery: Perfect for a modern or rustic theme.
- Themed Cutouts: Stars, hearts, animals, or even tiny clothes cutouts from cardstock.
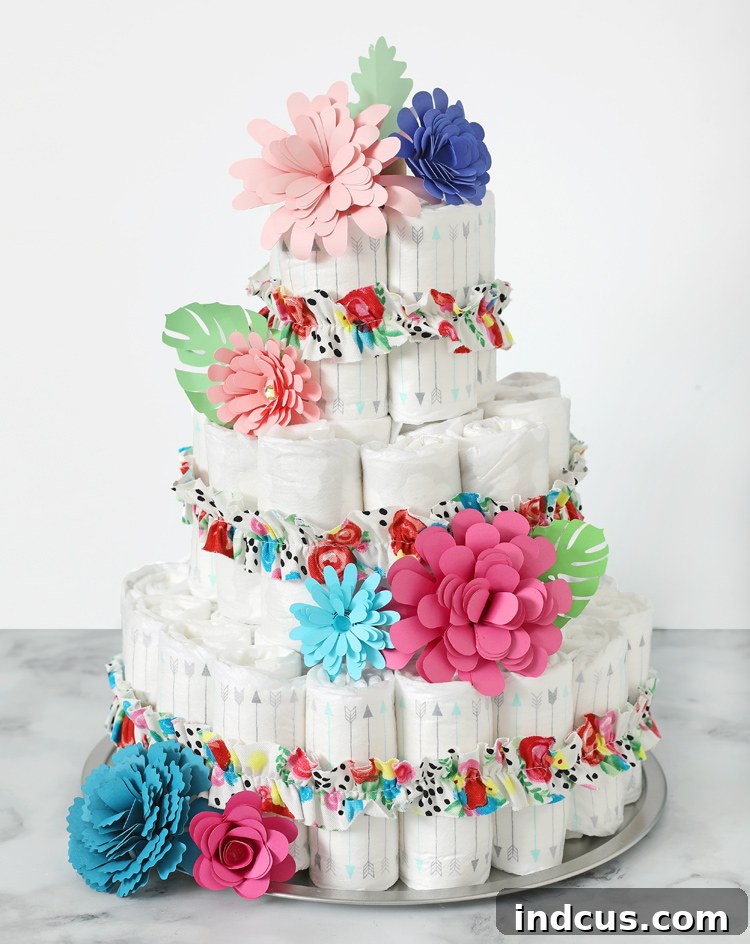
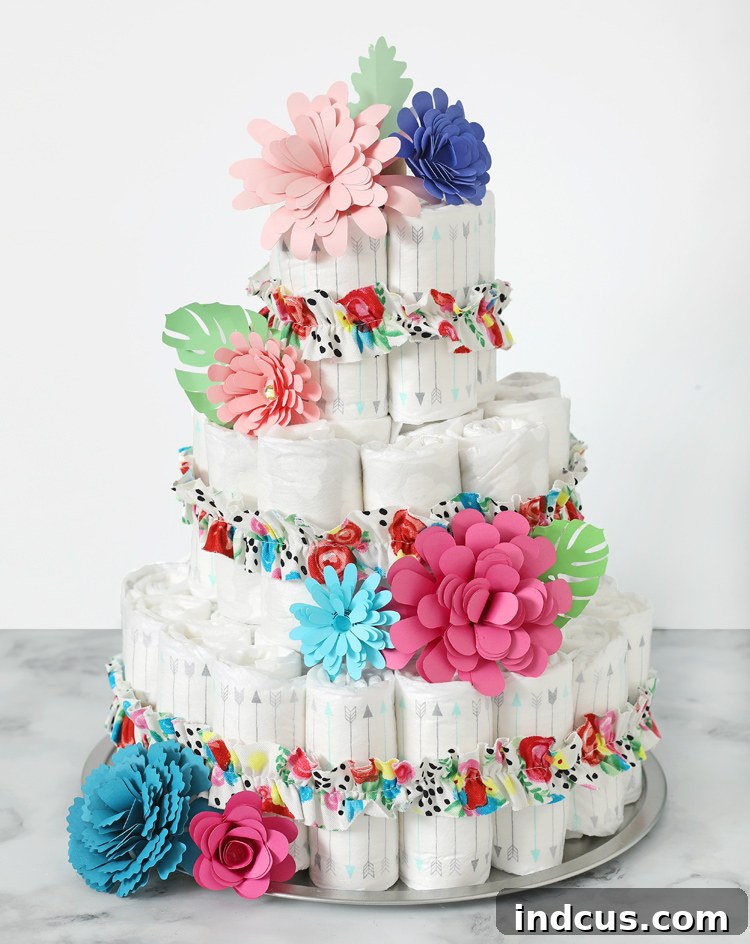
To spark your imagination, here are some fantastic diaper cake decorating ideas for various themes, complete with details on how each cake was adorned:
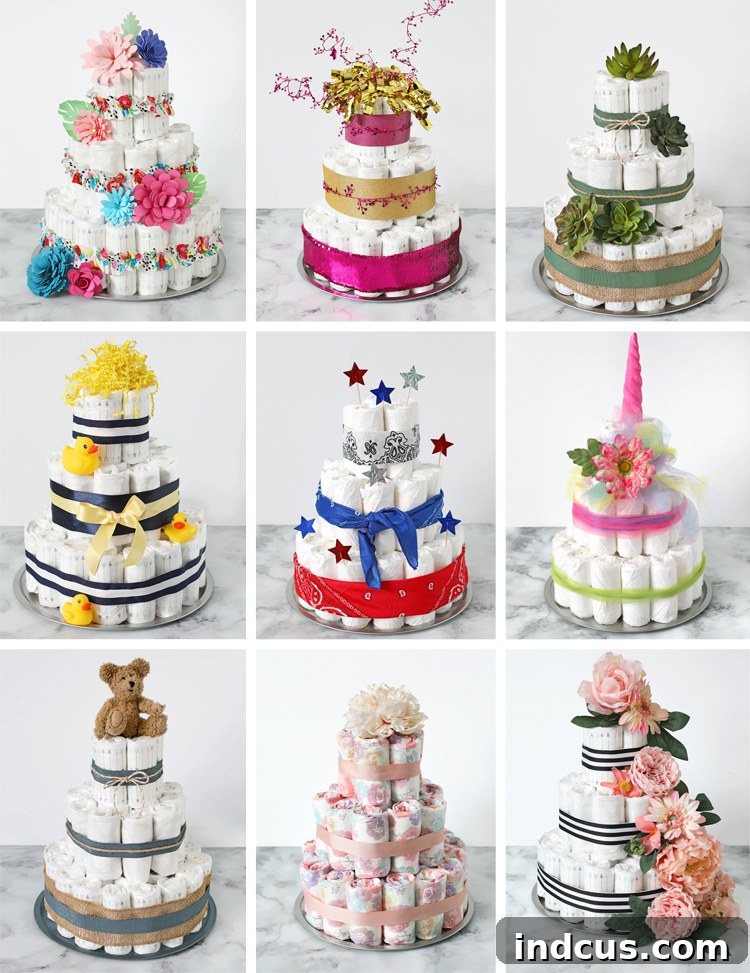
Remember, the beauty of making a diaper cake lies in the opportunity for personalization. Don’t be afraid to experiment with different materials and themes. Have fun with it, and let your creativity shine through to create a truly unique and heartfelt gift!
If you’re seeking more inventive and cherished baby shower gift ideas, be sure to explore this delightful baby shower burp cloth bouquet tutorial or discover my charming DIY Baby Shower Crate Closet for even more inspiration.
Watch Our Diaper Cake Video Tutorial
We sincerely hope this detailed guide has provided you with all the knowledge and confidence needed to create your very own stunning diaper cake. It’s a truly rewarding project that results in a beautiful and incredibly useful gift. Don’t forget to pin the image below to your favorite Pinterest board so you can easily revisit these tips and tricks whenever you’re ready to craft another masterpiece!