
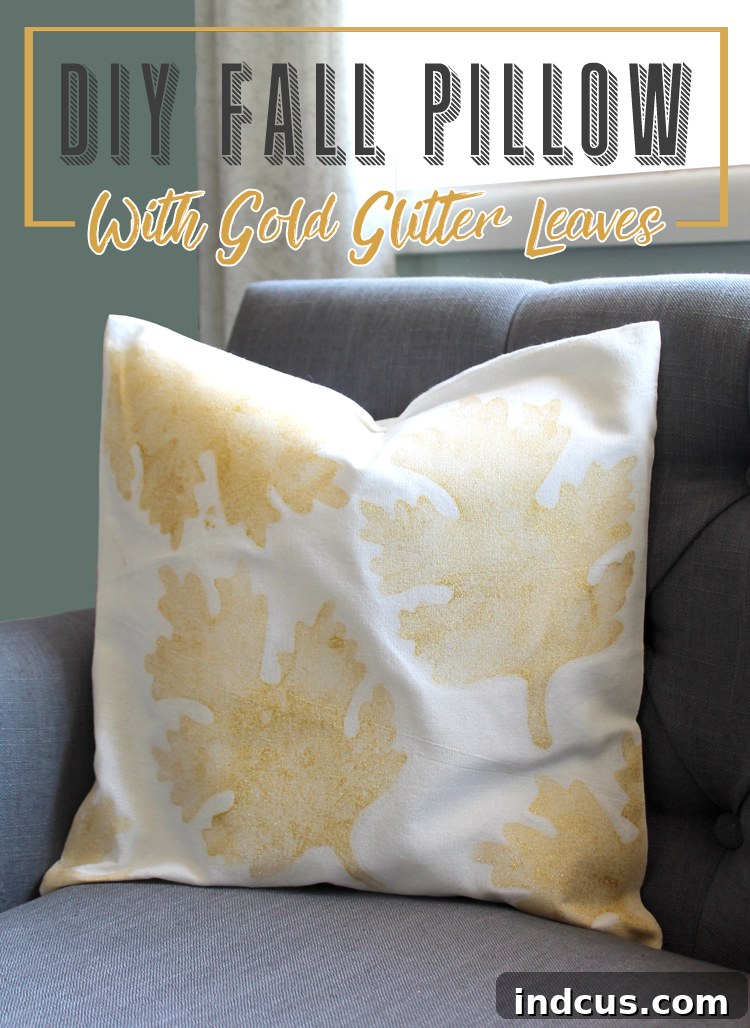
DIY Glittery Fall Leaf Pillow: Add Sparkle to Your Autumn Decor
As the crisp air of autumn settles in and leaves begin their vibrant transformation, there’s no better time to infuse your home with the cozy, festive spirit of Fall. And what better way to do so than with a stunning DIY project that’s both simple and incredibly rewarding? Forget complex sewing patterns or meticulous brush strokes – this tutorial unveils a brilliant technique to create a beautiful Fall-themed pillow adorned with shimmering, watercolor-effect leaves. It’s an effortless craft that promises to elevate your seasonal decor, requiring no advanced skills, just a creative spark and a few essential supplies.
Imagine golden, glittery leaves that seem to dance on your pillow, catching the light with every subtle shift. This project achieves a sophisticated “watercolor” appearance, making each leaf look uniquely painted and naturally iridescent. While photos can capture a glimpse of their charm, these leaves truly come alive in person, sparkling with a delicate glitter that adds a touch of magic to your living space. They are not just pretty; they’re incredibly fun to make, transforming an ordinary pillow into a focal point of your autumn aesthetics. Perfect for sprucing up your sofa, armchair, or even a cozy reading nook, this DIY Fall pillow project is a must-try for anyone looking to add a personalized touch to their seasonal home decor.
Why Choose DIY for Your Fall Decor?
Embracing do-it-yourself projects for seasonal decoration offers a plethora of benefits beyond just saving money. It allows for unparalleled personalization, ensuring your decor perfectly matches your unique style and existing home aesthetic. When you craft a piece like this glitter leaf pillow, you’re not just adding an item to your home; you’re infusing it with your creativity and a story. There’s immense satisfaction in looking at a beautiful piece and knowing you made it with your own hands. Moreover, DIY projects like this one provide a wonderful opportunity to unwind, engage in a creative outlet, and even bond with family or friends by making it a shared activity. This project, in particular, stands out for its simplicity, making it accessible even for crafting novices, yet yielding professional-looking results that will impress guests and bring a warm, inviting atmosphere to your Fall home.
Gather Your Crafting Essentials: Supplies Needed
Before diving into the creative process, gathering all your materials ensures a smooth and enjoyable crafting experience. This project uses specific tools and products to achieve that unique watercolor and glitter effect, making your Fall pillow truly stand out. While we provide affiliate links to help you easily find these items, feel free to explore similar products from your favorite craft stores. The key is to select quality materials that will withstand daily use and maintain their sparkle through the season.
Supplies Needed (affiliate links)
- 16×16 Natural Pillow Cover (with zippered closure): A pre-made pillow cover saves you the hassle of sewing and provides a clean canvas. A zippered closure is ideal for easy insertion and removal of the pillow form. Natural fabrics like cotton or linen work best for paint absorption.
- Tumble Dye Glitter Fabric Spray Paint: This is the star of the show! The spray application helps achieve the watercolor effect, and the glitter adds that essential sparkle. Choose a metallic gold or bronze for a true autumnal glow.
- Cricut Stencil Material: Specifically designed for clean cuts and easy adhesion, this material is perfect for creating intricate leaf designs. Its reusability also makes it cost-effective for multiple projects.
- Electronic Cutting Machine (e.g., Cricut, Silhouette): Essential for precision cutting of your stencil design. These machines open up a world of possibilities for intricate crafting.
- Wax Paper or Tin Foil: Crucial for protecting the back of your pillow cover from paint bleed-through.
- Iron: To heat set the fabric paint, ensuring its durability and washability.
- Clean Piece of Paper (e.g., parchment paper, scrap paper): To act as a barrier between the iron and your painted design during heat setting.
- Pillow Form (16×16 inches): To fill your decorated pillow cover and give it its plump, inviting shape.
- Optional: Lint Roller: To prepare your fabric for paint application, ensuring a smooth, clean surface.
- Optional: Craft Knife or Weeding Tool: For removing small pieces from your stencil if needed.
Step-by-Step Guide: Crafting Your Glittery Fall Pillow
Now that you have all your supplies ready, let’s embark on the fun part: bringing your vision to life! This project is designed to be straightforward, allowing even beginners to achieve stunning results. Follow these detailed steps carefully for the best outcome.
Step 1: Design and Cut Your Leaf Stencil
The foundation of your dazzling pillow is a perfectly cut stencil. An electronic cutting machine makes this step a breeze, offering precision and the ability to choose from countless designs.
Step 2: Prepare Your Pillow Cover and Apply the Stencil
Proper preparation is key to preventing paint bleed and ensuring your design looks crisp and professional.
Step 3: Protect Your Fabric from Bleed-Through
This simple yet crucial step ensures your design remains confined to one side of the pillow.
Step 4: Spray Your Glittery Design
Now for the fun part – adding color and sparkle! The spray paint technique helps achieve the watercolor effect.
Step 5: Address Paint Pooling
Sometimes, spray paint can pool on the stencil material, especially with glitter paints. Here’s how to manage it.
Step 6: Repeat the Pattern Across Your Pillow
Once you’ve sprayed one leaf, you’ll repeat the process to create a full, beautiful pattern.
Step 7: Heat Set the Fabric Paint
Heat setting is essential to make your painted design permanent, durable, and washable.
Step 8: Final Assembly and Styling
The moment of truth! Your beautiful new Fall pillow is almost ready for display.
Tips for Success and Customization
To ensure your DIY Fall pillow project is a smashing success, and to inspire further creativity, consider these additional tips:
- Practice First: If you’re new to fabric spray paint, consider doing a small test spray on a scrap piece of similar fabric to get a feel for the spray pattern and intensity.
- Ventilation is Key: Always work in a well-ventilated area when using spray paints to avoid inhaling fumes.
- Layering Colors: For a truly unique watercolor effect, try using two complementary shades of Tumble Dye glitter paint. Spray one color lightly, then overlap with another for depth and dimension.
- Vary Leaf Sizes and Orientation: To achieve a more natural and dynamic look, use stencils of different leaf sizes and rotate them as you apply them to the pillow.
- Beyond Leaves: While leaves are perfect for Fall, this technique can be adapted for any season! Think snowflakes for winter, flowers for spring, or geometric patterns for a modern twist.
- Gift Idea: A handmade glitter leaf pillow makes a thoughtful and personal gift for housewarmings, birthdays, or as a special token for a loved one who adores Fall.
- Care Instructions: To maintain the beauty of your pillow, spot clean as needed or hand wash gently in cold water with mild detergent. Air dry flat. Avoid harsh scrubbing or machine washing to preserve the glitter and paint.
Embrace the Autumn Glow with Your Handmade Creation
Isn’t that a fun and fulfilling Fall project? With minimal effort and maximum charm, you’ve created a beautiful piece of custom home decor that captures the essence of autumn. This DIY glittery Fall leaf pillow is more than just an accent piece; it’s a testament to your creativity and a warm invitation to embrace the changing seasons. The subtle sparkle and watercolor-inspired design make it a versatile addition that complements various interior styles, from rustic farmhouse to modern chic. So go ahead, let your home shine with a touch of handmade elegance this Fall, and enjoy the satisfaction of crafting something truly unique. Share your creations with us – we’d love to see how you’ve incorporated this shimmering DIY into your seasonal styling!







