
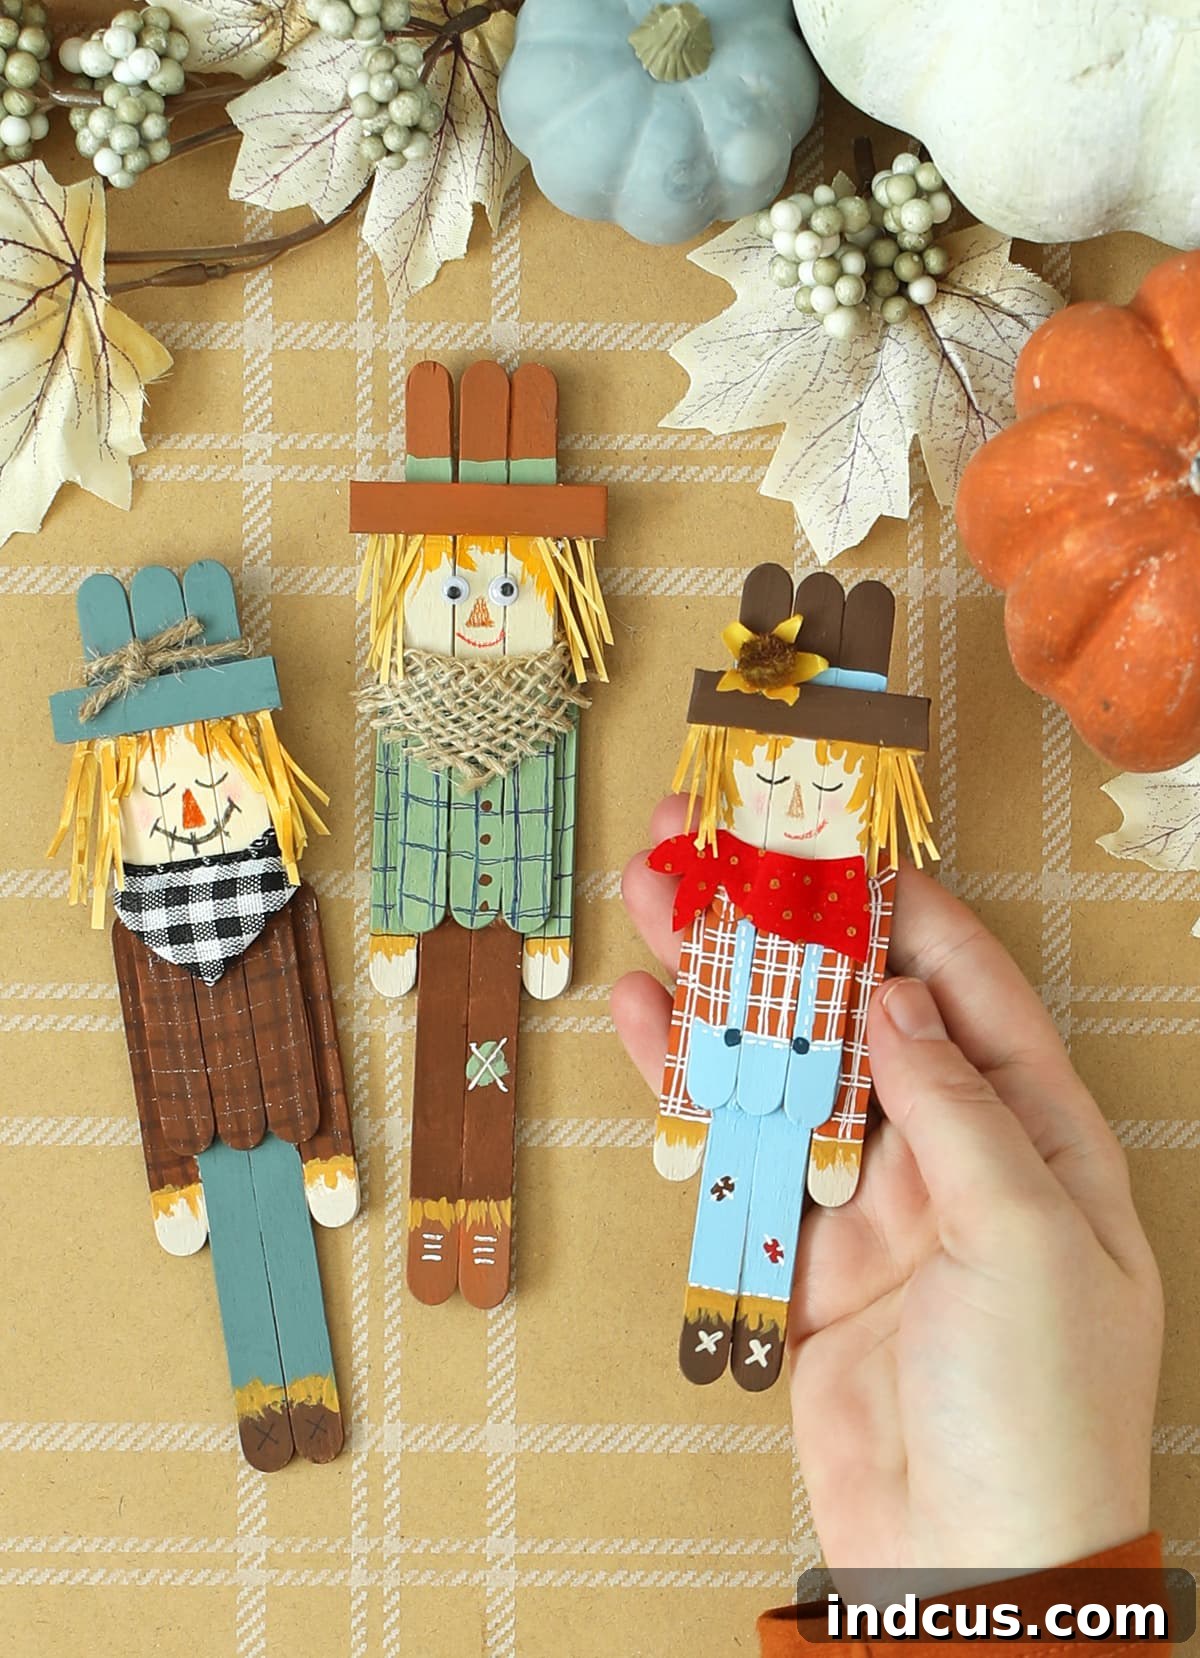
Craft Adorable DIY Popsicle Stick Scarecrows: The Ultimate Autumn Decor & Fun for All Ages
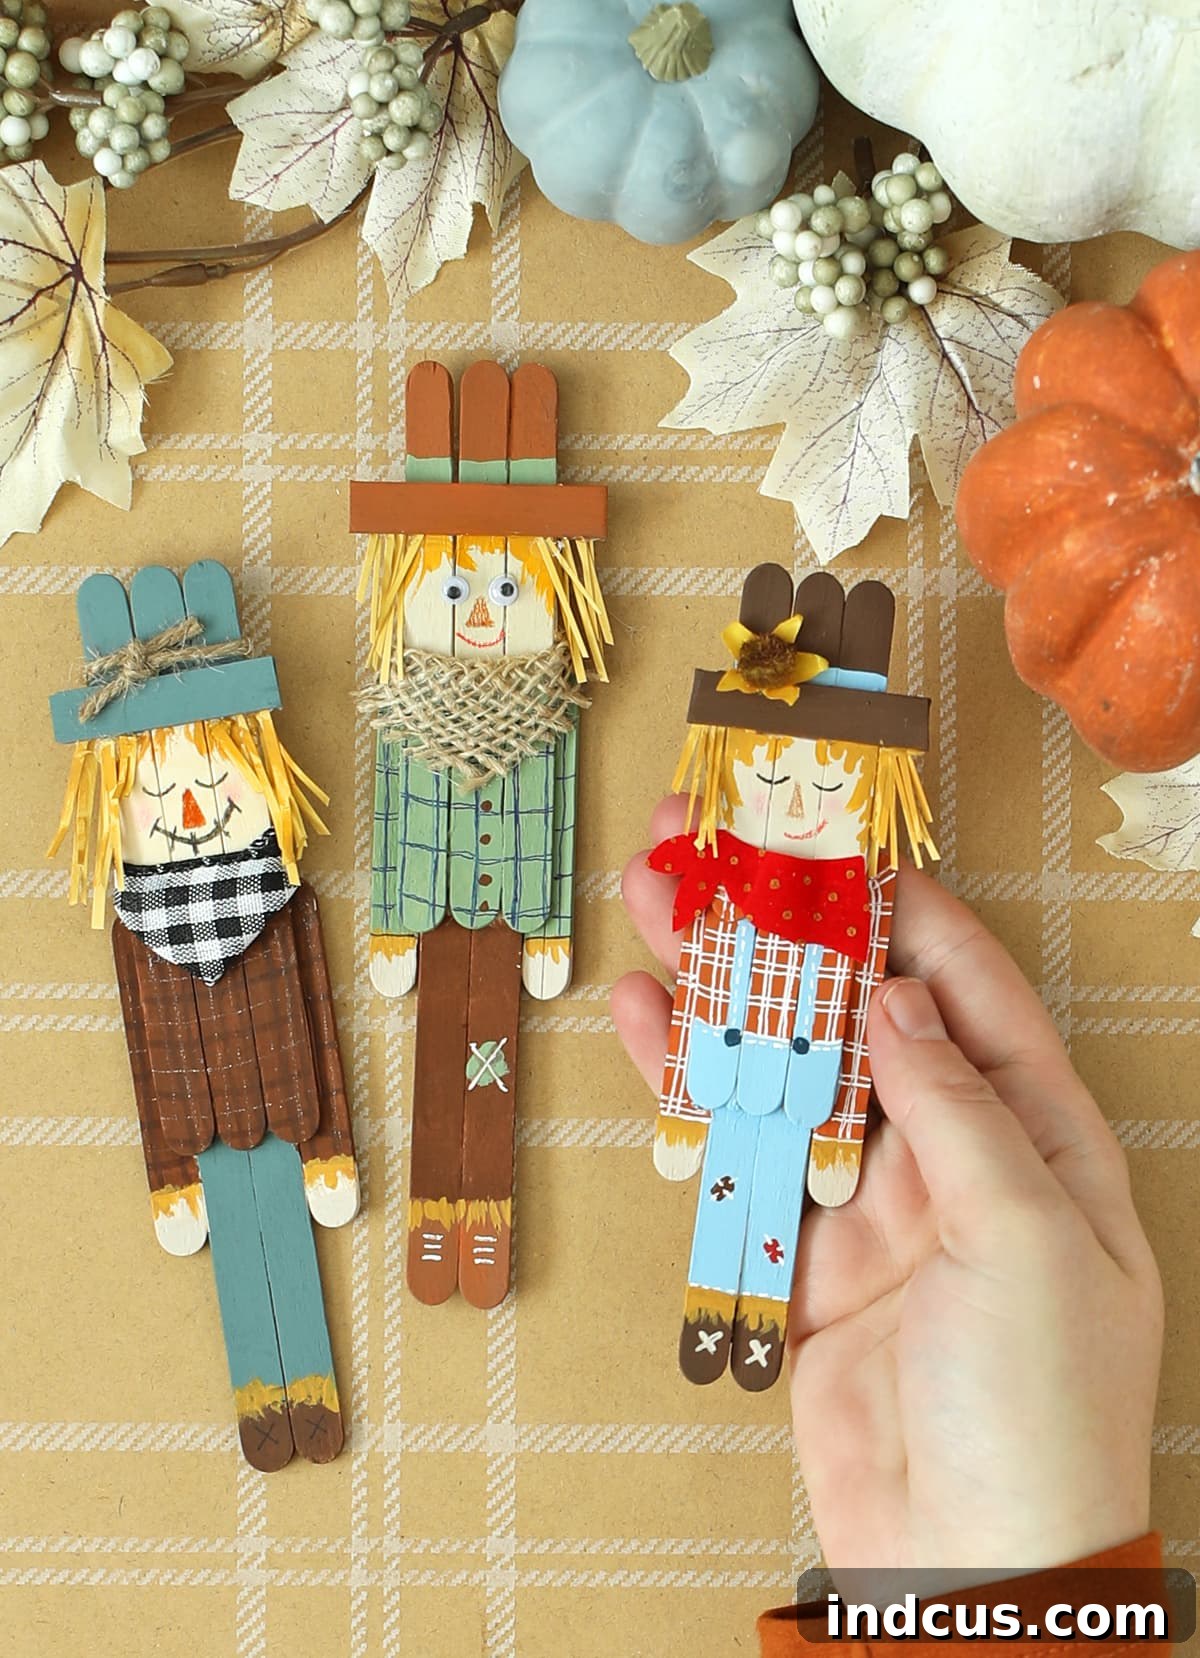
As the leaves begin to turn golden and a crisp coolness fills the air, there’s no better way to embrace the spirit of fall than with a delightful craft project. Today, we’re diving into the wonderful world of DIY autumn decor by showing you how to create the most enchanting popsicle stick scarecrows. This engaging activity is not only incredibly easy but also provides a fantastic opportunity for both kids and adults to express their creativity. Imagine these cute, quirky characters adorning your shelves, mantelpieces, or even turning into unique gifts for friends and family!
Popsicle stick crafts are a timeless favorite, renowned for their simplicity, affordability, and the endless possibilities they offer. Our scarecrow project takes these humble wooden sticks and transforms them into charming figures that perfectly capture the rustic, whimsical essence of the harvest season. Whether you’re looking for a fun weekend activity, a classroom project, or just a relaxing way to unwind, crafting these little scarecrows promises smiles and satisfaction. Let’s gather our materials and embark on this creative journey to bring some handmade charm into your autumn decor!
Essential Materials for Your Popsicle Stick Scarecrow Project
Before we begin crafting our adorable scarecrows, it’s crucial to gather all the necessary supplies. Most of these items are readily available at craft stores, online retailers, or even around your home, making this an accessible project for everyone. Having everything laid out beforehand ensures a smooth and enjoyable crafting experience.
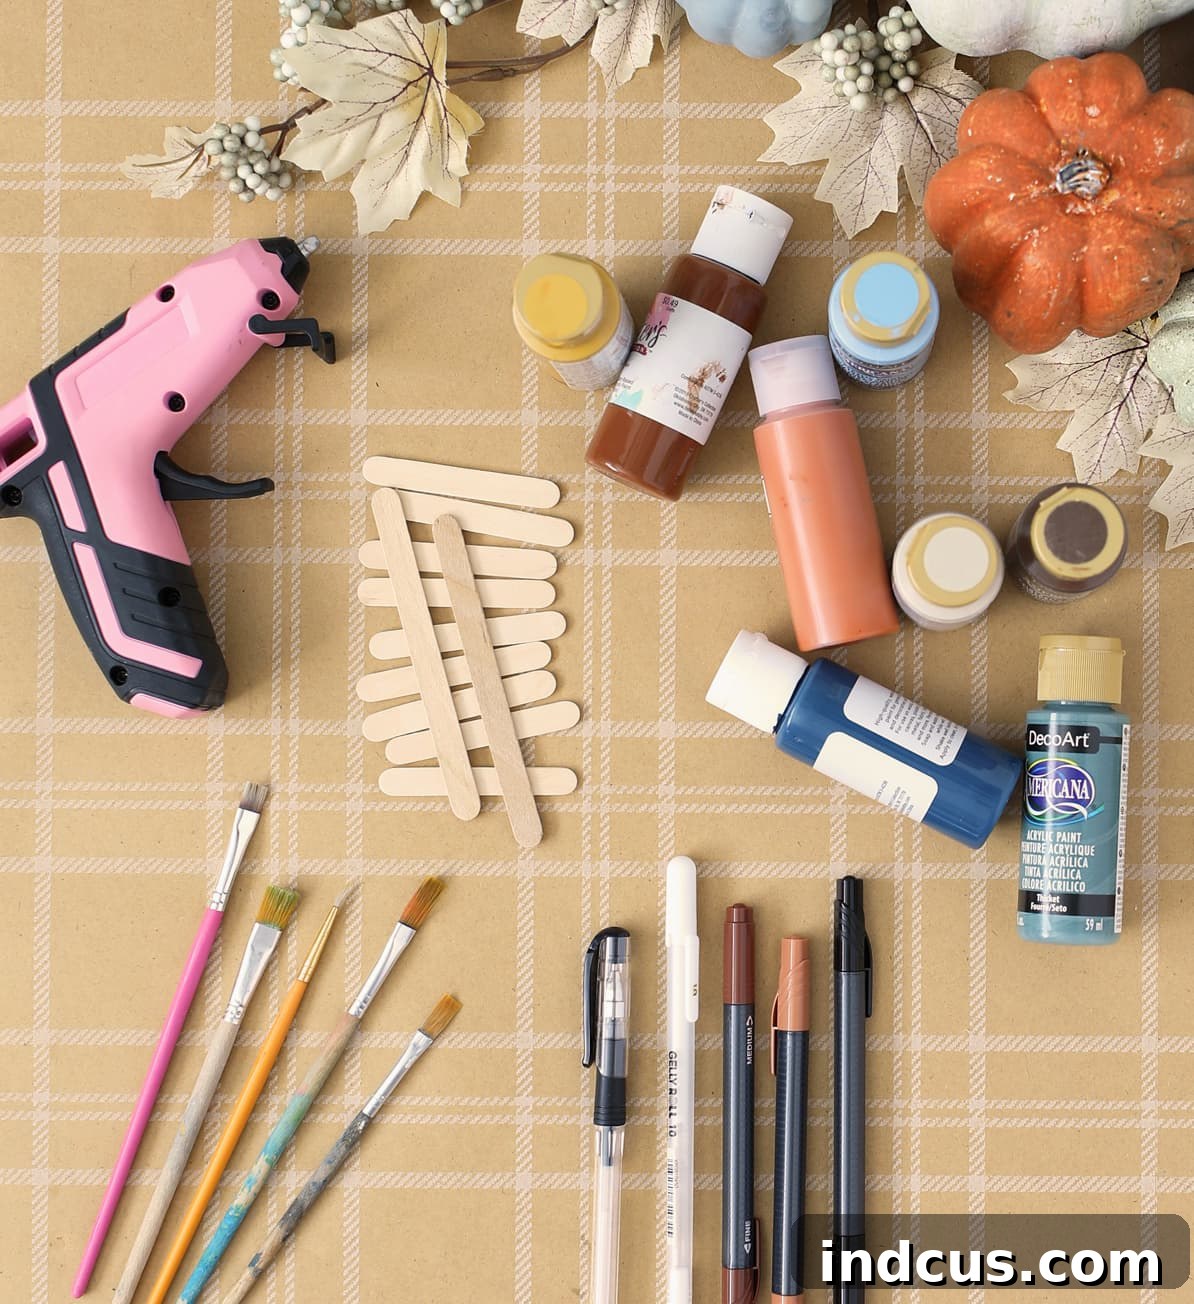
What You’ll Need:
- Small Craft Sticks (2.5 inches): These shorter sticks are perfect for creating the intricate details of the scarecrow’s body, hat, and arms. Having a good supply on hand is recommended.
- Standard Craft Sticks (4.5 inches): These longer sticks will form the main structure of your scarecrow, providing the necessary height and stability.
- Hot Glue Gun and Glue Sticks: A hot glue gun is ideal for this project due to its quick-drying nature, which allows for fast assembly and secure bonds. Always use with adult supervision, especially when crafting with children.
- Assorted Craft Paints: Choose a variety of autumn-inspired colors such as browns, yellows, oranges, reds, and greens for clothing, hats, and other details. Acrylic craft paints work wonderfully on wood.
- Small Paint Brushes: A selection of brush sizes, including fine-tipped brushes, will be essential for painting both larger areas and intricate details on your scarecrows.
- Paint Pens or Gel Pens: These pens are invaluable for adding precise details like facial features, stitching, plaid patterns, and other fine lines that bring your scarecrows to life.
- Assorted Embellishments: Get creative with decorative elements! Think ribbons, twine, miniature artificial flowers, small fabric scraps (like burlap or plaid), colorful paper, buttons, tiny bells, or even natural elements like small twigs or dried grass for hair.
- Tiny Googly Eyes (optional): For an extra touch of whimsical charm and personality, googly eyes can make your scarecrows even cuter and more expressive.
Pro Tip: Before you start, lay out all your materials. This ensures you have everything at hand and can easily choose colors and embellishments as you go, fostering a more fluid creative process.
Step-by-Step Instructions: Crafting Your Wooden Scarecrows
Now that we have all our materials ready, let’s dive into the fun part: assembling and decorating your popsicle stick scarecrows. Follow these detailed steps to construct your charming autumn figures. Remember, there’s no right or wrong way to be creative, so feel free to personalize each step!
Step 1: Constructing the Scarecrow’s Frame
The foundation of your scarecrow is built by carefully arranging and gluing the craft sticks. Precision here helps create a stable and visually appealing base for your artistic additions. Use your hot glue gun with care, applying a small bead of glue for each joint to ensure a strong hold without excess.
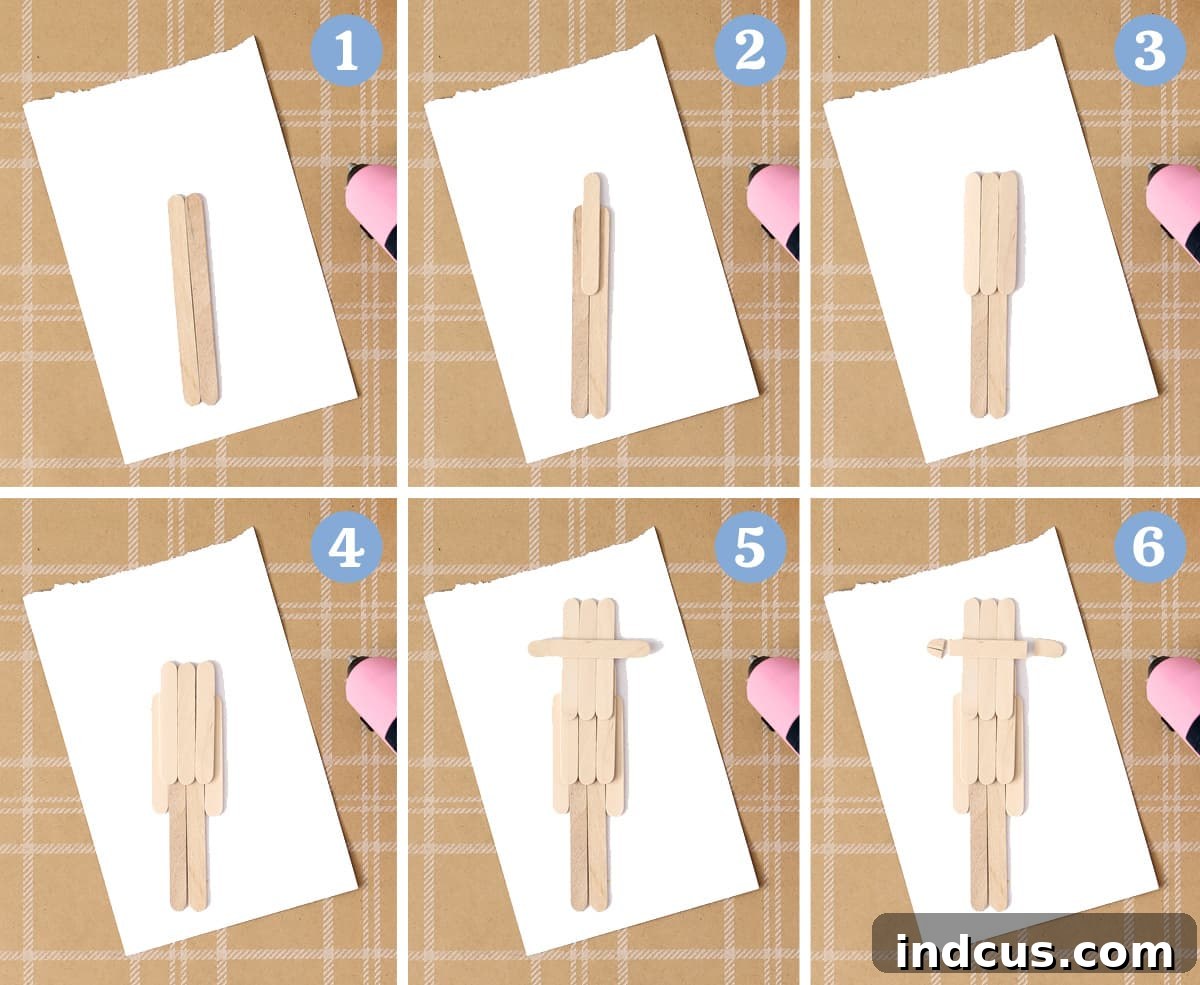
- Main Body: Begin by placing two standard-sized popsicle sticks side-by-side on a flat, protected surface. These will form the main torso and legs of your scarecrow.
- Torso Support: Take one small craft stick and glue it horizontally across the center of the two long sticks. This central stick provides stability and connects the two main body pieces.
- Upper Body & Hat Base: Add two more small sticks, positioning one on either side of the center small stick, creating a wider upper body section. Ensure these are securely glued to the two main vertical sticks.
- Arms: Next, take two small sticks and glue them horizontally, one on either side of the two long sticks, positioned below the upper body section. These will serve as your scarecrow’s arms. You can angle them slightly if you wish to give your scarecrow a more dynamic pose.
- Hat Structure: For the hat, add three more small sticks vertically to the very top area, above the upper body section. These sticks will form the crown of the hat.
- Hat Brim: Finally, glue one small stick horizontally across the bottom of these three vertical hat sticks. This will be the brim of the hat. For a more classic scarecrow hat shape, carefully cut off the curved sides of this horizontal hat brim using sharp scissors. This step adds a refined touch to the hat’s silhouette.
Safety Note: When working with a hot glue gun, always exercise caution. Keep fingers clear of the nozzle and hot glue, and work on a heat-resistant surface. Adult supervision is highly recommended for children.
Step 2: Bringing Your Scarecrow to Life with Paint
Once your scarecrow frame is assembled and the glue has fully dried, it’s time to add a splash of color! Painting is where your scarecrow truly starts to develop its unique character. Think about classic scarecrow attire – patched clothing, straw accents, and a weathered look.
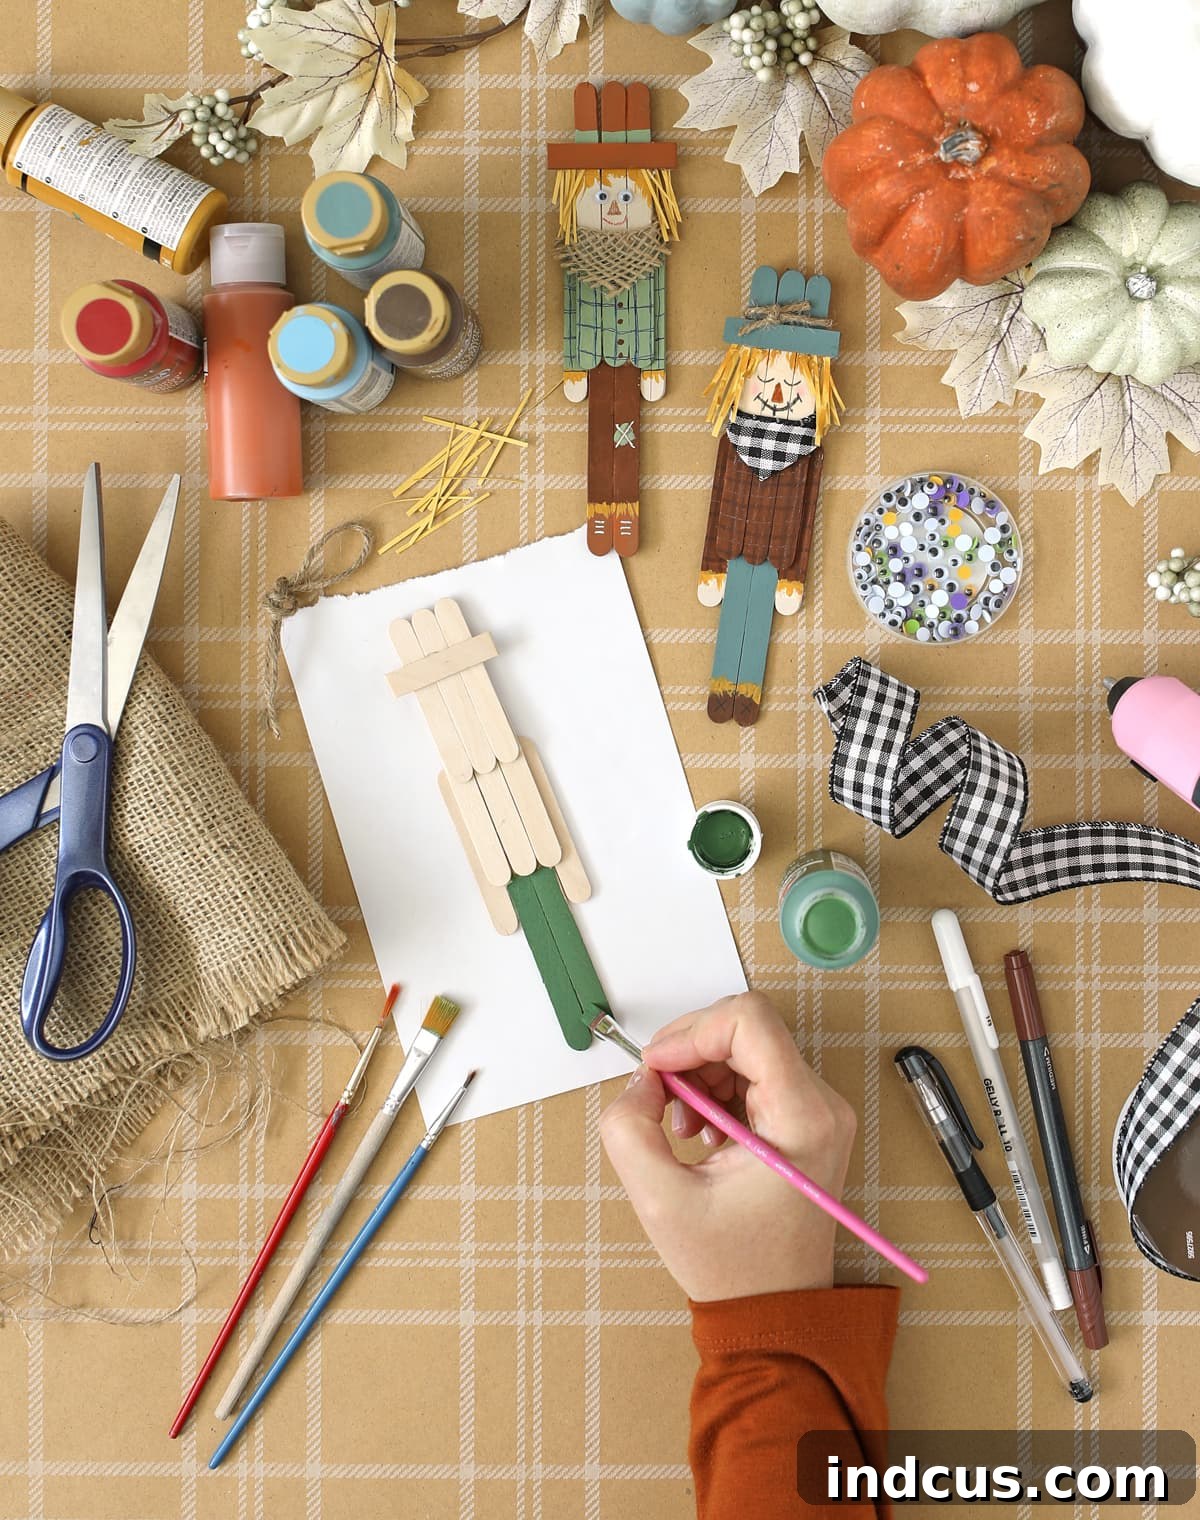
I find it most effective to work in layers, allowing each section to dry before moving on to the next. This prevents colors from bleeding and allows for crisp, clean lines. Begin by painting the larger areas: choose a color for the pants (e.g., blue, brown, or green) and another for the hat (often a darker brown or black). Once these base layers are dry, move on to the shirt or jacket area. After these main clothing sections have dried completely, you can then go in with smaller brushes to add the finer painted details. This includes painting wisps of straw sticking out from the sleeves and neck, creating the hat band, coloring shoes or boots at the bottom of the legs, and painting hair peeking out from under the hat.
Experiment with different color combinations and textures. You can even dab a bit of lighter paint to create a “worn” or “patched” effect on the clothing. Remember to clean your brushes thoroughly between colors.
Step 3: Adding Personality and Fine Details with Pens
This is where your scarecrow’s individual personality truly shines! Paint pens or gel pens are fantastic tools for adding intricate details that are difficult to achieve with a brush, especially on a small scale.
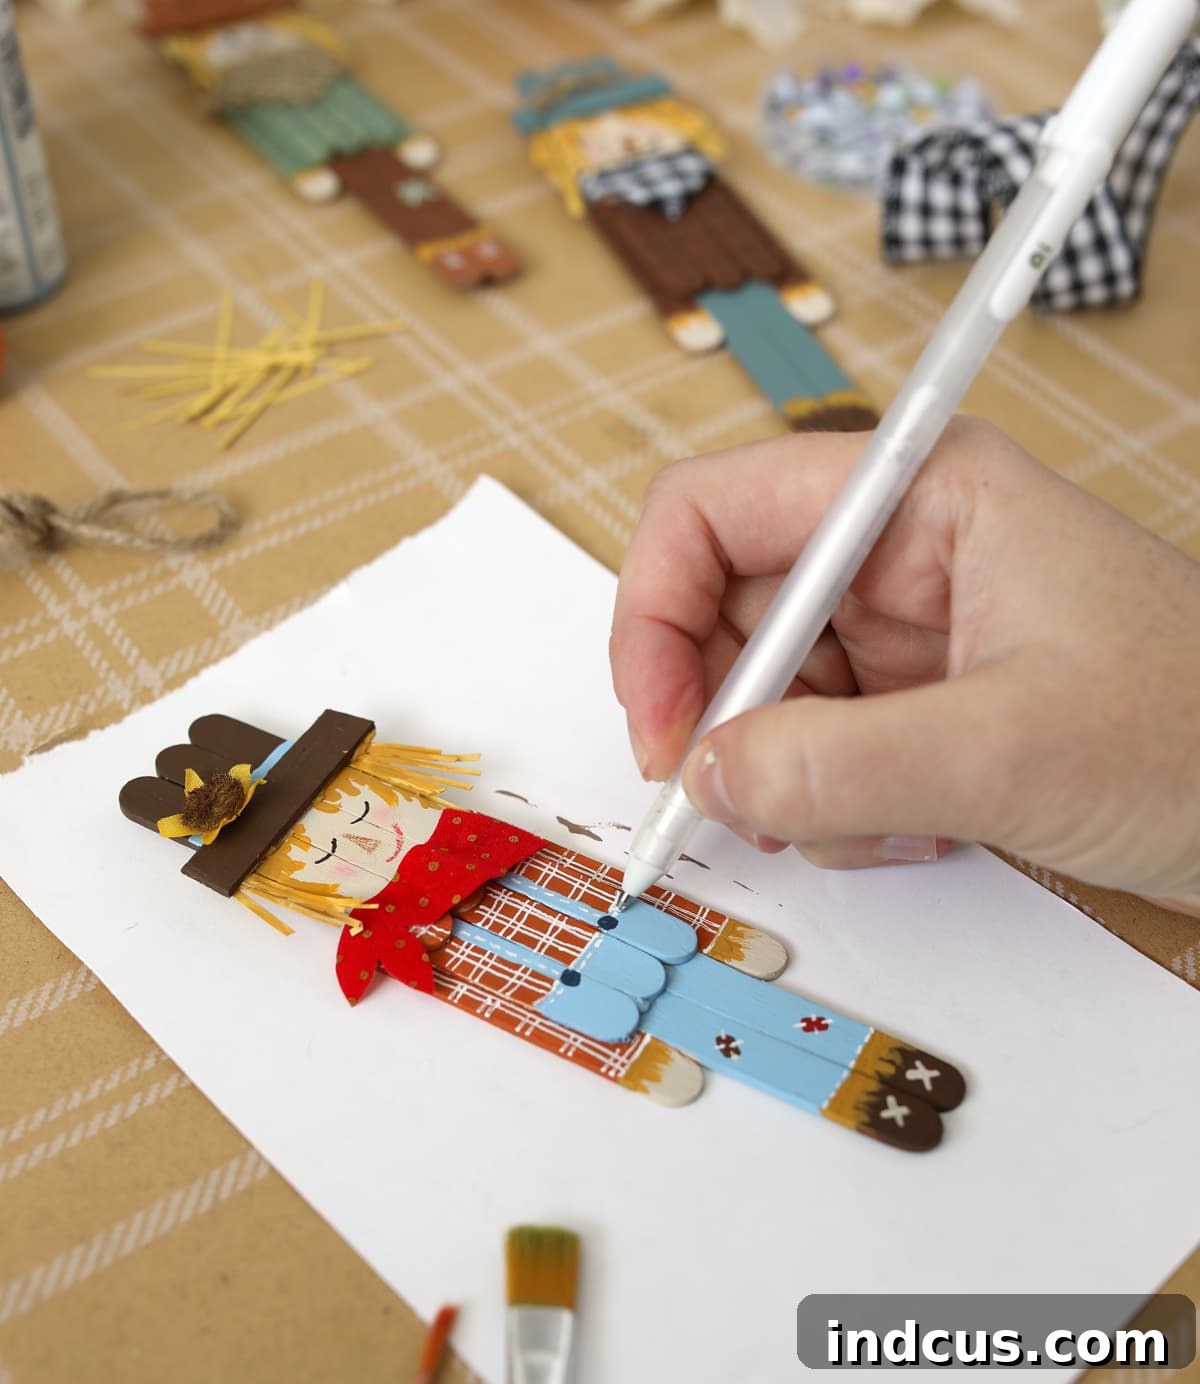
With a fine-tipped paint pen, you can effortlessly draw charming plaid stripes on a shirt, create delicate stitching along the edges of clothing, outline knee patches on the pants, and even draw shoelaces. The most exciting part is drawing the face! Give your scarecrow a friendly smile, rosy cheeks, or a surprised expression. If you prefer, tiny googly eyes can also be a delightful addition, adding an instant dose of cuteness and character. I often create a mix, some with painted eyes and others with googly eyes, to demonstrate the variety of looks you can achieve.
Consider adding subtle details like buttons (drawn with a pen or small actual buttons), belt buckles, or even small floral patterns to their clothing. These tiny touches make a big difference in creating a polished and personalized scarecrow.
Step 4: Accessorizing Your Scarecrow for Extra Charm
The final step in bringing your scarecrows to life is adding accessories and embellishments. These elements provide texture, depth, and that extra touch of personality that makes each scarecrow unique and captivating.
For hair, I often cut tiny strips of golden yellow cardstock, construction paper, or even felt and glue them to the backside of the hat, letting them peek out around the face. You could also use real straw, raffia, or yellow yarn for a more authentic, rustic look. Secure these hair pieces firmly with a dab of hot glue.
To really make your scarecrows pop, consider adding small fabric bandanas or scarves tied around their “necks.” A tiny piece of plaid fabric or burlap works wonderfully for this. These bandanas not only add a lovely splash of color and texture but also help balance the proportion of the scarecrow’s face, making them look more complete. I highly recommend including this accessory for a truly finished look.
Beyond the bandana, the possibilities for embellishment are endless! Tie a small piece of twine around an arm or leg, glue on a miniature artificial sunflower or other autumn-themed flower, attach tiny buttons, or add small patches of contrasting fabric. You could even give your scarecrow a tiny stick broom or a mini pumpkin to hold. The goal here is to infuse each scarecrow with its own distinct charm and story. Have fun exploring different combinations and materials to create a truly one-of-a-kind autumn masterpiece!
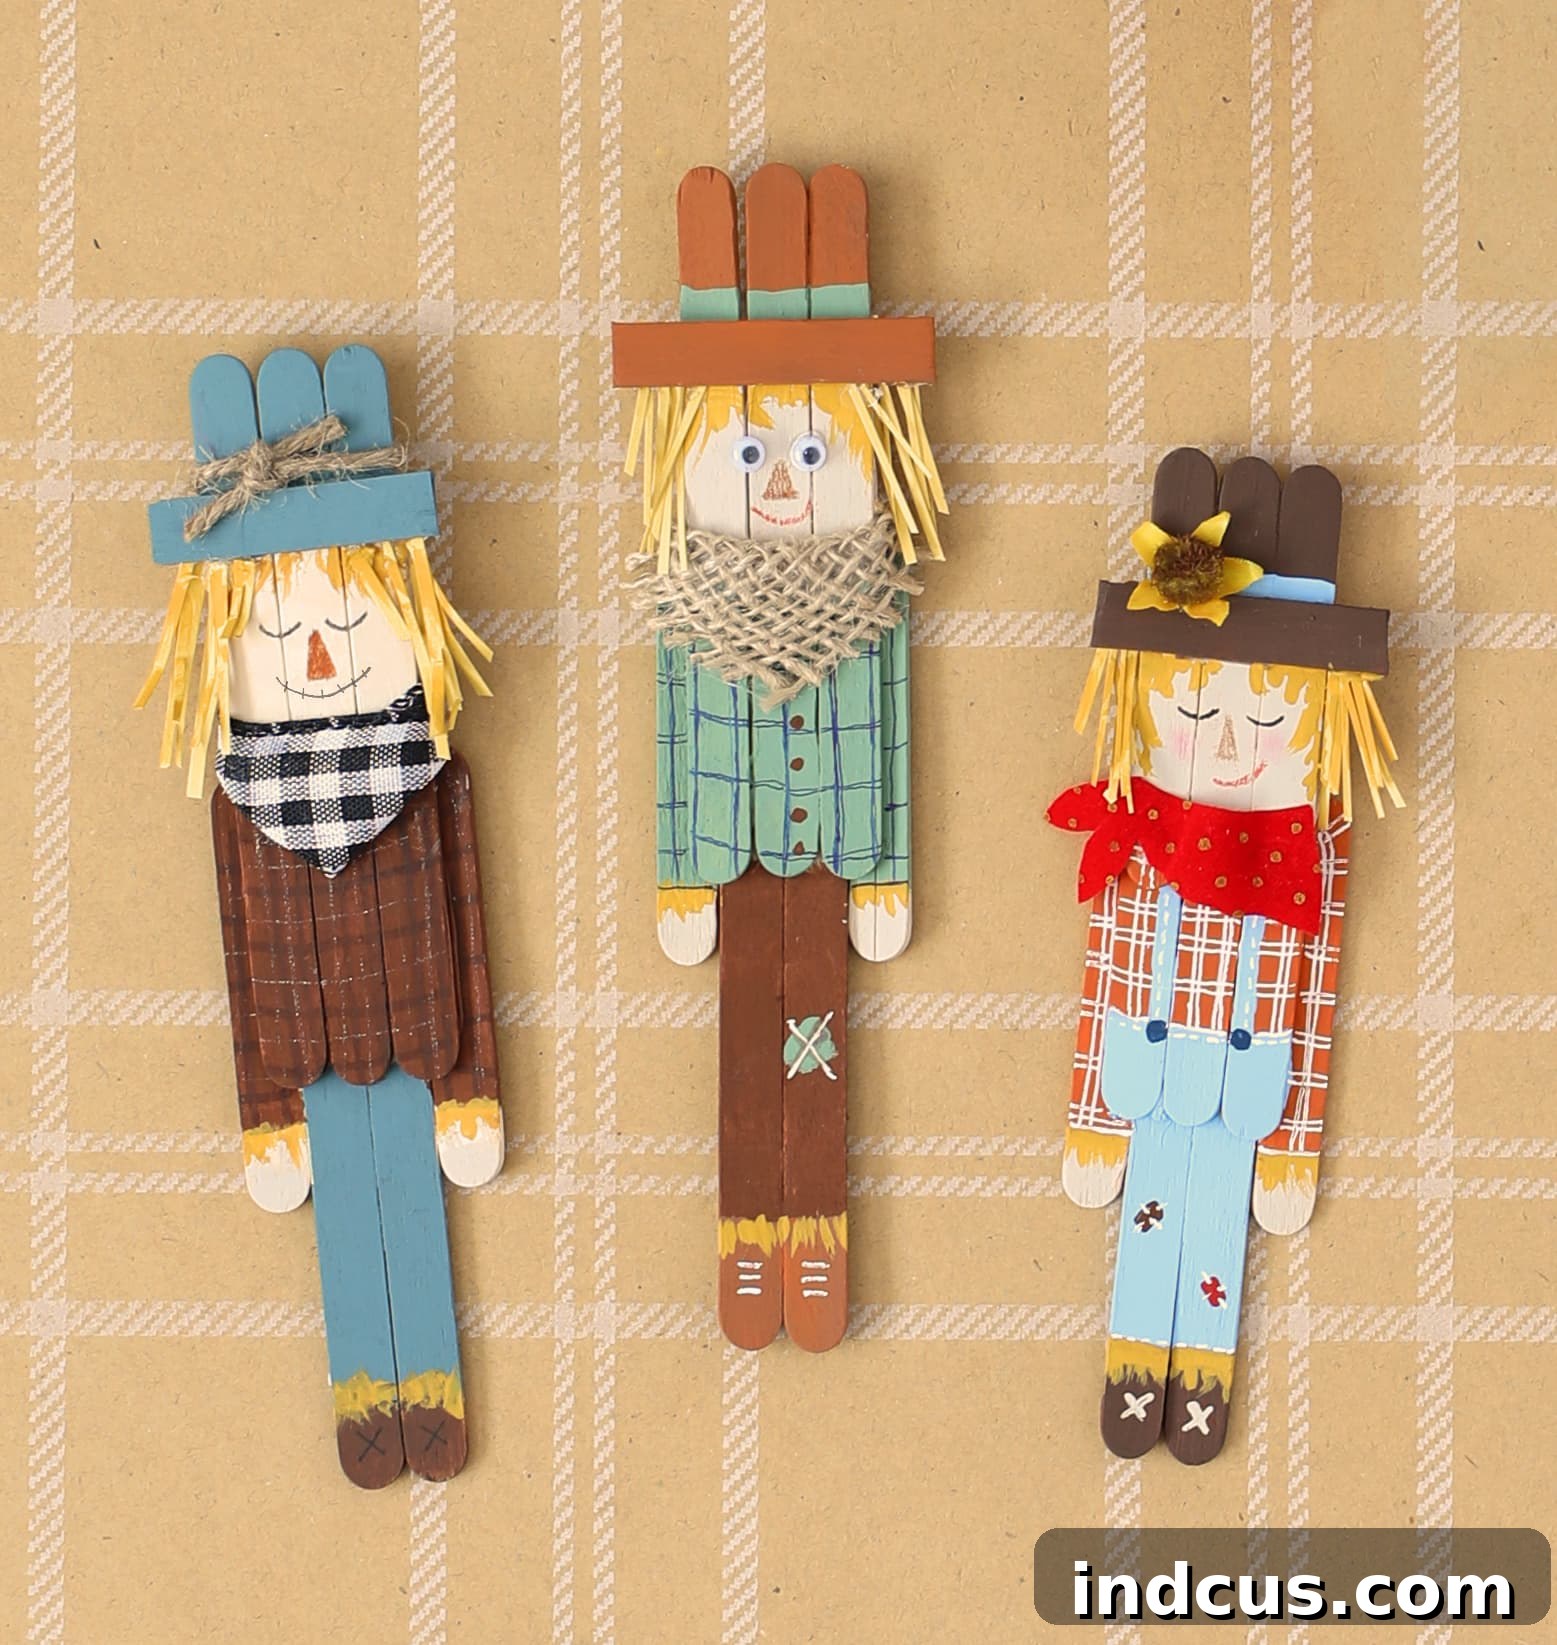
Aren’t they absolutely charming? I truly adore how each scarecrow develops its own distinct personality through the choice of colors, facial expressions, and tiny accessories. It’s incredibly rewarding to dream up little details and watch each scarecrow transform into a unique character. This is such a delightful and engaging fall craft, perfect for sparking creativity and adding a handmade touch to your seasonal decorations. I sincerely hope you’ll give this project a try and discover the joy of crafting your very own adorable popsicle stick scarecrows!
Popsicle Stick Scarecrows Video Tutorial
For those who prefer a visual guide, here’s a helpful video tutorial that walks you through each step of creating these charming popsicle stick scarecrows. Watch the process unfold and pick up additional tips and tricks to make your crafting experience even smoother.
If you’ve enjoyed crafting these scarecrows, you’ll be thrilled to know that craft sticks are incredibly versatile for creating a variety of characters for different seasons and holidays. I’ve had so much fun making various popsicle stick figures in the past, and if you liked this project, you might also want to explore these other creative ideas:
- Charming Popsicle Stick Nutcrackers – Perfect for holiday decorations!
- Whimsical Popsicle Stick Leprechauns – A festive craft for St. Patrick’s Day.
- Patriotic Popsicle Stick Uncle Sams – Ideal for Fourth of July celebrations.
Each of these crafts offers a unique opportunity to get creative with simple materials. Happy crafting, and enjoy adding a handmade touch to every season!







