
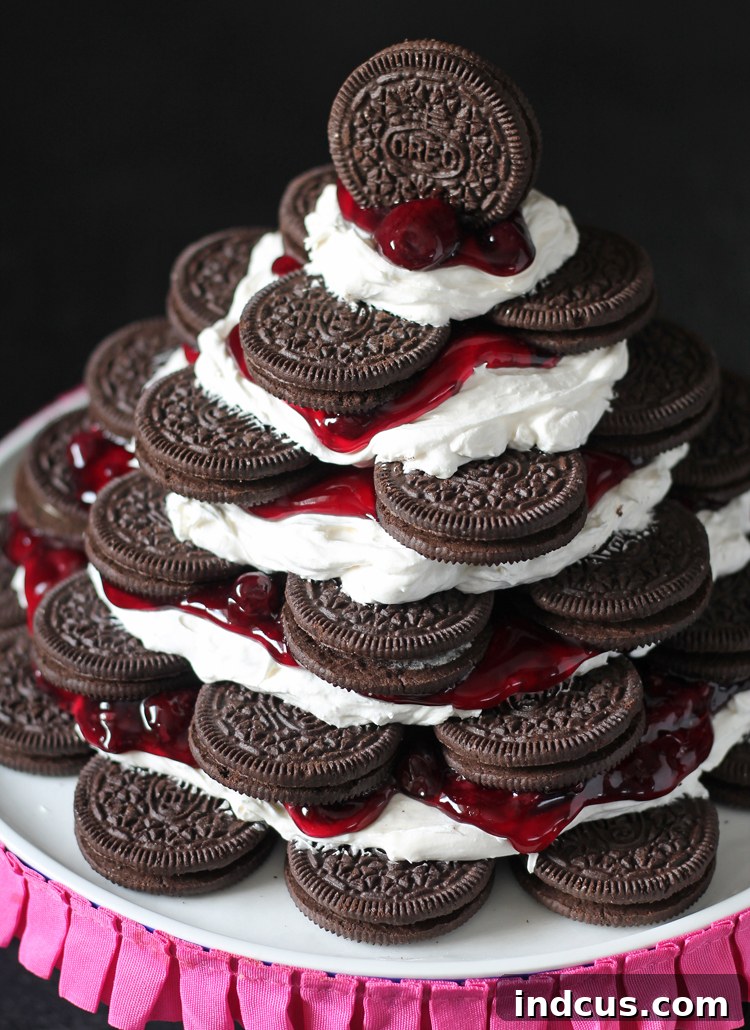
The Ultimate No-Bake Oreo Cheesecake Tower: Easy, Impressive, & Delicious
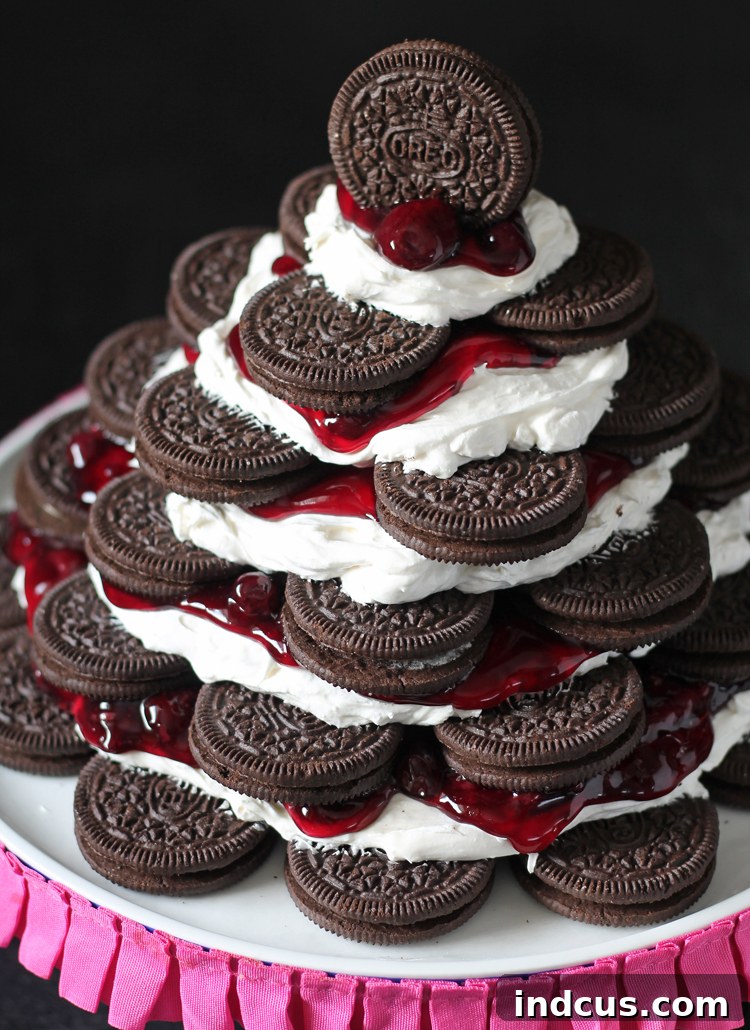
Are you searching for a dessert that not only tastes incredible but also creates a memorable visual impact? Look no further! This No-Bake Oreo Cheesecake Tower is an absolute game-changer. It’s a stunning, multi-layered dessert that cleverly forms a dramatic pyramid shape, making it an instant showstopper at any event. Combining the irresistible crunch of Oreo cookies with a light, creamy no-bake cheesecake filling and your favorite fruit flavors, this recipe delivers gourmet results with surprising ease. Get ready to delight your guests and earn major praise with this surprisingly simple, yet incredibly impressive, sweet treat.
This dessert is specifically designed for those who appreciate magnificent presentation without the fuss of traditional baking. Each bite offers a harmonious blend of textures and tastes: the familiar, rich cocoa notes of Oreo cookies provide a delightful foundation, perfectly complementing the smooth, airy cheesecake cream. The burst of tangy fruit pie filling cuts through the richness, creating a perfectly balanced flavor profile that will have everyone reaching for another slice. It truly is an Oreo lover’s dream dessert, elevated to an artistic level.
Why Choose This No-Bake Oreo Cheesecake Tower?
There are numerous reasons why this particular dessert stands out from the crowd. Firstly, its **no-bake nature** means you can achieve a decadent cheesecake texture without ever turning on your oven. This makes it a perfect choice for hot summer days, busy holidays, or simply when you want to minimize kitchen clean-up. Secondly, the **pyramid stacking** technique is ingeniously simple yet creates an incredibly elegant and unique display, far more exciting than a standard flat cheesecake. It literally builds anticipation! Thirdly, it’s remarkably **versatile**, allowing you to adapt the flavors to suit any palate or seasonal theme. Finally, and most importantly, it’s **insanely delicious**. The combination of classic flavors in a fresh, innovative presentation makes this a dessert that disappears quickly.
Customize Your Flavors: Endless Possibilities
One of the most enjoyable aspects of crafting this no-bake Oreo cheesecake tower is the freedom to personalize it. While the creamy cheesecake layer and classic Oreo cookies form the delicious core, the choice of fruit filling offers a canvas for your culinary creativity. We’ve had fantastic success with vibrant **mixed berry**, sweet **strawberry**, and tart **cherry** pie fillings, each adding its own unique character to the tower. But don’t hesitate to explore other options! Imagine a luscious peach filling for a summer treat, a zesty lemon for a bright contrast, or even a rich raspberry for a touch of sophistication. You can also experiment with different Oreo flavors – mint, peanut butter, or even Golden Oreos could offer exciting variations. This adaptability ensures your Oreo cheesecake tower is always a fresh and exciting experience.
Get Ready for the Super Simple Recipe!
Prepare to be amazed at how effortlessly you can create this show-stopping dessert. The instructions are straightforward, focusing on easy layering and minimal preparation. This section will guide you through gathering your ingredients and executing each step flawlessly, ensuring your No-Bake Oreo Cheesecake Tower is a resounding success.
Essential Ingredients for Your Tower:
- **2 packages (approx. 28 oz total) Oreo cookies:** These will form the crucial structural layers and provide that iconic chocolatey crunch.
- **8 oz. cream cheese, softened:** Room temperature cream cheese is vital for a smooth, lump-free cheesecake filling.
- **1/3 cup granulated sugar:** To sweeten our creamy cheesecake layer to perfection.
- **2 teaspoons pure vanilla extract:** Enhances the overall flavor profile of the cheesecake filling.
- **1 (8 oz.) container Cool Whip, thawed:** This provides the light, airy texture to our no-bake cheesecake. You can substitute with homemade whipped cream if preferred.
- **1 can (approx. 21 oz) mixed berry pie filling:** Or choose your favorite! Cherry, strawberry, blueberry, or peach all work wonderfully. Fresh berries can also be used for a lighter, more natural option.
Tools You’ll Need:
- Electric hand mixer or stand mixer with paddle attachment
- Large mixing bowl
- Serving platter or cake stand (a springform pan can also be used for initial shaping)
- Rubber spatula or offset knife for spreading
- Measuring cups and spoons
Step-by-Step Guide to Building Your Oreo Pyramid
-
Prepare the Velvety Cheesecake Filling:
In a spacious mixing bowl, use your electric hand mixer to beat the **softened cream cheese** until it’s wonderfully smooth and airy. It’s absolutely essential that the cream cheese is at room temperature to prevent any lumps. Next, incorporate the granulated sugar and vanilla extract, beating the mixture until it’s perfectly smooth and all ingredients are thoroughly combined. Finally, with a rubber spatula, gently fold in the thawed Cool Whip. Use broad, gentle strokes to maintain its light, fluffy texture; avoid overmixing which can deflate it.
-
Establish Your Oreo Foundation:
On your chosen cake stand or serving platter, carefully arrange a single, even layer of whole Oreo cookies. These will serve as the strong base for your tower. Ensure the cookies are placed close together, almost touching, to create a stable and continuous platform. If you’re using a springform pan, this layer will naturally mimic a traditional crust.
-
First Layer of Creamy Goodness and Fruit:
Generously spread about one-third of your freshly prepared no-bake cheesecake mixture over the Oreo base. Use a spatula or offset knife to ensure an even coating that extends to the edges of your cookie layer. Following this, delicately spoon a layer of your mixed berry pie filling (or whatever flavor you’ve chosen) over the cheesecake, spreading it gently to cover.
-
Constructing Your Impressive Pyramid:
Now, repeat the layering sequence. Add another layer of whole Oreo cookies, followed by another third of the cheesecake mixture, and then another layer of pie filling. Here’s the key to the pyramid shape: each new layer of Oreos should be slightly smaller in diameter than the one beneath it. This gradual reduction in size will naturally create the elegant, tapered tower effect. Continue this stacking process, reducing the number of Oreos with each ascending tier, until you have used all your delicious filling.
Expert Tip: As you build, focus on keeping each Oreo layer as flat and level as possible. A slight tilt can quickly turn your masterpiece into a “Leaning Tower of Oreos,” which, while perhaps unique, isn’t the most stable! Patience in this step will pay off with a beautifully symmetrical dessert.
-
The Critical Chill Time:
Once your magnificent Oreo stack cake is fully assembled, it’s time for the crucial chilling phase. Carefully transfer your cheesecake tower to the refrigerator. It needs to chill for a minimum of 3 hours, but for the absolute best results and optimal stability, we highly recommend an overnight chill. This allows the cheesecake filling to firm up properly, the layers to meld, and the flavors to deepen beautifully, ensuring easy slicing and a delightful texture.
Tips for Achieving No-Bake Cheesecake Perfection
While this recipe is incredibly simple, a few expert tips can ensure your No-Bake Oreo Cheesecake Tower is nothing short of magnificent:
- **Ensure Cream Cheese is Softened:** This is the golden rule for any smooth cheesecake. Cold cream cheese will inevitably lead to a lumpy filling, no matter how vigorously you beat it. Plan ahead and allow it to sit at room temperature for at least an hour before you begin mixing.
- **Thaw Cool Whip Completely:** For a perfectly smooth and integrated cheesecake mixture, your Cool Whip must be fully thawed. If you prefer to use homemade whipped cream, ensure it’s whipped to stiff peaks before gently folding it into the cream cheese mixture.
- **Steady and Centered Stacking:** The integrity of your pyramid relies on careful layering. Take your time to place each Oreo layer flat and centered. If you’re concerned about stability on a flat platter, starting in a loose springform pan or using a removable cake collar for the first few layers can be helpful.
- **Don’t Skimp on Chill Time:** This is perhaps the most important instruction for any no-bake cheesecake. The minimum 3 hours is necessary, but an overnight chill truly allows the cheesecake to set firmly, making for cleaner slices and an overall better texture.
- **Enhance Presentation:** Just before serving, consider adding a final flourish. A light dusting of cocoa powder, a scattering of fresh berries that match your pie filling, or even a few extra crushed Oreos can elevate its appearance and make it even more enticing.
Perfect for Any Celebration: Serving Suggestions
This No-Bake Oreo Cheesecake Tower is more than just a dessert; it’s a celebration centerpiece! Its impressive height and irresistible taste make it an ideal choice for a wide array of special occasions. Imagine the delight on faces when this grand dessert appears for a **birthday party** – you can even strategically place candles along its tiers for a spectacular effect! It’s also wonderfully suited for a romantic **Valentine’s Day** treat, a festive **Christmas Eve** dessert, or to ring in the **New Year** with sparkle. Beyond holidays, it’s fantastic for **baby showers, bridal brunches, summer BBQs, family reunions,** or simply when you want to make an ordinary weekend feel extraordinary. Whenever you desire an unforgettable dessert experience with minimal stress, this towering delight is your answer.
For an extra touch of indulgence, serve individual slices with a dollop of freshly whipped cream, a sprinkle of chocolate shavings, a drizzle of fudge sauce, or even a few extra fresh berries. The combination of textures and temperatures makes every forkful a moment of pure bliss.
Name That Dessert! What Would YOU Call It?
When I first showcased this magnificent dessert to my friends, their creativity was unleashed, leading to some truly hilarious and fitting names! It’s the kind of dessert that naturally sparks conversation and brings a smile to everyone’s face. Here are some of the fantastic and fun suggestions they came up with:
- Oreo Treesecake
- Devil’s Delight
- Little Red’s Wolf Bait
- Stairway to Oreo Heaven
- Cookies and Cream Mountain
- The pOREOmid (a personal favorite for its cleverness!)
- Black Forest Cookie Stack
- Oreo Colossus
- Cheesecake Skyscraper
- Midnight Delight Tower
Now, it’s your turn to join the fun! What creative and descriptive name would *you* give this delicious and dramatic No-Bake Oreo Cheesecake Tower? Share your imaginative ideas in the comments section below – we can’t wait to see what you come up with!
No Bake Oreo Cheesecake Tower Recipe Card
This stunning no-bake dessert looks incredibly impressive but is surprisingly easy to make, perfect for any special occasion that calls for a showstopper!
Prep Time:
20 minutes
Chill Time:
3 hours (or ideally overnight for best results)
Servings:
10-12 generous slices
Ingredients
- 2 packages (approx. 28 oz total) Oreo cookies
- 8 oz. cream cheese, softened
- 1/3 cup granulated sugar
- 2 teaspoons vanilla extract
- 1 (8 oz.) container Cool Whip, thawed
- 1 can (approx. 21 oz) mixed berry pie filling (or your choice of cherry, strawberry, etc.)
Instructions
- In a large mixing bowl, beat the softened cream cheese with an electric hand mixer until smooth and creamy. Add the granulated sugar and vanilla extract, continuing to beat until well combined. Gently fold in the thawed Cool Whip until the mixture is uniform and airy.
- On a serving platter or cake stand, arrange a single, even layer of whole Oreo cookies to form the base of your tower.
- Spread approximately one-third of the prepared cheesecake mixture evenly over the Oreo layer.
- Carefully spoon a layer of your chosen pie filling over the cheesecake mixture, spreading it gently to cover.
- Repeat the layering process: add another layer of Oreos, followed by another third of the cheesecake mixture, and then more pie filling. For subsequent layers, gradually reduce the number of Oreos to create a distinct pyramid shape.
- Continue stacking layers, ensuring each layer of Oreos is as flat and level as possible to maintain stability, until all the filling is used and your tower has reached an impressive height.
- Place the completed Oreo cheesecake tower in the refrigerator and chill for a minimum of 3 hours, or ideally overnight, before serving. This crucial step allows the cheesecake to set perfectly and ensures easy, clean slicing.
Did You Make This Stunning Dessert?
We’d absolutely love to see your beautiful creations! Share your No-Bake Oreo Cheesecake Tower photos with us on Instagram by tagging @thecraftpatch. And for more incredible dessert ideas and craft inspiration, make sure to follow us on Pinterest!
Happy no-baking!







