
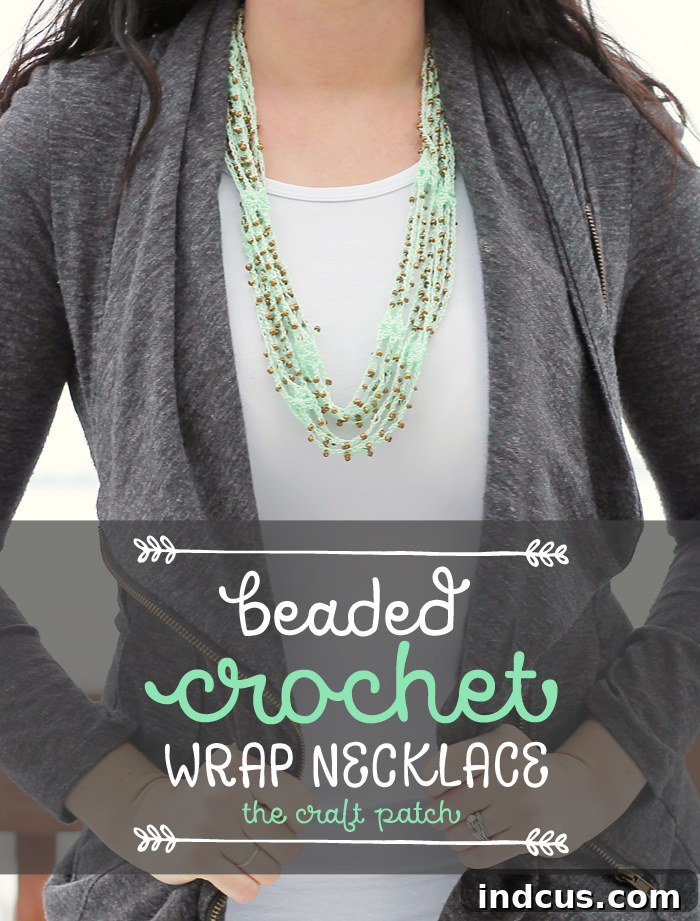
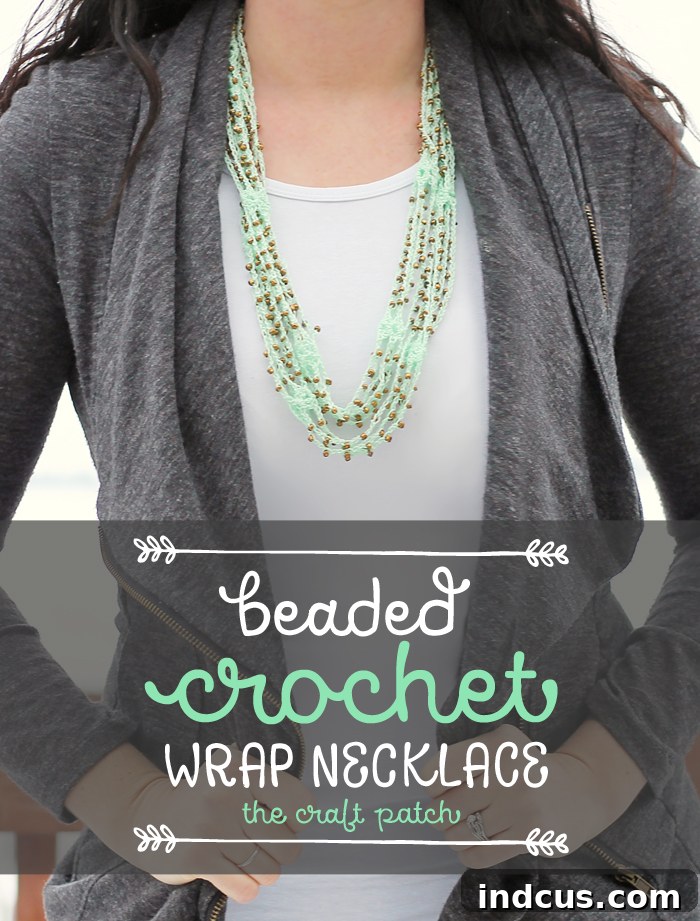
Craft Your Own Beaded Crochet Wrap Necklace: A Free Pattern & Full Tutorial
Have you ever considered elevating your crochet projects with the dazzling sparkle of beads? It’s a wonderfully creative and surprisingly simple technique that can transform ordinary pieces into extraordinary wearable art. Today, we’re thrilled to share a comprehensive, free pattern and tutorial for a stunning **beaded crochet wrap necklace**. This unique accessory beautifully blends the cozy elegance of a scarf with the delicate charm of a necklace, all enhanced by the radiant addition of beads.
Whether you’re new to crocheting with beads or looking for a fresh, inspiring project, this guide is designed for you. We’ll walk you through everything, from the essential materials to mastering the simple stitches, and of course, how to seamlessly integrate beads into your crochet work. Get ready to create a versatile piece that will add a touch of handmade elegance to any outfit.
Why Crochet a Beaded Wrap Necklace?
This particular project offers numerous benefits for crafters. Firstly, it’s an excellent way to introduce yourself to bead crochet, a technique that opens up a world of design possibilities. Secondly, the finished wrap necklace is incredibly versatile. It can be draped elegantly, wrapped multiple times for a layered look, or even tied, making it a truly adaptable accessory for various styles and occasions. Its lightweight nature, thanks to the use of crochet thread, ensures it’s comfortable to wear all day. Plus, imagine the satisfaction of telling admirers, “I made it myself!”
Gather Your Materials: What You’ll Need
Before diving into the fun of crocheting, it’s crucial to gather all your materials. High-quality supplies will not only make your crafting experience more enjoyable but also ensure a beautiful, durable finished product. Here’s a detailed list of what you’ll need for your beaded crochet wrap necklace:
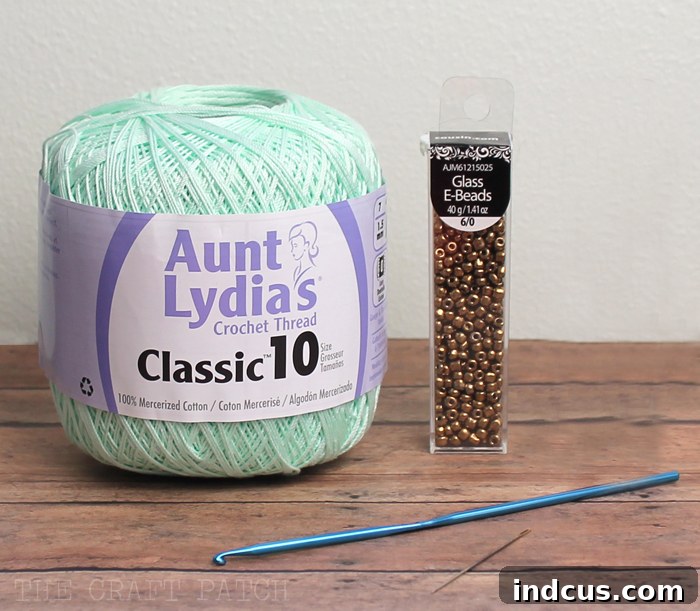
Materials Needed for Your Project
- 1 ball cotton crochet thread, size 10: This fine thread is ideal for creating delicate, lightweight jewelry. Its strength ensures your necklace will hold up well to wear, and the smaller gauge allows the beads to truly shine without being overshadowed by bulkier yarn.
- 560 glass E-beads or other small beads: E-beads are uniform in size and have a larger hole, making them perfect for stringing onto crochet thread. The quantity ensures you’ll have plenty to create the rich, multi-strand look of this wrap necklace. Feel free to experiment with different colors or finishes to personalize your piece!
- Crochet hook size E (3.5 mm): A size E hook is well-suited for working with size 10 crochet thread. It provides the right tension for creating even stitches that will beautifully showcase your beads. Always ensure your hook is comfortable to hold for extended crafting sessions.
- Blunt tip embroidery needle: This specialized needle is crucial for stringing the beads onto your thread. Its blunt tip prevents splitting the thread, and its eye should be large enough to accommodate the crochet thread while being slender enough to pass through the bead holes. Double-check that your chosen beads fit over the needle before you begin.
Preparing Your Project: Stringing the Beads
The first, and perhaps most meditative, step in creating your beaded necklace is stringing all the beads onto your crochet thread. This preparation is essential because the beads are added as you crochet, rather than being sewn on afterward. This method creates a seamless and integrated design.
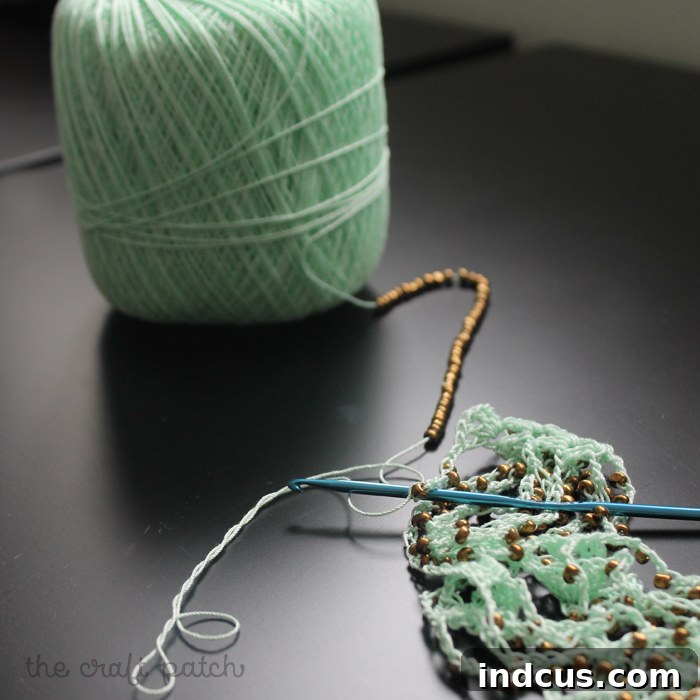
Using your blunt tip embroidery needle, carefully thread the entire package of beads onto your ball of crochet thread. This process can be time-consuming, but the stunning result is absolutely worth the effort. Find a comfortable spot, put on your favorite podcast or a good show (Netflix recommended!), and enjoy the rhythmic task of bead stringing. It’s a wonderful opportunity to relax and mentally prepare for the crocheting ahead. Ensure all beads are pushed down the thread, away from the working end, so they don’t interfere with your initial stitches.
Mastering the Key Stitches for Your Beaded Necklace
Once all your beads are strung and ready, you can begin the exciting part – crocheting! This pattern primarily uses two fundamental techniques: incorporating beads into chain stitches and the elegant shell stitch. We’ll break them down to ensure you feel confident.
How to Add Beads to Crochet
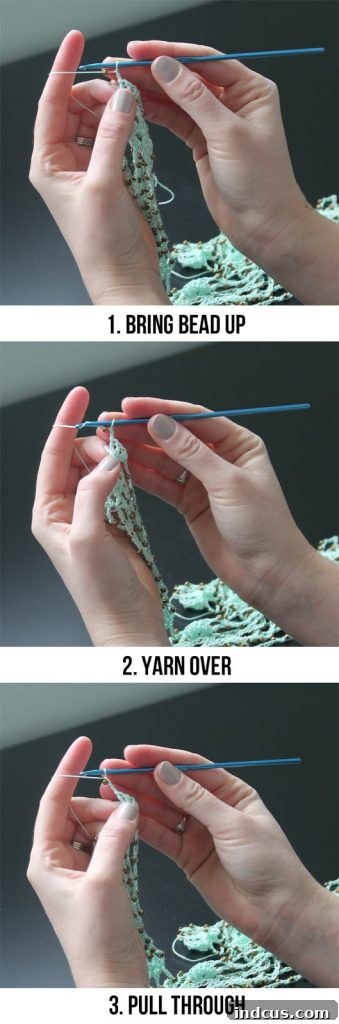
Adding beads is much simpler than it might seem. When the pattern instructs you to “chain around 1 bead,” here’s how you do it:
- Slide one bead right up next to your hook.
- Perform a standard chain stitch, but with the bead nestled snugly against your hook, effectively “chaining around” it.
- The bead will be secured within that chain loop.
It’s essentially a normal chain stitch, but you’re incorporating the bead directly into the stitch formation. The bead becomes an integral part of your crocheted fabric, creating a beautiful texture and sparkle. Don’t worry if it feels a little awkward at first; with a few practice stitches, it will become second nature.
Understanding the Shell Stitch
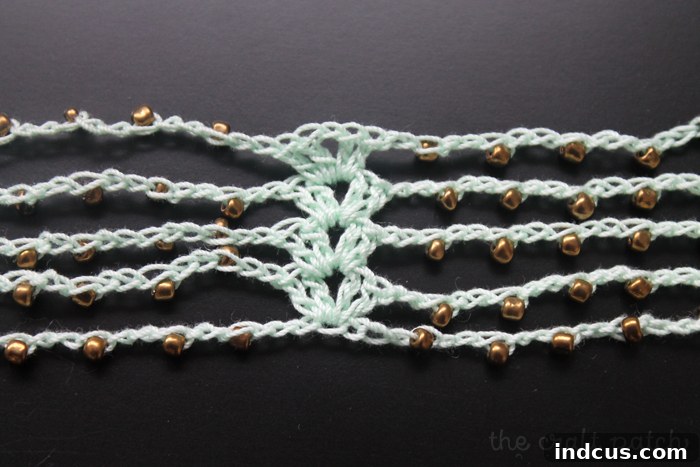
The only other special stitch you’ll need to know for this project is the shell stitch. This elegant stitch forms the connecting points between your beaded strands, giving the necklace its beautiful layered structure. A shell stitch is typically defined as:
(Two double crochet, chain 1, two double crochet) all worked into the same stitch or space.
This creates a distinctive fan-like shape, adding visual interest and stability to your necklace. It’s a cornerstone of the design, ensuring the beaded sections are neatly spaced and flow gracefully.
Ready to embark on this beautiful crafting journey? I promise that once you get into the rhythm, it’s quite simple and incredibly rewarding. I completed my own necklace in about two hours, even with the delightful distraction of crocheting with friends! This project is perfect for an afternoon craft session.
For your convenience, a printable PDF version of this detailed pattern is available at the bottom of this post.
The Beaded Crochet Wrap Necklace: Full Pattern Tutorial
This pattern is written in standard US crochet terms.
- Ch: Chain
- Sl St: Slip Stitch
- DC: Double Crochet
Step-by-Step Instructions
Begin by stringing all 560 beads onto your size 10 cotton crochet thread using the blunt tip embroidery needle. Ensure they are all pushed down the thread away from your working area.
ROUND 1: Foundation Chain and First Beaded Strands
Ch 4.
*(Ch around 1 bead, ch 2.) Repeat this sequence 7 times. Then, Ch 7.*
Repeat the section between ** (from Ch around 1 bead through Ch 7) a total of 13 more times. This will create your desired length for the necklace, forming the base for multiple beaded segments.
After the last Ch 7, complete the final sequence: (Ch around 1 bead, ch 2.) Repeat 7 times. Then, Ch 3.
At this point, you should have a total of 14 distinct beaded sections, each followed by a long chain segment.
Slip stitch into the 1st chain you made to join the circle. This action will also effectively complete your last group of 7 chain stitches, creating a continuous loop. (Refer to picture A below for visual guidance.)
ROUND 2: Introducing the First Shell Stitches
Ch 2 (this acts as the first part of your first double crochet, but we will count it as a separate stitch). (See picture B below.)
Then, in the very first stitch where you previously made your slip stitch to join Round 1, work your first shell stitch: (2 DC, ch 1, 2 DC). (See picture C below.) This forms the anchor for your next layer of beaded strands.
*Ch 2. Now, create another beaded strand section: (Ch around 1 bead, ch 2.) Repeat this sequence 7 times. Finish this beaded section with a Ch 2.
Next, locate the 4th stitch of the Ch 7 section from the previous round. Into this specific 4th stitch, work another shell stitch: (2 DC, ch 1, 2 DC).*
Repeat the instructions between ** (from the Ch 2 before the beaded strand to the shell stitch) all the way around the circle until you reach the beginning of the round. This establishes the second layer of beaded strands connected by shell stitches.
ROUNDS 3-5: Building Additional Beaded Strands
*Start by working a shell stitch into the chain-1 space (the center of the previous round’s shell stitch): (2 DC, ch 1, 2 DC).
Then, Ch 2. Create another beaded strand: (Ch around 1 bead, ch 2.) Repeat this 7 times. Finish this beaded section with a Ch 2.*
Repeat the instructions between ** (from the shell stitch to the Ch 2 after the beaded strand) all the way around the circle. Continue repeating this pattern for Rounds 3, 4, and 5.
Once you complete Round 5, attach the very last beaded section to the first shell stitch of that round with a slip stitch to neatly close the circle.
After completing Round 5, you should have five beautiful, distinct strands of beads all connected together by the elegant shell stitches. This multi-layered design creates a rich, textured look for your wrap necklace.
Customization Tips for Your Necklace
This pattern is designed for flexibility! You can easily customize your necklace to be thinner or thicker depending on your preference:
- For a Thinner Necklace: Stop after Round 3 or 4. Each round adds another strand, so fewer rounds mean fewer layers.
- For a Thicker Necklace: Simply continue repeating Round 3 (the * between ** instructions) for additional rounds. Just remember this crucial point: if you decide to go thicker and add more rounds, you MUST string more beads onto your thread *before* you start crocheting. Each additional round will require approximately 7 x 14 = 98 beads (7 beads per section, 14 sections). Plan accordingly!
- Varying Bead Types: While E-beads are recommended for their ease of use, you can experiment with different small seed beads, glass beads, or even tiny gemstone chips, as long as they fit over your embroidery needle and can be strung onto the thread.
- Color Play: Don’t limit yourself to one color of thread or beads! Imagine a necklace with ombré beads, or contrasting thread and bead colors for a bold statement.
Once you are satisfied with the number of strands, carefully tie off your thread. Weave in all loose ends securely with your embroidery needle to ensure a neat and professional finish. Taking your time on this step will prevent your beautiful work from unraveling.
Visual Aids: Key Steps in Photos
Sometimes, seeing a step makes all the difference. Here are a few pictures to illustrate the key moments in the pattern, helping you visualize the process and ensure your necklace comes together perfectly:
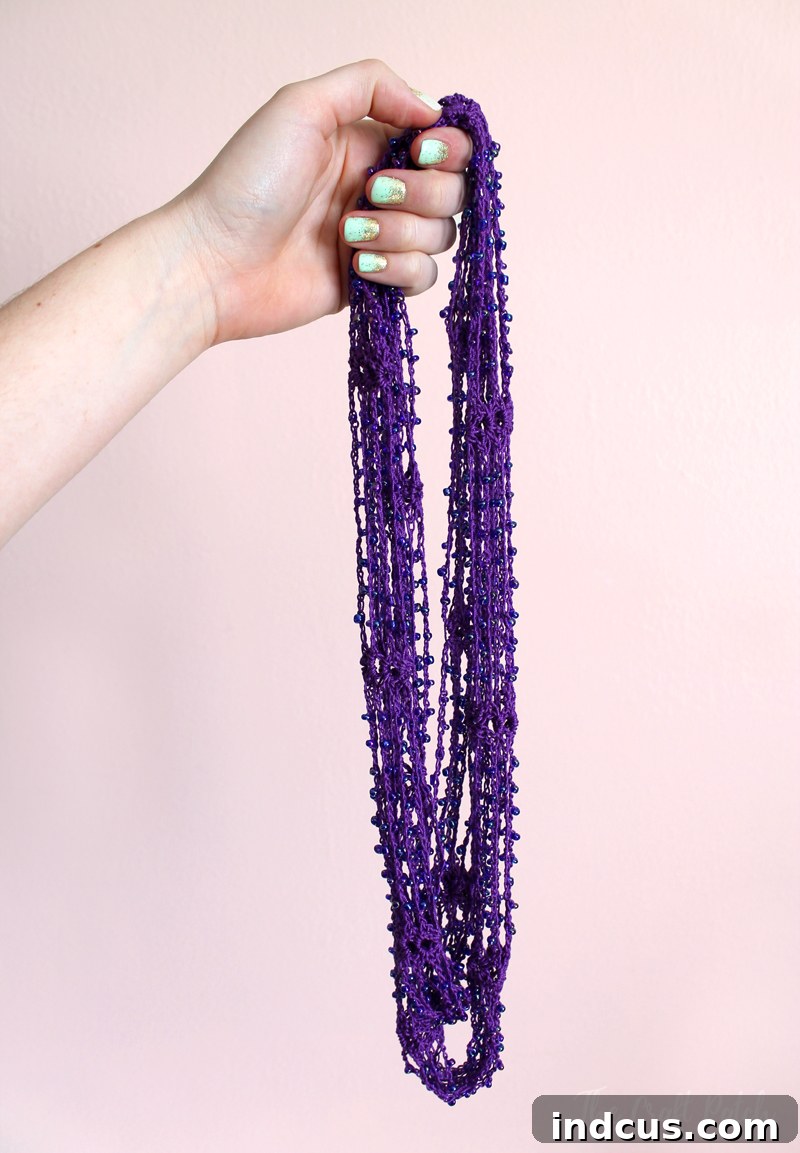
Your Finished Beaded Crochet Wrap Necklace
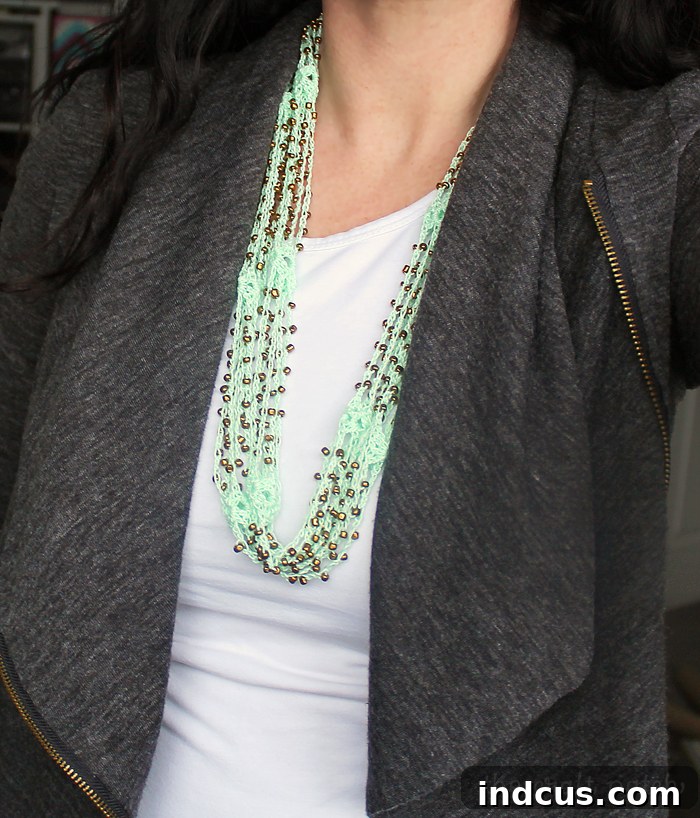
Here’s a close-up of the finished product, allowing you to appreciate the intricate details and how all the elements – the delicate beaded chains and the elegant shell stitches – come together to form a cohesive and beautiful accessory:
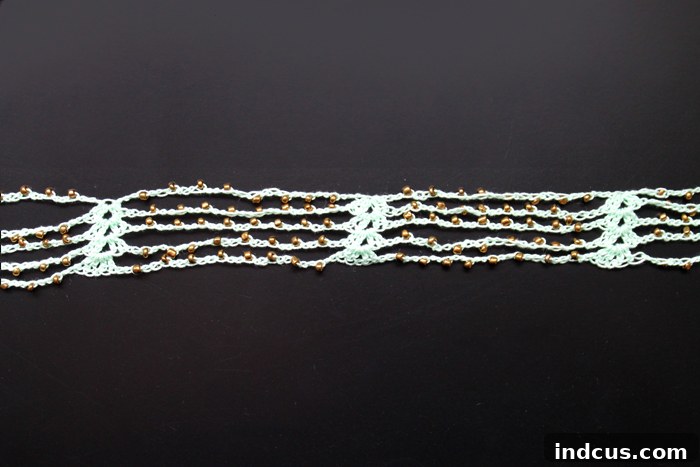
I absolutely adore my new necklace! It’s such a fun, unique, and versatile accessory. The process of creating it was just as enjoyable as wearing it. I’m already planning to make a few more in different colors, perhaps with varying types of beads to create diverse looks. A vibrant coral version is definitely calling my name – what about you?
Beaded Crochet Wrap Necklace Video Tutorial
For those who prefer visual learning, or just want an extra boost of confidence, we’ve prepared a detailed video tutorial. Watch as we demonstrate each step, from stringing the beads to forming the shells, ensuring you can follow along with ease.
Watch the Full Tutorial Here!
Share Your Creation!
We absolutely love seeing what you create! Once you’ve completed your beautiful beaded crochet wrap necklace, please share it with us. Tag us on social media or send us a picture. Your finished projects are a huge source of inspiration for our crafting community. Happy crocheting!







