
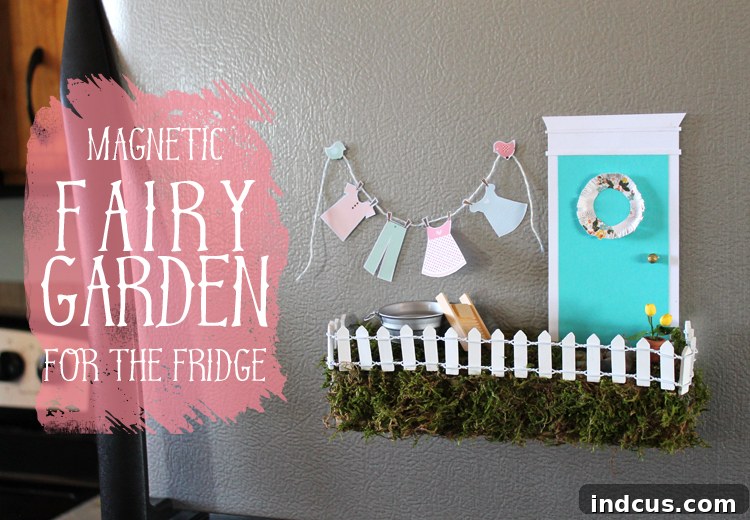
In the enchanting world of miniature crafts, few trends capture the imagination quite like fairy gardens. There’s an undeniable charm in tiny landscapes, meticulously crafted to invite whimsical creatures into our homes. However, traditional fairy gardens often come with limitations: they’re typically static, demand dedicated space, and are usually designed for outdoor settings. What if you could bring this magical world indoors, customize its scenes on a whim, and even hide secret treasures within its confines? Prepare to be enchanted by the ultimate solution: a Magnetic Fridge Fairy Garden! This ingenious DIY project takes the beloved miniature world and gives it a dynamic, space-saving, and utterly delightful twist, perfect for adding a touch of magic to your kitchen.
I absolutely adore the current fairy garden craze. There’s something inherently captivating about miniature worlds, their delicate details, and the endless possibilities for creativity they offer. While I’ve admired countless beautiful fairy garden designs, I yearned for something different—a versatile, indoor version that allowed me to easily change out scenes to suit my mood, the season, or an upcoming holiday. This desire led me to create this truly awesome magnetic fairy garden, designed to live right on your fridge! It’s not just a decorative piece; it’s an interactive canvas for your imagination, a conversation starter, and a source of daily joy. Say goodbye to fixed displays and hello to a constantly evolving miniature masterpiece.
Creating your very own magnetic fairy garden is a rewarding and relatively simple craft project that brings a personalized touch to your home decor. To embark on this whimsical journey and craft your unique miniature world, you will need a selection of basic crafting supplies and, of course, a dash of creativity. Here’s a comprehensive list of what you’ll gather to bring your fridge fairy garden to life:
Supplies Needed for Your Magnetic Fairy Garden Adventure
- Wooden Pencil Box: This forms the foundational structure of your fairy garden. Its sliding lid is crucial for creating the clever “secret compartment” feature, making it a perfect base for this project. Look for one that’s sturdy and has a smooth finish.
- Fairy Garden Miniatures: This is where the magic truly comes alive! Think tiny benches, fairy figurines, miniature animals, whimsical houses, or tiny gardening tools. The more variety you have, the more elaborate and changeable your scenes can be.
- Sheet Moss: Essential for creating a lush, natural-looking base for your garden. Sheet moss is easy to work with and provides an authentic miniature landscape texture.
- Miniature Picket Fence: A delightful addition that helps define the boundary of your fairy world. It adds a charming, rustic touch and enhances the garden aesthetic.
- Pebbles: Perfect for crafting charming pathways or adding texture to your landscape. You can easily gather these from your yard or purchase decorative craft pebbles.
- Strong Magnets: These are critical for securely attaching your fairy garden to the fridge. Investing in good quality, powerful magnets (like neodymium magnets) will ensure your garden stays put, preventing any accidental falls. The stronger, the better for this project!
- Sheet Magnets: Thin and flexible, these are ideal for making your changeable backgrounds and individual miniature pieces magnetic, allowing for endless scene customization.
- Glue Gun and Hot Glue: Your best friend for quick and strong adhesion of moss, fence, and structural elements.
- Scrapbook Paper: This is your artistic canvas for creating diverse and captivating backgrounds for your scenes. Choose various patterns, colors, and textures to inspire different moods and stories.
Detailed Instructions for Crafting Your Magnetic Fairy Garden
Follow these steps carefully to construct your delightful and interactive magnetic fairy garden. Each step is designed to guide you through creating a durable, aesthetically pleasing, and highly functional miniature world.
Step 1: Laying the Green Foundation with Sheet Moss
Begin by meticulously hot gluing the sheet moss onto the lid, top, and sides of your wooden pencil box. The goal here is to completely cover these visible wooden surfaces, creating a seamless, natural-looking green base for your fairy landscape. This step can get a little messy, so it’s advisable to work on a protected surface and have some damp paper towels handy. Ensure the moss is pressed firmly into the hot glue for a secure attachment. Don’t worry too much about perfection at this stage; small imperfections can often add to the rustic charm of a fairy garden.
Step 2: Crafting a Charming Pebble Walkway
Once your moss is securely in place, it’s time to add an element of interest and texture. Carefully arrange and hot glue small pebbles to create a miniature walkway across your mossy landscape. This path not only breaks up the greenery but also provides a focal point for your tiny scenes. You can design it to be straight, winding, or even leading to a specific miniature element like a tiny bench or a fairy house. This simple addition significantly enhances the visual appeal and depth of your fairy garden.
Step 3: Creating the Ingenious Secret Compartment
This is where the magic of the pencil box truly shines! With the sliding lid open, carefully add more moss around the outside edge of the box, specifically on the surfaces that will be visible when the lid is slid back into place. The trick here is to ensure that all of the bare wood is covered by the moss once the lid is closed. This careful moss placement creates a brilliantly disguised secret compartment within the pencil box. This hidden space is absolutely perfect for storing your extra fairy garden pieces, allowing you to easily switch out miniatures and backgrounds to create different scenes without losing any of your precious tiny treasures. It’s a functional and delightful feature that adds to the versatility of your magnetic garden.
Step 4: Securing Your Garden with Strong Magnets
Now, it’s time to make your fairy garden truly magnetic! Apply a generous amount of hot glue to the back of the pencil box – this is the side directly opposite from the sliding lid. Firmly press your strong magnets onto the hot glue, ensuring they are evenly spaced and well-adhered. The quantity and strength of your magnets will depend on the size and weight of your pencil box and its contents, but generally, 3-4 powerful magnets should suffice for a secure hold. Test the adhesion once the glue has cooled to ensure your fairy garden will remain firmly attached to your fridge, resisting accidental bumps and movement.
Step 5: Adding the Charming Miniature Fence
Take your miniature picket fence and gently bend it to fit around the perimeter of your mossy fairy garden. Use a pair of scissors or wire cutters to trim the fence down to the appropriate size, ensuring it wraps neatly around the front and sides of the box. Once you’re happy with the fit, use more hot glue to attach the fence securely to the edges of the box. This fence not only adds a lovely decorative element but also helps to define the boundaries of your miniature world, giving it a polished and complete look.
Step 6: Unleashing Creativity with Changeable Scenes
This is arguably the most exciting and dynamic part of the entire project! Gather your chosen scrapbook papers, selecting designs that evoke different moods, seasons, or themes. These papers will serve as the interchangeable backgrounds for your fairy scenes. Cut each piece of scrapbook paper to fit snugly within the open area of your fairy garden. Then, attach small, strategically placed bits of sheet magnet to the back of each paper background. This will allow your backgrounds to adhere magnetically to the fridge (or even to the inside back wall of your pencil box if you prefer a tighter fit) and be easily swapped out. The beauty of this design lies in its versatility. One day your fairies might be enjoying a sunny spring meadow, and the next, they could be celebrating a snowy winter wonderland or a spooky Halloween night. The possibilities are truly limitless, encouraging endless imaginative play and decorative changes.
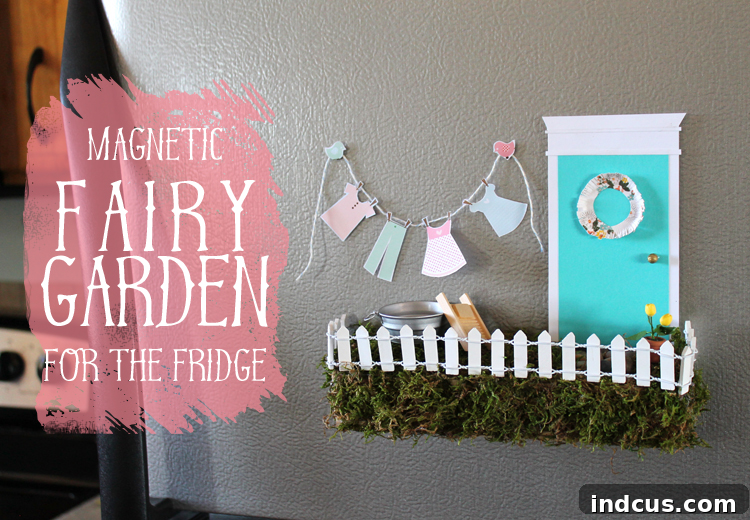
I started with a charming “laundry day” scene, complete with tiny clotheslines and little garments swaying in an imaginary breeze. This simple background instantly brought a sense of domestic magic to the tiny world.
Next, I crafted a delightful “picnic dinner” scene, featuring a cozy blanket, miniature food items, and even a charming little window box background to add depth and a touch of architectural detail. These scenes are just the beginning; you can let your imagination soar!
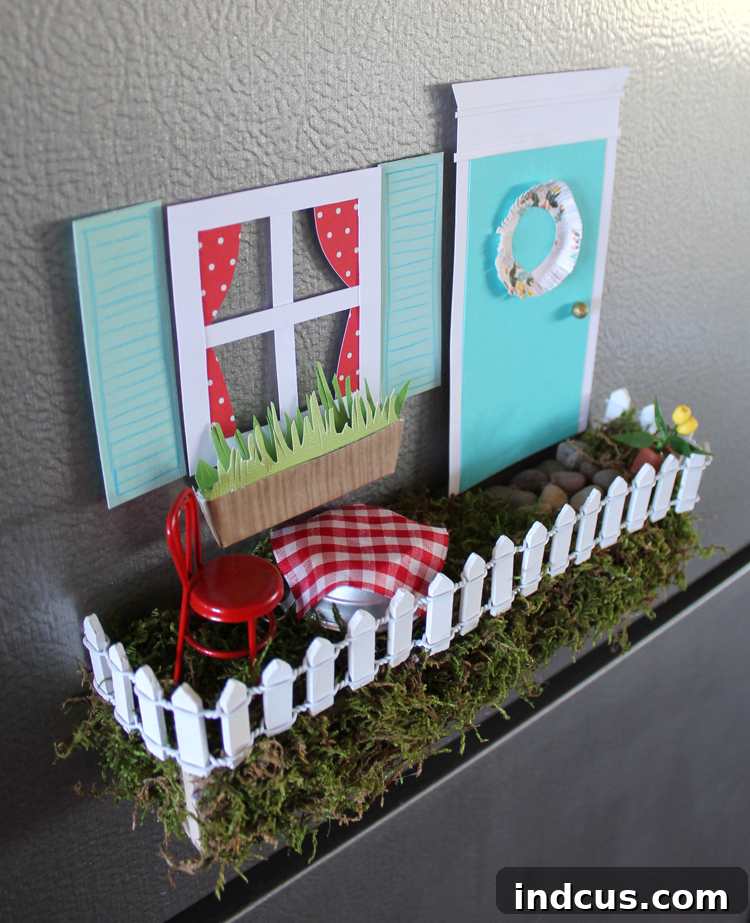
I mean, seriously, how much fun is this?! The interactive nature of this magnetic fairy garden is what truly sets it apart. I’m already brimming with ideas for even more scenes to create throughout the year. Imagine a vibrant camping scene for summer adventures, a spooky yet charming trick-or-treat scene for Fall, and of course, a dazzling Christmas scene for December, complete with tiny festive decorations. The versatility means your fairy garden can always reflect the current season, a holiday, or simply your whimsical mood. It’s an ongoing project of joy and creativity that truly brightens up any space.
This magnetic fairy garden isn’t just a craft; it’s a dynamic piece of art that constantly evolves. It’s a wonderful way to express creativity, reduce stress, and add a unique, personalized touch to your home. Whether you’re a seasoned crafter or just looking for a fun weekend project, this DIY magnetic fairy garden is sure to bring a smile to your face and a dash of enchantment to your everyday life. So gather your supplies, unleash your inner child, and start building your very own miniature world that defies the ordinary!
Curious to see this innovative magnetic fairy garden in full action? I’ve put together a short video that beautifully showcases its features. You absolutely HAVE to see the ingenious secret compartment at work—it’s truly a game-changer for storing your precious miniatures and effortlessly switching between your enchanting scenes. Watching the video will provide a clear demonstration of just how easy and fun it is to interact with and customize your fridge-mounted magical world.







