
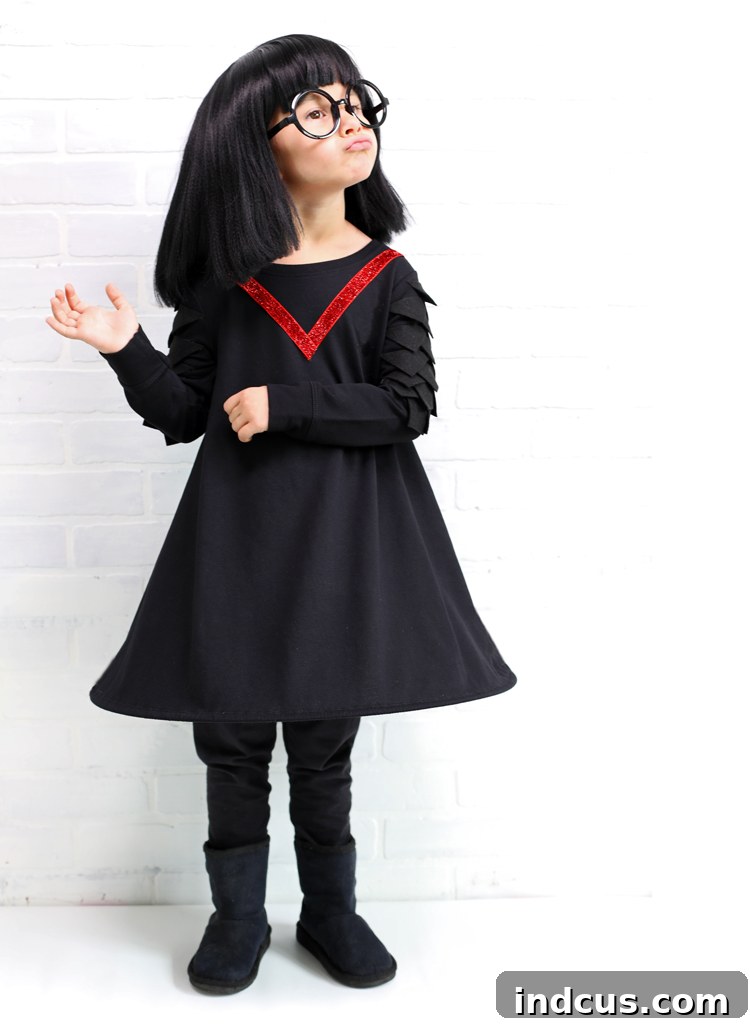
Create an Iconic Look: The Ultimate No-Sew Edna Mode Costume Guide
Dahling, no capes! But definitely, an effortlessly chic, no-sew Edna Mode costume that will turn heads and steal the show. If you’re a fan of Disney’s The Incredibles, you’ll undoubtedly appreciate the inimitable style and sharp wit of Edna Mode. Recreating her distinctive look doesn’t require a sewing machine, making it one of the quickest and easiest DIY Halloween costumes you can craft. This comprehensive guide will walk you through every step, ensuring your Edna Mode costume is not only recognizable but also perfectly polished, suitable for any age or size.
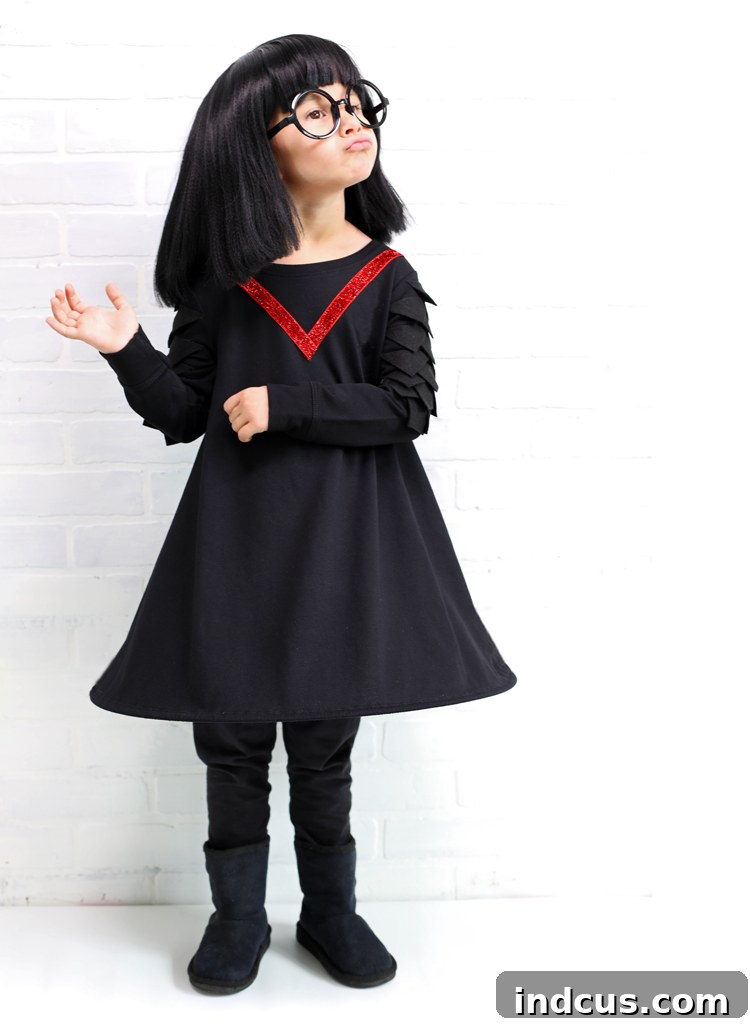
Why Choose a No-Sew Edna Mode Costume?
In a world of elaborate, time-consuming costume creations, Edna Mode would surely approve of efficiency without sacrificing style. A no-sew costume epitomizes this philosophy. Whether you’re a seasoned crafter or a complete beginner, the “no-sew” approach offers numerous advantages:
- Time-Saving: Perfect for last-minute Halloween plans or busy schedules.
- Beginner-Friendly: No complex patterns or machinery required, just basic crafting skills.
- Cost-Effective: Often utilizes readily available materials, keeping your budget in check.
- Adaptable: Easily customized for different body types and age groups, from toddlers to adults.
- Less Stress: Focus on the fun of creation rather than the technicalities of sewing.
Embracing a no-sew project means you can channel Edna’s iconic fashion sense with minimal fuss, delivering maximum impact.
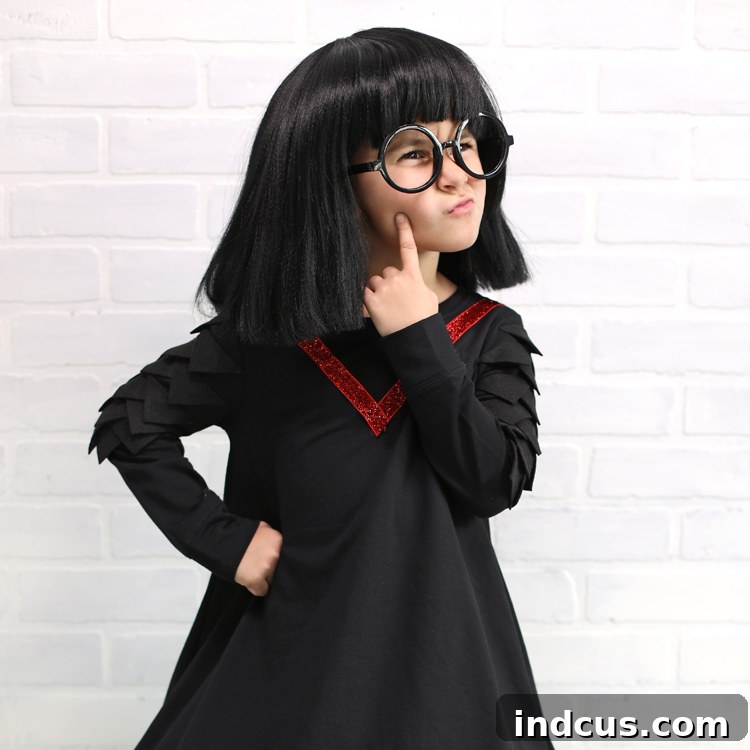
Gathering Your Materials: The Essentials for Your Edna Mode Look
To embark on your no-sew Edna Mode costume adventure, you’ll need a carefully curated selection of supplies. Each item plays a crucial role in replicating her signature silhouette and striking details. Here’s a detailed list of what you’ll need:
Materials Needed:
- Black Long Sleeve Swing Dress: This is the foundation of Edna’s look. You’ll need a dress with a distinct A-line flare that lacks a defined waistline. The “swing” style naturally emulates her unique broad, minimalist shape. Opt for a fabric that holds its shape well but isn’t too stiff.
- Red Ribbon: A vibrant red ribbon will be used to create the iconic “V” shape on the bodice, a key design element that adds a pop of color to her otherwise monochrome outfit. Choose a ribbon that is wide enough to make an impact, perhaps 1-2 inches.
- Large Metal Wreath Form: This seemingly unconventional item is your secret weapon for achieving Edna’s exaggerated A-line dress silhouette. It provides the necessary structure to make the skirt stand out dramatically from the body. Look for a wreath form that is large enough to create a substantial circumference at the hem of your chosen dress.
- Snip Pliers: Essential for carefully cutting and shaping the metal wreath form. Ensure they are robust enough to handle wire.
- Hot Glue Gun + Glue Sticks or Fabric Glue: Your primary tools for attaching all the elements without a single stitch. A hot glue gun offers quick drying and strong adhesion, while fabric glue provides a more flexible, washable bond, though it requires longer drying times. Choose based on your preference and the desired durability.
- Black Felt: This material will be cut into geometric triangles to adorn the sleeves, a subtle but significant detail of Edna’s avant-garde designs. Ensure you have enough felt to cover the desired area of both sleeves.
- Edna Mode Wig and Glasses Kit: The ultimate game-changer! These accessories are instantly recognizable and crucial for transforming into Edna Mode. A good quality kit will complete your look with authenticity, saving you time and effort in styling.
Finding the Perfect Black Swing Dress:
The success of your Edna Mode costume hinges on selecting the right black dress. It needs to be a long-sleeved, a-line or swing-style dress that flows outward from the shoulders without a cinched waist. This silhouette is paramount to capturing Edna’s unique design aesthetic. While searching, consider comfort and the fabric’s ability to hold the wire frame effectively. Here are some excellent options I found that are suitable for various ages and sizes:
- Girls Size 3-10: Ideal for younger fans eager to embody the iconic designer.
- Women’s XS – XXL: A versatile range to ensure adults can also achieve a perfectly fitted Edna ensemble.
- Toddler and Girl 12mo-16: Great for even the littlest fashionistas.
Remember, the goal is a sleek, black, long-sleeved dress that flares out dramatically from the top, mimicking Edna’s signature avant-garde gown.
Step-by-Step Instructions: Crafting Your No-Sew Edna Mode Masterpiece
Now that you have all your materials, let’s dive into the creation process. Follow these simple, no-sew steps to assemble your stunning Edna Mode costume.
Step 1: Achieving Edna’s Iconic Silhouette – The Wire Frame
Edna Mode’s dress isn’t just a simple A-line; it boasts an almost architectural structure, standing away from the body to create a truly distinctive shape. This step is crucial for recreating that dramatic silhouette.
- Prepare the Wire Frame: Carefully cut one complete round of wire off the large metal wreath form using your snip pliers. This single circular wire will be inserted into the hem of your dress to give it the necessary rigidity and flare.
-

Carefully snip one round of wire from the wreath form. - Cut and Insert the Wire: Clip the wire circle open using your snip pliers. Locate the inside bottom hem of your black dress. Carefully cut a small, discreet hole (just large enough for the wire to pass through) in this inner hem.
-
Thread the wire carefully through the hem. - Thread and Secure: Begin threading the cut wire circle through the bottom hem of the dress. Guide it all the way around until both ends of the wire emerge from the small hole you created. Once threaded, tape the two ends of the wire firmly back together to form a continuous circle. Use strong adhesive tape for a secure hold.
- Conceal the Wire: Gently slide the taped wire ends and the opening back inside the hem of the dress. Adjust the fabric so that the wire is completely encased and the seam appears seamless, making it nearly invisible. This creates the foundational structure for Edna’s signature A-line look.
-
Ensure the wire is fully concealed for a polished finish.
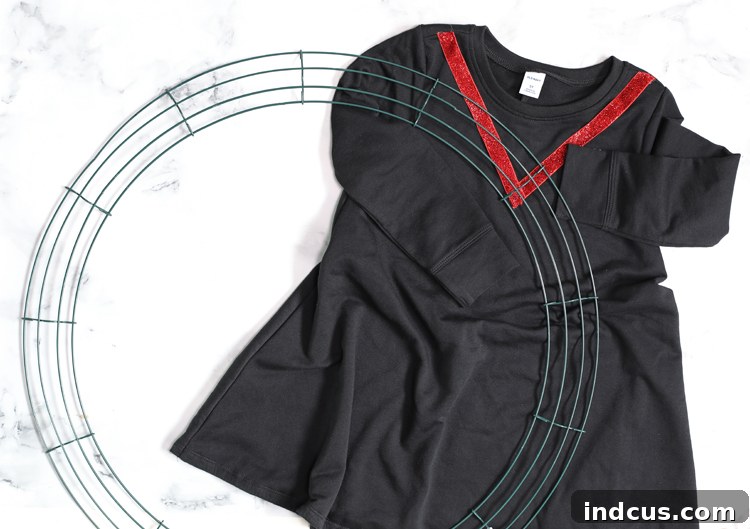
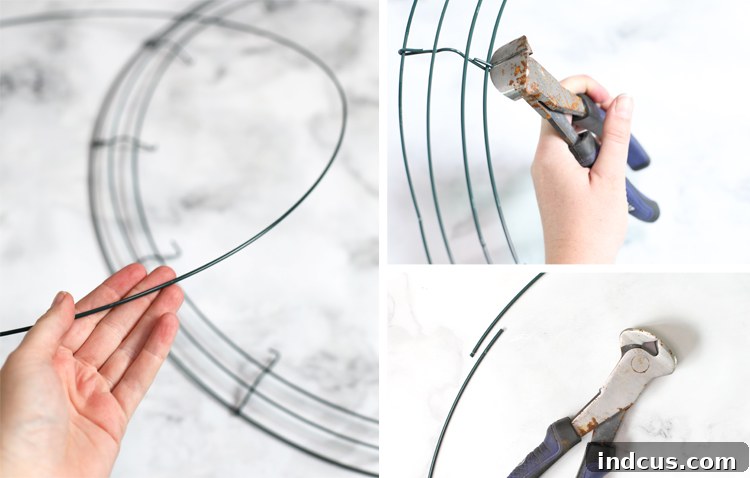
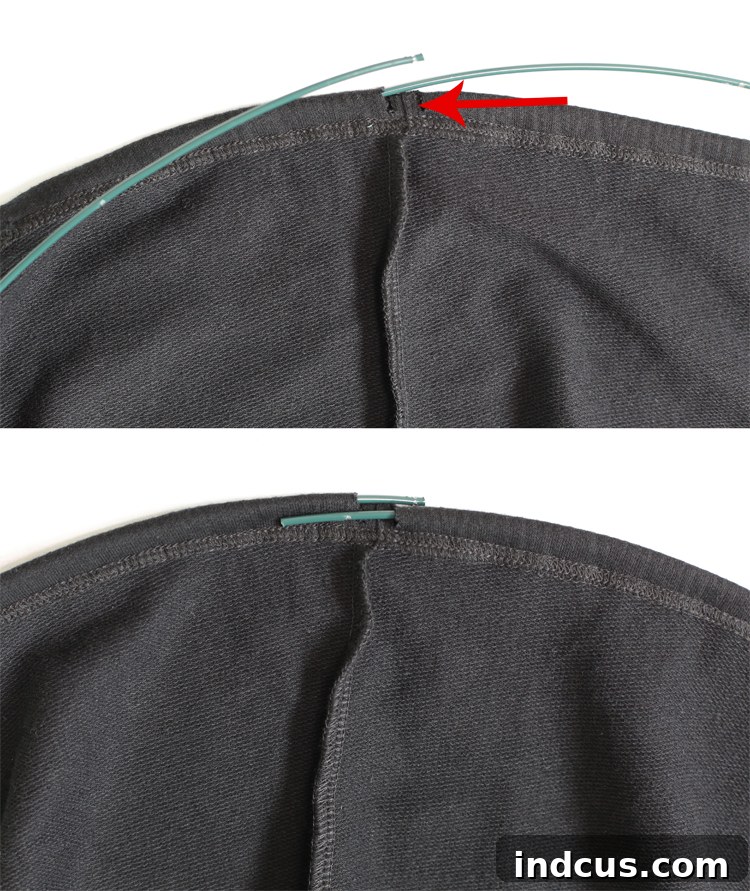
Step 2: The Signature Red Detailing – Bodice Ribbon
Edna’s costume is mostly black, but the striking red “V” on her bodice is an unmistakable element of her design. This step adds that iconic splash of color.
- Position the Ribbon: Lay your black dress flat. Take your red ribbon and carefully arrange it in a crisp “V” shape onto the bodice of the dress. The top points of the “V” should align roughly with the shoulder seams, and the point of the “V” should extend downwards towards the center of the chest. Ensure the “V” is symmetrical and visually appealing.
- Glue into Place: Once you’re satisfied with the placement, secure the ribbon using your hot glue gun or fabric glue. Apply a thin, continuous line of glue along the edges of the ribbon that will be adhered to the dress. Press firmly to ensure a strong bond. If using fabric glue, allow ample drying time.
- Trim Edges: After the glue has set, carefully trim any excess ribbon along the top edges, aligning it neatly with the shoulder seams for a clean, professional finish.
-
The distinctive red ‘V’ adds Edna’s signature touch.
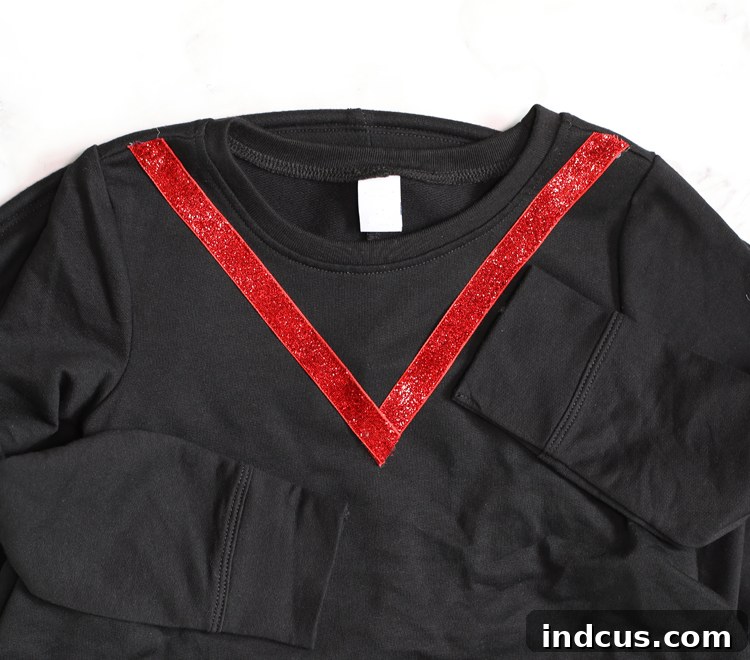
Step 3: Geometric Sleeve Embellishments – Felt Triangles
The subtle, geometric detailing on Edna’s sleeves adds to her avant-garde designer persona. This step brings those intricate details to life.
- Prepare Felt Triangles: Take your black felt. First, cut the felt into squares of a manageable size (e.g., 2×2 inches or 3×3 inches, depending on the desired size of your triangles and the scale of the dress). Then, cut each square diagonally from corner to corner to create two perfect triangles. If you have a rotary cutter and a cutting mat, this process will be much faster and yield more precise cuts. However, a good pair of fabric scissors and a steady hand will work just as well.
- Attach to Sleeves: Apply a thin line of hot glue along the top, long edge of each felt triangle. Carefully position and glue the triangles to the dress sleeve. Start from the bottom of the sleeve and work your way up, or vice versa. Alternate the placement of the triangles from row to row, creating a staggered, overlapping effect as shown in the inspiration photos. This gives the sleeves a textured, three-dimensional appearance that mirrors Edna’s sophisticated designs. Ensure consistent spacing for a polished look.
-
Add geometric felt details to the sleeves for an authentic Edna touch.
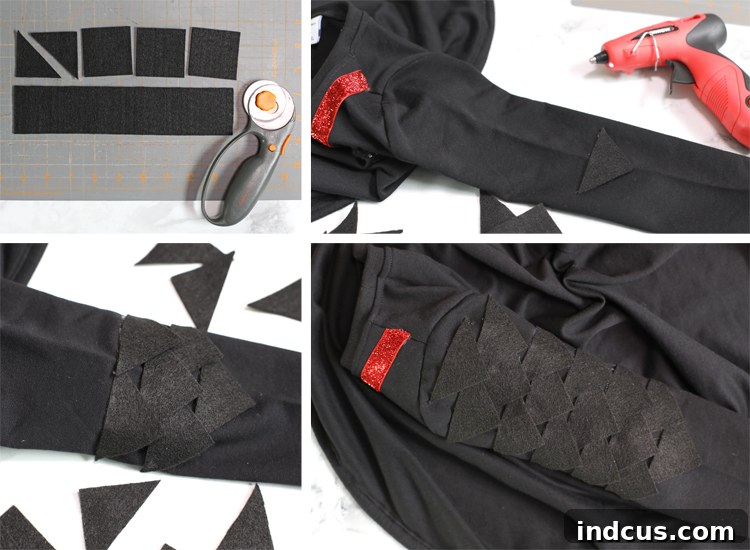
The Finishing Touches: Wrinkle-Free Perfection with Downy Wrinkle Releaser
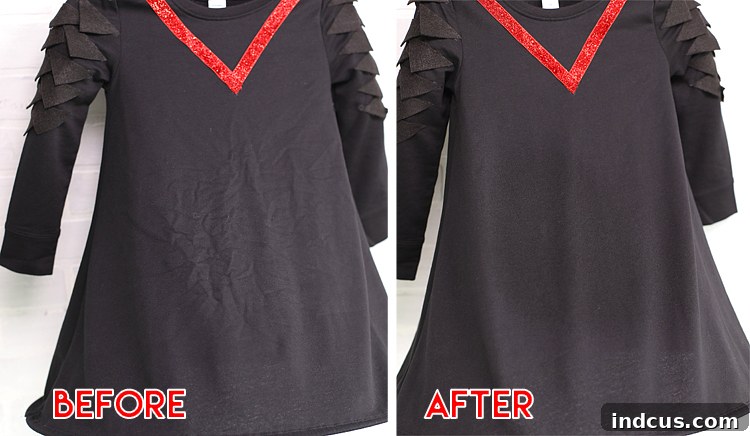
Once you’ve added the geometric felt details, your Edna Mode dress is nearly complete! However, as Edna herself would say, “Dahling, no wrinkles!” A truly perfect costume, especially one inspired by a fashion visionary, must be impeccable. This is where Downy Wrinkle Releaser becomes your invaluable ally.
Have you used this product before? It is absolutely AMAZING for achieving that crisp, wrinkle-free look without the hassle of ironing. For delicate fabrics, or when you’re short on time, it’s a lifesaver.
The process is incredibly simple:
- Spray lightly.
- Smooth hand over wrinkles.
- Hang and let dry.
- BOOM. Wrinkles gone.
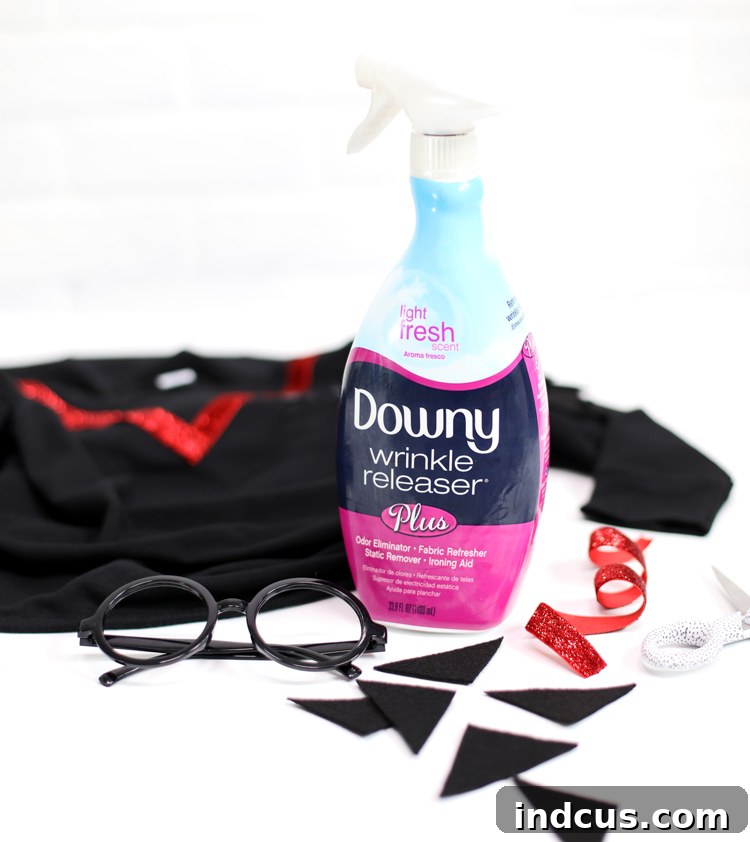
Edna and I are big fans of anything with that kind of super power. We often have a bunch of satin Halloween costumes in our dress-up box made from delicate, flimsy fabric that makes ironing them a nightmare – they’d melt! So, Downy Wrinkle Releaser Plus is a fantastic solution to make them presentable again without risk of damage. If you’d like to try this magical product, you can buy it on Amazon.
Beyond costumes, I’m also going to use it to touch up a pair of curtains that are wrinkled but I’m too lazy to take down to iron. Winning at life, my friends, with quick and easy solutions for everyday dilemmas!
Accessorizing Your Edna Mode Look
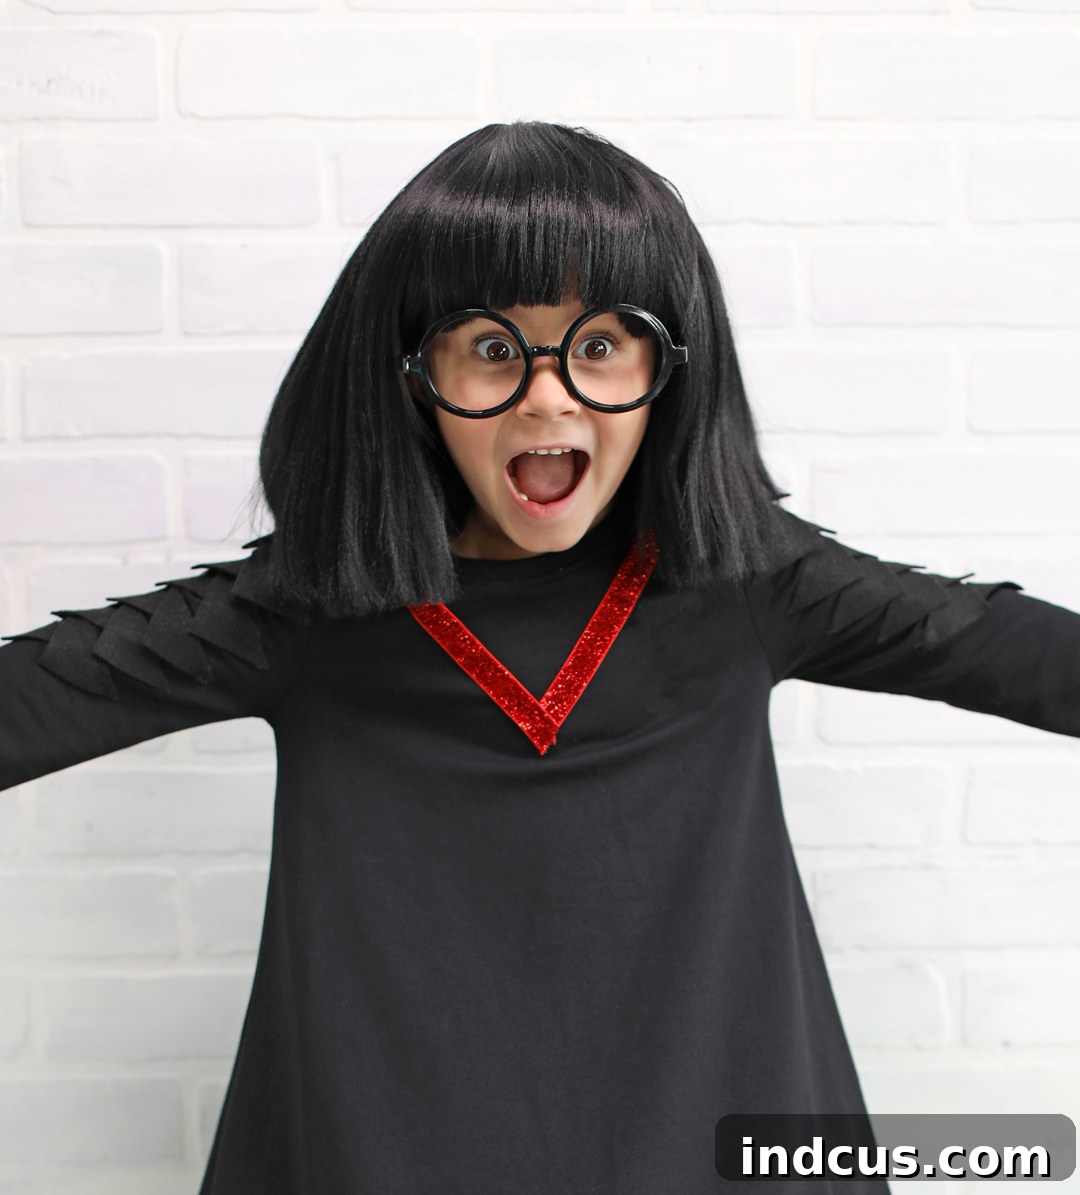
While the dress forms the foundation, the true essence of Edna Mode lies in her distinctive accessories and unwavering confidence. Your Edna Mode wig and glasses kit is crucial. The perfectly coiffed bob and bold, round spectacles are instantly recognizable and cement your transformation. Beyond these, consider embodying her persona:
- Attitude: Stand tall, speak with conviction, and exude a sense of unparalleled style.
- Minimalist Makeup: Keep your makeup simple and clean, focusing on a strong brow to complement the glasses.
- Confident Posture: Edna never slouches. Maintain an upright, poised posture.
Styling Your Edna Mode Costume for Any Occasion
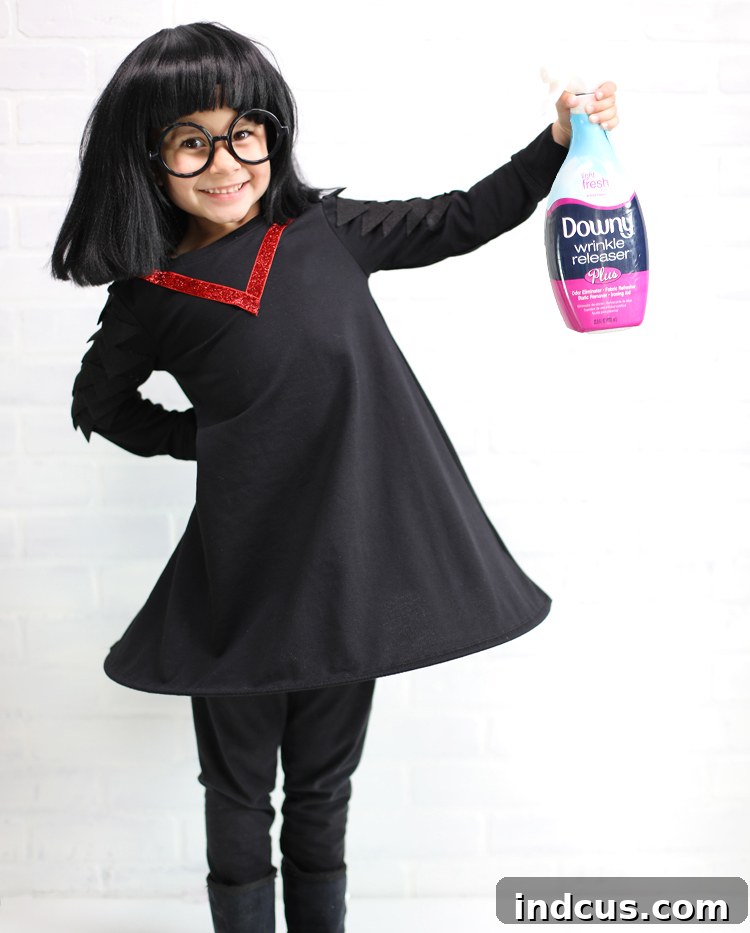
This no-sew Edna Mode costume isn’t just for Halloween! Its timeless appeal and iconic recognition make it perfect for various events:
- Halloween Parties: Stand out with a unique, handmade costume.
- Cosplay Conventions: A comfortable and distinctive choice for fans of The Incredibles.
- Themed Birthday Parties: Delight guests with your creative flair.
- School Dress-Up Days: A fun and appropriate character for children.
- Disney-Themed Events: Perfect for park visits or movie nights.
Whether for a child or an adult, the adaptability of this design ensures everyone can channel their inner fashion icon.
Conclusion: Embrace Your Inner Fashion Designer
And there you have it! A magnificent, no-sew Edna Mode costume that perfectly captures the essence of this beloved character. This DIY project proves that you don’t need expert sewing skills to create a show-stopping outfit. With just a few simple materials and some creative spirit, you can transform into the world’s most iconic superhero fashion designer. So, go forth and inspire, dahling! Your easy and stylish Edna Mode costume is sure to be a hit.
Looking for more costume inspiration from The Incredibles universe? Don’t stop at Edna! Check out my Syndrome Costume guide for another fantastic DIY idea to complete your Incredibles-themed ensemble.







