
Crafting the Perfect Magnetic Quiet Book: A DIY Guide for Engaging Little Minds
In a world increasingly dominated by screens, the charm of a handmade, interactive activity book remains timeless. Imagine a tool that not only captivates your child’s attention but also fosters creativity, fine motor skills, and quiet concentration – welcome to the wonderful world of the magnetic quiet book. This isn’t just any craft project; it’s a labor of love, a personalized educational toy, and a fantastic solution for keeping little ones happily occupied in various settings, from church services to long car rides or doctor’s appointments. While a project like this might feel like it’s never truly “done” as you continuously add new pages and refine existing ones, the journey of creation and the joy it brings are well worth the effort.
My own magnetic quiet book journey began with creating a special activity for my daughter to take to church. It quickly evolved into a dynamic collection of pages, some inspired by religious themes, others purely for fun and learning. The beauty of a DIY project like this lies in its incredible versatility: you can pull ideas from friends, discover endless inspiration online, or let your own imagination run wild. The result is a unique, personalized item that perfectly suits your child’s interests and developmental stage.
The core concept behind this particular quiet book involves sturdy pages made from cardstock, which are then painted with magnetic paint and laminated for durability. Each interactive piece features a small magnet affixed to its back, allowing children to move and rearrange elements freely on the magnetic pages. This innovative magnetic feature adds an extra layer of engagement, making the activities endlessly replayable and incredibly satisfying for young hands. Let’s delve deeper into how you can create your very own magnetic quiet book masterpiece.
The Appeal of a DIY Magnetic Quiet Book
In a world full of mass-produced toys, a handmade quiet book stands out. It’s more than just an activity; it’s a testament to thoughtful crafting and a deep understanding of a child’s needs. The magnetic element elevates the traditional quiet book experience, offering distinct advantages:
- Enhanced Engagement: The ability to move and reposition pieces adds an interactive, puzzle-like quality that keeps children engaged for longer periods.
- Durability and Reusability: Laminated pages and pieces, combined with the secure magnetic attachment, make the book incredibly durable and capable of withstanding countless play sessions.
- Portability: Magnetic pieces stay put even when the book is jostled, making it ideal for travel in cars, planes, or waiting rooms without the worry of losing small parts.
- Skill Development: Manipulating the magnetic pieces helps children develop crucial fine motor skills, hand-eye coordination, and problem-solving abilities.
- Unlimited Customization: From learning the alphabet and numbers to exploring Bible stories or practicing dressing up, the themes are only limited by your imagination. You can tailor every page to your child’s age, interests, and learning goals.
This level of personalization is what truly sets a DIY magnetic quiet book apart. You can incorporate characters, colors, and concepts that your child loves, making the learning and play experience deeply resonant and effective.
Materials You’ll Need for Your Magnetic Masterpiece
Creating a magnetic quiet book involves a few key materials that ensure both its functionality and longevity:
- Sturdy Cardstock: This forms the base of your pages. Opt for a heavy-weight cardstock (e.g., 65-110 lb) for maximum durability.
- Magnetic Paint: This is the secret ingredient! Magnetic paint contains tiny iron particles that allow magnets to stick to it. You’ll paint your cardstock pages with this.
- Laminator and Laminating Pouches: Essential for protecting both your pages and your individual magnetic pieces from wear and tear, spills, and sticky fingers. This step significantly extends the life of your book.
- Small, Self-Adhesive Magnets: Look for thin, flexible magnet sheets or small disc magnets with adhesive backing. These will be stuck to the back of your laminated activity pieces.
- Artwork: This can be printables downloaded from the internet (like the artwork mentioned below), hand-drawn illustrations, or even photos.
- Scissors or Craft Knife: For precise cutting of pages and activity pieces.
- Strong Adhesive (Optional): If your magnets aren’t self-adhesive, you’ll need a strong craft glue suitable for laminating film.
- Binding Method: Consider binder rings, ribbon, or a spiral binding to hold your pages together. For individual activity pages that can be swapped out, binder rings are excellent.
Before you begin, ensure you have a well-ventilated area for painting and enough space for your materials to dry.
Step-by-Step Guide to Crafting Your Magnetic Quiet Book
1. Design and Prepare Your Artwork
Start by brainstorming themes and activities. Will it be a religious story, an alphabet matching game, a dress-up doll, or a shape sorter? Once you have your ideas, prepare your artwork. Print out your chosen designs onto cardstock. If you’re drawing freehand, do so directly onto the cardstock for the pages and separate sheets for the magnetic pieces.
For pages like “Joseph’s Coat of Many Colors,” obtaining pre-designed artwork can save a lot of time and ensure a professional look. The artwork for this captivating page, and many other inspiring religious themes, can often be purchased from specialized resources such as LDSQUIETBOOKS, which offers a fantastic array of printable designs perfect for quiet books.
2. Apply Magnetic Paint to Pages
Once your main page artwork is ready, carefully paint the areas of the cardstock pages where you want the magnetic pieces to stick. Follow the manufacturer’s instructions for the magnetic paint, typically requiring multiple coats for optimal magnetic strength. Allow each coat to dry completely before applying the next. This step is crucial for the magnetic functionality of your book.
3. Laminate Your Pages
After the magnetic paint has thoroughly dried, laminate each page. This protects the paint, the artwork, and the cardstock itself, making the pages durable, wipeable, and kid-proof. Trim the laminated pages, leaving a small border around the edge to ensure the seal holds.
4. Create and Laminate Your Magnetic Pieces
Print or draw all the smaller, interactive elements for your pages (e.g., pieces of Joseph’s coat, different parts of the armor, letters, numbers, animal parts). Cut them out with precision. Then, laminate each of these individual pieces. This is vital for their durability, as these are the parts that will be handled the most. Once laminated, cut them out again, leaving a small edge.
5. Attach Magnets to Pieces
Affix a small magnet to the back of each laminated piece. If you’re using self-adhesive magnets, simply peel and stick. If not, use a strong, clear-drying adhesive to securely attach the magnets. Ensure the magnets are firmly attached and that no small parts could easily detach, especially if the book is for very young children.
6. Assemble Your Book
Finally, bind your pages together. Punch holes in your laminated pages and use binder rings or ribbon for an easily adjustable book. You can also opt for a spiral binding service for a more polished finish. The goal is to create a sturdy, accessible book that your child can easily flip through and interact with.
Inspiring Page Ideas and Themes
The beauty of a magnetic quiet book lies in its boundless thematic possibilities. Here are some ideas to get your creative juices flowing:
Religious Themes for Spiritual Growth
- Joseph’s Coat of Many Colors: A classic and visually rich story where children can dress Joseph in his colorful coat.
- The Armor of God: Based on Ephesians 6, this page allows children to assemble the different pieces of spiritual armor onto a figure. The artwork for this meaningful page, much like other religious themes, is often available for purchase from resources like LDSQUIETBOOKS. These pre-designed sets provide a wonderful foundation for teaching important scriptures.
- Noah’s Ark: Matching animals to the ark, or pairing them up.
- Nativity Scene: Assembling the figures of the first Christmas.
- Temple or Church Page: Placing family members or symbols onto a church or temple scene.
Educational Themes for Early Learning
- Alphabet Matching: Matching uppercase to lowercase letters, or letters to pictures.
- Number and Counting: Counting objects, matching numbers, or simple addition/subtraction.
- Shape Sorter: Matching geometric shapes to their outlines.
- Color Recognition: Matching colored objects or shapes.
- Weather Chart: Dressing a character for different weather conditions, or placing weather icons onto a background.
- Parts of the Body/Face: Assembling a face or body with magnetic pieces.
Fun and Imaginative Play Themes
- Dress-Up Dolls: Magnetic paper dolls with various outfits and accessories.
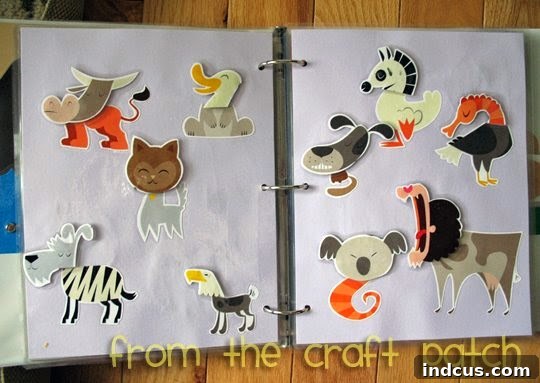
- Farm or Zoo Animals: Matching animals to their habitats or sounds.
- Vehicle Sort: Matching different modes of transportation.
- Build-a-Face/Monster: Mix-and-match eyes, noses, mouths for silly faces.
- Seasonal Trees: Adding leaves, flowers, fruits, or snow to a tree for different seasons.
Tips for Success and Durability
- Quality Materials Matter: Investing in good quality cardstock, magnetic paint, and laminating pouches will significantly impact the longevity and aesthetic appeal of your quiet book.
- Secure Magnets: Double-check that all magnets are firmly attached to the pieces. For very young children, ensure magnets are large enough not to be a choking hazard or are completely sealed within the laminated piece.
- Allow Drying Time: Be patient with the magnetic paint. Rushing the drying process can compromise its effectiveness.
- Involve Your Child: If age-appropriate, let your child help choose themes or even decorate some pages. This ownership will make the book even more special to them.
- Expand Over Time: Don’t feel pressured to create all the pages at once. A quiet book is an evolving project. Add new pages as your child grows and their interests change. This keeps the book fresh and engaging for years to come.
Embark on Your Magnetic Quiet Book Adventure!
Creating a magnetic quiet book is a truly rewarding endeavor. It’s a chance to pour your creativity into a meaningful gift that will provide countless hours of quiet, educational fun for a special child in your life. Whether it’s for church, travel, or simply a calm afternoon at home, this handmade activity book is sure to become a cherished item.
Ready for more inspiration and detailed instructions? Continue your journey with these additional resources:
Discover even more creative magnetic quiet book page ideas: Part II here and Part III here.
Learn the specifics about working with magnetic paint: Find a comprehensive guide on using magnetic paint here.







