
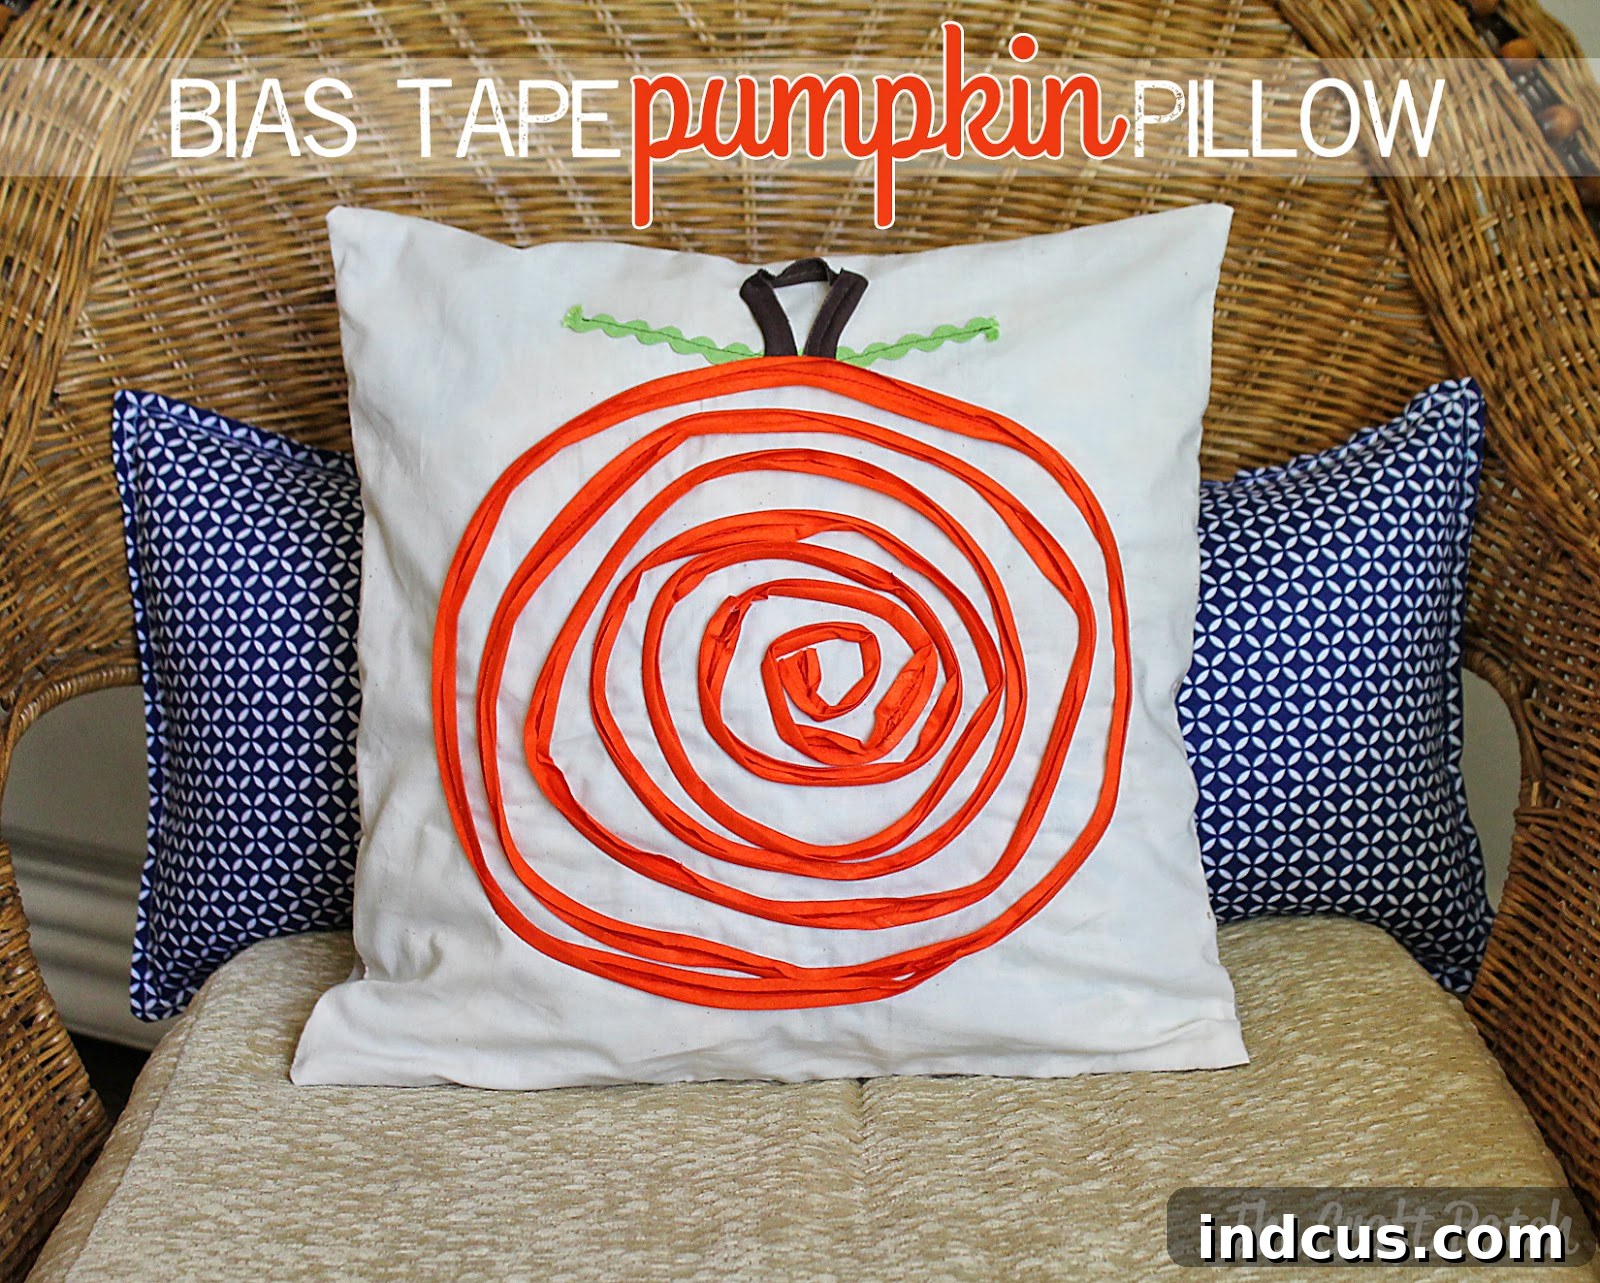
Crafting Cozy Autumn Vibes: A DIY Bias Tape Pumpkin Pillow Tutorial for Fall
There’s a magical shift in the air as summer fades and autumn makes its grand entrance. For many, this seasonal transition ignites a desire to infuse their living spaces with the warmth and charm that Fall embodies. While I haven’t always been one to meticulously swap out my throw pillows with the changing seasons, this year, a newfound excitement for autumn decor inspired me to dive into a creative project. There’s something inherently delightful about cozying up your home with handcrafted pieces that reflect the beauty outside, and what better way to celebrate Fall than with a charming, handmade pumpkin pillow?
This project isn’t just about making a pillow; it’s about embracing the spirit of the season, adding a personal touch to your home, and enjoying the therapeutic process of creation. The result is a unique, textural piece that brings immediate warmth and a festive autumnal feel to any room. Let’s embark on this journey to create your very own bias tape pumpkin pillow, a perfect addition to your fall decor ideas.
Why Embrace Seasonal Decor? The Allure of Fall in Your Home
The allure of fall is undeniable. From the crisp air and vibrant foliage to the comforting scent of pumpkin spice and warm apple cider, it’s a season that beckons us to slow down and savor life’s simple pleasures. Bringing seasonal elements into your home decor allows you to extend this feeling indoors, transforming your living space into a haven of comfort and style. Swapping out accessories like throw pillows, blankets, and candles is one of the easiest and most impactful ways to refresh your home’s aesthetic with each new season.
For autumn, this often means incorporating rich, earthy tones, natural textures, and motifs inspired by the harvest and holidays. A handmade DIY pumpkin pillow, like the one we’re crafting today, goes beyond mere decoration. It’s a statement of personal style, a testament to the joy of making, and a warm invitation for guests to feel at home. It’s also an excellent way to express your creativity and escape the mundane, adding a unique, artisanal flair that mass-produced items simply can’t replicate. The satisfaction of creating something beautiful with your own hands for your home is incredibly rewarding.
Materials You’ll Need: Gathering Your Crafting Essentials for a Cozy Autumn Pillow
Before we dive into the creative process, let’s gather all the essential materials. Having everything ready ensures a smooth and enjoyable crafting experience. This project uses readily available sewing supplies and a few decorative elements to bring your pumpkin to life.
- Fabric: A square piece of sturdy fabric (e.g., cotton duck, canvas, linen blend) in a neutral color like cream, off-white, or light gray. The size should be sufficient to cover your chosen pillow insert, plus seam allowances. For a standard 18×18 inch pillow, you’ll need approximately two 19×19 inch squares for the front and back.
- Bias Fold Tape: Orange, pre-folded bias tape. You’ll need a good amount, typically several yards, depending on the desired density of your pumpkin spiral and the size of your pillow. Wide bias tape (e.g., 1/2 inch double fold) works best for a prominent pumpkin texture.
- Brown Piping: A small length of brown piping (about 6-8 inches) for the pumpkin stem.
- Green Ric-Rac: A small piece of green ric-rac (about 10-12 inches) for the pumpkin leaves.
- Sewing Machine: Essential for stitching.
- Matching Thread: Orange thread for the bias tape, brown for the piping, green for the ric-rac, and a neutral thread for assembling the pillow cover.
- Fabric Scissors: For precise cutting.
- Pins: Optional, but helpful for securing fabric.
- Iron and Ironing Board: For pressing seams and preparing fabric.
- Measuring Tape or Ruler: For accurate measurements.
- Pillow Insert: The actual pillow you intend to cover.
Tips for Choosing Materials: Opt for a fabric that complements your existing decor. For the bias tape, various shades of orange are available, allowing you to create anything from a vibrant classic pumpkin to a more muted, rustic one. Don’t be afraid to experiment with different textures or even patterned bias tape for a unique look!
Step-by-Step Guide: Crafting Your Charming Bias Tape Pumpkin Pillow
Let’s get started on bringing your sewing project for fall to life. This process involves a bit of patience, especially with the bias tape, but the rewarding outcome is well worth the effort.
Preparing Your Fabric Base
Begin by cutting your chosen base fabric. For a standard pillow, you’ll typically need two squares for the front and back. Measure your pillow insert and add about 1 inch to each side for seam allowances. For instance, for an 18×18 inch insert, cut two 19×19 inch squares. If you’re creating an envelope-style back (which is recommended for easy removal), you’ll adjust the back pieces slightly.
The Art of the Bias Tape Spiral
Take one of your fabric squares – this will be the front of your pillow. The magic of the pumpkin design comes from the bias tape spiral. Locate the center of your fabric square. You can do this by folding it in half lengthwise and then widthwise, pressing gently to create a crease, or by using a fabric marker. Once you’ve established the center, grab your orange bias tape.
Open the bias tape so you can see its center fold line. This fold line will be your guide as you sew. Starting from the center of your fabric, begin sewing the bias tape down in a spiral motion, working outwards. I chose to freehand this part, which allows for a more organic and charmingly irregular pumpkin shape. If you prefer more precision, you could lightly mark concentric circles or a spiral with a washable fabric pen.
This step requires patience! You’ll need to stop frequently, lift your presser foot, and adjust the bias tape to get it to lay flat and turn smoothly, especially as the curves become tighter towards the center and wider towards the edges. The goal isn’t perfection; the slight unevenness and irregular shape of a hand-sewn spiral contribute significantly to the pillow’s unique texture and rustic charm. This tactile quality is what makes handmade items so special.
Continue sewing the spiral until it reaches the desired size for your pumpkin, leaving enough space around the edges for your pillow cover’s seam allowance. Take a moment to admire the emerging texture – it’s quite captivating!
Adding the Finishing Touches: Stem and Leaves
Once your bias tape pumpkin spiral is complete, it’s time to add the charming details that truly bring it to life: the stem and leaves.
- The Stem: Take your brown piping. Position it at the top center of your bias tape pumpkin, curving it slightly to mimic a natural pumpkin stem. Pin it in place and carefully stitch it down, sewing close to the edge of the piping. You can use a zipper foot on your sewing machine to get a closer stitch if desired.
- The Leaves: For the leaves, use your green ric-rac. Cut two small pieces, each about 4-6 inches long. Fold or shape them into leaf-like curves and position them near the base of the brown stem. Pin them in place and stitch them down. You can overlap them slightly or position them facing opposite directions for a natural look.
These small additions make a huge difference, transforming a simple spiral into an unmistakable autumnal pumpkin. Consider adding other embellishments if you like, such as a small embroidered swirl for a tendril or even a tiny fabric button for extra detail.
Assembling Your Pillow Cover
The final step is to sew your decorated pumpkin front into a pillow cover. The easiest and most practical method is to create an envelope-style back. This allows you to easily remove the cover for cleaning or for switching out your seasonal decor when Fall comes to an end.
For an envelope back, you’ll need two rectangular pieces of fabric for the back, each roughly the same width as your front panel but about two-thirds of its height. Hem one long edge of each back piece. Then, lay your pumpkin front piece right side up. Place one back piece on top, right side down, aligning its unhemmed edge with the top of the front piece. Place the second back piece on top, right side down, aligning its unhemmed edge with the bottom of the front piece. The hemmed edges of the two back pieces will overlap in the middle. Pin all layers together around the perimeter.
Sew around all four edges of the pinned square using a 1/2-inch seam allowance. Be sure to backstitch at the beginning and end, and especially where the back pieces overlap, for added durability. Clip the corners to reduce bulk. Turn the pillow cover right side out through the envelope opening, gently pushing out the corners. Give it a good press with an iron to create crisp edges. Finally, insert your pillow form, and your beautiful handmade bias tape pumpkin pillow is complete!
Personalizing Your Pumpkin Pillow: Beyond the Basics
While the classic orange pumpkin is universally loved, don’t hesitate to personalize your design to perfectly match your home’s aesthetic. Here are a few ideas to inspire you:
- Color Variations: Experiment with different bias tape colors. White, cream, or even subtle teal bias tape can create chic, modern pumpkin designs. Use a silver or gold piping for an elegant touch.
- Different Embellishments: Instead of ric-rac, consider using green felt cut into leaf shapes, or even embroidering small vine details. Small buttons, beads, or fabric scraps can add unique accents.
- Size and Shape: Make a set of varying-sized pumpkin pillows for a dynamic display on your sofa or entryway bench.
- Fabric Choices: While a sturdy cotton is ideal for the base, consider experimenting with burlap for a rustic feel, or even a soft flannel for extra coziness.
This project is incredibly versatile, allowing you to adapt it to your personal style and existing autumn home decor. The charm of DIY lies in the ability to make something truly your own.
The Joy of DIY: Benefits of Handmade Home Decor
Engaging in DIY home decor projects, especially seasonal ones, offers a plethora of benefits beyond simply having a new item for your home. It’s a creative outlet that allows for personal expression and results in truly unique pieces that can’t be found in stores. Handmade items carry a story and a warmth that mass-produced goods often lack.
Moreover, crafting can be a wonderfully therapeutic activity, offering a chance to unwind, focus your mind, and experience the satisfaction of bringing an idea to fruition. It’s also often a more cost-effective way to decorate, allowing you to achieve a high-end look without the hefty price tag. Plus, there’s an eco-friendly aspect to DIY, as you can often repurpose materials or use sustainable options.
Embrace the Season, One Stitch at a Time
Creating this bias tape pumpkin pillow has been a delightful way to welcome the autumn season into my home. The process, though requiring a touch of patience, results in a truly charming and unique piece of handmade fall decor that adds warmth and personality to any space. It’s a testament to the fact that even small, handcrafted details can significantly enhance the ambiance of your home.
I encourage you to gather your materials, fire up your sewing machine, and embark on this rewarding project. Don’t worry about achieving absolute perfection; the beauty lies in the handmade quality and the love stitched into every curve of the pumpkin. As I continue to craft a few more seasonal pillows, I look forward to showcasing the entire collection soon, transforming my living room into an inviting autumn sanctuary. Happy crafting!







