
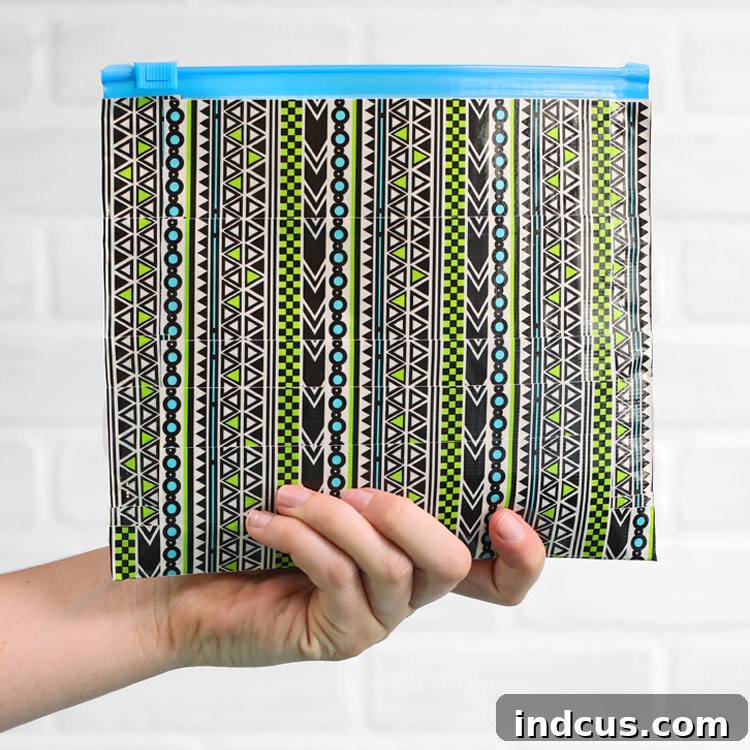
Craft Your Own Durable & Waterproof Zippered Pouch: The Ultimate Duct Tape DIY Project!
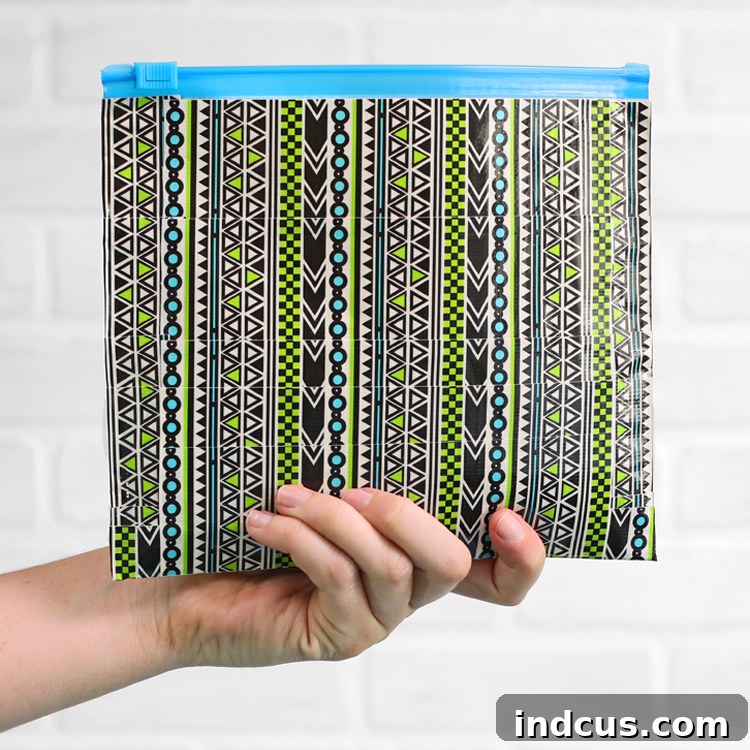
Unleash your creativity and practicality with this incredibly simple yet highly functional DIY project: a waterproof zippered pouch crafted entirely from duct tape and a plastic Ziploc bag! This ingenious hack transforms everyday household items into a sturdy, adorable, and water-resistant organizer perfect for countless uses. Whether you’re a seasoned crafter or just looking for a fun, quick activity, this project is accessible to everyone, including kids.
Imagine having a customizable pouch that keeps your essentials dry and organized, no matter where your adventures take you. We recently made these fantastic pouches at a family reunion, and the ease of the craft meant even the youngest participants could complete them with minimal assistance. This makes it an ideal activity for summer camps, scouting events, school projects, or simply a productive and enjoyable afternoon at home. The resulting bag isn’t just a pretty face; it’s genuinely robust, appealing to the eye, and completely waterproof, making it an absolute must-have for travel toiletries, beach trips, or protecting electronics from splashes.
Forget flimsy plastic bags or expensive store-bought organizers. With this project, you’ll create a personalized, durable solution that stands up to wear and tear. The versatility of design, thanks to the vast array of patterned duct tapes available today, means your pouch can reflect your unique style or be tailored for specific purposes. Get ready to dive into a craft that’s not only incredibly satisfying to make but also genuinely useful in your daily life.
Why Every Home Needs a DIY Duct Tape Pouch
The appeal of a homemade duct tape pouch goes far beyond just being a fun craft project. Its inherent qualities make it an indispensable item for organization and protection. Firstly, its waterproof nature is a game-changer. Think about carrying your phone, wallet, or keys to the pool or beach – a duct tape pouch offers reliable protection against splashes and sand, keeping your valuables safe and dry. For travelers, it becomes an essential toiletry bag, preventing shampoo leaks from ruining your clothes in your suitcase.
Secondly, durability is a key advantage. Duct tape is renowned for its strength and resilience. When layered correctly, it creates a surprisingly robust fabric that can withstand daily use, jostling in bags, and even minor abrasions. Unlike fabric pouches that might fray or tear, a duct tape pouch maintains its integrity, offering long-lasting utility. This sturdiness also means it can hold heavier items without stretching or breaking down.
Thirdly, the sheer customizability is a major draw. With an ever-expanding universe of duct tape patterns, colors, and even textures, the design possibilities are endless. You can create a pouch that perfectly matches your personality, coordinates with your luggage, or features themes for specific holidays or interests. This personal touch makes each pouch unique and a joy to use or gift. Lastly, the incredibly low cost of materials makes this an accessible project for everyone, allowing you to create multiple pouches without breaking the bank.
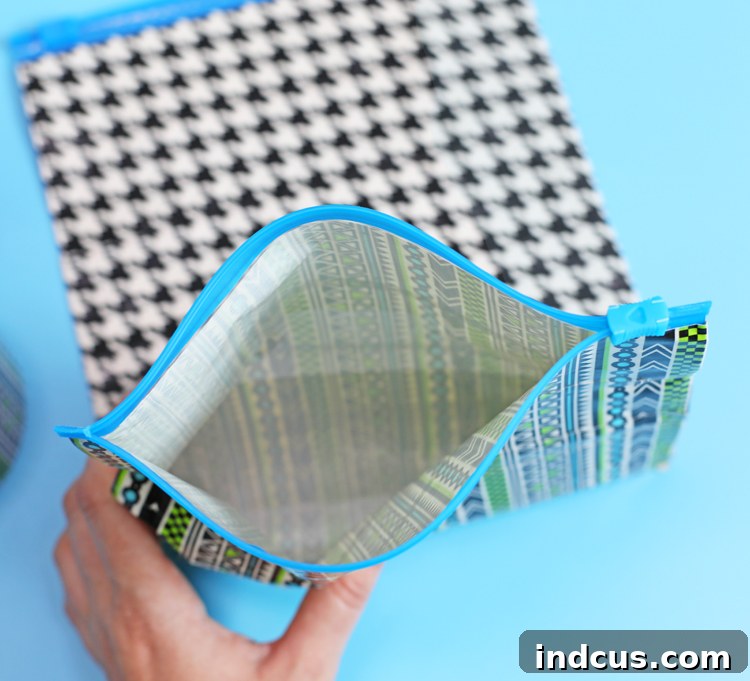
Essential Supplies for Your Duct Tape Pouch
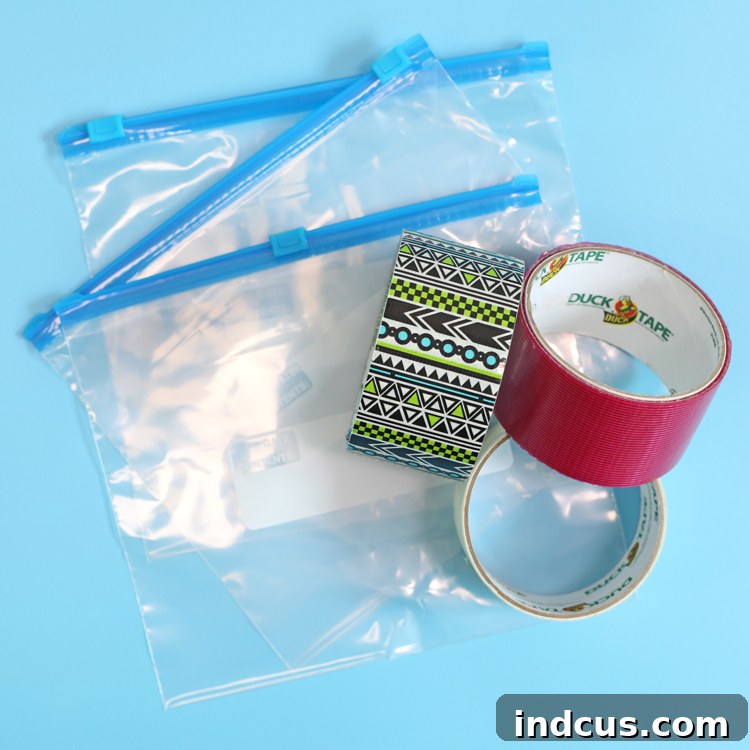
One of the most appealing aspects of this craft is how few supplies you need. Forget long shopping lists or expensive specialty items; you likely already have most of what’s required in your home! For this project, you’ll only need two primary materials, which keeps the cost down and the crafting quick and easy. These simple components combine to create a remarkably sophisticated and useful item.
- Sliding Zippered Plastic Bags: Any size will work for this project, from small sandwich bags to larger gallon-sized storage bags. The key is the “sliding zipper” mechanism, which is much more robust and easier to open and close once covered with tape compared to traditional press-and-seal Ziploc bags. The plastic bag forms the core structure of your pouch, providing the essential zippered closure and an initial waterproof layer. Consider the intended use of your pouch when selecting the bag size – a sandwich bag might be perfect for cash and cards, while a quart or gallon bag could hold toiletries or a tablet.
- Patterned Duct Tape: This is where the real fun begins! The variety of patterned duct tape available today is truly astonishing. From polka dots and stripes to animal prints, floral designs, geometric shapes, and even glitter tapes, the options are limitless. Choose a design that speaks to you or matches the personality of the recipient if you’re making it as a gift. The duct tape not only provides the vibrant aesthetic but also adds significant durability and the final waterproof seal to your pouch. You’ll need at least one roll, but having a few different patterns can allow for creative combinations and accents. (Note: As an Amazon Associate, I earn from qualifying purchases through affiliate links like the one above.)
In addition to these two main items, you’ll find a pair of sharp scissors and a flat, clean work surface helpful for a smoother crafting experience. That’s it! Gather these simple supplies, and you’re ready to create a truly unique and practical accessory.
Getting Started: Preparing for Your Craft Session
Before you dive into the hands-on fun of making your duct tape pouch, it’s always a good idea to take a few moments to prepare your workspace and mentally walk through the steps. While this craft is genuinely straightforward and kid-friendly, a little preparation can ensure a seamless and enjoyable experience for everyone involved. Don’t be intimidated by written instructions; sometimes they make simple tasks seem more complex than they are. Rest assured, this project is very intuitive once you start!
First, clear a flat, clean surface where you can comfortably work. A kitchen table, craft desk, or even a section of the floor will do. Lay down a protective covering if you’re concerned about tape residue, though duct tape generally peels cleanly off most surfaces. Gather your chosen sliding zippered plastic bag, your favorite patterned duct tape, and a good pair of sharp scissors. Having everything within arm’s reach prevents interruptions and helps maintain your crafting flow.
If you prefer visual learning or simply want to see the process in action, remember that a detailed video tutorial is available further down this page. Watching it once before you start can provide immense clarity and boost your confidence in tackling each step. Whether you follow the written guide, the video, or a combination of both, the goal is to have fun and create something wonderful!
Step-by-Step Guide: Crafting Your Durable Duct Tape Pouch
Creating your waterproof duct tape pouch is a series of simple, repetitive steps that build upon each other. Precision and smooth application are key to a professional-looking finish. Follow these detailed instructions, and you’ll have your very own custom pouch in no time.
Step 1: Measure and Cut Your First Tape Strip
Begin by unrolling a strip of your chosen duct tape. You’ll want this first piece to be significantly longer than the width of your plastic zippered bag. A good rule of thumb is to cut a piece of tape that is at least 4 inches longer than the bag’s width. For example, if your bag is 8 inches wide, cut a tape strip approximately 12 inches long. This extra length will be used to wrap around the sides of the bag, creating neat, finished edges. Use your scissors to make a clean cut.
Step 2: Secure the Top Edge of the Bag
Carefully line up this first, long strip of duct tape just below the plastic zipper mechanism of your bag. You want the top edge of the tape to snuggle right against the bottom edge of the slider zipper, but not obstruct its movement. Ensure the tape is centered horizontally on the bag, so you have roughly 2 inches of tape overhanging on each side. Press the tape down firmly and smoothly onto one side of the plastic bag, working from the center outwards to eliminate any air bubbles or wrinkles.
Step 3: Fold and Cover the Overhanging Sides
Now, flip the plastic bag over to the other side. You’ll see the sticky 2-inch sections of duct tape overhanging on both the left and right sides. Carefully fold these overhanging pieces of tape inwards, pressing them firmly onto the back of the bag. These folds will create sealed, clean side edges for your pouch. Next, cut a smaller, separate piece of duct tape – just long enough to cover the back side of the bag’s top edge where you folded the tape. Apply this piece smoothly to cover the exposed sticky areas and complete the top edge’s coverage on the back.
Step 4: Continue Covering the Bag with Tape
Repeat the process of applying tape strips, working your way down the bag. Each subsequent strip of duct tape should slightly overlap the previous one (by about 1/8 to 1/4 inch) to ensure full coverage and a waterproof seal. Continue applying strips to the front, then flip the bag, fold the side overhangs, and apply a covering strip to the back. Maintain the 2-inch overhang on the sides for each strip until you reach the very bottom of the bag. This consistent layering builds up the durability and structure of your pouch.
Step 5: Addressing the Bottom Edge – Part One
When you get to the very last strip of duct tape, pay close attention to its placement. Apply this final strip to the front of the bag, but make sure that approximately half of its width hangs off the bottom edge of the plastic bag. For example, if your tape is 2 inches wide, about 1 inch should extend beyond the plastic bag’s bottom edge. This overhang is crucial for creating a neatly sealed bottom for your pouch.
Step 6: Creating the Bottom Flaps
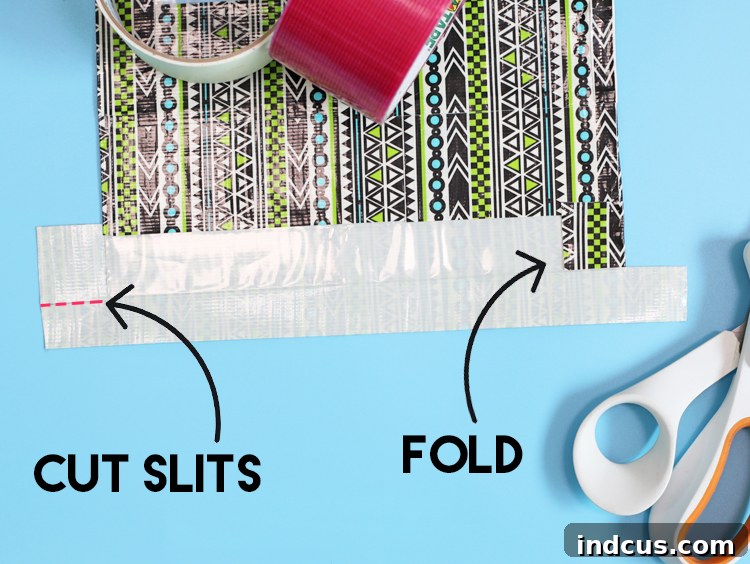
With the last strip of tape applied and half of it hanging off the bottom, it’s time to create the bottom seal. Carefully cut several small slits into the overhanging portion of the tape, perpendicular to the bag’s bottom edge. These slits should be about 1/2 to 1 inch apart. This will create several small “flaps” of tape. Now, fold these individual flaps upwards and inwards, pressing them firmly onto the bottom edge of the plastic bag. This technique allows the tape to conform smoothly to the curve of the bag’s bottom, preventing wrinkles and creating a clean, sealed edge.
Step 7: Folding Up the Bottom
Once all the small flaps are folded up and pressed into place, carefully fold the entire bottom overhanging piece of duct tape (the half that initially hung off the bag) upwards onto the back of the bag. Press it down firmly to secure it. You’ll notice some small excess flaps or corners of tape on the sides where this bottom piece meets the side tape. Use your scissors to carefully trim off these excess flaps, creating a clean and straight bottom edge for your pouch. This step ensures a polished and professional finish.
Step 8: Finishing the Back Bottom Edge
Finally, repeat the entire bottom sealing process from Step 5, 6, and 7, but this time on the back side of the bag. Apply a final strip of tape to the back, ensuring half hangs off the bottom. Cut slits, fold up the flaps, then fold the main bottom piece upwards and trim any excess. This ensures that the entire plastic bag, front and back, is fully encased in duct tape, creating a completely waterproof, sturdy, and beautifully finished zippered pouch. And just like that, you’ve created a fantastic and functional item!
Tips for a Perfect & Long-Lasting Pouch
While the basic steps are simple, a few extra tips can elevate your duct tape pouch from good to great, ensuring it’s not only visually appealing but also maximally durable and functional. Incorporating these practices will help you achieve a professional-looking finish and extend the life of your handmade organizer.
- Smooth Out Air Bubbles: As you apply each strip of duct tape, use a flat edge (like a ruler, a credit card, or even your fingernail) to smooth out any air bubbles or wrinkles. This not only makes the pouch look neater but also ensures a stronger, more waterproof seal.
- Precision with Scissors: Invest in a good pair of sharp scissors dedicated to crafting. Duct tape can dull scissors quickly, so having a designated pair will make cutting much easier and cleaner, resulting in crisp edges.
- Experiment with Designs: Don’t limit yourself to a single pattern or color! Use different tapes for the front and back, create stripes, or even cut out shapes from one tape to layer onto another. The creative possibilities are endless, allowing you to personalize your pouch truly.
- Consider Bag Size: Think about what you want to store in your pouch before choosing the Ziploc bag size. Smaller pouches are great for coins, keys, or cards, while larger ones can hold tablets, books, or multiple toiletries.
- Double Layer for Extra Durability: For items that might experience more wear and tear, consider adding a second layer of duct tape over the first. This significantly increases the pouch’s strength and resilience, though it will make it slightly stiffer.
- Clean Your Workspace: Duct tape is sticky! Keep your workspace clean by regularly removing small bits of tape to prevent them from adhering to your project or tools.
- Secure the Zipper: When applying tape near the zipper, ensure it doesn’t obstruct the slider’s movement. A small gap, just enough for the slider to move freely, is essential.
Creative Uses for Your Waterproof Duct Tape Pouch
Once you’ve mastered the art of making these fantastic pouches, you’ll discover they are incredibly versatile and can be adapted for numerous practical applications. Their waterproof and durable nature makes them suitable for situations where traditional fabric pouches might fall short. Here are just a few ideas to inspire you:
- Travel Toiletries Bag: The classic use! Keep your shampoo, conditioner, and lotions secure and prevent leaks from ruining your clothes in your suitcase.
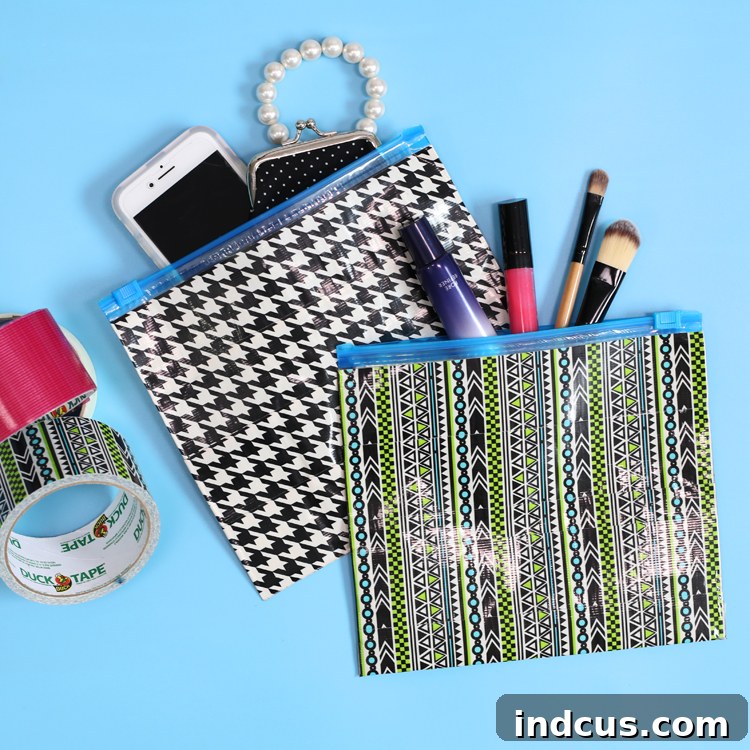
- Beach or Pool Essentials: Protect your phone, keys, sunglasses, and sunscreen from sand and water while enjoying a day by the water. My own bag is perfect for keeping my phone dry when I head to the pool!
- Kids’ Craft or School Supplies: Organize crayons, markers, small toys, or pencils in a personalized pouch that can withstand spills and rough handling.
- First Aid Kit: Assemble a mini first-aid kit for your car, hiking bag, or home, ensuring bandages and antiseptic wipes stay dry and clean.
- Snack Bag (for packaged snacks): While not food-safe for direct contact, it’s perfect for carrying packaged snacks like granola bars, fruit snacks, or chips, keeping them protected and organized.
- Small Tool Organizer: Keep small screwdrivers, wrenches, or other hardware items organized in your toolbox or car trunk.
- Gift Packaging: Instead of wrapping paper, present a small gift inside a custom-made duct tape pouch for an extra thoughtful and reusable touch.
- Cable and Charger Organizer: Tame the tangle of electronic cables, headphones, and chargers in your bag or drawer.
- Emergency Car Kit: Store important documents, a small flashlight, or other emergency items in a waterproof pouch in your glove compartment.
- Coin Purse or Wallet: A smaller pouch can serve as a quirky and durable coin purse or a minimalist wallet for essential cards and cash.
The possibilities are truly endless, limited only by your imagination and the size of your plastic bag!
Frequently Asked Questions (FAQs) About Duct Tape Pouches
As you embark on your duct tape crafting journey, you might have a few questions. Here are answers to some of the most common queries:
Q: Is the duct tape pouch truly waterproof?
A: Yes, when constructed correctly with overlapping tape strips and fully sealed edges, the duct tape pouch is highly waterproof. The layers of duct tape and the inner plastic bag combine to create an excellent barrier against moisture. It’s perfect for protecting contents from splashes, rain, or even brief submersion.
Q: How long does a duct tape pouch typically last?
A: The lifespan of your pouch largely depends on its usage and construction. With proper care and smooth application, these pouches are surprisingly durable and can last for months, even years, of regular use. Duct tape is designed for strength, and when layered, it creates a robust material. Avoid sharp objects inside that could puncture the tape, and it will serve you well.
Q: Can I wash my duct tape pouch if it gets dirty?
A: Duct tape pouches are not suitable for machine washing or submerging in water for cleaning (unless you are only cleaning the outside). Instead, simply wipe the exterior with a damp cloth and mild soap to remove any dirt or grime. For tougher spots, a small amount of rubbing alcohol on a cloth can help, but test it on an inconspicuous area first.
Q: What if I only have regular press-and-seal Ziploc bags, not the sliding zipper type?
A: While the sliding zippered bags are recommended because their mechanism is easier to operate once covered with tape, you can still use regular press-and-seal Ziploc bags. However, it might be a bit trickier to open and close the bag after it’s fully taped. If using a press-and-seal bag, make sure to leave a very small gap of exposed plastic above the seal to make it easier to grip and open.
Q: Can I make different shapes or sizes?
A: Absolutely! The beauty of this craft is its adaptability. You can use any size of Ziploc bag, from tiny snack bags to large gallon bags, to create pouches of varying dimensions. While the tutorial focuses on a rectangular pouch, you could theoretically experiment with bags that have different initial shapes, though sealing the edges might become more complex.
Watch the Video Tutorial for Visual Guidance
We understand that sometimes seeing is believing, especially when it comes to crafting. If you prefer to follow along visually or need a clearer understanding of any particular step, a comprehensive video tutorial is available. This video will walk you through each stage of the pouch-making process, offering real-time demonstrations and helpful close-ups to ensure your success. Scroll down to find the embedded video and watch how quickly and easily these fun and functional duct tape zippered pouches come to life!
Unleash Your Inner Crafter: Start Your Duct Tape Pouch Today!
There you have it – a complete guide to creating your very own cute, sturdy, and super useful waterproof zippered pouch from just duct tape and a Ziploc bag. This project is a testament to the power of simple materials and a little creativity. Whether you’re looking for a practical travel accessory, a unique gift, or a fun activity for a rainy afternoon, these pouches deliver on all fronts. They are incredibly satisfying to make, surprisingly durable, and endlessly customizable to fit your style and needs. So grab your supplies, pick out your favorite duct tape patterns, and start crafting. You’ll be amazed at what you can create!
Don’t just take our word for it; try it yourself and experience the joy of turning ordinary items into something extraordinary. Share your creations, experiment with different designs, and discover all the wonderful ways these duct tape pouches can simplify and brighten your life. Happy crafting!







