
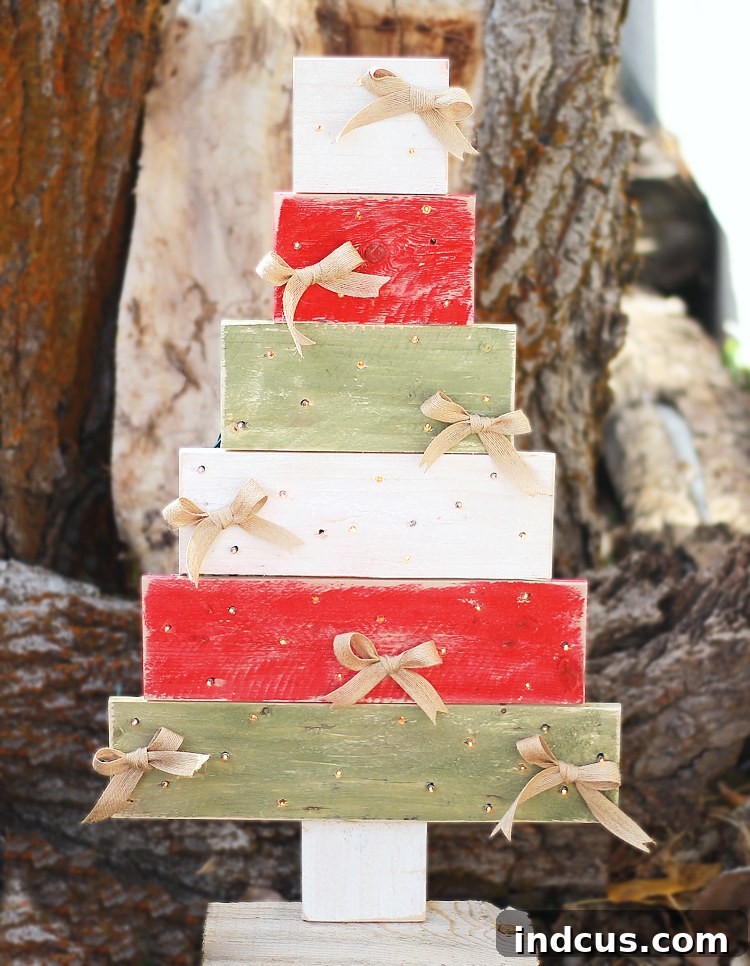
The allure of handmade, rustic decor for the holidays is undeniable. There’s something truly special about a piece that carries the charm and warmth of craftsmanship, especially when it comes to Christmas decorations. Pallet wood projects, in particular, exude a unique blend of reclaimed beauty and cozy imperfection, making them highly sought after for adding a touch of farmhouse chic or vintage flair to any home. However, for many DIY enthusiasts, the idea of sourcing pallet wood, meticulously cutting it to size, and then assembling a complex structure can feel daunting and time-consuming amidst the already bustling holiday season. It’s a common dilemma: love the look, but not the labor.
This is precisely why I was absolutely thrilled to discover a fantastic shortcut to achieving that beloved pallet wood aesthetic without all the preliminary effort. My excitement peaked when I found ready-made pallet wood Christmas trees that arrived pre-assembled and simply awaited their artistic transformation. This ingenious solution allows you to bypass the most challenging steps of pallet breakdown and construction, jumping straight into the fun part: decorating! For my own project, I embraced a playful retro Christmas palette, adorning the tree with vibrant, cheerful colors and a dazzling array of lights. The result? It has instantly become one of my absolute favorite festive pieces this year, radiating a joyful glow and a truly unique charm that catches every eye.
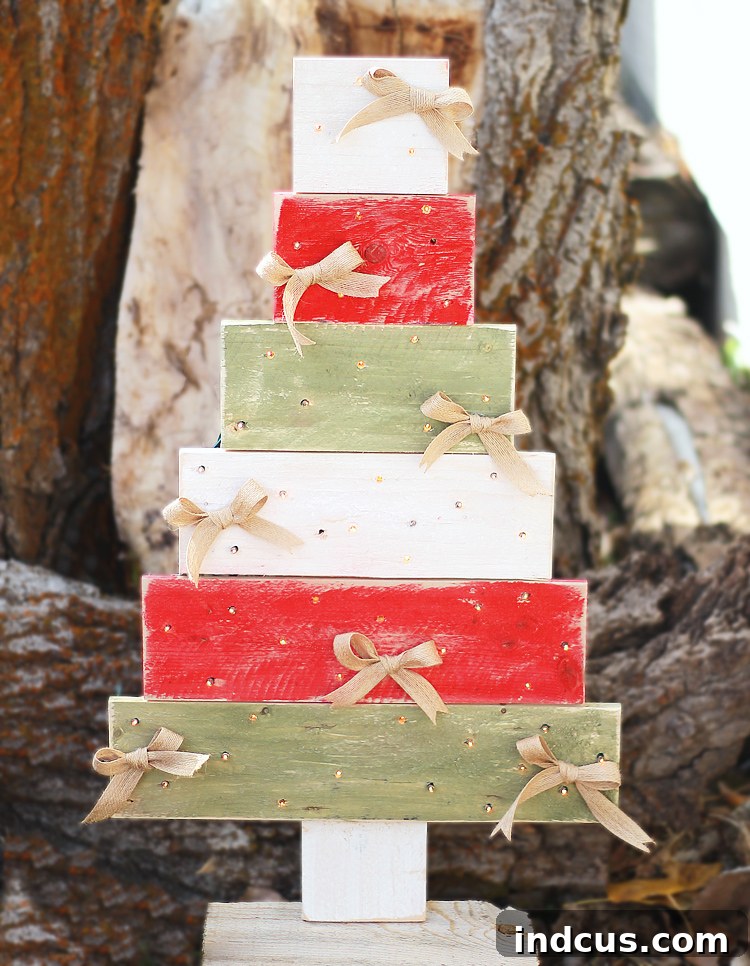
Craft Your Own Dazzling Pallet Wood Christmas Tree: An Easy DIY Guide
Embrace Rustic Charm with a Simple DIY Christmas Decoration
Imagine a holiday decoration that perfectly blends rustic elegance with personalized flair. Our DIY pallet wood Christmas tree project offers just that! This guide provides a straightforward path to creating a stunning, illuminated wooden tree that will captivate visitors and add a heartfelt touch to your seasonal decor. Forget the complexities of traditional pallet projects; we’re focusing on simplicity, creativity, and maximum festive impact.
What You’ll Need to Get Started
Creating your very own festive pallet wood Christmas tree is simpler than you might imagine, especially when starting with a pre-made base. The beauty of this project lies in its minimal material requirements and the opportunity for boundless creativity. Here’s a detailed list of what you’ll need to gather:
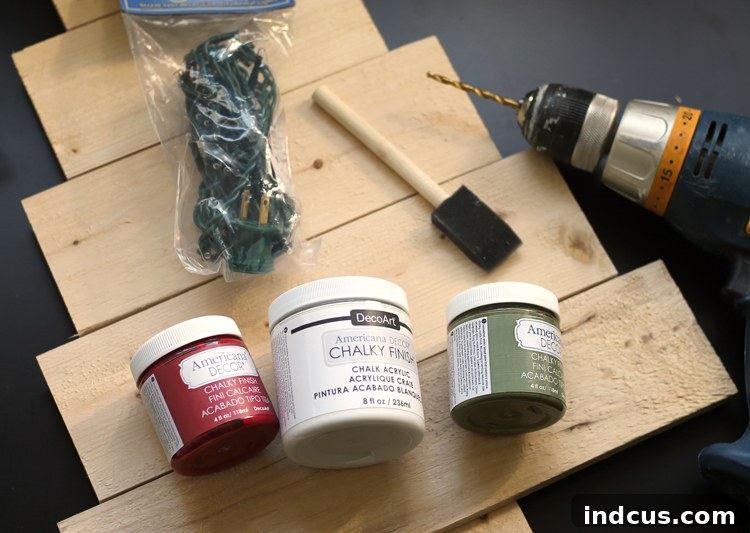
Essential Materials:
- Rice Lights (50 count): Often referred to as fairy lights, these small, delicate lights are perfect for creating a soft, magical glow. A 50-count strand is ideal for a medium-sized tree, providing ample illumination without overwhelming the design. Consider warm white for a classic look, or multi-colored for a playful retro vibe.
- Craft Paint: Acrylic craft paints are versatile, quick-drying, and available in an endless array of colors. You can choose a single shade for a monochromatic look, or select several complementary colors to paint each section of your tree uniquely. Chalk paint is another excellent option for achieving a matte, distressed finish.
- Paint Brushes: A variety of brush sizes will be helpful. A wider flat brush is great for covering larger areas quickly, while smaller detail brushes can be used for edges or intricate designs if you decide to add them.
- Drill & Drill Bits: A standard electric drill is necessary for creating the holes for your lights. Make sure you have a set of drill bits of varying sizes to find the perfect fit for your chosen string lights. Safety glasses are also highly recommended when operating a drill.
Sourcing Your Unfinished Wooden Tree Base
The original wooden pallet tree featured in these photos was a product from Darice, a company that is unfortunately no longer in business. However, the good news is that the concept of an unfinished wooden tree base has become quite popular, and there are many excellent alternatives available today. Opting for a pre-made wooden tree base significantly streamlines the project, allowing you to focus purely on the decorative aspects rather than the initial construction. These unfinished trees often come in various shapes and sizes, mimicking the rustic, slatted look of pallet wood, or offering a sleek, modern silhouette ready for customization. Below are a few fantastic options you could consider for your project, ensuring you find the perfect foundation for your personalized Christmas decoration:
- Wood Slat Tree
- Unfinished Wood Slat Trees
- Standing Triangle Wood Tree
Step-by-Step Guide: Crafting Your Illuminated Wooden Tree
Now that you have all your materials, let’s dive into the creative process. These instructions are designed to be simple and easy to follow, ensuring a rewarding DIY experience.
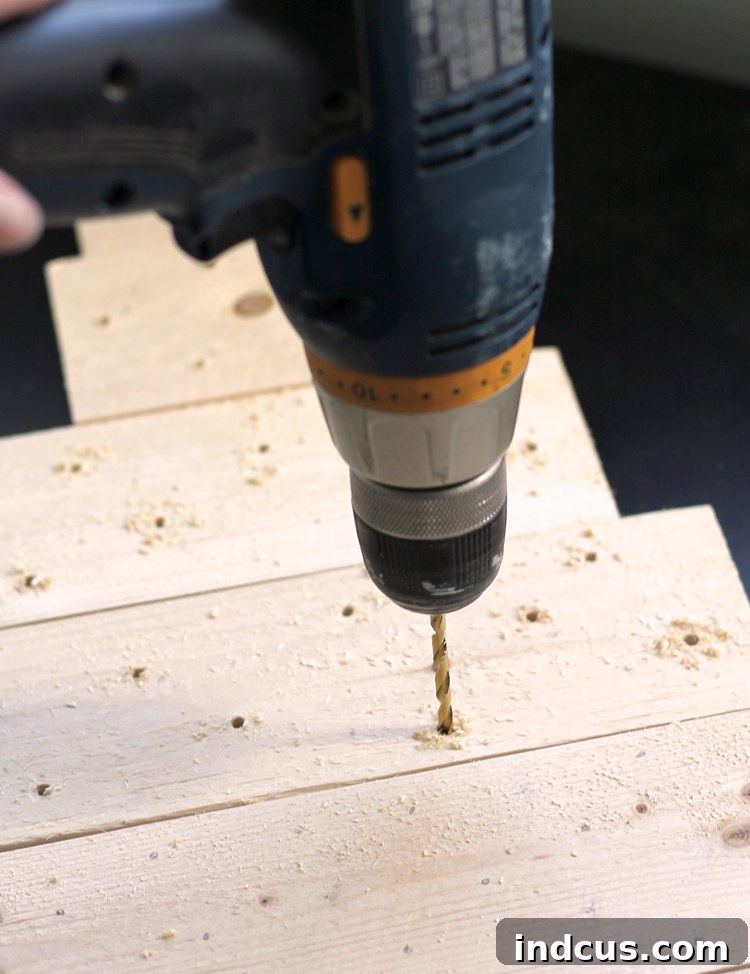
1. Precisely Drill Holes for Your Lights
This initial step is crucial for the successful integration of your lights. Begin by selecting a scrap piece of wood that is similar in thickness to your pallet wood tree. This will serve as your testing ground for drill bits. It’s essential to find the right size drill bit – one that allows the individual bulbs of your rice lights to fit snugly, but not so loosely that they fall out, and not so tightly that you damage the wire or the wood. Test several bits until you achieve the perfect fit. Once you’ve identified the correct bit, carefully mark 50 spots on your pallet wood tree where you intend to place each light. When planning your spacing, keep in mind the length of the cord between each light. It only stretches so far, so strategic placement is key to ensuring an even distribution of light without any taut or dangling wires. Consider a zigzag pattern or a random cluster for a more organic look. Always wear appropriate safety goggles when drilling to protect your eyes, and if possible, clamp your wooden tree securely to a workbench to prevent it from shifting during drilling.
2. Personalize Your Tree with Paint
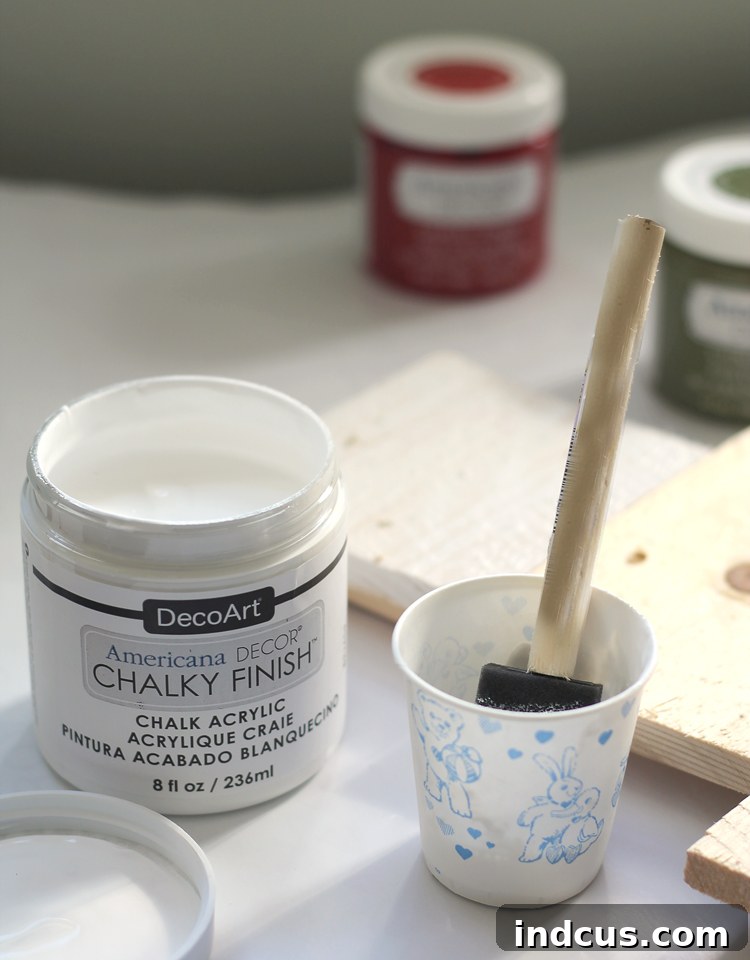
This is where your tree truly begins to come to life! For my project, I envisioned a charming, chippy, and weathered finish that evokes a sense of vintage nostalgia. To achieve this rustic effect, I slightly watered down my craft paint. This technique allows for a more translucent application, where the wood grain can subtly show through, and makes the paint easier to distress later. I chose to paint each section of the tree a different, playful retro color, creating a vibrant and cheerful display. After applying the paint and allowing each section to dry completely – which is vital to prevent smudging or mixing of colors – I took a fine-grit sandpaper and lightly sanded the entire piece. This gentle sanding not only enhances the weathered look by exposing small flecks of natural wood underneath but also adds incredible depth and dimension to the painted surface. If you prefer a more modern aesthetic, you could opt for solid, opaque coats of paint in a single color or an ombre gradient. Chalk paints are excellent for a matte, distressed finish, while acrylics offer a broader color spectrum. Don’t be afraid to experiment with different techniques like dry brushing or stenciling to add further unique touches.
3. Carefully String Your Lights
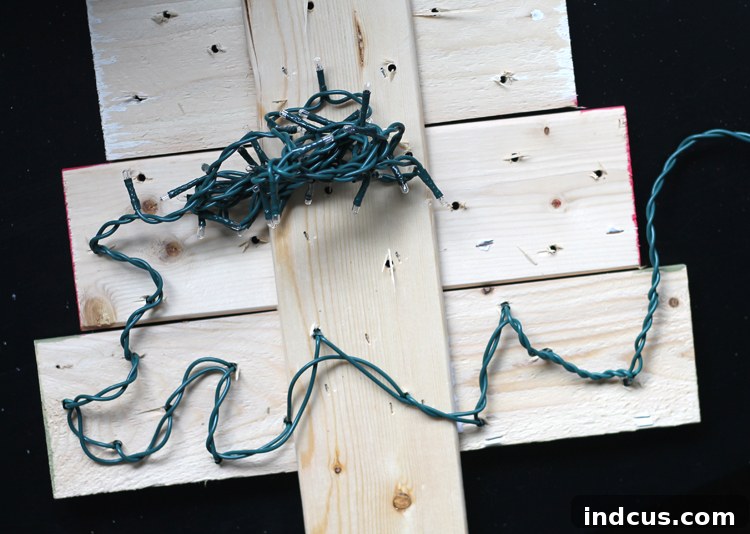
With the paint dry and your holes drilled, it’s time to illuminate your creation. Begin stringing your rice lights by selecting a starting point, perhaps a corner or the bottom of the tree, and pushing the first light bulb through its designated hole. This part can be a little intricate, especially with smaller lights and tight spacing. The key is to plan your route in advance. Before pushing all the lights through, mentally trace or even lightly mark the path your cord will take to reach each hole. This foresight helps prevent the cord from getting tangled, stretched too tightly, or running out of length before you’ve reached all your marked spots. Push each light bulb firmly but gently through its hole, ensuring the bulb protrudes slightly on the front side of the tree while the wiring remains neatly tucked away on the back. Work systematically, making sure the cord is taut enough to be tidy but not so tight that it strains the wires or pulls the lights out of their holes. Once all 50 lights are in place, step back and admire the potential glow!
The Finished Masterpiece: A Delightful Holiday Decoration
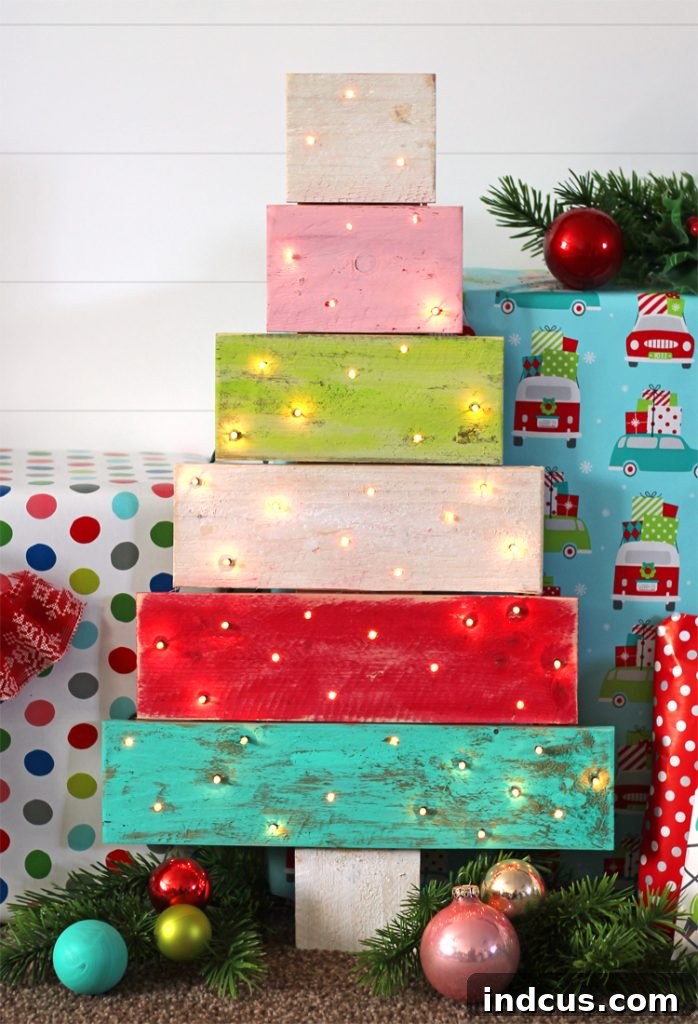
And just like that, with a few simple steps, you’ve transformed a plain wooden form into a captivating Christmas decoration! Isn’t it incredibly rewarding to create something so charming and personal with your own hands? The process is not only enjoyable but also yields a truly unique piece that reflects your individual style and festive spirit.
Beyond the Day: A Magical Nighttime Glow
While this delightful pallet wood Christmas tree certainly makes a cute statement during the day with its vibrant colors and rustic texture, its true magic truly comes alive at night. As dusk settles and you plug in the rice lights, the transformation is absolutely breathtaking. The soft, warm glow emanating from each tiny bulb creates a mesmerizing effect, casting a cozy ambiance across the room. It’s a moment of pure holiday joy, watching the entire piece come alive with a radiant light. This illuminated wooden tree is perfect for adding a touch of enchantment to your mantelpiece, brightening a gloomy corner, or serving as a welcoming beacon in an entryway. Its versatility and undeniable charm make it an instant focal point in any holiday display.

Tips for Displaying Your Rustic Christmas Tree
Once your beautiful pallet wood Christmas tree is complete, the next step is to find the perfect spot for it to shine. Its rustic yet refined aesthetic makes it incredibly versatile for various home decor styles. Consider placing it on a prominent mantelpiece, where its glow can highlight holiday stockings and other festive accents. It also makes a charming centerpiece for a dining table, adding warmth to family meals. For a welcoming touch, position it on an entryway console table to greet guests with its inviting glow. If you have a covered porch or patio, this tree can extend your holiday cheer outdoors, creating a festive atmosphere. Pairing it with other natural elements like pinecones, faux snow, or additional greenery will further enhance its rustic appeal. This DIY tree isn’t just a decoration; it’s a conversation starter, a testament to your creativity, and a heartwarming addition to your holiday traditions.
Share Your Masterpiece!
We hope this detailed guide inspires you to create your own stunning pallet wood Christmas tree. It’s a project that combines the satisfaction of DIY with the joy of personalized holiday decor, resulting in a piece that you’ll cherish for years to come. Don’t let the idea of complex woodworking deter you from embracing the rustic charm of pallet creations. With pre-made wooden bases and a dash of creativity, you can achieve a truly spectacular result with minimal effort. We’d love to see your unique interpretations! Share your finished pallet wood Christmas trees with us and spread the festive inspiration. Happy crafting, and merry decorating!







