
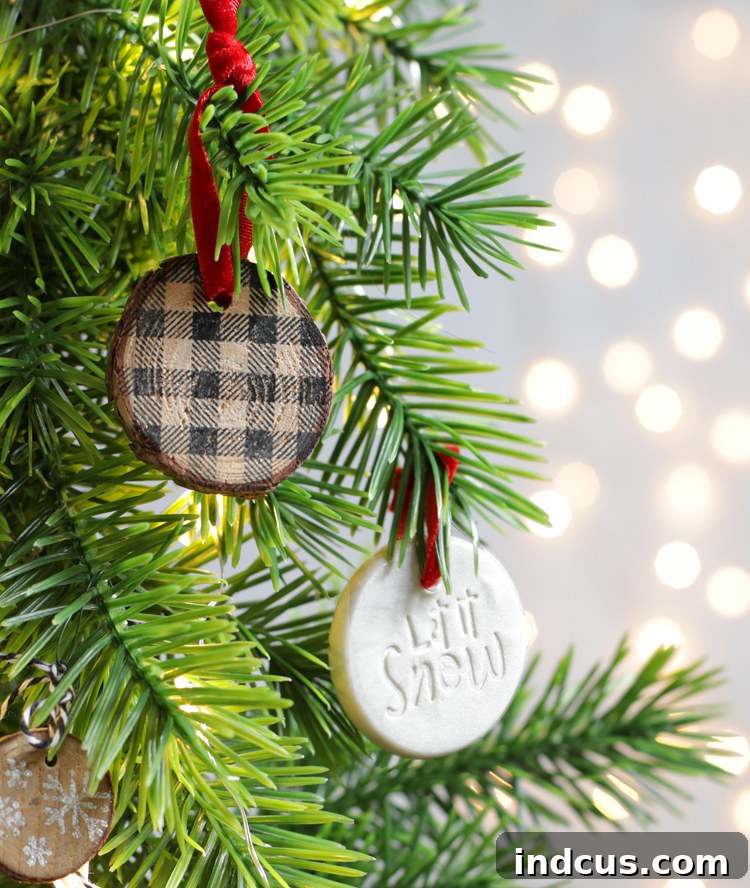
Crafting Joy: Two Beautiful Ways to Make DIY Stamped Christmas Ornaments
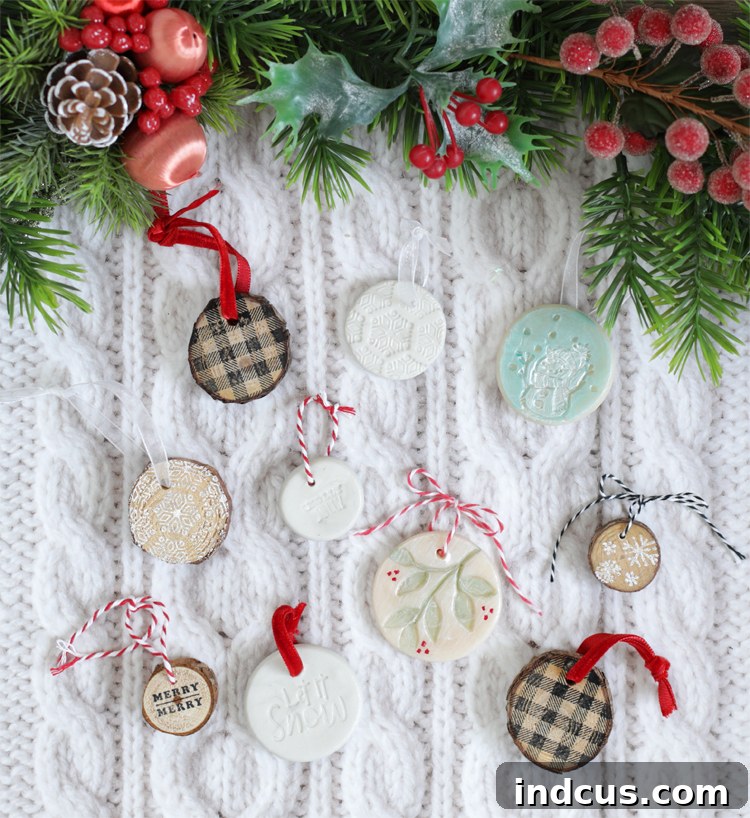
There’s something truly magical about decorating a Christmas tree with ornaments made by hand. Each piece carries a story, a memory, and a personal touch that store-bought decorations simply can’t replicate. Handmade Christmas ornaments aren’t just beautiful additions to your holiday decor; they also make heartfelt gifts for loved ones, thoughtful present toppers, or even unique placeholders for your festive table settings. The joy of creating them is often as rewarding as admiring them.
In this comprehensive guide, we’ll explore two distinct and equally charming methods for creating your own DIY stamped Christmas ornaments. Whether you’re drawn to the rustic appeal of wood slice ornaments featuring stamped designs or prefer the intricate impressions possible with oven-bake clay, you’ll find these projects are incredibly satisfying and surprisingly simple. We’ll walk you through each step, ensuring even novice crafters can achieve stunning results just in time for the holiday season.
This festive crafting journey is brought to you in partnership with Stampin’ Up!, providing exceptional quality stamps and supplies to ignite your creativity.
Get ready to unleash your inner artisan and personalize your holiday celebrations with these unique, custom-made decorations. Let’s gather our tools and materials!
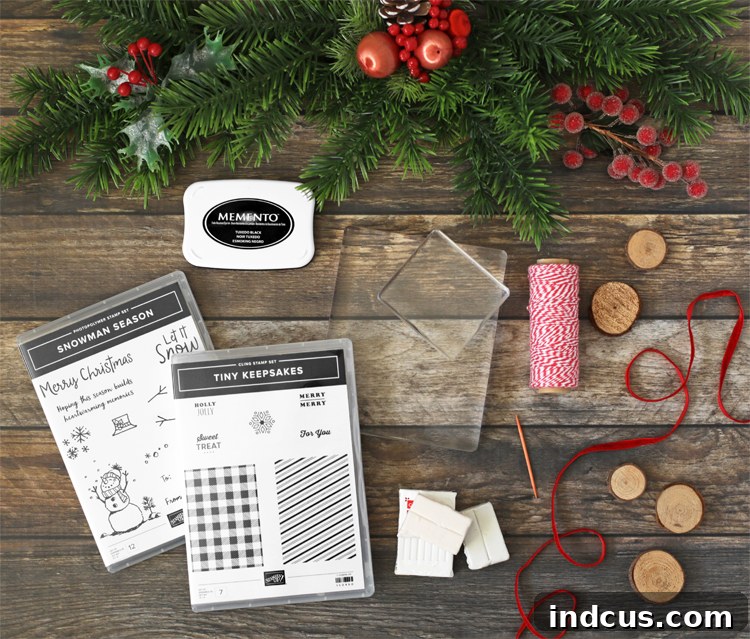
Essential Materials for Your Stamped Christmas Ornaments
Before diving into the creative process, ensure you have all the necessary supplies on hand. The following list includes items for both the wood slice and clay ornament methods, giving you the flexibility to choose your preferred style or even try both!
- Tiny Keepsakes Cling Stamp Set: Ideal for small, intricate designs perfect for ornaments.
- Snowman Season Photopolymer Stamp Set: Offers charming holiday themes for a classic Christmas feel.
- Memento Black Ink Pad: A high-quality ink pad for crisp, clear impressions on wood or other porous surfaces.
- Clear Stamping Blocks: Essential for holding your stamps. We recommend having various sizes, such as Block F and Block D, to accommodate different stamp sizes.
- Wood Slices: Look for pre-drilled natural wood slices for a rustic touch. Various sizes offer versatility.
- Polymer Oven-Bake Clay: Choose a brand known for its ease of conditioning and baking instructions. White or light-colored clay works best for showcasing stamped impressions.
- Ribbon and/or Baker’s Twine: For hanging your finished ornaments. Select colors and textures that complement your designs.
- Toothpick: A simple tool for creating hanging holes in clay ornaments.
- Aluminum Foil: Used as a non-stick surface for baking clay ornaments.
- Drill (for wood slices): If your wood slices are not pre-drilled, a small drill with an appropriate bit will be needed.
- Rolling Pin or Clear Stamping Block: For flattening clay evenly.
- Optional: Stampin’ Blends markers, acrylic craft paint, fine-tip brushes, or clear glaze for decorating clay ornaments.
Ready to see these beautiful ornaments come to life? Be sure to watch the detailed video tutorial available towards the end of this post for a visual guide to both techniques!
Method 1: Rustic Charm with Stamped Wood Slice Christmas Ornaments
Embrace the warmth of nature with these effortlessly elegant wood slice ornaments. Stamping directly onto wood reveals the beautiful grain, creating a truly unique and rustic holiday decoration. This method is incredibly straightforward and yields stunning results perfect for a woodland-themed Christmas tree or as charming accents on gift packages.
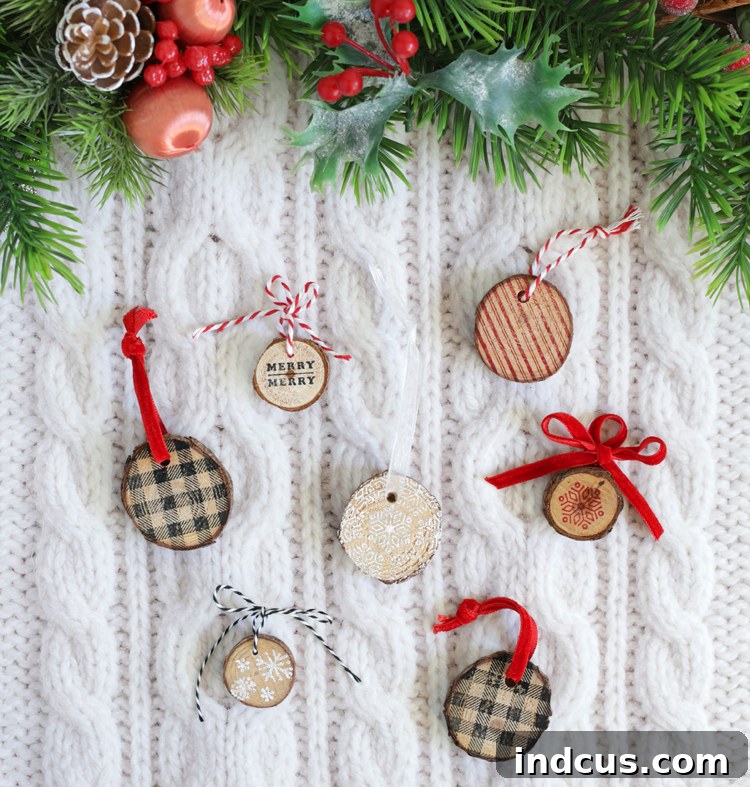
Step-by-Step Guide for Wood Slice Ornaments:
- Prepare Your Wood Slices for Hanging: If your wood slices aren’t already pre-drilled, this is your first step. Carefully use a small drill bit (around 1/8 inch or 3mm works well for ribbon/twine) to drill a hole near the top edge of each wood slice. Ensure the hole is centered and large enough for your chosen hanging material. Always exercise caution when using power tools, or consider purchasing pre-drilled slices for convenience.
- Select Your Stamp Design and Mount It: Browse through your stamp sets and choose a design that fits well within the size of your wood slice. For a classic look, consider plaid patterns like buffalo check, or festive imagery such as snowflakes, trees, or holiday sentiments. Firmly attach your selected stamp to a clear stamping block. Ensure it’s securely adhered to prevent slippage during stamping.
- Ink and Stamp Your Design: Press the mounted stamp onto your Memento Black Ink Pad (or any permanent ink suitable for wood) until the entire surface of the stamp is evenly coated. Carefully position the inked stamp over the wood slice, aligning it precisely where you want the design to appear. Apply firm, even pressure directly down onto the wood slice for a few seconds. Avoid rocking the stamp, as this can cause smudging. Lift the stamp straight up to reveal your beautifully crisp design. Allow the ink to dry completely before moving on.
- Add Your Hanger: Once the ink is dry, it’s time to add the finishing touch. Cut a length of ribbon, baker’s twine, or rustic jute string (about 8-10 inches). Thread one end of the ribbon or twine through the drilled hole from the front to the back, then bring it back through to the front, forming a loop. Tie the ends together in a secure knot or a decorative bow at the top. You can also simply tie a loop for hanging without a bow.
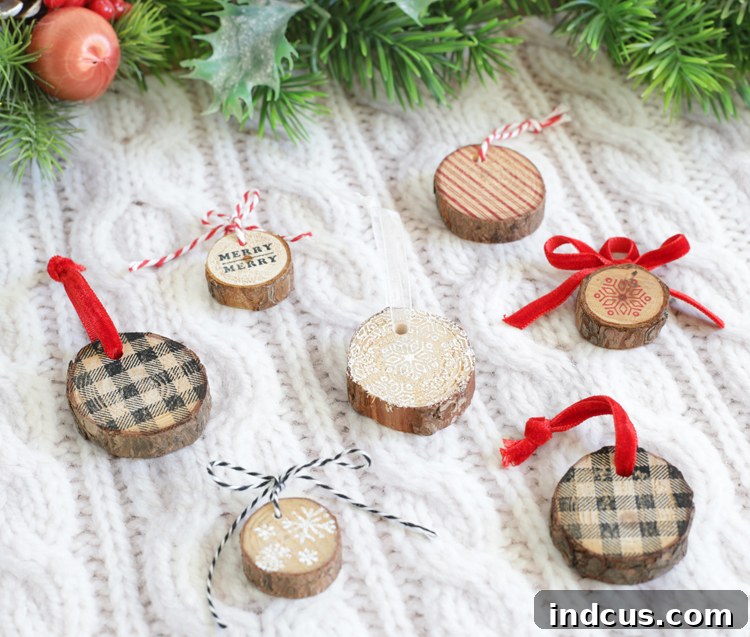
The charm of these stamped wood ornaments lies in their simplicity and the natural variations of the wood grain peeking through the ink. The buffalo check design, in particular, creates a wonderfully cozy and traditional holiday aesthetic. They are incredibly easy to mass-produce, making them perfect for crafting in bulk for gifts, craft fairs, or a cohesive tree theme. These rustic beauties will undoubtedly add a touch of woodland magic to your holiday decor!
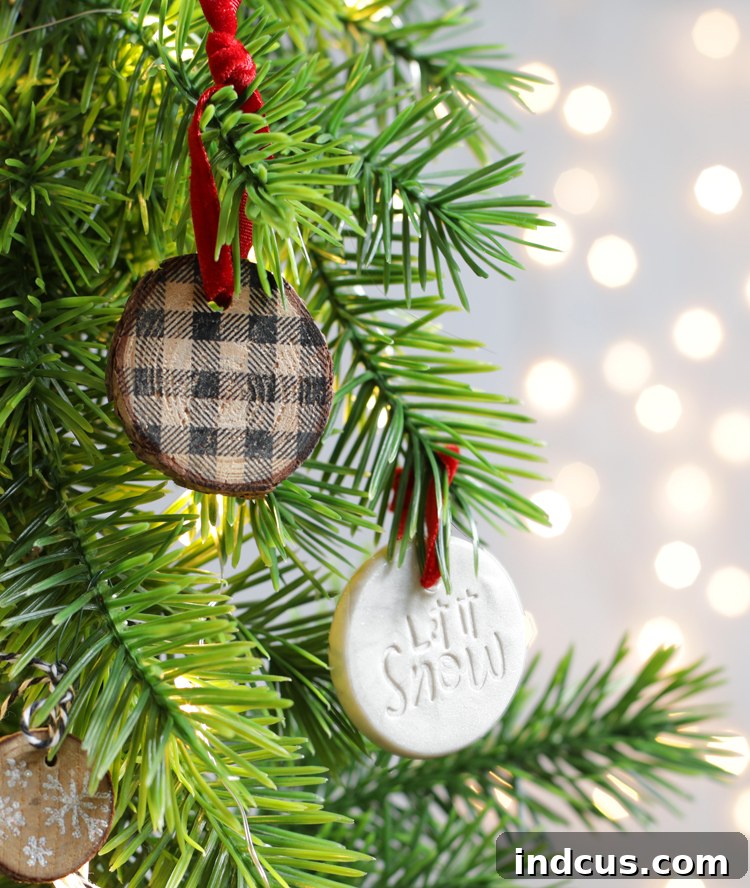
Method 2: Elegant Impressions with DIY Stamped Clay Christmas Ornaments
For those who love intricate details and a refined finish, stamped clay ornaments are an absolute delight. The unique ability of stamps to create a beautiful relief image when pressed into soft polymer clay results in an elegant and tactile ornament. The subtle three-dimensional quality of these pieces truly captures attention, making them a sophisticated addition to any Christmas tree or a cherished gift for someone special. You’ll be amazed at the professional-looking results you can achieve with just a few simple steps.
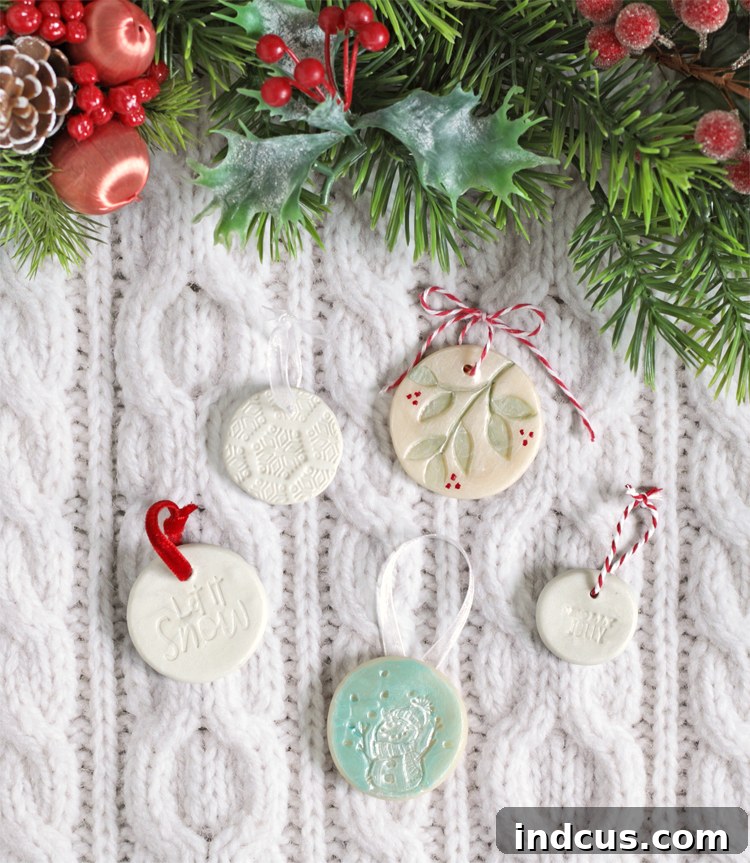
Step-by-Step Guide for Clay Ornaments:
- Condition Your Polymer Clay: Begin by tearing off a quarter piece of clay from a standard 2 oz. brick. This amount is generally sufficient to create an ornament approximately 3 inches in diameter. Knead the clay thoroughly between your fingers or roll it in your hands until it becomes soft, pliable, and warm. This conditioning process is crucial as it activates the polymers, making the clay easier to work with and preventing cracks during baking.
- Roll and Flatten the Clay: Once conditioned, roll the clay into a smooth, perfect sphere in your hands. Place it on a clean, smooth work surface, such as a ceramic tile, glass cutting board, or even a piece of parchment paper. Use a clear stamping block, a rolling pin, or another smooth, flat object to gently smash and flatten the clay into an even disc. You have full control over the thickness of your ornament; press more for thinner ornaments or less for thicker, more substantial pieces. Aim for an even thickness (around 1/8 to 1/4 inch) to ensure even baking.
- Create Your Stamped Impression: Attach your chosen stamp design firmly to a clear stamping block. For clay, ensure your stamp is completely clean and *un-inked*. Position the stamp over your flattened clay disc. Gently and evenly press the stamp into the clay. Apply consistent pressure to ensure the entire design is transferred clearly and deeply into the clay. Slowly lift the stamp straight up. Don’t worry if your first attempt isn’t perfect; polymer clay is forgiving! Simply re-roll the clay and try again until you achieve a satisfactory impression.
- Form the Hanging Hole: Using a toothpick or a small crafting tool, carefully create a small hole near the top edge of your stamped clay ornament. Ensure the hole is large enough to accommodate your chosen ribbon or twine after baking. Gently twist the toothpick to make a clean, smooth hole. Avoid making it too close to the edge, as this could lead to breakage after baking.
- Bake Your Clay Ornaments: Carefully transfer your stamped clay ornaments onto a piece of aluminum foil or parchment paper placed on a baking sheet. Preheat your oven to the temperature specified on your polymer clay package. While the clay used in this example recommended baking at 275 degrees Fahrenheit (135 degrees Celsius) for 15 minutes, baking times and temperatures can vary between different brands and types of polymer clay. Always consult the manufacturer’s instructions for the best results to ensure proper curing and durability.
- Cool and Decorate (Optional): Once baked, remove the ornaments from the oven and allow them to cool completely on the aluminum foil. As they cool, they will harden. Once cool, you have the option to leave them their natural white color for a minimalist look, or you can add color! Use Stampin’ Blends markers, acrylic craft paints, or even fine-tip paint pens to highlight the raised design or add accents. A clear glaze can also be applied for a protective, glossy finish.
- Add Your Hanger: The final step is to thread a festive ribbon, baker’s twine, or even metallic thread through the hole you created earlier. Tie the ends in a knot or a loop to complete your beautiful, custom-stamped clay Christmas ornament.
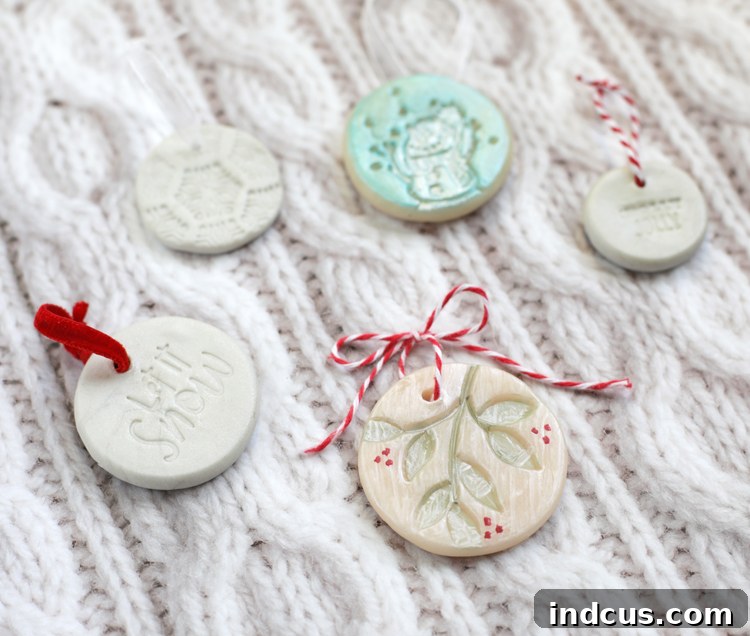
There you have it! Two incredibly simple yet stunning methods for creating personalized DIY Christmas ornaments. Both techniques offer a wonderful way to express your creativity and add a heartfelt touch to your holiday decorations. Whether you’re a seasoned crafter or just starting, these projects are accessible and fun for all ages, making them perfect for a family crafting session. The joy of hanging these unique pieces, or gifting them, will surely become a cherished part of your holiday tradition.
Watch the DIY Stamped Christmas Ornaments Video Tutorial
For a step-by-step visual demonstration of both the wood slice and clay ornament techniques, be sure to check out our comprehensive video tutorial. It’s the perfect companion to these written instructions, offering clear guidance and helpful tips to ensure your crafting success.
(Video player embed would typically go here. Please refer to the video tutorial mentioned above for a visual guide.)
Tips for Perfecting Your Stamped Ornaments
- Experiment with Stamps: Don’t limit yourself to traditional Christmas stamps. Geometric patterns, monograms, or even nature-inspired designs can create stunning and unique ornaments.
- Practice Makes Perfect: If you’re new to stamping, do a few practice runs on scrap wood or clay before tackling your final ornaments. This helps you get a feel for the pressure needed.
- Personalize and Customize: Consider adding names, dates, or small hand-painted details to your ornaments to make them even more special.
- Safety First: When drilling wood slices, always wear safety goggles and use a stable work surface. Supervise children closely if they are participating in the crafting process, especially with tools and the oven.
- Seal Your Wood Ornaments (Optional): To protect your stamped wood slices and prevent ink from fading over time, you can apply a thin coat of clear sealant or varnish once the ink is completely dry.
- Gift with Love: These handmade ornaments make wonderful gifts. Tie them onto presents with matching ribbon, or create a small set packaged in a festive box.
We hope this guide inspires you to create a beautiful collection of handmade stamped Christmas ornaments this season. Happy crafting!







