
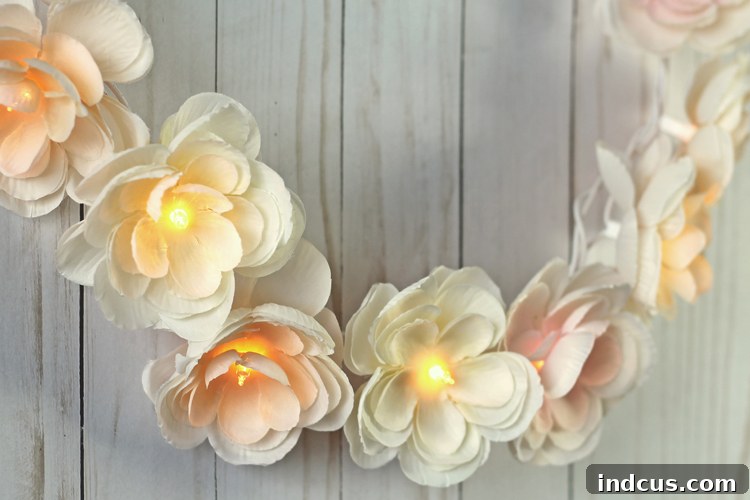
Illuminate Your Space: The Ultimate DIY Lighted Floral Garland Guide
Are you ready to transform your living space with a touch of enchanting glow and timeless elegance? Today, we’re diving into a captivating DIY project that promises to do just that: crafting your very own lighted floral garland. This isn’t just any decor; it’s a magical fusion of delicate blooms and soft, twinkling lights that can elevate the ambiance of any room or special occasion. What makes this project truly wonderful is its versatility – while I found the most exquisite silk ranunculus bouquets, you can easily adapt this guide to use any type of artificial flower that captures your heart.
Imagine a garland where each flower cradles a tiny light, creating a shimmering, ethereal display. That’s exactly what we’re going to achieve!
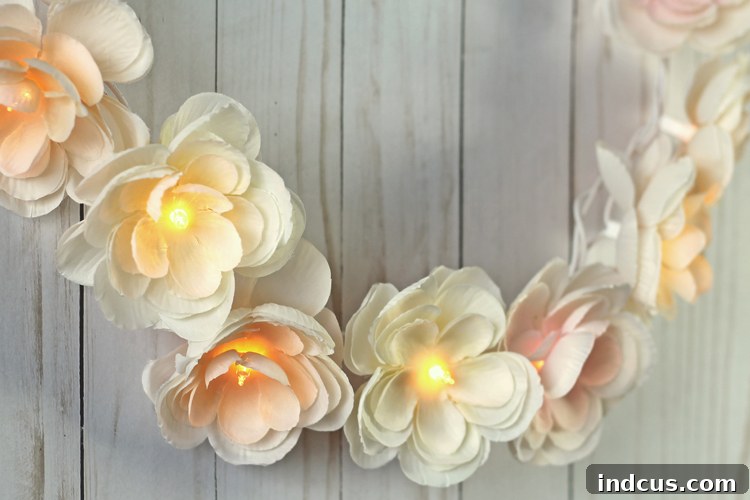
Doesn’t it look absolutely captivating? The way the soft glow emanates from the very heart of each flower is truly enchanting. This garland doesn’t just decorate; it inspires, creating a serene and romantic atmosphere that feels straight out of a fairytale. The gentle twinkle adds a dynamic charm, making it a focal point wherever it’s displayed.
Why a Lighted Floral Garland is Your Next Must-Do DIY Project
Beyond its undeniable beauty, a lighted floral garland offers a multitude of benefits, making it an ideal choice for crafters of all skill levels:
- Unmatched Ambiance: The combination of flowers and lights creates a unique, warm, and inviting glow that regular lighting or plain garlands simply cannot replicate.
- Customization at Its Best: From the type and color of flowers to the style and warmth of the lights, every element can be chosen to perfectly match your decor style or event theme.
- Cost-Effective Elegance: Achieve a high-end, bespoke look without the hefty price tag often associated with professional floral arrangements or specialty lighting.
- Versatile Decor: As you’ll see, this garland isn’t limited to one setting. It transitions beautifully from a whimsical wedding accent to a cozy bedroom highlight.
- Rewarding Experience: There’s immense satisfaction in creating something beautiful with your own hands, especially when the result is this stunning.
I can absolutely envision this garland serving as a breathtaking centerpiece for DIY wedding decor. Picture it draped across a sweetheart table, woven through a ceremony arch, or cascading down a reception staircase. Its gentle luminescence would add an unparalleled touch of romance and sophistication to any wedding theme, from rustic chic to modern minimalist.
Honestly, just look at it! It’s utterly gorgeous! The soft blush tones, particularly from the ranunculus I used, are inherently romantic and dreamy. They evoke a sense of calm elegance, making this garland perfect for celebrations of love, nurseries, or simply for adding a serene touch to your personal sanctuary.
Currently, my lovely floral garland graces my craft room, adding a splash of whimsical beauty to my creative space. However, I might just have to give in to my daughters’ pleas and let them adorn their bedroom with its magical glow. Maybe. It’s truly hard to part with!
Materials You’ll Need for Your Lighted Floral Garland
Gathering your supplies is the first exciting step! Here’s what you’ll need to create your enchanting garland:
- Artificial Flowers: Approximately 2-3 bouquets of silk flowers (like ranunculus, roses, peonies, or hydrangeas). Choose colors and types that complement your desired aesthetic. Wal-Mart, craft stores, or online retailers are great sources. Ensure they have enough “petal depth” to house the lights.
- String Lights: One strand of white LED string lights (battery-operated or plug-in, depending on your display needs). Warm white is typically preferred for a soft, romantic glow. Consider the length you’ll need for your garland.
- Floral Wire or Hot Glue Gun with Glue Sticks: Floral wire offers flexibility and reusability, while a hot glue gun provides a strong, quick bond. Choose the method you’re most comfortable with.
- Wire Cutters/Scissors: To trim flower stems and floral wire if using.
Step-by-Step Guide: Crafting Your Magical Floral Garland
Ready to bring your vision to life? Follow these simple steps:
- Prepare Your Flowers: Carefully remove the flower heads from their stems. Most artificial flowers are designed so the heads can be easily pulled off or snipped with wire cutters. For flowers like ranunculus, you might gently open up the petals slightly to make room for the light.
- Prepare Your Lights: Unravel your string lights. If using battery-operated lights, insert fresh batteries. Test them to ensure they are all working correctly before proceeding.
- Integrate Lights into Flowers: This is where the magic happens! For each flower head, gently push one light bulb into the center. Ensure the bulb is nestled securely within the petals. You want the light to glow from within the flower, not just sit on top.
- Secure the Flowers to the Light Strand:
- Using Floral Wire: Wrap a small piece of floral wire around the base of the flower head and then twist it securely around the light string, ensuring the flower is firmly attached and facing the desired direction.
- Using Hot Glue: Apply a small dot of hot glue to the plastic base of the flower head, then press it firmly onto the wire of the light strand. Hold in place for a few seconds until the glue sets. Be careful not to apply glue directly to the light bulb itself.
- Continue Attaching: Work your way along the light strand, attaching a flower to every other bulb, or at intervals that create your desired fullness. Some prefer a denser look, while others like a more spaced-out arrangement. Consider staggering the flowers so they don’t all face the same direction, adding to the organic feel.
- Arrange and Adjust: Once all your flowers are attached, gently fluff the petals and arrange the garland to your liking. Drape it to see how the lights and flowers fall, making any final adjustments to position or fullness.
It’s so easy, I promise! For a visual guide to every step of the process, a video tutorial would be incredibly helpful to see the techniques in action.
Tips for a Perfect Lighted Floral Garland
- Choose Quality Flowers: While any fake flower works, higher-quality silk flowers will significantly enhance the overall look and feel of your garland.
- Vary Flower Sizes: Incorporate different sizes of flowers for added visual interest and a more natural appearance.
- Consider Greenery: Don’t shy away from adding some artificial greenery or leaves along with your flowers for a lush, organic touch.
- Battery-Operated vs. Plug-in: Decide based on where you plan to display it. Battery-operated offers flexibility, while plug-in ensures continuous light without battery changes.
- Safety First: If using a hot glue gun, be mindful of hot surfaces. Always ensure your string lights are in good working order and not frayed.
Creative Ways to Display Your Enchanting Garland
The beauty of this lighted floral garland lies in its incredible versatility. Here are just a few ideas for where it can cast its magical glow:
- Weddings & Events: Adorn ceremony arches, reception tables, stair railings, photo booth backdrops, or wrap around pillars for an utterly romantic effect.
- Bedroom Sanctuary: Drape it above your headboard, along a shelf, or around a mirror to create a cozy, dreamy retreat.
- Nursery Whimsy: Add a soft, comforting glow above a crib (out of reach, of course!) or along a changing table for a whimsical touch.
- Craft Room Inspiration: Just like mine, it can brighten up your creative space, inspiring new projects with its cheerful luminescence.
- Living Room Focal Point: Weave it through a mantelpiece display, along a bookshelf, or across a window sill for an inviting atmosphere.
- Seasonal Decor: Change up your flower choices to match holidays or seasons – vibrant reds and greens for Christmas, pastels for spring, or warm oranges and browns for autumn.
- Party Decor: Perfect for birthdays, bridal showers, baby showers, or any celebration where a touch of elegance and warmth is desired.
Care and Maintenance
To keep your lighted floral garland looking pristine:
- Dusting: Gently dust the flowers periodically with a soft brush or a hairdryer on a cool, low setting.
- Storage: When not in use, carefully coil the garland and store it in a clean, dry container to protect the flowers and lights.
- Battery Replacement: If using battery-operated lights, replace batteries as needed to maintain brightness.
Frequently Asked Questions About Lighted Floral Garlands
- Can I use real flowers for this project?
- While real flowers are beautiful, they wilt quickly. Artificial (silk) flowers are recommended for longevity and durability, making this a lasting decoration.
- Are these garlands safe to leave on overnight?
- LED lights generate very little heat, making them generally safe. However, for battery-operated lights, turning them off conserves battery life. For plug-in lights, always ensure they are rated for continuous use and supervise them initially. It’s always best practice to turn off decorative lights when leaving the house or going to bed.
- How long do batteries last in battery-operated string lights?
- Battery life varies greatly depending on the quality of the batteries and the lights, but typically ranges from 24-72 hours of continuous use.
- Can I use this garland outdoors?
- Only if you use outdoor-rated string lights and artificial flowers that can withstand outdoor elements. Most standard silk flowers and indoor lights are not suitable for prolonged outdoor exposure.
- What if my flowers don’t have a natural opening for the light?
- You can gently separate the petals with your fingers or use a tiny bit of hot glue to create a small opening and secure the light. Alternatively, wrap the light around the base of the flower head.
Conclusion: Light Up Your World with DIY Beauty
Creating a lighted floral garland is more than just a craft project; it’s an opportunity to infuse your surroundings with warmth, beauty, and a personalized touch. Whether you’re envisioning a romantic wedding backdrop, a soothing nursery accent, or simply a charming addition to your craft room, this DIY project is accessible, rewarding, and undeniably stunning.
So, gather your favorite faux blooms, string your lights, and let your creativity shine. You’ll be amazed at the magical ambiance you can create with your own two hands. Happy crafting!







