
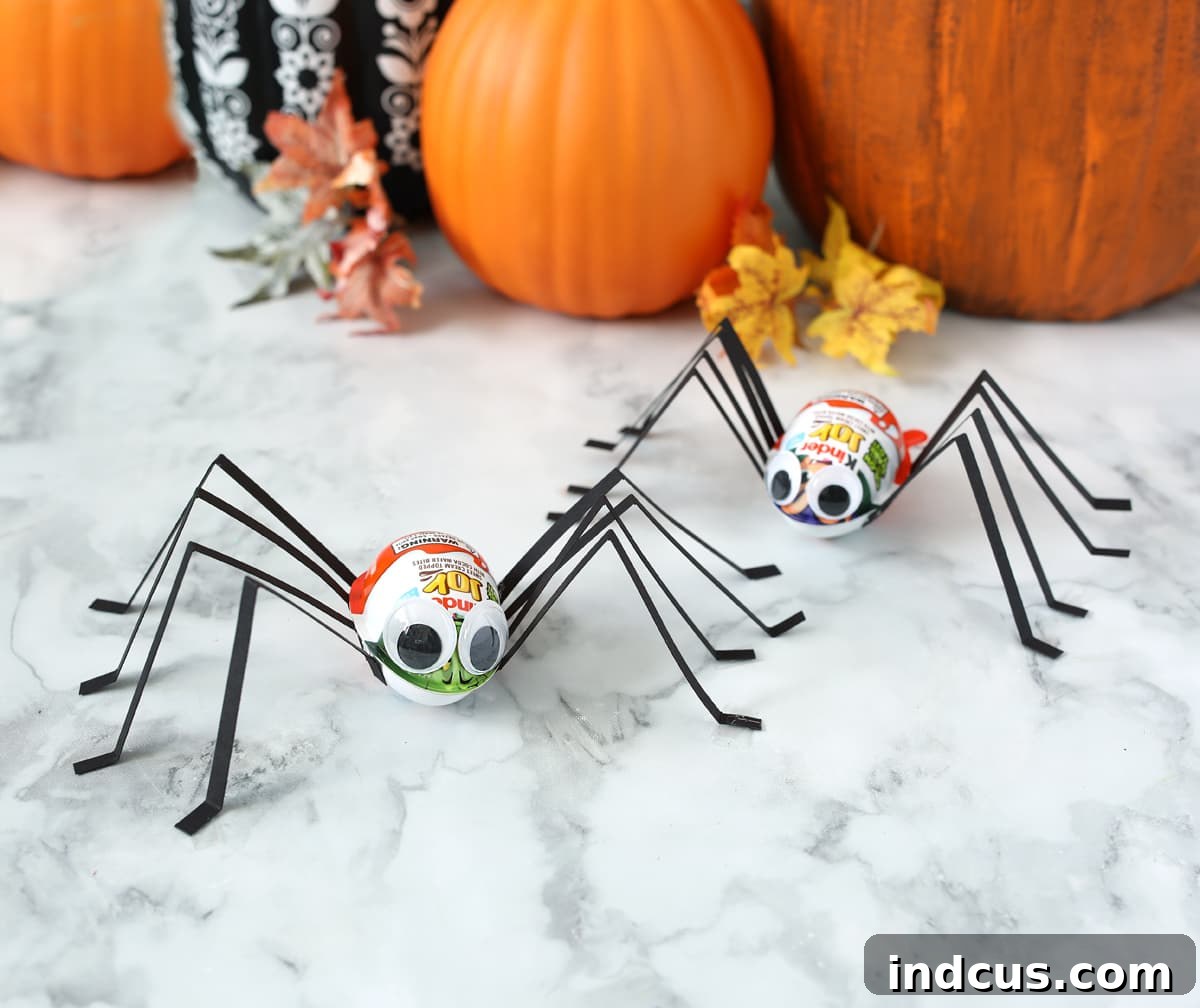
Spooktacular Fun: How to Transform Kinder Eggs into Adorable Halloween Spiders!
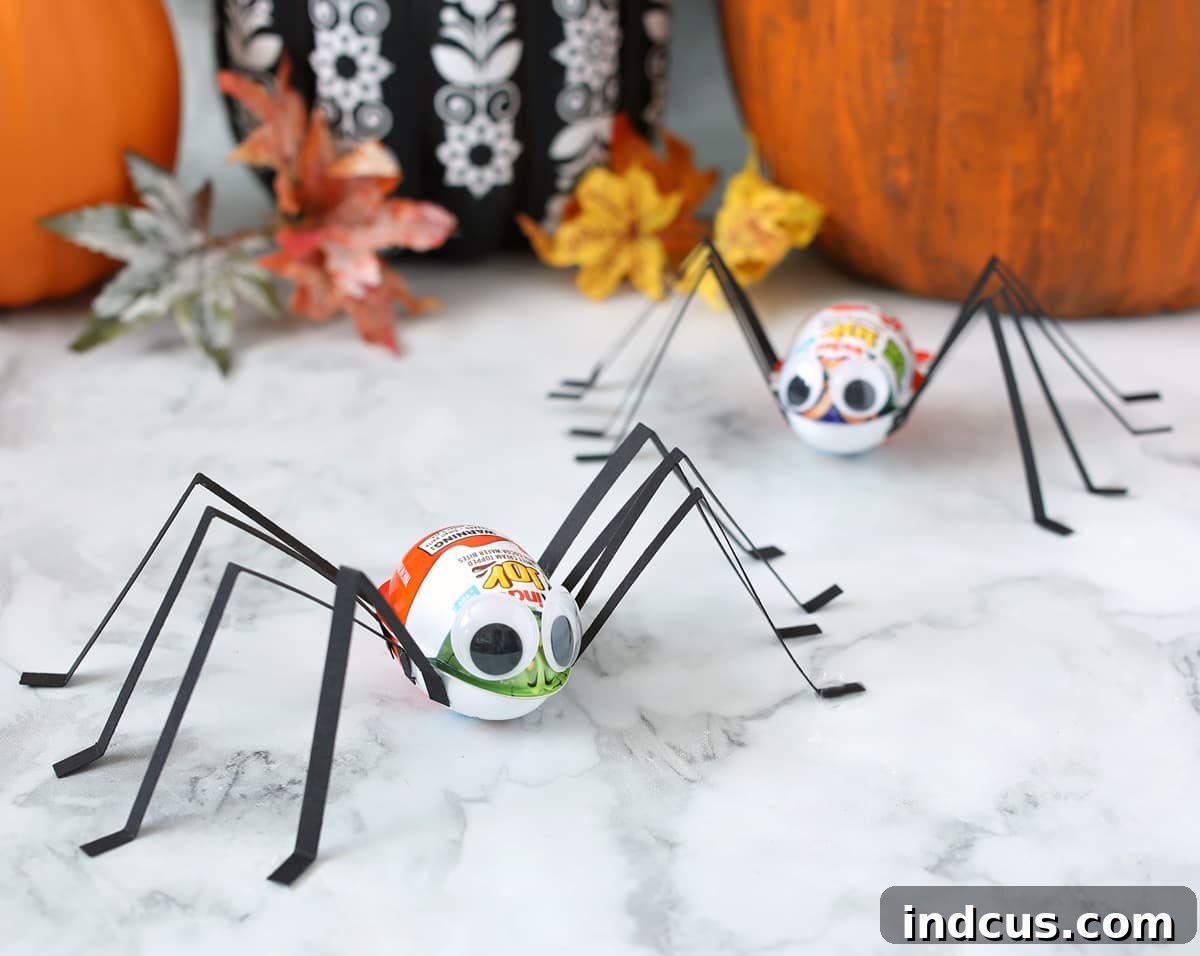
Halloween is a season of delightful frights, creative costumes, and, of course, delicious treats! But what if you could combine all three into one incredibly fun and simple activity? Today, we’re diving into a charming DIY project that transforms ordinary Kinder Eggs into the cutest, treat-filled spiders, perfect for adding a unique touch to your spooky celebrations. This craft isn’t just about making something; it’s about creating a memorable experience, offering a toy, a craft activity, and a yummy treat all rolled into one!
For those unfamiliar, Kinder Eggs (specifically the Kinder Joy variety available in some regions, or the classic Kinder Surprise where legal) are renowned for their dual appeal: one side holds a delightful chocolate treat, while the other conceals a surprise toy. This unique concept makes them an instant hit with children worldwide, including my own little ones. Their inherent appeal makes them the perfect base for a holiday-themed transformation. Imagine the joy on a child’s face when they receive a spooky spider that’s also an edible surprise and a small toy!
Whether you’re looking for a creative alternative to traditional trick-or-treat candy, a charming party favor for a Halloween gathering, or just a fun afternoon activity with your kids, these Kinder Egg spiders are guaranteed to be a hit. They’re super easy to make, require minimal supplies, and the result is an undeniably adorable (and slightly spooky!) creation. Let me walk you through every step of crafting these charming eight-legged friends, ensuring your Halloween is filled with extra smiles and less sugar rush, thanks to the added play element.
Why This DIY Kinder Egg Spider Craft is a Must-Try This Halloween
In a world often saturated with store-bought Halloween decorations and standard candy handouts, a handmade treat stands out. This Kinder Egg spider craft offers a fantastic blend of creativity, personal touch, and multi-sensory engagement. Here’s why it’s an absolute must-try for families and educators alike:
- A Craft, a Toy, and a Treat: This project truly offers the best of all worlds. Kids get to participate in a fun crafting activity, enjoy a delicious chocolate, and then play with a surprise toy hidden inside. It’s a triple threat of joy!
- Engages Fine Motor Skills: From cutting the cardstock legs to carefully attaching the googly eyes, this craft provides an excellent opportunity for children to develop and refine their fine motor skills, hand-eye coordination, and dexterity.
- Simple & Accessible: You don’t need to be a crafting expert to make these spiders. The steps are straightforward, and the materials are easily accessible, making it a perfect project for parents, teachers, and even older kids to lead.
- Personalized Halloween Gifting: Instead of generic candy, these spiders offer a personalized and thoughtful treat. They’re perfect for school classmates, close friends, or neighborhood trick-or-treaters, showcasing a unique effort.
- Budget-Friendly for Small Groups: While Kinder Eggs can add up for very large groups, for a classroom party or a handful of trick-or-treaters, this craft is an economical way to create memorable, multi-faceted favors.
- Encourages Creativity: Beyond following instructions, there’s ample room for customization. Kids can choose different colored cardstock, add glitter, or create unique facial expressions with the googly eyes, fostering their imaginative spirit.
- Reduced Candy Focus (with a treat): For parents looking to moderate candy intake during Halloween, these spiders offer a balanced alternative. The chocolate portion is relatively small, and the emphasis shifts to the toy and the craft itself.
Materials You’ll Need to Craft Your Friendly Spiders
Before we embark on our crafting adventure, let’s gather all the necessary supplies. The beauty of this project lies in its simplicity and the readily available nature of its components. You likely have some of these items already, making it even easier to get started on your Halloween spider army!
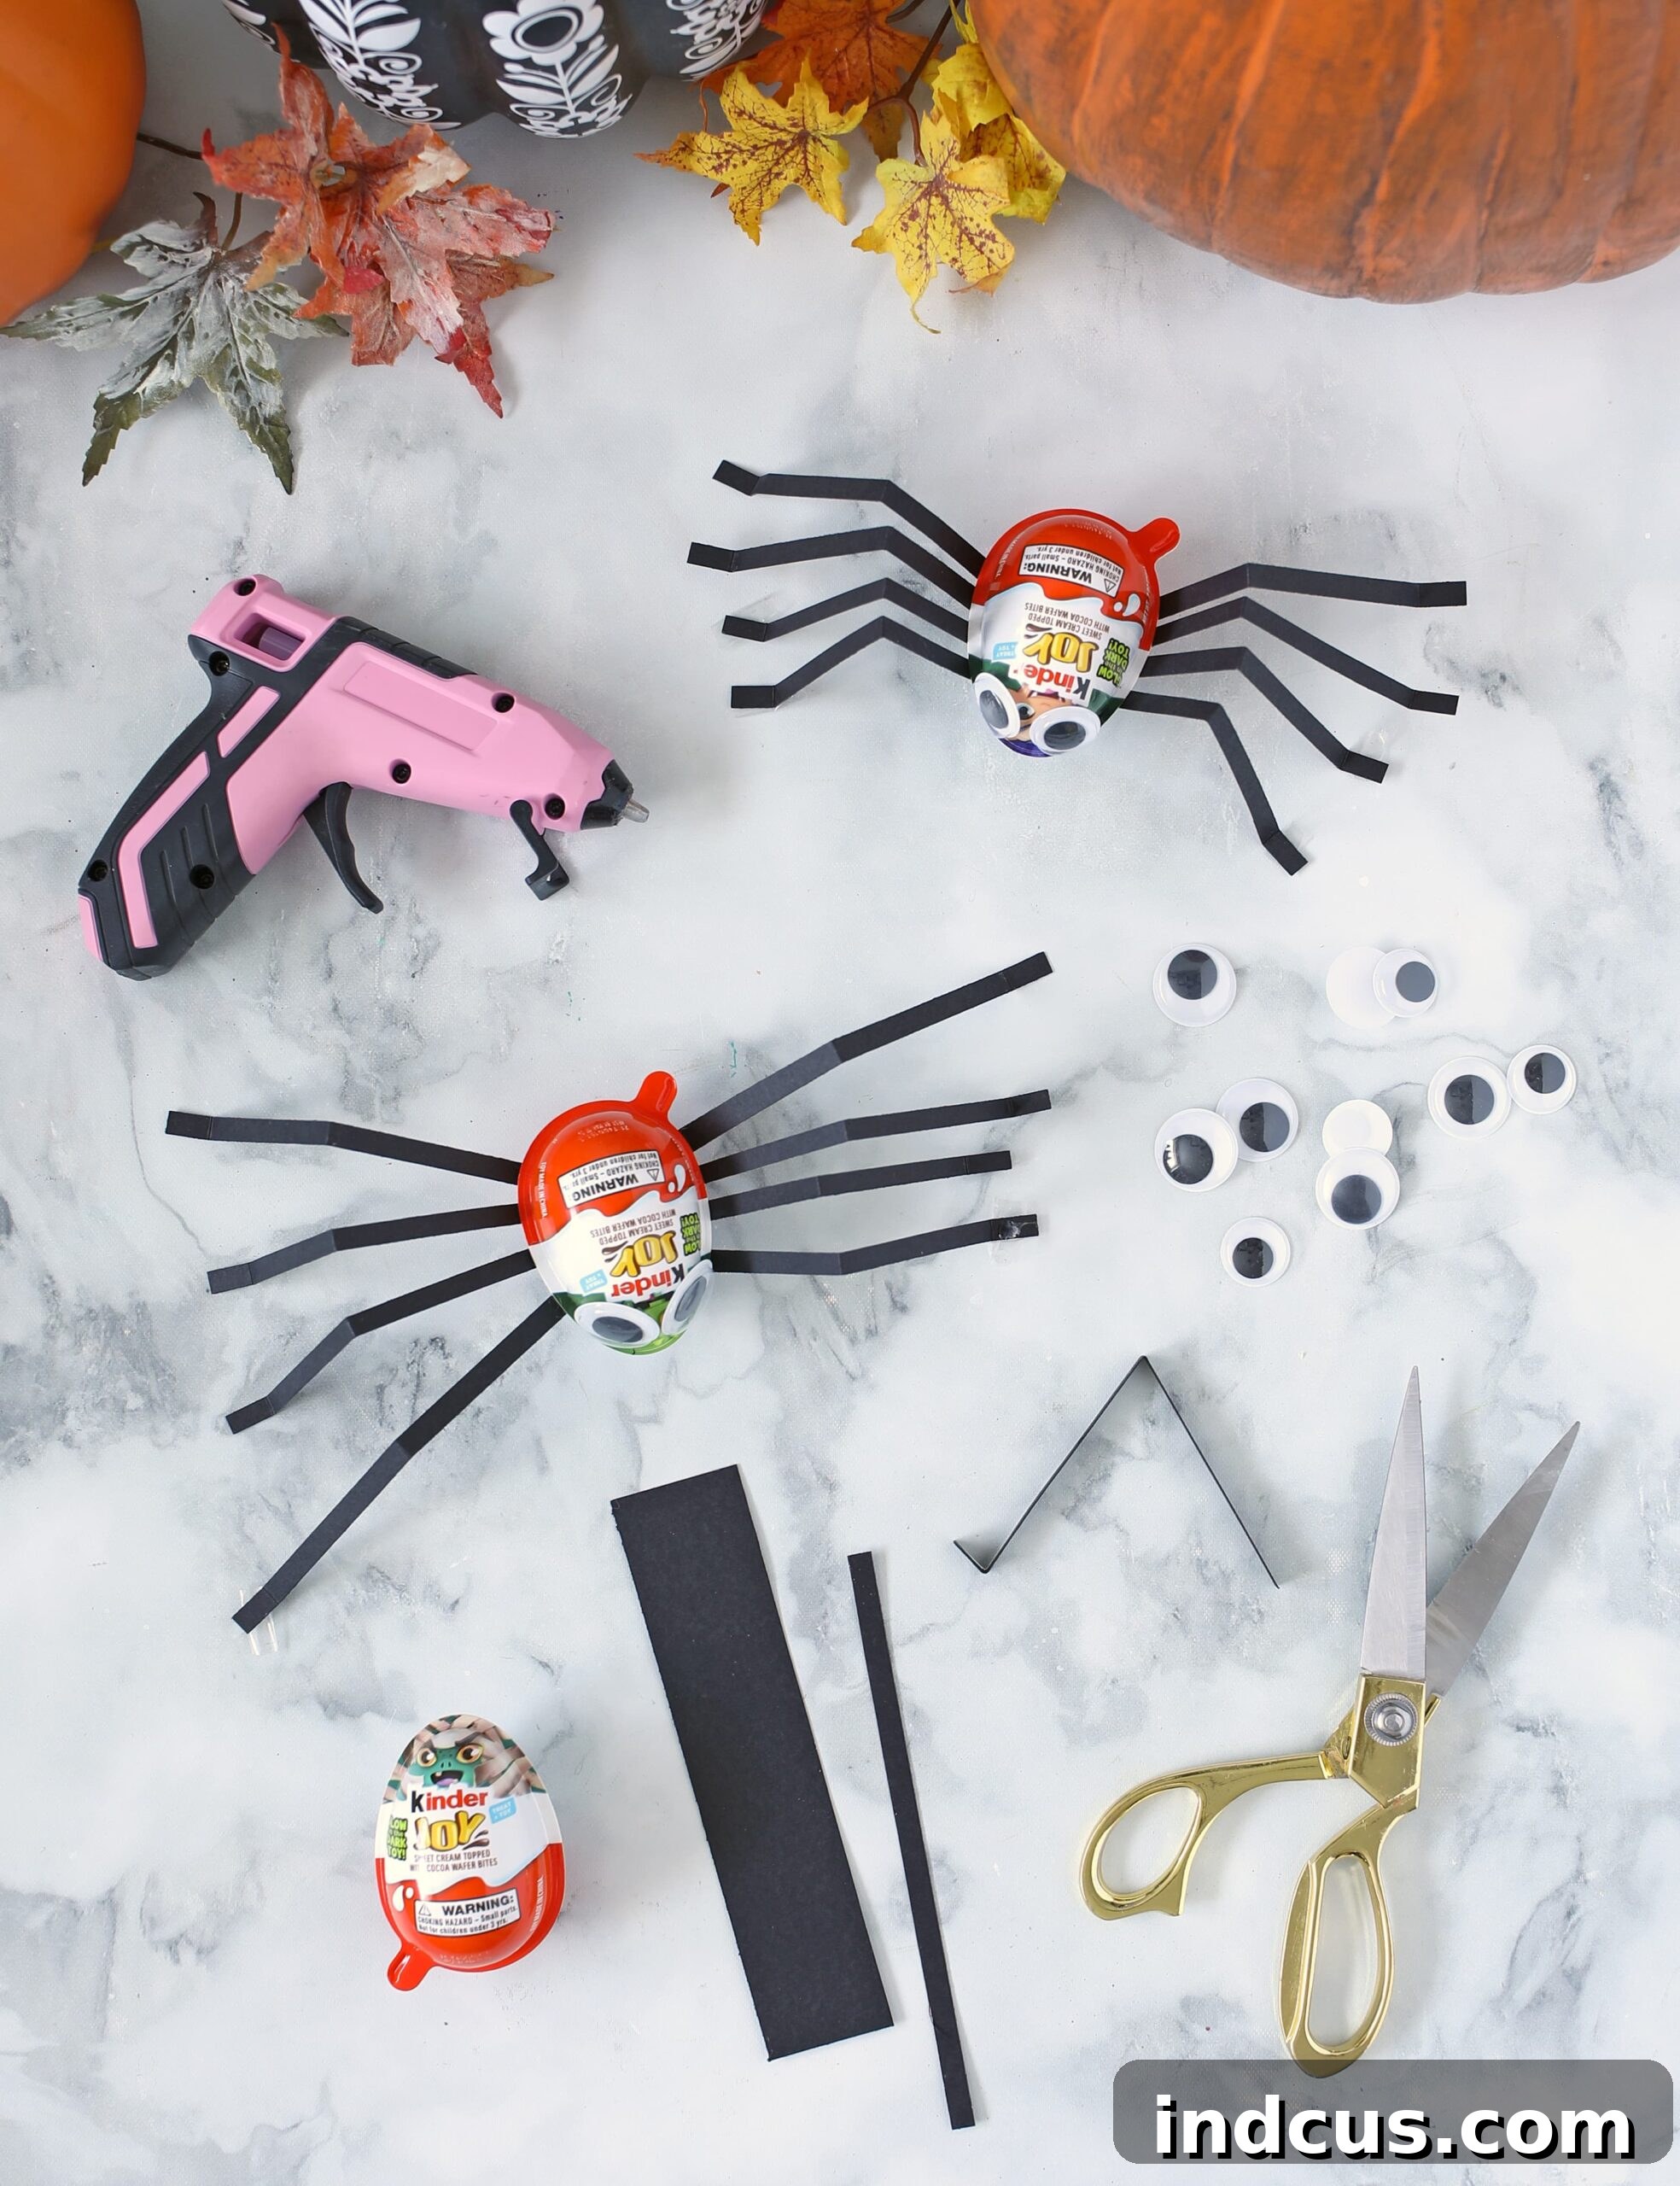
List of Crafting Supplies:
- Kinder Eggs (or similar plastic capsule treats): These are the stars of our show! You’ll need one for each spider you plan to make. The classic Kinder Surprise or Kinder Joy varieties both work wonderfully.
- Black Cardstock: This provides the perfect sturdy and classic look for your spider’s legs. Choose a medium-weight cardstock that holds its shape well when folded. If you want to get creative, consider other colors like purple, orange, or even glitter cardstock for unique spiders!
- Scissors or Paper Trimmer: A paper trimmer will make cutting uniform strips incredibly fast and easy, especially if you’re making many spiders. However, a good pair of sharp scissors works just fine for smaller batches. Ensure child-safe scissors are used if kids are helping with this step.
- Large Googly Eyes: These instantly add character and charm to your spiders. Large eyes tend to make them look more adorable and less menacing, which is perfect for a friendly Halloween craft. Feel free to experiment with different sizes or even multiple pairs for a more “spider-like” appearance!
- Hot Glue Gun with Glue Sticks: A hot glue gun is ideal for this project because it dries quickly and creates a strong bond, ensuring the legs and eyes stay firmly attached. Always supervise children when using a hot glue gun, or have an adult handle this part for younger crafters. For a safer alternative, craft glue or strong adhesive dots can be used, though drying time will be longer.
Step-by-Step Instructions to Create Your Kinder Egg Spiders
Now that we have all our materials, let’s get crafting! Follow these simple instructions to transform your Kinder Eggs into delightful Halloween spiders. Precision and a bit of patience will ensure your spiders look perfect.
Step 1: Prepare Your Spider Legs from Black Cardstock
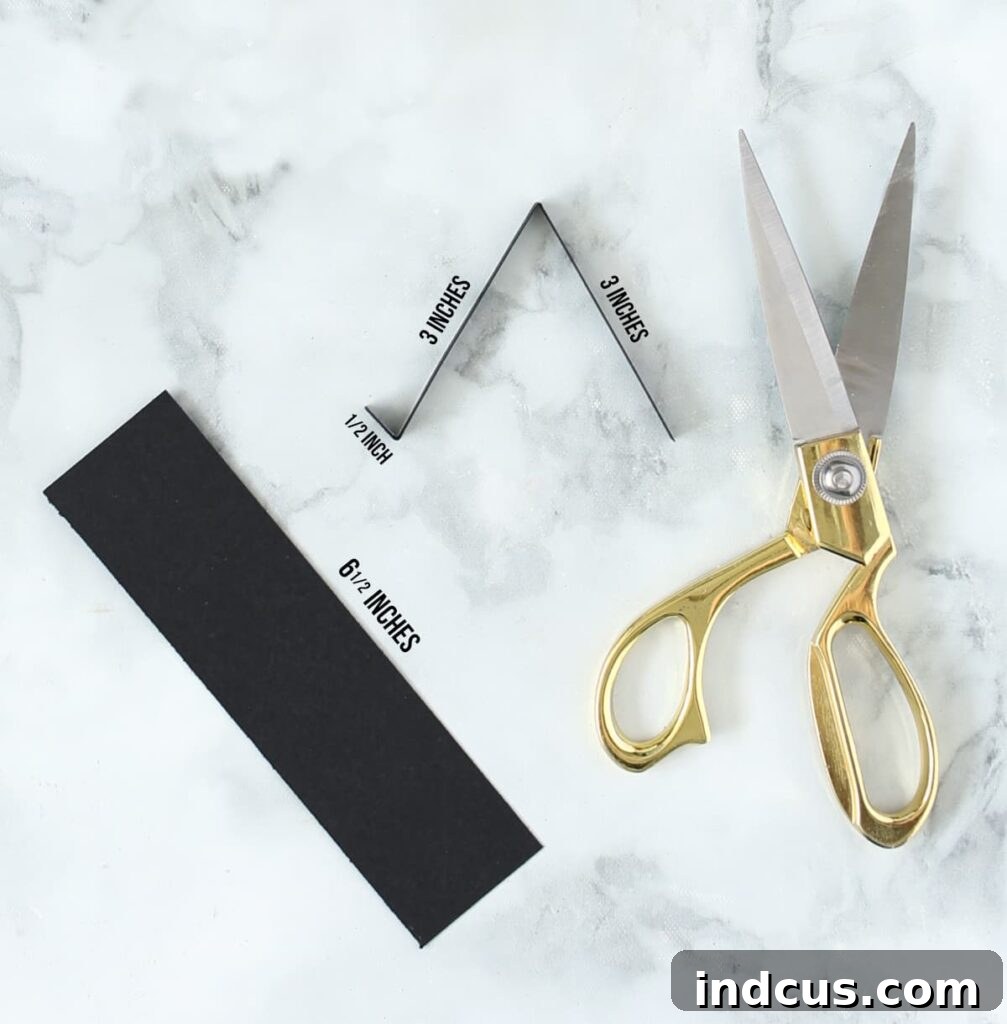
The first crucial step is creating the spider’s eight legs. Take your black cardstock and cut a strip that is 6.5 inches long. This length provides enough material for the leg structure and a small tab for attachment. Next, take this 6.5-inch strip and cut it lengthwise into skinny 1/4 inch strips. Each of these thin strips will become one spider leg. If you have a paper trimmer, this process will be incredibly fast and result in perfectly uniform strips, which adds to the neatness of the finished product. If you’re using scissors, take your time and aim for consistent width. You will need eight of these strips for each Kinder Egg spider, so plan accordingly for the number of spiders you intend to make.
Step 2: Fold the Cardstock Strips to Form Spider Legs
Once your strips are cut, it’s time to give them their characteristic spider leg shape. This involves a simple two-part fold. First, take one strip and fold up a small 1/2 inch section at one end. This small tab will be used to securely attach the leg to the Kinder Egg. Think of it as the ‘foot’ of the leg that glues to the body. After creating this small tab, fold the remaining longer part of the strip sharply in half, bending it downwards from the tab. This creates the primary joint of the spider’s leg, giving it that angular, realistic appearance. Repeat this folding process for all eight cardstock strips. When finished, each strip should resemble a bent spider leg, with a short flat tab at one end for gluing. The visual example provided in the image below illustrates this folding technique perfectly.
Step 3: Attach the Spider Legs to the Kinder Egg Body
Now, grab your hot glue gun (ensuring it’s heated and ready) and your folded spider legs. Carefully attach four spider legs to each side of the Kinder Egg. It’s crucial to position them strategically: glue them just below the center seam of the Kinder Egg. This placement ensures that you can still easily open the egg to access the treat and toy without tearing or damaging the spider legs. Apply a small dot of hot glue to the 1/2-inch tab you created in Step 2, then firmly press it onto the Kinder Egg. Hold each leg in place for a few seconds until the glue sets. Space the four legs evenly on each side to give your spider a balanced and symmetrical appearance. The quick-drying nature of hot glue makes this step efficient and secure.
Step 4: Give Your Spider Its Googly Eyes
The final touch that truly brings your spider to life is adding its eyes! Take your large googly eyes and apply a small dot of hot glue to the back of each. Carefully attach two googly eyes to the front “face” of the Kinder Egg. You can place them close together for a cute, wide-eyed look, or slightly further apart for a different expression. If you’re feeling adventurous, you could even add more eyes (spiders typically have eight!) using smaller googly eyes for a more authentic, albeit slightly creepier, effect. Once the eyes are firmly attached, your Kinder Egg spider is complete!
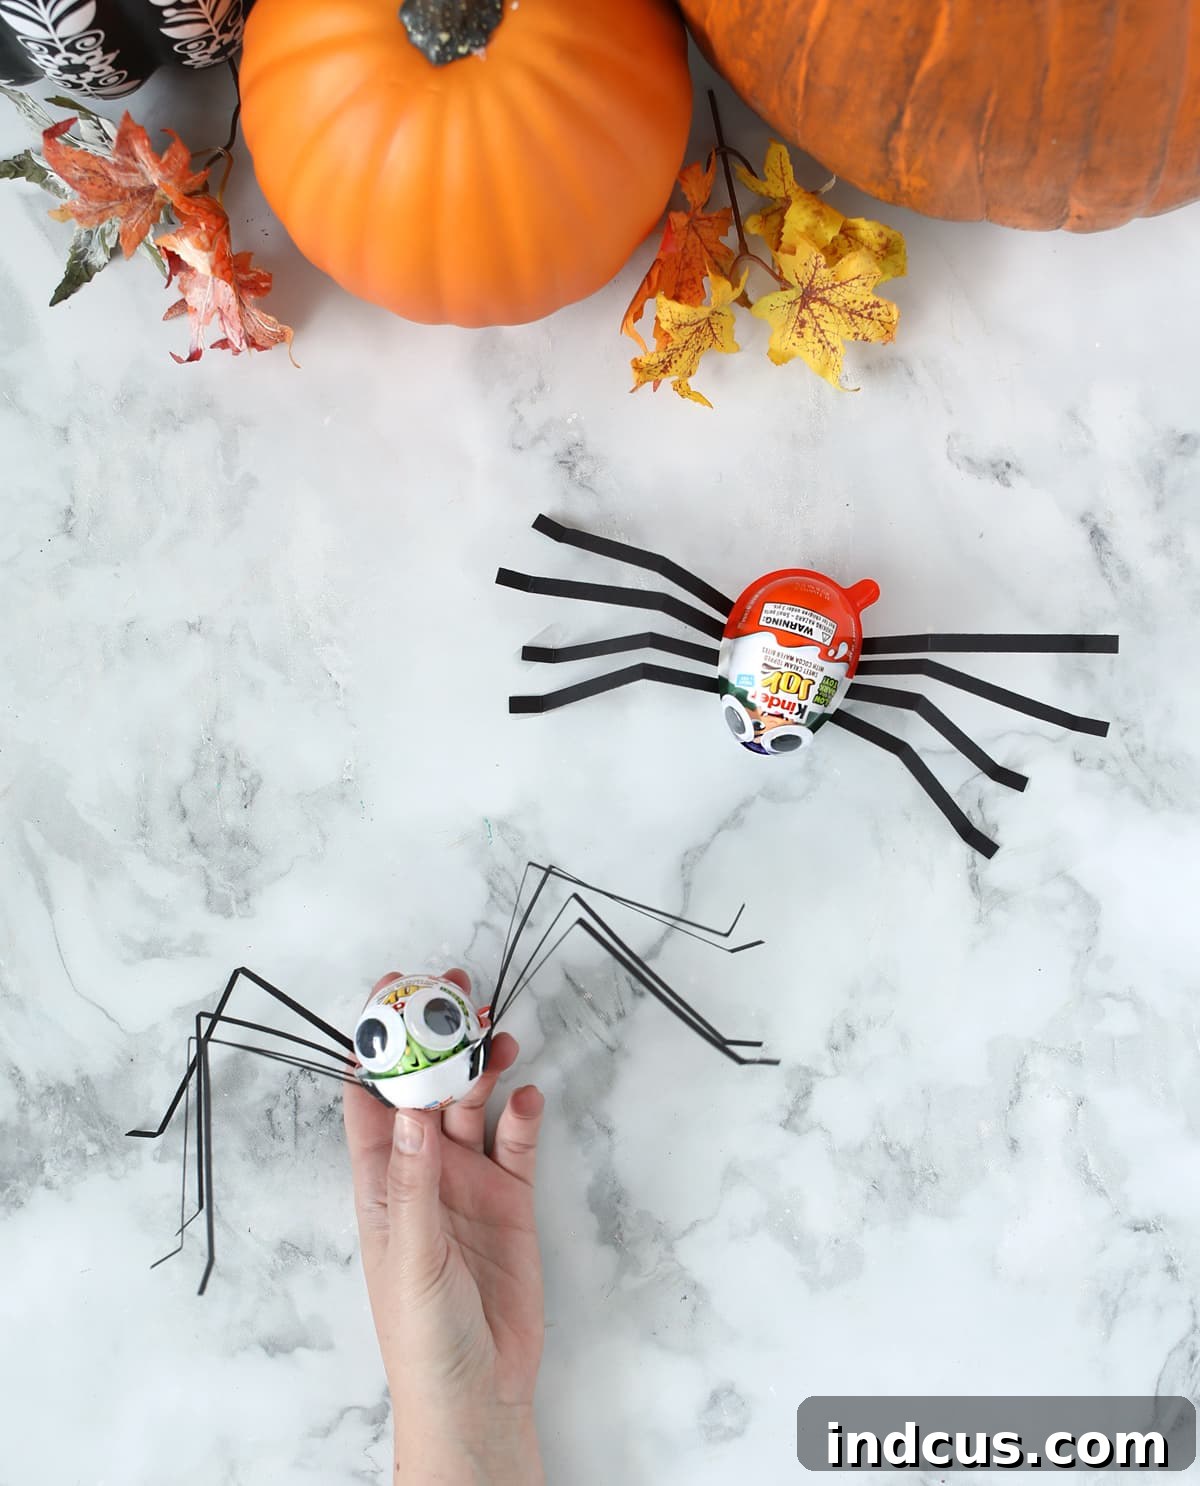
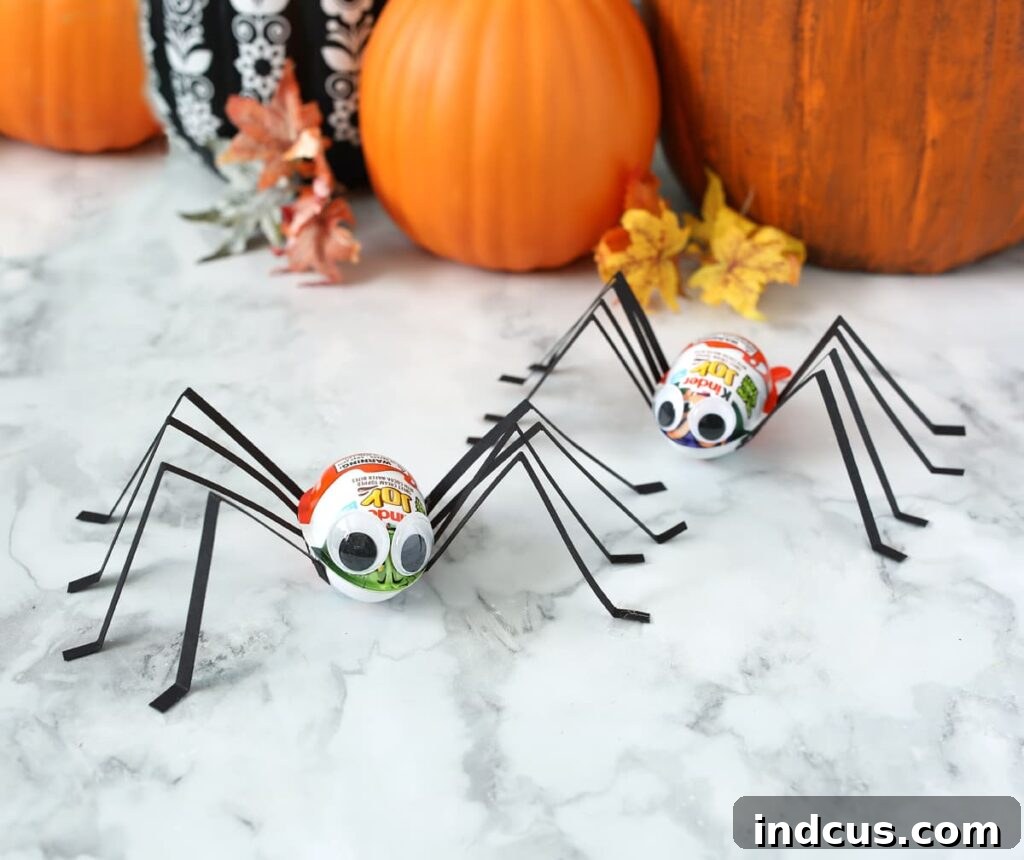
Voila! You’ve just created an adorable, edible, and playable Halloween spider! This entire process is incredibly easy, delivering maximum impact with minimal effort. I can almost guarantee that the children in my son’s preschool class will absolutely adore these creative and engaging treats. They combine the thrill of a surprise with the fun of a craft, making them a truly special handout.
Creative Ways to Share Your Kinder Egg Spiders This Halloween
These charming Kinder Egg spiders aren’t just a fun craft; they’re versatile treats that can enhance your Halloween celebrations in numerous ways. Here are some fantastic ideas for how and where to distribute or display your spooky creations:
- For the Trick-or-Treaters: If you live in an area with fewer trick-or-treaters, or if you prefer to offer something a little more special than typical candy, these spiders are perfect! They’re a unique, multi-faceted treat that will make your house stand out. They’re also an excellent alternative for children with common food allergies, as the toy inside offers a fun non-food component (always check ingredients if handing out the chocolate).
- Classroom Halloween Parties: Elevate your child’s classroom Halloween party by bringing in these delightful spiders. They can serve as individual party favors or even as a supervised craft activity during the party. While Kinder Eggs might be a bit pricier than bulk candy, for a smaller class size, it’s a worthwhile investment for a truly memorable experience. Imagine the excitement as each child leaves with their very own handmade spider, complete with a secret surprise!
- Grandchildren and Family Friends: Surprise your grandchildren, nieces, nephews, or neighborhood kids with these personalized gifts. They’re a thoughtful gesture that shows you’ve put extra effort into their Halloween fun. This is a wonderful way to connect with the younger members of your family and community.
- Halloween Birthday Party Favors: Hosting a Halloween-themed birthday party? These spiders make fantastic and unique party favors that guests will remember long after the celebration ends. They double as both a small gift and a treat.
- Spooky Table Decorations: Arrange a collection of your Kinder Egg spiders on a Halloween-themed party table alongside other decorations. They can add a playful and whimsical touch to your festive spread. You could even attach a string to them and hang them from branches or light fixtures for a “spider web” effect.
- School Fundraisers or Craft Fairs: If you’re looking for a unique item to sell at a school fundraiser or a local craft fair during the autumn season, these spiders could be a popular choice. Package them individually with a small tag explaining what they are.
- Neighborhood “Boo-ing” Tradition: Participate in the fun neighborhood tradition of “boo-ing” friends and neighbors by leaving a surprise basket of treats on their doorstep. Include a couple of these Kinder Egg spiders to add a handmade, festive touch to your “boo” package.
Tips for Customization and Safety
While the basic design is incredibly charming, don’t hesitate to get creative and personalize your Kinder Egg spiders! Here are a few ideas to spark your imagination:
- Color Variations: Instead of just black cardstock, experiment with purple, orange, green, or even glittery cardstock for the legs. You can create a whole rainbow of friendly spiders!
- More Eyes, More Fun: Spiders famously have eight eyes! While two large googly eyes are cute, consider adding smaller ones to mimic a more anatomically correct (and slightly spookier!) spider.
- Fuzzy Legs: For an extra tactile element, use black pipe cleaners instead of cardstock for the legs. You can twist and bend them into various poses.
- Webs and More: Create a simple “web” using white yarn or string, and suspend your spiders from it. This makes for a fantastic hanging decoration.
- Decorate the Egg Itself: Before adding legs and eyes, you could wrap the Kinder Egg in colored tissue paper or draw small designs on it with a permanent marker for even more customization.
Safety Considerations:
- Hot Glue Gun Supervision: Always ensure adult supervision when a hot glue gun is in use, especially with younger children, to prevent burns. For very young crafters, adults should handle the gluing, or use a safer alternative like strong craft glue, allowing for longer drying times.
- Small Parts: Remember that Kinder Eggs contain small toys, which can be a choking hazard for children under three years old. Ensure that recipients are of an appropriate age, or instruct parents to remove the toy before giving it to very young children.
This Halloween, go beyond the ordinary and create something truly special with these delightful Kinder Egg spiders. They are a testament to how a simple idea, combined with a touch of creativity, can bring immense joy and make lasting memories. Who will be the lucky recipients of your spooktacular creations? Get crafting and spread the Halloween cheer!







