
Transforming Our Bathroom: The Incredible Grout Refresh Makeover
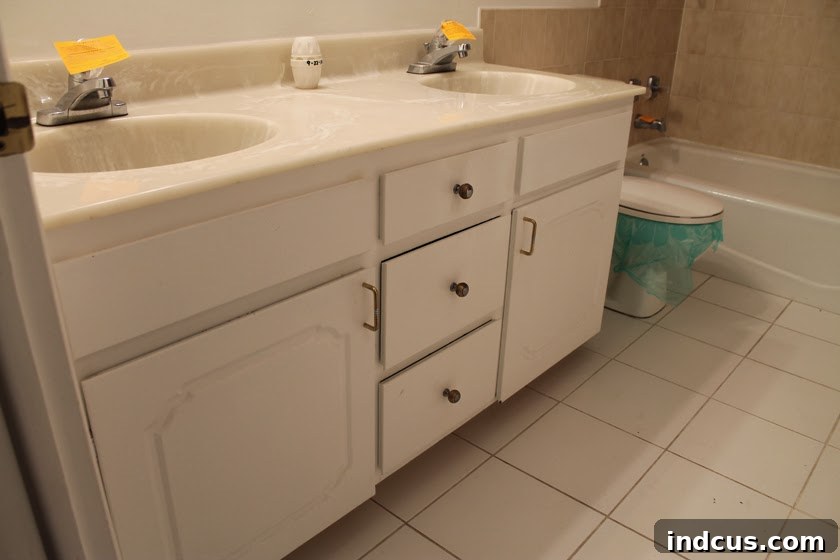
Embarking on a home renovation journey is always exhilarating, and I’m absolutely thrilled to share the significant strides we’ve made in our bathroom makeover. Like many older homes, ours came with its unique charm and a few areas crying out for a refresh. This particular bathroom, while perfectly functional, possessed an undeniable “before” quality that hinted at its untapped potential. From the moment we first toured the house, I envisioned a brighter, cleaner space, starting with one of its most prominent features – the tiled floor. Here’s a glimpse of the bathroom as it appeared when we first stepped inside:
While certainly not a disaster zone, this bathroom was a canvas awaiting a fresh coat of creativity and a serious deep clean. It had good bones, but the overall aesthetic felt dated and lacked the sparkle we craved. Among all the elements begging for attention, there was one particular detail that consistently captured my gaze and, frankly, drove me to distraction: the condition of the grout lines. They were far beyond what a simple scrub could fix, a subtle but persistent reminder that this room needed more than just a surface-level improvement.
The Persistent Problem: Battling Years of Stubborn, Dirty Grout
Of all the renovation challenges, the sight of aged, discolored grout can be one of the most frustrating. It doesn’t just look unappealing; it actively detracts from the perceived cleanliness of an entire room. For me, the grout in this bathroom was a major point of contention. Despite the tiles themselves being a crisp, classic white, the grout lines had settled into a rather uninviting brownish-yellow hue over the years. This stark contrast wasn’t just unsightly; it screamed “dirty” no matter how much effort I put into cleaning the surrounding surfaces. It was a constant visual nuisance, a small detail that had a disproportionately large impact on the room’s overall feel.
My initial attempts to tackle this issue were met with limited success. I employed my trusty homemade grout cleaning concoction, a formula that had proven effective on less severe stains in the past. While it did manage to lift some of the surface grime, it quickly became evident that this particular grout was deeply stained, embedded with years of dirt and wear that no amount of scrubbing could truly erase. The underlying discoloration remained, a stubborn testament to its age, leaving me feeling disheartened and convinced that a more radical solution was needed. Each time I stepped into the bathroom, that persistent stain would catch my eye, making me wince and reinforcing the need for a real transformation.
The visual dissonance was truly jarring: pristine white tiles juxtaposed against dark, grubby lines that refused to brighten. It created an immediate impression of neglect, no matter how diligently I cleaned the rest of the bathroom. The psychological impact of dingy grout cannot be overstated – it can make an otherwise tidy space feel perpetually unclean. I knew that for this bathroom to truly shine, to project the fresh and inviting atmosphere I envisioned, this stubborn grout had to go, or at least be dramatically improved. It was time to find a lasting solution that went beyond superficial cleaning and truly revitalized the floor.
Discovering the Game-Changer: Mapei Grout Refresh
With traditional cleaning methods proving inadequate, I turned to my favorite form of research: devouring DIY blogs and online forums. I spent countless hours sifting through reviews, before-and-after photos, and application tutorials, searching for a product that could genuinely restore the grout without the arduous and costly process of regrouting. My efforts led me to a highly praised product called Mapei Grout Refresh, and the testimonials were compelling enough to convince me to give it a try. This wasn’t just another cleaner; it promised to be a grout colorant and sealant in one, offering a fresh, uniform look while also protecting the grout from future staining.
I found my bottle of Mapei Grout Refresh at Lowe’s, conveniently located in the tile aisle, where it retailed for a very reasonable $12. For those who prefer other retailers, Home Depot also carries a similar product under a different brand name, offering comparable results. The availability and affordability of this solution immediately made it an attractive option for a DIY enthusiast like myself. It felt like a small investment that held the promise of a huge impact on the bathroom’s aesthetic. Choosing the right color was also a consideration, as Mapei Grout Refresh comes in a variety of shades. Despite pondering darker, potentially more forgiving options, I stubbornly adhered to my vision of a bright, pristine white, confident that the renewed cleanliness would be worth any future maintenance.
Step-by-Step Application: A DIY Guide to Grout Transformation
Armed with my bottle of Mapei Grout Refresh, I was eager to begin the transformation. The instructions on the bottle were straightforward, but I’ve learned that attention to detail can make all the difference in DIY projects. Here’s a breakdown of the application process that led to such remarkable results:
Preparation is Key
Before applying the product, it’s crucial to ensure your grout is as clean as possible, even if it’s deeply stained. I gave the entire floor a thorough scrub and allowed it to dry completely. This ensures maximum adhesion of the Grout Refresh. While not strictly necessary, some DIYers recommend masking off delicate adjacent surfaces, but for floor tiles, careful application is usually sufficient.
Applying the Grout Colorant
The first step involves applying the Grout Refresh directly to the grout lines. The product has a consistency similar to paint or a thick stain, designed to penetrate and recolor the existing grout. I dispensed a small amount onto the grout and used an old toothbrush to work it into the lines. The toothbrush bristles are perfect for pushing the colorant deep into the porous surface of the grout, ensuring full coverage and a uniform finish. It’s a relatively slow process, requiring careful attention to each grout line, but the methodical nature of the task felt meditative as I watched the old, dirty color disappear under a fresh coat of white.
The Waiting Game and Initial Curing
After applying the Grout Refresh to all the lines, the instructions advised waiting for 30 to 60 minutes. This crucial period allows the product to properly set and adhere to the grout. It’s important not to rush this step, as proper curing contributes significantly to the durability and longevity of the finish. During this time, the colorant transitions from a liquid to a more solid state, effectively bonding with the old grout.
Removing Excess and Revealing the New Grout
Once the initial setting time had passed, the next step was to mist the floor lightly with a spray bottle filled with water and wait for another five minutes. This softens any excess product that may have dried on the tile surface, making it easier to remove. The final, and arguably most satisfying, step involves scrubbing off any of the excess colorant from the tile surfaces. I used a soft scrub brush and a damp cloth for this, working carefully to avoid disturbing the freshly colored grout lines.
Learning from Experience: Tips for a Flawless Finish
As with any DIY project, there’s a learning curve, and I quickly discovered a critical nuance during the cleaning phase. While scrubbing the excess paint off the tiles, I inadvertently applied too much pressure directly to the grout lines in a few spots. The result? I accidentally scrubbed off some of the freshly applied colorant, revealing the old, discolored grout underneath.
This minor mishap taught me a valuable lesson: when removing the excess, focus exclusively on the tile surface, using gentle, circular motions. The goal is to clean the tile without abrading the freshly treated grout. It’s a subtle distinction but crucial for a perfect finish. Luckily, these were just a few tiny spots, easily remedied with a quick touch-up later. It’s no big deal in the grand scheme of things, but certainly a tip I’d pass on to anyone attempting this project. Remember, patience and precision are your best friends here. Working in smaller sections can also help ensure you don’t miss any areas for scrubbing the excess off before it dries too much on the tile.
The Big Reveal: A Stunning Grout Transformation!
After carefully cleaning up all the extra product and allowing the floor to fully dry, I stepped back to survey my handiwork. The immediate reaction was pure disbelief, followed by an overwhelming sense of delight. The transformation was nothing short of miraculous.
LOOK AT THAT GROUT!!! It’s so, so absolutely pristine, shockingly… white! The difference was night and day, truly breathtaking. The years of ingrained dirt and discoloration had vanished, replaced by crisp, bright lines that made the entire floor look brand new. It was as if a heavy veil had been lifted, revealing the true potential of the bathroom.
I honestly cannot convey how incredibly thrilled I am with these results. The bathroom, which once felt perpetually dingy due to its grout, now radiates a genuine sense of cleanliness and freshness. It’s not just an aesthetic improvement; it’s a profound psychological one. Stepping into the bathroom no longer elicits a cringe but a feeling of joy and satisfaction. The sheer impact of such a seemingly small detail on the overall ambiance of the room is astonishing. I’m just giddy with how much brighter and more inviting the space feels now!
Durability and Future Prospects: A Grout That Stays Clean
Beyond the immediate visual impact, I’m optimistic about the long-term performance of Mapei Grout Refresh. From numerous other reviews I’ve read, this product boasts impressive durability, holding up remarkably well against daily wear and tear. A significant added benefit is its dual function as a sealant. This means that not only does it recolor the grout, but it also creates a protective barrier, which should actively help prevent future stains from penetrating the porous surface. I’m keeping my fingers crossed that this protective quality will live up to expectations, ensuring our pristine white grout remains so for years to come.
One of the best parts about this project is how little product I actually used. The bottle of Grout Refresh contains a generous amount, so I have plenty left over for any potential touch-ups that might be needed down the line. This gives me great peace of mind, knowing that maintaining the fresh look will be simple and cost-effective. While I did consider opting for a darker grout color—the product comes in a wide array of shades, offering choices from classic grays to bolder tones—I ultimately decided against it. I simply didn’t think a darker shade would achieve the bright, airy aesthetic I was striving for in this bathroom. So, I stubbornly chose white, fully aware that it might require a bit more vigilance to keep immaculate. But seeing the results, I truly believe it was the right decision. Only time will tell how well it holds up to the demands of a busy household, but I am confident this product is a long-term winner.
An Affordable and Rewarding DIY Project
The entire process, from initial application to final cleanup, took me roughly an hour. The cost of the Mapei Grout Refresh was just $12. When you weigh an hour of effort and a mere twelve-dollar investment against the dramatic, almost unbelievable transformation it brought to our bathroom, it unequivocally stands as a “win, win, win” project! It’s incredible how such a small change can have such a monumental impact on the perception of an entire space.
This grout refresh was just one exciting step in our ongoing bathroom renovation journey. We have many more updates currently in the works, and I’m eagerly anticipating bringing those to life. In fact, as I write this, my wonderful husband is out in the garage, diligently cutting wood for the next phase of this project – he’s truly the best! I am incredibly pleased with how this bathroom is coming together, piece by piece, and I simply cannot wait to share the complete transformation with all of you. Stay tuned for more DIY adventures and progress reports!







