
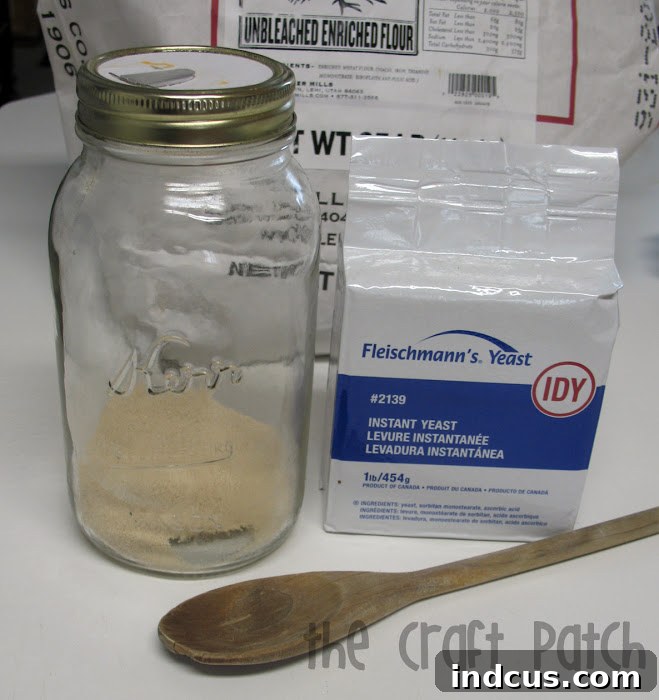
Revolutionize Your Pantry: Craft a DIY Pour Spout for Any Canning Jar!
In the quest for a more organized, efficient, and budget-friendly kitchen, many of us turn to buying ingredients in bulk. It’s a smart move, often saving a substantial amount of money compared to purchasing smaller, pre-packaged quantities. However, the convenience of bulk buying often comes with a perplexing question: how do you store these larger volumes of ingredients easily and accessibly? Whether it’s a hefty bag of flour, a gallon of oats, or the humble yet essential yeast that fuels your baking passion, finding the right storage solution can be a recurring headache. Bulky bags are prone to tearing, difficult to pour from, and can make a mess faster than you can say “spill.” Traditional containers might not offer the precision you need, especially for fine powders. But what if we told you there’s an incredibly simple, eco-friendly, and cost-effective hack that can transform an ordinary canning jar into the ultimate pour-spout dispenser? Prepare to discover a game-changing tip that will not only streamline your pantry but also add a touch of DIY satisfaction to your culinary routine.
The Smart Way to Save: Embracing Bulk Purchases
The allure of bulk buying is undeniable. For avid bakers, cooks, and budget-conscious households, it represents significant savings. Take yeast, for example. Purchasing a 1-pound brick of active dry yeast for just a few dollars drastically outperforms the cost of multiple tiny jars or individual packets. This principle extends across a vast array of pantry staples: flour, sugar, salt, spices, oats, rice, and even powdered laundry detergent. Beyond the immediate financial benefits, buying in bulk often means less packaging, contributing to a reduced environmental footprint. It’s a win-win scenario, allowing you to stock up on essentials without constantly running to the store, all while making a positive impact on your wallet and the planet. Yet, the initial savings can quickly be overshadowed by the practical challenges of storing these larger quantities.
The Bulk Storage Dilemma: Why Traditional Methods Fall Short
So, you’ve made the smart choice to buy in bulk. Now comes the real challenge: finding an effective storage method that keeps your ingredients fresh, accessible, and your kitchen tidy. Original packaging, often large and cumbersome bags, rarely offers a convenient pouring solution. Trying to scoop from a deep bag can lead to spills, wasted product, and general frustration. Transferring to traditional airtight containers helps with freshness but can still leave you wrestling with a measuring spoon and a wide opening, leading to more mess. Furthermore, opaque containers hide their contents, making it difficult to gauge how much you have left without opening them up. This often results in unexpected shortages right when you need an ingredient most. We need a solution that combines the airtight freshness of a good container with the precision and ease of a pour spout – and thankfully, one exists right in your recycling bin!
Your Ingenious Solution: The DIY Pour Spout Canning Jar
Imagine a world where your bulk yeast pours effortlessly into your measuring spoon, your spices dispense perfectly onto your dish, and your laundry detergent slides precisely into the machine, all from a clear, organized jar. This isn’t a fantasy; it’s a simple, brilliant hack using an item you likely already have on hand: an empty cardboard salt container. By repurposing its pour spout, you can transform any standard canning jar into a highly functional and aesthetically pleasing dispenser. This innovative approach not only solves the common bulk storage problems but also promotes resourcefulness and sustainability in your home. Get ready to say goodbye to messy countertops and hello to a perfectly organized pantry system that makes cooking, baking, and even cleaning a breeze.
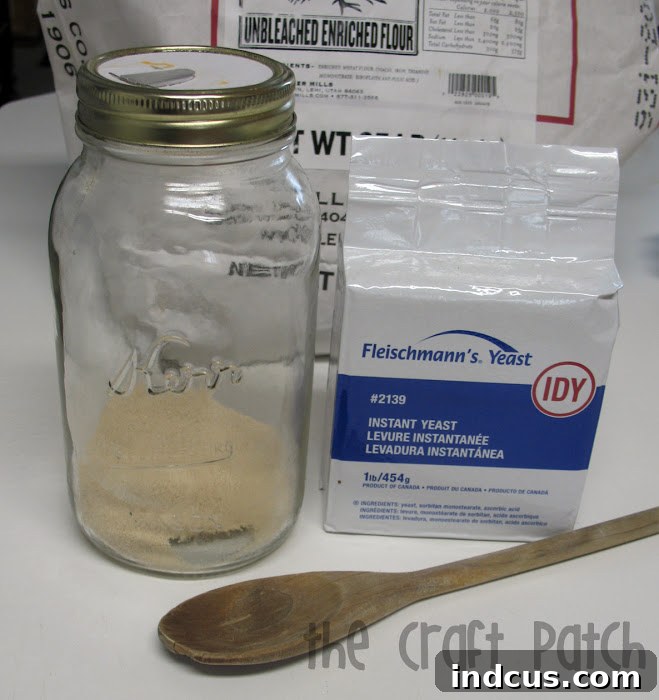
The beauty of this hack lies in its simplicity and effectiveness. Once assembled, this pour-top jar becomes an invaluable tool in your kitchen arsenal. Its clear glass design allows for at-a-glance monitoring of your ingredient levels, preventing those frustrating moments when you realize you’ve run out mid-recipe. The secure canning ring ensures an airtight seal, preserving freshness and extending the shelf life of your bulk purchases. Moreover, the integrated pour spout provides unparalleled control, allowing for precise measurements directly into spoons or bowls without the usual spills and mess associated with scooping from wide-mouthed containers. This little DIY project takes mere minutes to complete but offers a lifetime of convenience and organization.
Gather Your Simple Supplies: What You’ll Need
One of the most appealing aspects of this DIY project is that it requires minimal supplies, most of which are likely already in your home. You won’t need any specialized tools or expensive materials. Gather these everyday items, and you’ll be on your way to a more organized kitchen:
- An empty canning jar: Any size will work, from pint to quart or even half-gallon, depending on the volume of ingredients you wish to store. Make sure it’s clean and dry.
- A canning jar ring: You’ll need the metal ring that screws onto the jar, not the flat lid insert.
- An empty cardboard salt container with a pour spout: This is the star of our show! Ensure it’s clean and free of any residual salt. Brands like Morton Salt are perfect for this.
- Scissors or a craft knife: For precisely cutting the cardboard spout.
- A marker or pencil: To trace the outline for cutting.
That’s it! With these basic items, you’re ready to transform your bulk storage woes into a clever and functional solution.
Step-by-Step Guide: Crafting Your Own Pour Spout Lid
Creating your custom pour spout lid is incredibly straightforward and takes just a few minutes. Follow these easy steps to assemble your new, efficient storage container:
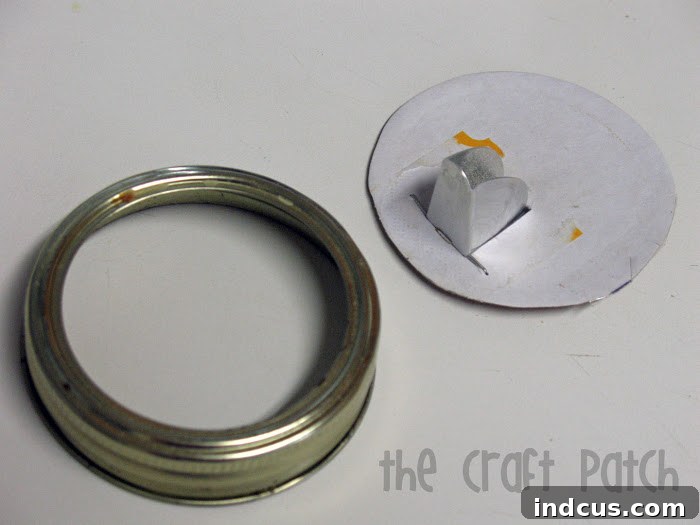
Step 1: Prepare Your Salt Container Spout
Carefully clean out your empty cardboard salt container, ensuring no salt residue remains. Take your scissors or craft knife and cut off the top portion of the salt container, specifically the part that includes the hinged pour spout. You’ll want to cut around the entire perimeter of the top, aiming to get a flat piece of cardboard with the pour spout mechanism intact. Try to make the cut as clean and circular as possible, making sure the spout itself remains firmly attached to the cardboard piece. A craft knife can offer more precision for a cleaner edge, but sharp scissors work just as well.
Step 2: Size and Secure the Spout
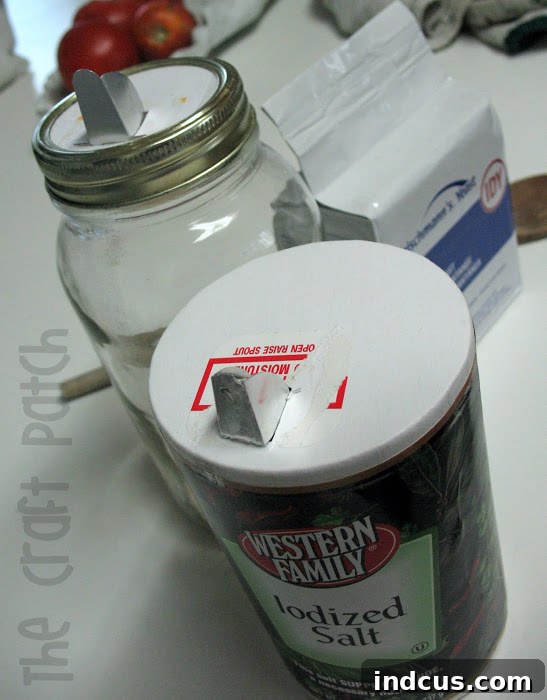
Now, place the metal canning jar ring over the cardboard piece you just cut, centering it around the pour spout. Using a marker or pencil, trace the inner circle of the canning ring onto the cardboard. This traced line will be your guide. Carefully cut along this line with your scissors or craft knife. The goal is to create a cardboard circle that fits perfectly inside the canning ring, with the pour spout positioned to dispense. Once cut, fit this cardboard piece (with its spout) into the canning ring, just as you would a regular canning lid. Then, screw the entire assembly onto your canning jar. The canning ring will hold the cardboard insert firmly in place, creating a secure and functional pour spout lid. Test the spout to ensure it opens and closes smoothly.
Beyond Yeast: Unlock the Versatility of Your New Pour Spout Jar
While the initial inspiration for this hack might have been bulk yeast, the applications for your new DIY pour spout jar are virtually endless. This clever conversion offers a superior storage solution for a multitude of pantry items, making them more accessible, organized, and mess-free. Once you start using these, you’ll wonder how you ever managed without them!
Perfect for Baking Essentials
Beyond yeast, consider other baking ingredients bought in bulk. Fine flours like almond flour or cornstarch, various sugars (granulated, powdered), baking soda, and baking powder can all benefit from the controlled dispensing of a pour spout. Sprinkles, nonpareils, and other small cake decorations also become much easier to manage without spills. Storing them in clear jars with spouts makes your baking station more efficient and enjoyable.
Mastering Spice Storage
Many home cooks buy commonly used spices like garlic powder, onion powder, or chili flakes in larger quantities. Transferring them to pour-spout jars ensures they’re always ready for a quick shake or precise measurement. This is especially useful for spices that tend to clump or are difficult to scoop from wide containers. Your spice rack will thank you for the upgrade!
Effortless Dry Goods Dispensing
Think about staple dry goods: rice, lentils, oats, quinoa, or even small pasta shapes. While these might not always require a “pour” in the same way fine powders do, the spout can still offer controlled dispensing into measuring cups, reducing mess and ensuring you get exactly the amount you need without over-pouring. This is particularly handy for breakfast cereals or granola where a measured pour keeps portions in check.
Creative Craft Room Organization
This hack isn’t just for the kitchen! Crafters know the struggle of containing tiny, loose items. Glitter, small beads, sand, powdered pigments, or even tiny buttons can be neatly stored and precisely dispensed from these jars. No more accidental glitter bombs or spilled bead collections! The clear jars also allow you to quickly identify contents, speeding up your crafting process.
Smart Solutions for Cleaning Supplies
If you purchase bulk cleaning ingredients like borax, washing soda, baking soda (for cleaning), or powdered laundry detergent, this pour spout jar is a game-changer. It allows for easy and measured dispensing into your washing machine or cleaning solutions, preventing over-use and reducing waste. The sturdy glass jar is also more durable than many original packaging options for these heavy-duty cleaners.
Why This DIY Solution Shines: Key Benefits
This simple DIY project offers a multitude of advantages that extend beyond mere convenience. It truly enhances your home management in several key areas:
- Cost-Effective: By repurposing materials and facilitating bulk purchases, this hack directly contributes to significant savings on groceries and household items. You’re reusing what you already have, saving money on new storage containers.
- Eco-Friendly: Giving new life to old canning jars and cardboard salt containers reduces waste destined for landfills. It’s a small but impactful step towards a more sustainable and environmentally conscious lifestyle.
- Superior Organization: Creating uniform, clear containers with easy-to-use spouts brings unparalleled order to your pantry, cupboards, or craft room. Everything has its place, and finding what you need becomes effortless.
- Ease of Use: The primary benefit is the mess-free and controlled pouring. No more spills, no more struggling with awkward bags. The clear glass also means you can instantly see how much content remains, preventing unexpected shortages.
- Freshness Factor: When closed, the canning ring and spout create a reasonably airtight seal, helping to preserve the freshness and potency of your ingredients for longer periods, which is crucial for items like yeast and spices.
Tips for Success and Longevity
To get the most out of your DIY pour spout jars and ensure they last, consider these additional tips:
- Cleaning: Always ensure the salt container top is thoroughly clean and dry before use, especially if you’re storing food items.
- Choosing Your Jar: Standard mouth canning jars work best for this hack. Wide-mouth jars might be too large for the typical salt spout.
- Labeling: Even with clear jars, proper labeling is key for organization. Use chalk labels, adhesive labels, or even a permanent marker directly on the glass to clearly identify contents and dates.
- Maintenance: The cardboard spout might not last forever, especially with frequent use or exposure to moisture. Keep an eye on its condition and replace it with a new one when it starts to show wear and tear.
- Storage Location: While canning jars are great for airtight storage, always follow general guidelines for specific ingredients. Yeast, for instance, benefits from being stored in the back of the fridge or freezer to maintain its potency.
Join the Movement: Share Your Clever Hacks!
This simple pour spout hack is a testament to the power of creative repurposing and practical problem-solving. It transforms a mundane chore—storing bulk ingredients—into an efficient and even enjoyable part of your daily routine. By embracing this DIY solution, you’re not only saving money and reducing waste but also gaining a more organized and functional living space. We encourage you to try this project in your own home and experience the difference it makes. Once you’ve set up your own pour-spout jars, you’ll likely find even more ingenious uses for them around the house. What will you put in your newly transformed canning jar? Share your ideas and help inspire others to embrace smart, sustainable, and simple solutions in their homes!







