Craft Enchanting Silvery Snowflakes from Cocktail Forks: Your Ultimate DIY Christmas Decoration Guide
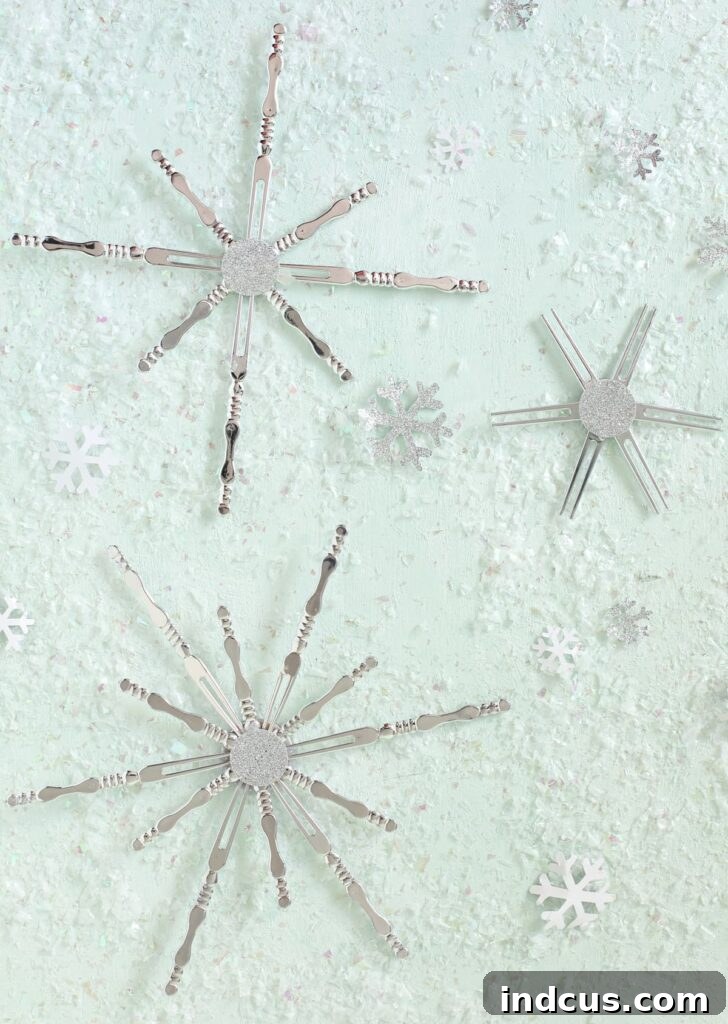
The holiday season is a magical time, filled with warmth, cheer, and the joy of decorating. While store-bought decorations are convenient, there’s something truly special about adorning your home with handmade creations. This year, why not add a touch of unique sparkle to your festive decor with stunning, silvery snowflakes crafted from an unexpected item: appetizer forks!
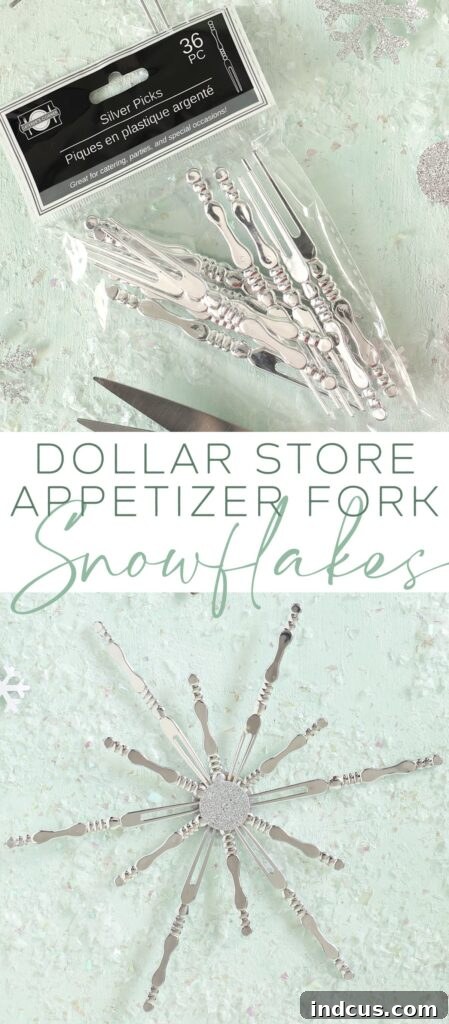
Imagine strolling through the aisles of your favorite dollar store, seeking inspiration, when suddenly a brilliant idea strikes. That’s precisely what happened when I spotted those humble food picks – those dainty, inexpensive cocktail forks. Instantly, a vision of shimmering snowflakes danced in my mind. The idea was simple, quick, and promised an elegant result without breaking the bank. I grabbed several packs, eager to transform my creative spark into a beautiful reality, and the finished snowflakes turned out even more charming than I had envisioned. Today, I’m thrilled to share this super easy Christmas craft tutorial, ensuring you can create your own collection of these gorgeous DIY snowflakes and infuse your home with personalized holiday magic.
This project is not only incredibly simple but also remarkably versatile, allowing for endless customization to match your unique style. Whether you’re a seasoned crafter or just starting, you’ll find joy in bringing these exquisite decorations to life. Let’s dive into how you can make your very own elegant cocktail fork snowflakes!
Gather Your Simple Supplies for Elegant Snowflakes
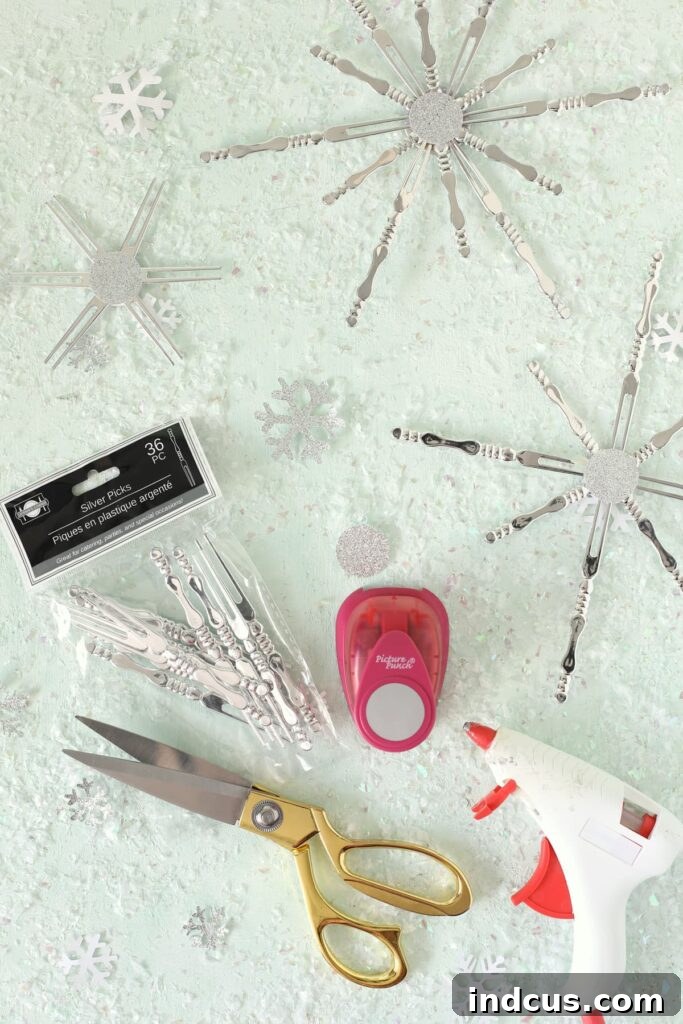
One of the best aspects of this DIY snowflake craft is the minimal number of supplies required, most of which you likely already have or can easily acquire. You won’t need any complex tools or expensive materials to achieve these stunning results. Here’s everything you’ll need to start crafting:
- Appetizer Forks: These are the stars of our show! Look for plastic or metallic ones, preferably in silver or clear, to achieve that classic snowflake shimmer. Their delicate prongs naturally lend themselves to intricate snowflake patterns.
- Circle Punch (1-inch recommended): This tool will create perfectly uniform centers for your snowflakes, ensuring a neat and professional finish. If you don’t have a circle punch, don’t worry! You can easily use a Silhouette or Cricut machine for precise cuts, or simply trace a small coin or bottle cap and cut the circles out by hand with scissors. The key is to have two identical circles per snowflake.
- Cardstock: I chose a dazzling silver glitter paper for my snowflakes, which beautifully catches the light and enhances the icy, magical aesthetic. However, feel free to experiment with other colors and textures – white, blue, or even holographic cardstock would look fantastic. The thickness of cardstock provides a sturdy base for your fork arrangement.
- Scissors: Essential for cutting your cardstock circles (if not using a punch or machine) and for any minor adjustments to the forks, should you decide to trim them for varied snowflake designs.
- Hot Glue Gun + Glue Sticks: Your secret weapon for quick and strong adhesion. Hot glue sets rapidly, making the assembly process incredibly fast and efficient. Always exercise caution when using a hot glue gun to prevent burns.
I found my appetizer forks at Dollar Tree, making this an incredibly budget-friendly craft. However, these versatile food picks are widely available. You can often find them in party supply stores, kitchenware sections of larger retailers, or numerous online marketplaces. Look for packs of 50 or 100 to make a batch of beautiful snowflakes without having to restock frequently.
Step-by-Step Instructions: Crafting Your Festive Fork Snowflakes
Creating these delicate snowflakes is surprisingly straightforward. Follow these simple steps, and you’ll have a gorgeous collection of holiday decorations in no time.
Step 1: Prepare Your Snowflake Cores
Begin by cutting two identical 1-inch circles from your chosen cardstock. These circles will serve as the sturdy center of your snowflake, providing a base for the forks and a neat finish. While a circle punch ensures perfect symmetry and speed, don’t hesitate to use an electronic cutting machine if you have one, or simply trace a small round object (like a quarter or a bottle cap) onto your cardstock and carefully cut out the circles by hand with sharp scissors. Precision here will contribute to a more polished final product, so take your time to get clean edges.
Step 2: Design Your Unique Snowflake Pattern
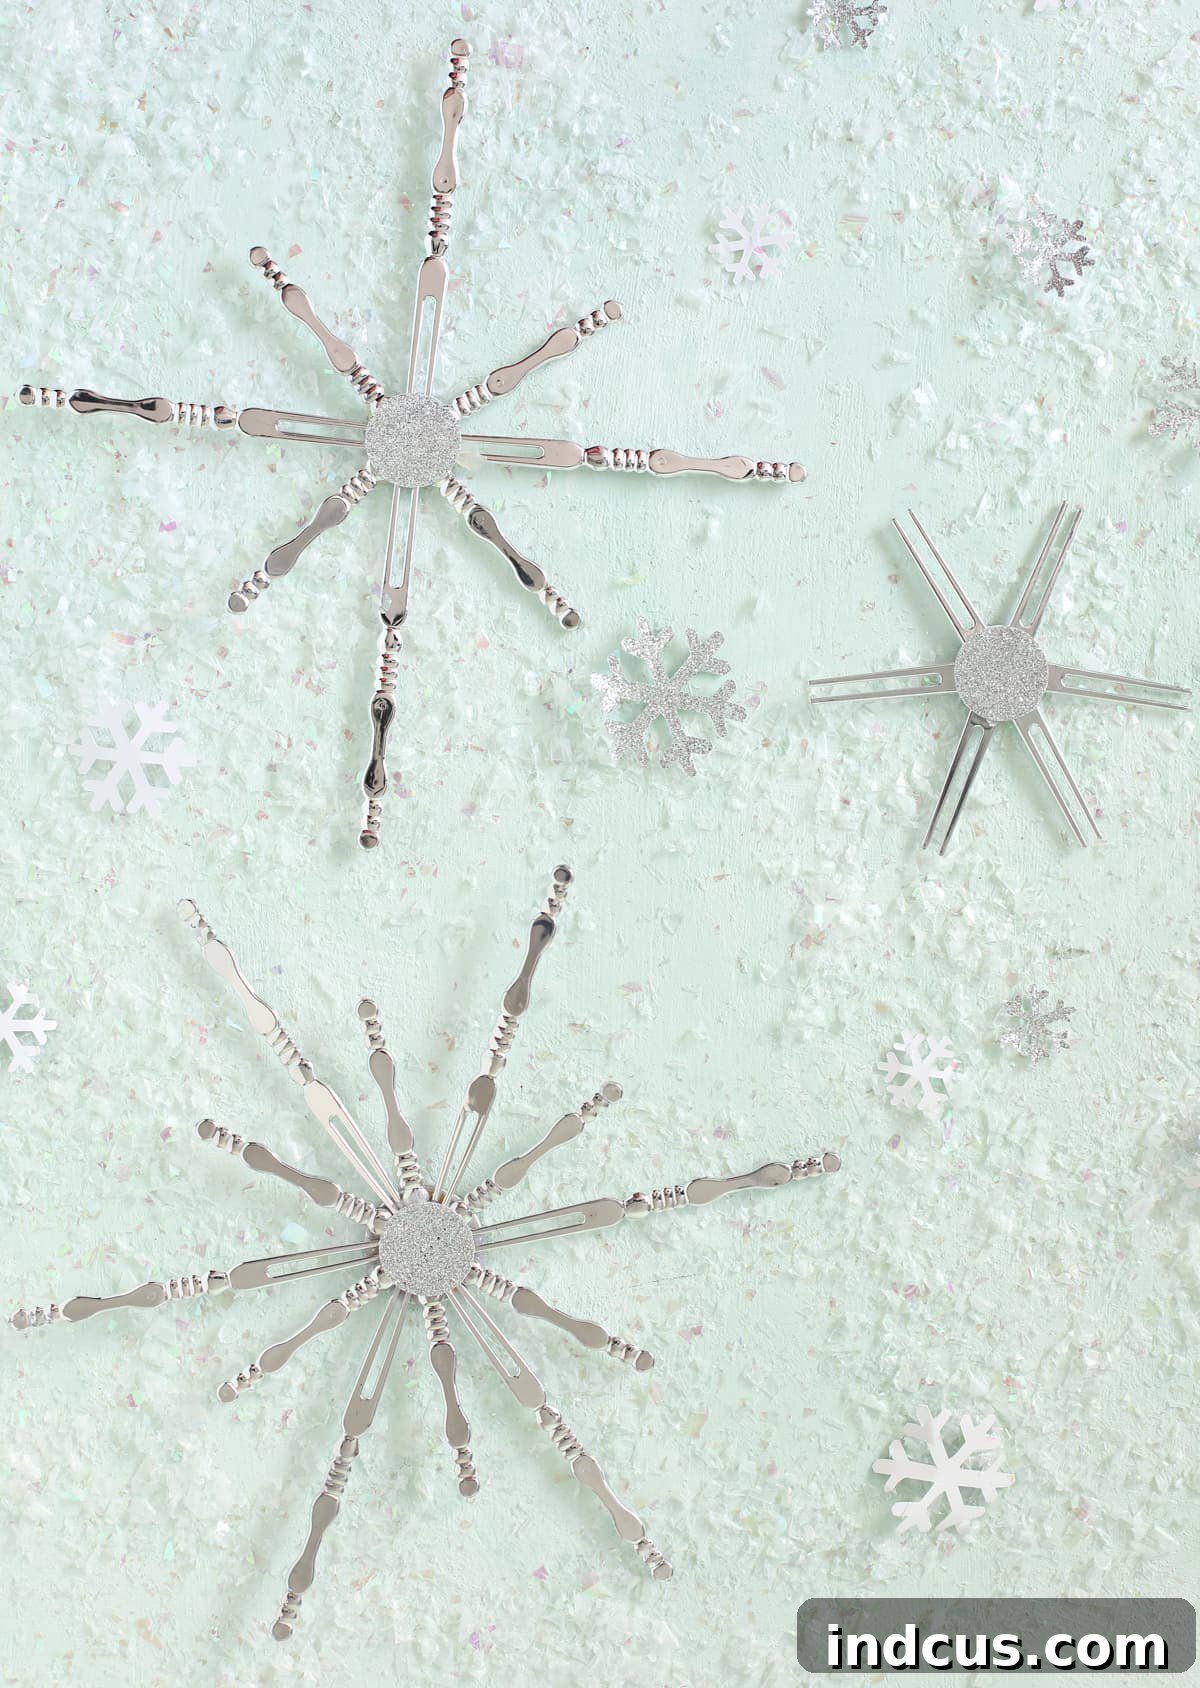
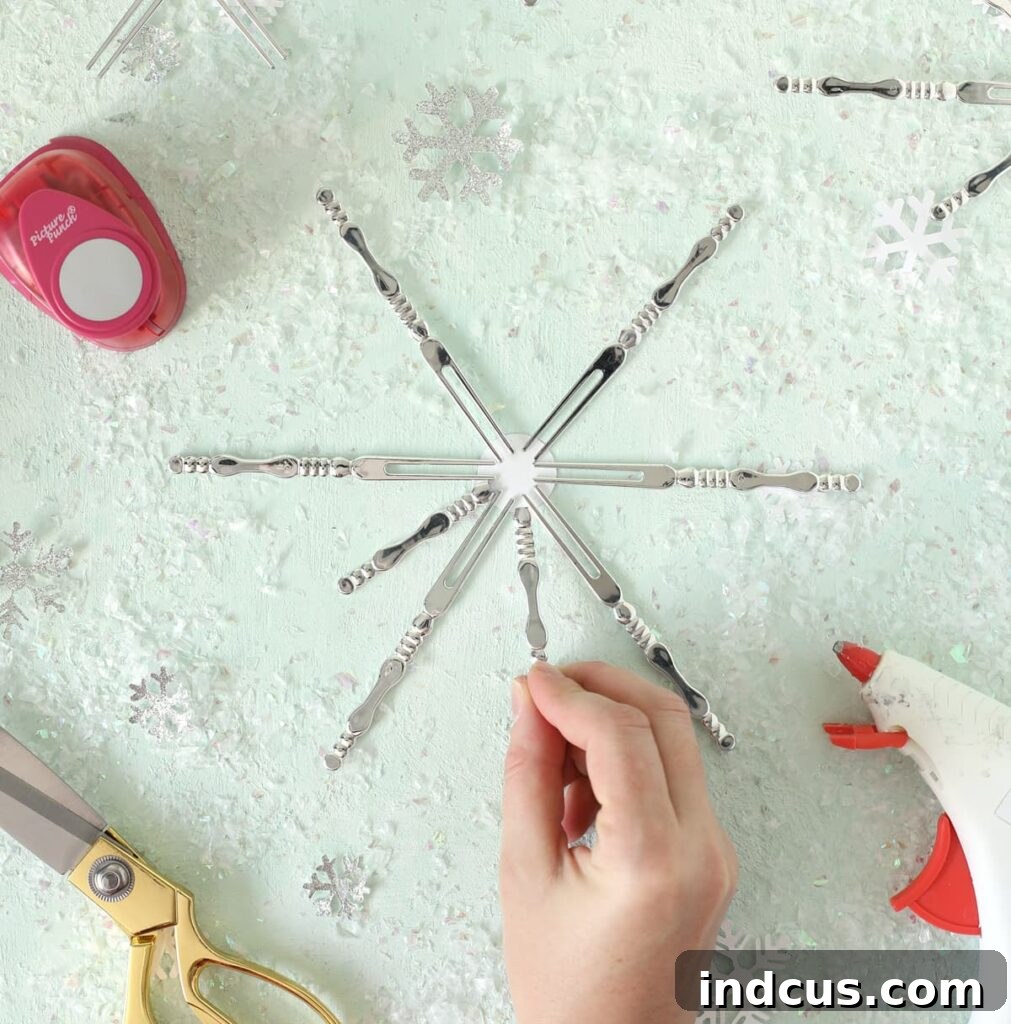
Now for the fun part: arranging your appetizer forks! Take one of your cardstock circles and begin positioning the forks around its perimeter. The goal is to create a snowflake shape, with the handles (the fatter, solid ends) of the forks meeting in the center, on top of the circle. Experiment with different numbers of forks and their angles to create varied designs. You might use six, eight, or even twelve forks for a denser snowflake. Don’t be afraid to overlap them slightly or adjust their spacing. For added visual interest, you can even cut some of the fork handles down to different lengths before arranging them, creating a layered or more dynamic effect. Before applying any glue, lay out your design completely to ensure you’re happy with the symmetry and overall aesthetic.
Step 3: Secure Your Snowflake with Hot Glue
Once you’ve settled on your perfect snowflake design, it’s time to secure everything into place. Carefully lift each fork one by one, apply a generous dab of hot glue to the handle end, and firmly press it back onto the cardstock circle in your chosen arrangement. Work quickly as hot glue sets fast. Once all the forks are glued down, take your second cardstock circle and apply hot glue to one side. Carefully place this second circle directly on top of the first, sandwiching the fork handles securely between the two cardstock pieces. Press firmly to ensure good adhesion and to cover up any visible glue or raw edges of the fork handles, giving your snowflake a clean, finished look on both sides. Allow a minute or two for the glue to fully set and cool, and your beautiful cocktail fork snowflake is complete!
Unleashing Creativity: Customization and Variations
While the basic silvery snowflake is stunning on its own, this craft offers endless possibilities for customization. Don’t be afraid to let your imagination run wild!
Material Magic: Beyond Plastic Forks
The beauty of this project lies in its adaptability. While plastic appetizer forks are affordable and readily available, consider other materials for entirely different aesthetics:
- Wooden Forks: For a rustic, natural, or farmhouse-style holiday decor, wooden appetizer forks would be absolutely charming. You could leave them natural, stain them, or even paint them white for a Scandinavian look.
- Colored Forks: If you find appetizer forks in vibrant colors like red, green, gold, or blue, they can instantly transform your snowflakes to match a specific holiday theme or party decor.
- Metallic Forks: True metallic (silverware-style) appetizer forks would create a more luxurious, heirloom-quality decoration, though they might be heavier and require stronger adhesive.
Color and Texture: Adding Sparkle and Depth
The possibilities for adding color and texture are truly limitless:
- Spray Paint: A simple can of metallic spray paint (gold, rose gold, copper, or even iridescent white) can drastically change the look of any basic plastic fork. Remember to work in a well-ventilated area and apply multiple light coats for the best finish.
- Glitter: For maximum sparkle, once your snowflakes are assembled, apply a thin layer of craft glue to the forks and sprinkle them generously with fine glitter. White, iridescent, silver, or blue glitter would enhance the icy snowflake effect.
- Faux Snow: Use a textured spray or paste designed to mimic snow for a realistic frosty finish.
Center Embellishments: The Final Touch
The central cardstock circles provide a perfect canvas for additional embellishments:
- Rhinestones & Gems: Glue a single larger rhinestone or several smaller ones in the center for an extra dose of sparkle.
- Small Beads or Pearls: Create a delicate, intricate look by adding tiny beads around the edge of the center circle or in the very middle.
- Mini Buttons or Charms: For a whimsical touch, attach a tiny decorative button or a small holiday-themed charm.
- Ribbons or Bows: A tiny satin bow can be glued to the top of the snowflake for a charming accent, especially if using them as ornaments.
Decorating with Your Handmade Cocktail Fork Snowflakes
These versatile snowflakes aren’t just for the Christmas tree! Their elegant simplicity makes them suitable for a wide array of holiday decorating ideas, bringing a cohesive and beautiful touch to your entire home.
Window Displays: A Winter Wonderland View
One of my favorite ways to display these beautiful creations is to hang them from a kitchen window, or any window for that matter, using fishing line. The clear fishing line makes them appear as if they are magically floating, creating a stunning winter wonderland effect both inside and out. Hang them at varying heights to add visual interest and depth, allowing them to gently twirl and catch the light.
Christmas Tree Ornaments: A Unique Shimmer
Naturally, these snowflakes make exquisite Christmas tree ornaments. Simply attach a loop of thin ribbon or thread to the top of one of the fork prongs or hot glue a small ornament hook to the back. Their silvery sheen will beautifully complement traditional ornaments and reflect the twinkling lights of your tree.
Garlands and Wreaths: Integrated Elegance
Incorporate your snowflakes into a festive garland by attaching them along its length with small pieces of wire or glue. They would look stunning intertwined with evergreen boughs, battery-operated fairy lights, or cranberries. Similarly, these snowflakes can be a fantastic addition to a DIY holiday wreath, adding a focal point or a scattering of frosty accents.
Gift Toppers and Place Settings: Personal Touches
Elevate your gift wrapping by using a snowflake as a unique gift topper instead of a traditional bow. It adds a handmade, personal touch that the recipient can then keep as a souvenir. For holiday dinner parties, use smaller snowflakes as elegant place card holders or simply place one at each guest’s setting for a sophisticated and festive touch.
Tabletop and Mantel Decor: Grouped for Impact
Arrange a cluster of varying-sized snowflakes on a decorative tray, alongside some pillar candles, pinecones, and evergreen sprigs, to create a charming tabletop centerpiece. They also look fantastic displayed on a mantelpiece, perhaps leaning against a mirror or artwork, surrounded by twinkling lights and other festive accents.
Video Tutorial: Watch the Magic Unfold
Sometimes, seeing is believing! For those who prefer a visual guide, I’ve put together a quick video tutorial demonstrating each step of this simple yet enchanting craft. Watching the process will help clarify any questions and inspire you to get started right away.
Conclusion: Your Winter Wonderland Awaits
And there you have it! A truly super cute, delightfully simple, and incredibly affordable Christmas craft that promises to add a unique sparkle to your holiday celebrations. From the initial spark of inspiration in a dollar store aisle to the final shimmering snowflake, this project is a testament to the joy of DIY. Whether you make a few for your tree or a whole flurry for your windows, these cocktail fork snowflakes are sure to charm everyone who sees them. Get creative, have fun, and enjoy the magic of crafting your own festive decor!
Loved this easy DIY Christmas craft idea? Pin it to save it for later and share the festive fun with your friends!