
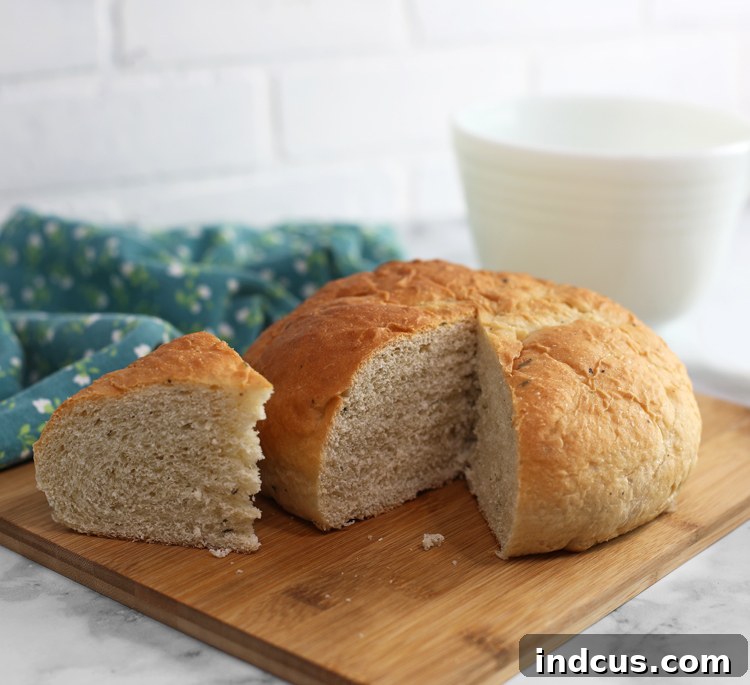
Rustic Rosemary Bread: The Ultimate Guide to a Crispy Crust and Pillowy Soft Center
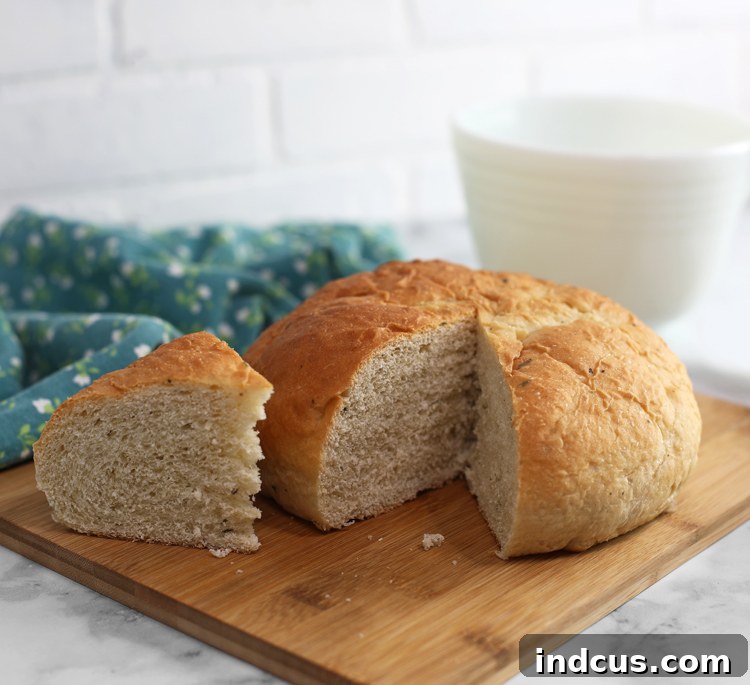
Imagine the comforting embrace of warm, freshly baked bread, its enticing aroma filling every corner of your home. Now, picture that bread with a golden, shatteringly crispy crust that crackles under your knife, revealing an interior so light, airy, and soft it practically melts in your mouth. This isn’t just a dream; it’s the reality of creating our Rustic Rosemary Bread. This easy and incredibly flavorful artisan bread is a true revelation, promising a bakery-quality loaf right from your own kitchen. If you’ve ever savored the delightful bread at a fine Italian restaurant, prepare to be transported to a similar state of culinary bliss.
This recipe is designed to be approachable for home bakers of all skill levels, turning simple ingredients into a masterpiece of texture and taste. The secret to its remarkable crust lies in a clever steaming technique during baking, while fragrant fresh rosemary infuses the entire loaf with an earthy, aromatic essence. Whether you’re planning a cozy family dinner or looking to impress guests, this homemade rosemary bread serves as the perfect companion, equally delicious dipped in a rich olive oil blend or generously slathered with softened butter. Get ready to embark on a delightful baking journey that culminates in a loaf you’ll be proud to share, and even more delighted to eat!
Why This Homemade Rosemary Bread Will Become Your New Favorite
Baking bread from scratch is one of life’s most rewarding culinary experiences, and this Rustic Rosemary Bread elevates that joy. Here’s a closer look at what makes this recipe truly special and why you’ll want to make it again and again:
- An Unforgettable Sensory Experience: From the moment you mix the dough to the first glorious bite, this bread engages all your senses. The sweet, yeasty scent mingling with fresh rosemary as it bakes, the visual appeal of its golden-brown exterior, the crisp sound of the crust, and finally, the tender chewiness of the crumb – it’s a feast for more than just your palate.
- Perfect Contrast in Textures: The magic of this artisan loaf lies in its remarkable textural contrast. The exterior boasts a wonderfully crispy, thin crust that gives way to an interior that is incredibly soft, airy, and just chewy enough to be satisfying. This perfect harmony makes every bite an absolute pleasure.
- Robust, Aromatic Flavor: Fresh rosemary is the undeniable star, lending a distinct, slightly piney, and highly fragrant flavor that permeates every crumb. This aromatic herb complements a wide array of savory dishes, making the bread versatile enough for any meal or occasion.
- Easy-to-Achieve Artisan Quality: You don’t need a professional oven or years of baking experience to create an artisan-quality loaf. Our straightforward instructions, combined with a simple trick of baking with steam, will guide you to a bread that looks and tastes like it came from a gourmet bakery, but with the added pride of being homemade.
- Incredibly Versatile for Any Meal: This rosemary bread is far more than just a side dish. It’s superb for dipping in your favorite olive oil and herb blend, fantastic alongside hearty Italian pasta dishes, a stellar base for gourmet sandwiches, or simply enjoyed on its own with a generous spread of butter. Its versatility makes it a staple for any home cook.
- The Joys of Homemade Wholesomeness: Baking at home gives you complete control over your ingredients, ensuring a fresh loaf free from preservatives and artificial additives. Plus, the process itself is wonderfully therapeutic, culminating in a delicious, wholesome food you’ve crafted with your own hands.
The Science of the Crisp Crust: Unlocking Bakery Secrets with Steam
That coveted crispy crust, often associated with professional bakeries, is surprisingly easy to replicate at home using the power of steam. Understanding why this simple technique works will help you appreciate the magic unfolding in your oven:
- Delaying Crust Formation: When bread is introduced to a humid, steamy environment in the oven, the moisture prevents the surface of the dough from drying out and forming a hard crust too quickly. This extended elasticity allows the loaf to expand more fully during the initial stages of baking – a phenomenon known as “oven spring.” The result is a lighter, airier crumb.
- Gelatinization for Shine and Texture: The moist heat from the steam also promotes the gelatinization of starches on the dough’s surface. This process contributes to a more appealing, slightly glossy finish on the crust, enhancing its visual appeal.
- Achieving Ultimate Crispness: As the baking progresses and the steam naturally dissipates (or when you remove the water pan), the gelatinized surface quickly dries out and crisps up. This rapid drying creates that delightful, thin, and crunchy crust that is the hallmark of truly exceptional artisan bread.
By simply placing a shallow pan of water on the bottom rack of your oven, you can easily harness this professional baking technique, elevating your homemade rosemary bread to an impressive culinary creation.
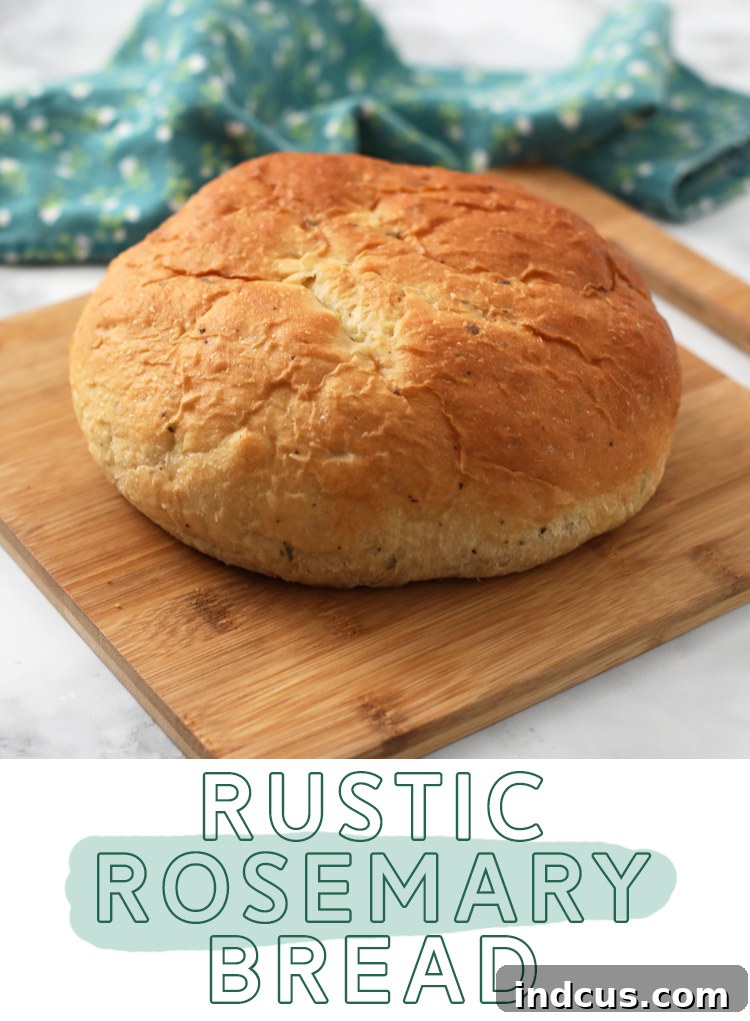
Rosemary Bread
This rustic rosemary bread has a delicious crispy crust and a pillowy soft center. You’ll adore this artisan bread! It’s like something from a high-end restaurant, but made with love in your own kitchen.
Share on Facebook
Rate This Recipe
Ingredients
- 1 tablespoon active dry yeast
- 1 tablespoon granulated sugar
- 1 cup warm water (ideally between 105-115°F / 40-46°C)
- 2.5 cups all-purpose flour (plus up to 1/2 cup more, as needed)
- 1 teaspoon fine sea salt
- 1 tablespoon fresh rosemary, finely chopped (or 2 teaspoons dried rosemary)
- 1 tablespoon unsalted butter, softened
Instructions
- Preheat your oven to 375 degrees Fahrenheit (190 degrees Celsius). This ensures the oven is at the correct temperature when the bread goes in.
- In the bowl of a stand mixer fitted with a dough hook, or directly in your bread machine pan, combine the active dry yeast, granulated sugar, warm water, the initial 2.5 cups of all-purpose flour, salt, and the chopped rosemary.
- Mix on low speed (or initiate the dough cycle on your bread machine). Continue mixing, gradually adding the additional flour one tablespoon at a time, until the dough is no longer excessively sticky and begins to gather into a ball, pulling away from the sides of the bowl. The dough should feel soft and slightly tacky, but not wet or clinging to your fingers.
- Increase the mixer speed to medium-low and knead the dough for 7-10 minutes. This develops the gluten, resulting in a smooth, elastic dough. If using a bread machine, allow it to complete its full dough cycle, which typically includes the initial rise.
- Lightly grease a large clean bowl with a drizzle of olive oil. Transfer the kneaded dough to this bowl, turning it once to ensure it’s lightly coated with oil. Cover the bowl snugly with a clean kitchen towel or plastic wrap. Place the bowl in a warm, draft-free location and let the dough rise until it has doubled in size, which usually takes about 1 hour. This is the first proofing.
- Once the dough has doubled, gently punch it down to release the air. Turn the dough out onto a lightly floured surface and gently shape it into a smooth, round or oval loaf. Avoid overworking the dough at this stage.
- Drizzle a small amount of olive oil onto a baking sheet, or line it with parchment paper for easy removal. Place the shaped dough onto the prepared baking sheet. Cover it loosely and let it rise for a second time for 15-20 minutes in a warm spot. This secondary rise allows the loaf to achieve its final volume.
- If you desire an extra boost of flavor and visual appeal, sprinkle a little more fresh or dried rosemary over the top of the loaf just before baking. Place the tablespoon of softened butter directly on top of the loaf. As it bakes, the butter will melt and seep into the crust, enriching its flavor and color.
- On the bottom rack of your preheated oven, place a shallow, oven-safe baking dish (like a metal pie plate or cast iron skillet) filled with approximately 1 inch of hot water. This will create the crucial steam for that crispy crust.
- Carefully transfer the baking sheet with your rosemary bread to the middle rack of the oven. Bake for about 30 minutes, or until the bread achieves a deep golden-brown color and, when tapped on the bottom, sounds hollow. For absolute certainty, an instant-read thermometer inserted into the center should register between 190-200 degrees Fahrenheit (88-93°C).
- Once baked, remove the bread from the oven and immediately transfer it to a wire cooling rack. Allow it to cool completely before slicing and serving. Cooling is vital as it allows the internal structure of the bread to set, preventing a gummy texture.
Expert Tips for Baking Your Best Rosemary Bread
Achieving a perfect loaf of rosemary bread is simple when you follow these helpful tips:
- Mind the Yeast: Always ensure your active dry yeast is fresh and potent. Warm water (105-115°F / 40-46°C) is key to activating it; water that’s too cold won’t activate it, and water that’s too hot will kill it. If your yeast doesn’t become foamy after mixing with sugar and water, it’s best to start with a new packet.
- Flour Measurement and Dough Consistency: The exact amount of flour can vary due to humidity or how you measure. Use the “scoop and level” method for accuracy. The goal is a dough that is soft, pliable, and slightly tacky to the touch, but not so sticky that it aggressively clings to your hands or the mixer bowl.
- The Power of Fresh Rosemary: While dried rosemary can be used (use about half the amount as it’s more concentrated), fresh rosemary offers an unparalleled aroma and flavor. Finely chop it to distribute its essence evenly throughout the dough.
- Patience During Rising: Don’t rush the rising process (proofing). A full and proper rise is critical for a light, airy, and flavorful loaf. Find a warm, draft-free spot. If your kitchen is cool, you can briefly warm your oven to its lowest setting, turn it off, and let the dough rise inside with the door slightly ajar.
- Cool Completely Before Slicing: This is arguably one of the most important steps! Slicing warm bread can lead to a dense, gummy texture. Cooling on a wire rack allows steam to escape and the internal structure to fully set, resulting in the desired pillowy soft crumb.
- Enhance Your Crust: For an extra shiny and crisp crust, consider brushing the loaf with a light egg wash (one egg whisked with a tablespoon of water) before the second rise. This can also help seeds adhere better if you’re adding toppings.
Flavor Variations: Unleash Your Creativity
While the classic rosemary bread is divine, this versatile recipe serves as an excellent base for various flavor explorations. Don’t be afraid to experiment!
- Garlic & Herb Fusion: Elevate the savory notes by adding 1-2 teaspoons of garlic powder or 2-3 cloves of minced fresh garlic to the dough. You can also incorporate a blend of other dried Italian herbs like oregano, basil, or a pinch of thyme for a robust, herbaceous profile.
- Cheesy Indulgence: Fold in 1/2 to 3/4 cup of grated Parmesan, shredded sharp cheddar, or a blend of Italian cheeses during the final stages of kneading. The cheese will melt beautifully, creating pockets of rich flavor.
- Mediterranean Delight: For a delightful Mediterranean twist, add 1/4 cup of chopped, oil-packed sun-dried tomatoes (drained) and 1/4 cup of pitted, chopped Kalamata olives to the dough. This adds bursts of tangy, briny goodness.
- Caramelized Onion Sweetness: Sauté one medium onion, finely chopped, until it’s deeply caramelized and sweet. Let it cool completely, then fold it into the dough. The sweet and savory combination is truly irresistible.
- Spicy Kick: A pinch of red pepper flakes (1/2 to 1 teaspoon) can add a subtle warmth and gentle heat, especially if you plan to serve it with pasta or spicy dips.
- Seed Toppings: Before the second rise, lightly brush the top of the loaf with water or an egg wash, then sprinkle generously with sesame seeds, poppy seeds, or even a mix of everything bagel seasoning for an added layer of texture and flavor.
Perfect Pairings: Serving Your Artisan Rosemary Loaf
This versatile rosemary bread is the ideal accompaniment to almost any meal, and delicious enough to enjoy all on its own. Here are some of our favorite ways to serve it:
- Classic Dipping Oil: The quintessential pairing! Serve with a shallow dish of high-quality extra virgin olive oil, perhaps infused with a splash of balsamic vinegar, a sprinkle of red pepper flakes, dried oregano, and a pinch of salt and black pepper.
- Alongside Italian Feasts: It’s the ultimate mop for rich pasta sauces, a delightful partner to lasagna, chicken parmesan, hearty minestrone, or any robust Italian dinner.
- Gourmet Sandwiches: Slice thick pieces to create extraordinary sandwiches. Fill them with your favorite deli meats, cheeses, fresh lettuce, tomatoes, and a flavorful spread for a lunch that feels truly special.
- With Soups and Stews: The bread’s sturdy crust and soft interior make it perfect for soaking up the rich broths and gravies of your favorite soups, chilis, and stews.
- Toasted with Butter: Sometimes, simplicity is best. Lightly toast slices and slather with softened unsalted butter for a comforting breakfast, snack, or side with eggs.
- Bruschetta Base: For an elegant appetizer, slice the bread thinly, toast it lightly, and top with a fresh mixture of diced tomatoes, fresh basil, minced garlic, and a drizzle of olive oil.
- With Cheese Boards: Its aromatic flavor makes it a wonderful addition to a charcuterie or cheese board, pairing well with various cheeses, cured meats, and fruit.
Storing Your Delicious Homemade Rosemary Bread
To ensure your artisan rosemary bread remains fresh and flavorful for as long as possible, proper storage is key:
- At Room Temperature: Once the bread has completely cooled, store it in an airtight container, a bread box, or wrap it in a clean kitchen towel before placing it in a plastic bag. This method helps maintain freshness for 2-3 days. A paper bag alone can keep the crust crispier, but combining it with a plastic bag helps prevent drying out too quickly.
- Freezing for Longer Storage: For extended freshness, this bread freezes beautifully. Once fully cooled, slice the loaf or wrap it whole in plastic wrap, then place it in a freezer-safe bag or aluminum foil. It can be frozen for up to 3 months. Thaw individual slices at room temperature, or toast them directly from frozen for a quick and warm treat.
- Reviving Stale Bread: If your bread has become a little stale, don’t despair! Lightly dampen the crust with water (you can use your hands or a spray bottle) and reheat the loaf in a 350°F (175°C) oven for 5-10 minutes. This will bring back some of its warmth and crispness, making it enjoyable again.
Did You Make This Delicious Rustic Rosemary Bread?
We absolutely love seeing your culinary creations! Share your beautiful loaves and tag us on Instagram @thecraftpatch. And for more inspiring recipes, craft ideas, and home decor tips, be sure to follow us on Pinterest!
Pin Recipe
Share Recipe on Facebook
Love this recipe? Don’t forget to save it to your favorites so you can bake this incredible bread again and again!
Craving More Irresistible Homemade Bread Recipes?
Best Ever Homemade Bread
100% Whole Wheat Bread







