
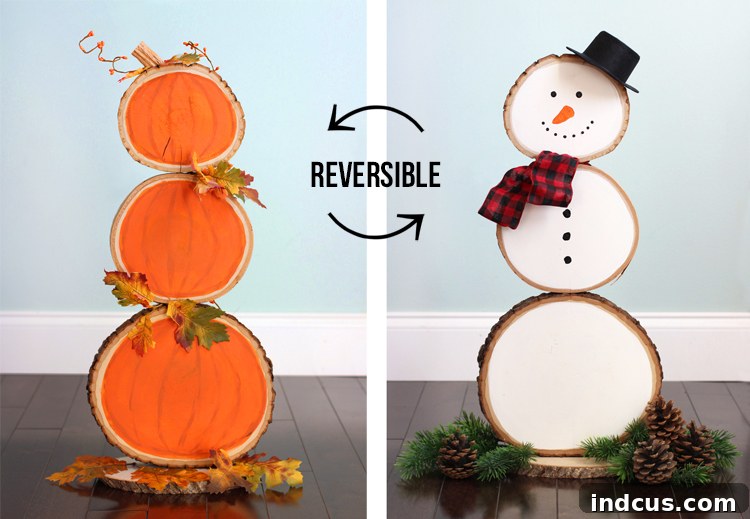
Craft a Charming Reversible Wood Slice Porch Decoration: Pumpkins for Fall, Snowman for Winter
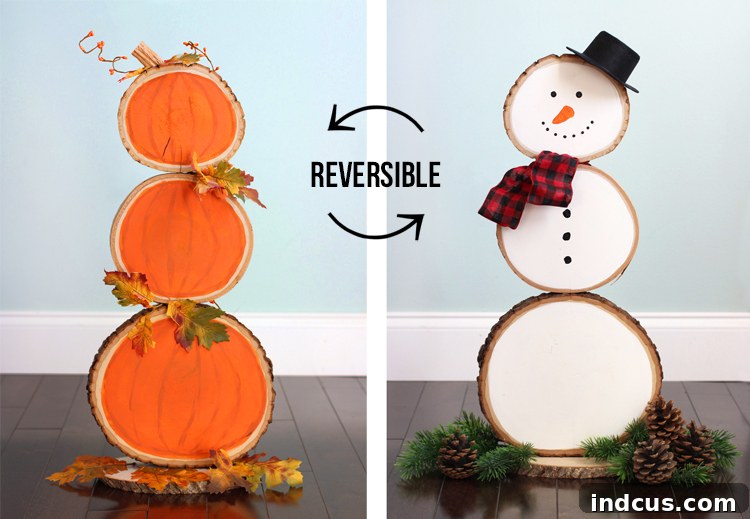
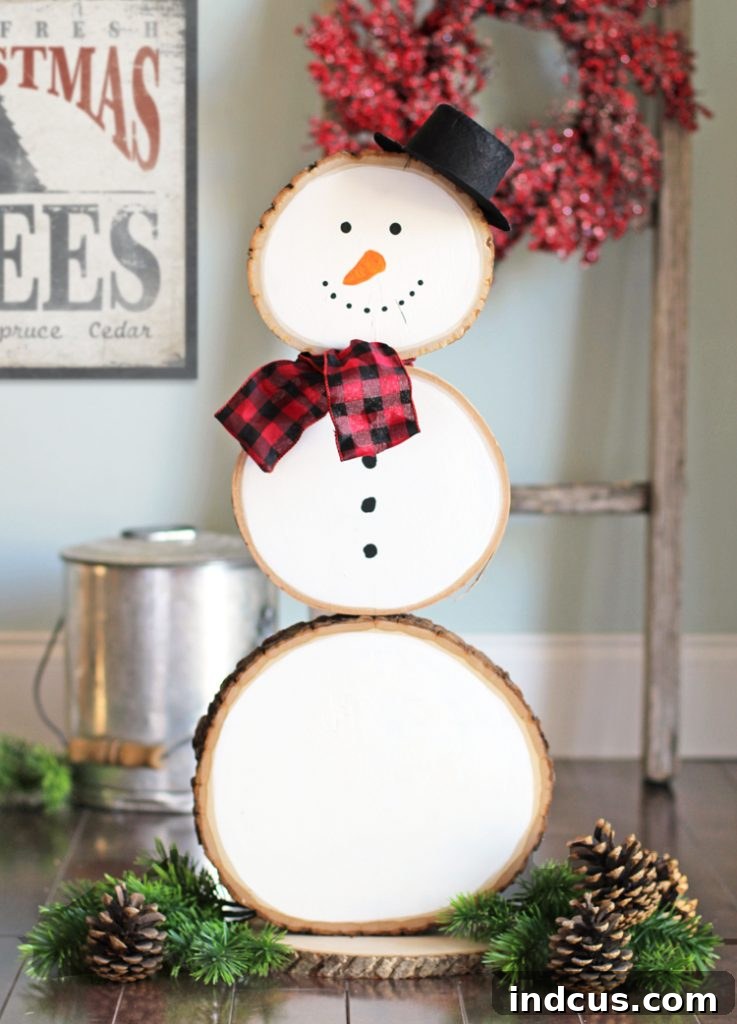
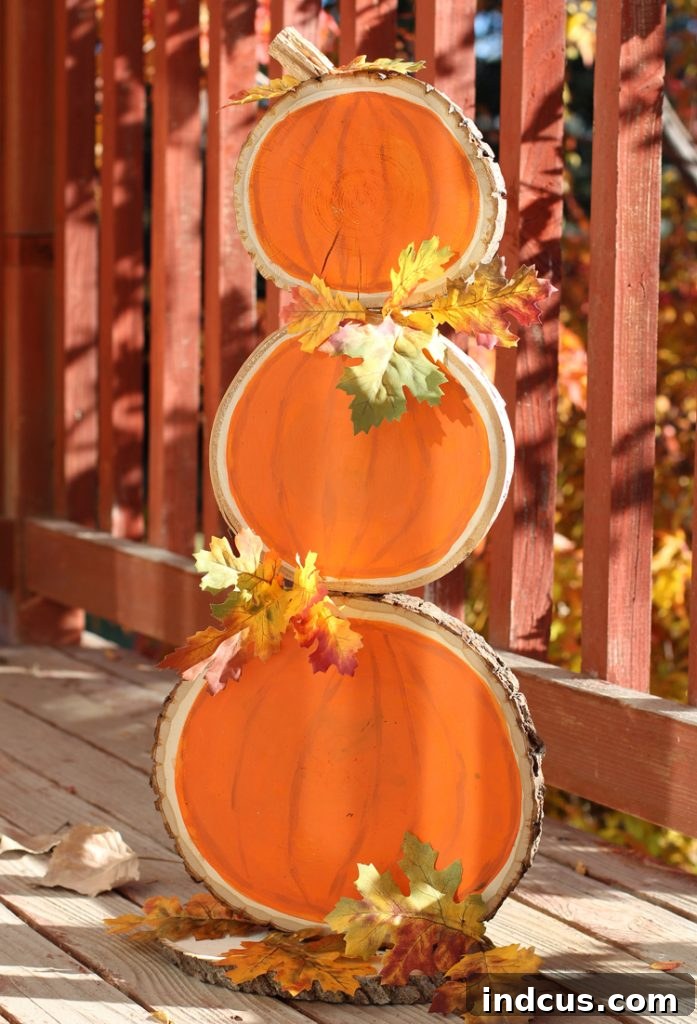
Embrace the beauty of the changing seasons with a craft project that offers double the charm and value! Creating versatile decorations that transition effortlessly from one season to the next is a clever way to enhance your home’s aesthetic without constant redecorating. This delightful reversible wood slice porch decoration perfectly embodies that spirit, featuring a heartwarming display of rustic fall pumpkins on one side and a cheerful, welcoming snowman on the other. Imagine the convenience of showcasing festive autumnal vibes throughout September, October, and November, then simply flipping your decoration to usher in the cozy magic of winter from December through January. It’s truly a two-for-one deal that extends your decorating efforts and brings continuous joy to your entryway!
Join us on this creative journey as we guide you through a comprehensive, step-by-step tutorial. You’ll learn exactly how to craft your very own wood slice reversible porch decoration, transforming simple materials into a cherished piece of seasonal decor that will welcome guests with its unique, handcrafted appeal.
Essential Materials and Tools for Your Reversible Wood Slice Craft
To embark on this engaging DIY project, gathering the right materials is the first crucial step. The beauty of this craft lies in its rustic charm, often utilizing items easily found at craft stores or even around your home. Here’s a detailed list of what you’ll need to create your reversible wood slice masterpiece:
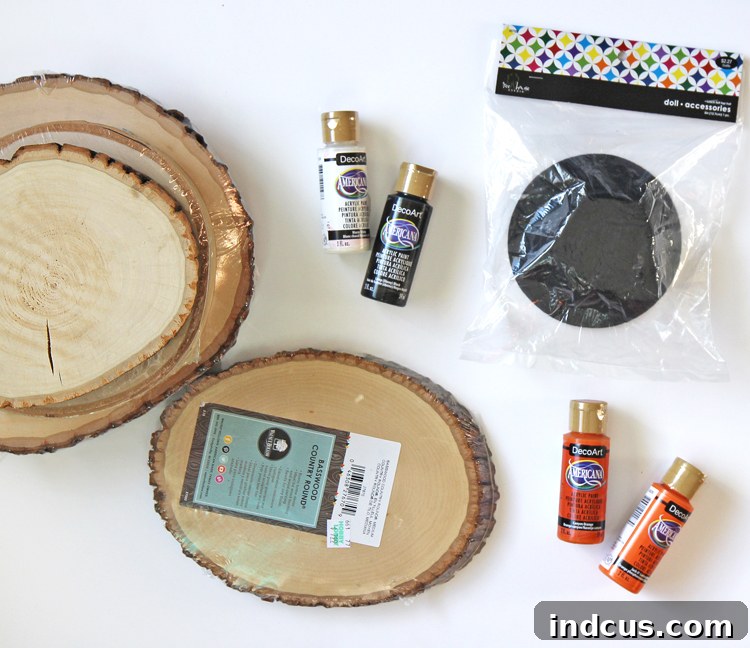
Materials You’ll Need
- Thick Wood Slices: (**Important Note on Selection below)
- Small: Approximately 7-inch diameter (for the top pumpkin/snowman head)
- Medium: Approximately 9-inch diameter (for the middle pumpkin/snowman body)
- Large: Approximately 11-inch diameter (for the bottom pumpkin/snowman body)
- Why thick slices? The 2-inch thickness provides stability and a substantial look, crucial for a freestanding porch decoration. Thin slices are prone to warping and might not hold up as well outdoors.
- Basswood Country Round Base: Approximately 11-inch oval (**See note).
- This piece serves as the stable foundation for your stacked wood slices, preventing your decoration from toppling over.
- Craft Paint: Black, White, Orange, and Dark Orange Acrylic Craft Paint.
- Acrylic paints are excellent for wood crafts due to their versatility, quick drying time, and durability once sealed. The specific colors are essential for creating realistic pumpkins and a classic snowman.
- Paint Brushes: A variety of sizes, including a wider brush for covering large areas and a finer brush for detailed work like faces and pumpkin veins.
- Felt Doll’s Hat: (Approximately 5 inches, often found in the doll clothing section of craft stores).
- This charming accessory adds character to your snowman and conveniently conceals the pumpkin stem when flipped.
- Plaid Ribbon: (For the snowman’s scarf).
- Buffalo plaid is a popular choice for rustic fall and winter decor, adding a cozy touch. Choose a width that complements the snowman’s size.
- Wooden Dowel: A sturdy dowel that matches the drill bit size you’ll use for stacking.
- The dowel is crucial for vertically aligning and securing your wood slices, ensuring a stable, stacked structure.
- Electric Drill: With drill bits matching your dowel size.
- 2-inch Screw: To anchor the largest wood slice to the base.
- Pumpkin Stem or Twig: A real pumpkin stem, a carved stick, or a decorative twig.
- This natural element adds authenticity to your pumpkin side.
- Wood Glue or Hot Glue: For attaching the stem and other embellishments.
- Wood glue offers a stronger, more permanent bond for structural elements, while hot glue is excellent for quick attachments and decorative details.
** Note on Wood Slice Selection: The right wood slices are key to the success and visual appeal of this project. While you can find wood slices in the wood crafting aisle at Hobby Lobby, and often in the Christmas section during holiday seasons, we strongly recommend purchasing them in person. Sizes and shapes can vary significantly, and seeing how different pieces fit together is invaluable. Don’t be shy about laying them out on the floor right there in the store to find the perfect trio that stacks well and looks balanced – sometimes, you truly must “suffer for your art!” Ensure you select the thicker birch wood slices for the main body of your decoration. The thinner Basswood Country Rounds are generally too delicate for the stacked body and are best reserved for the base piece. Shopping in person helps you avoid any surprises with sizing or how the individual pieces marry together, ensuring a harmonious and sturdy final product.
Step-by-Step Guide: Crafting Your Reversible Seasonal Masterpiece
Now that you’ve gathered all your materials, it’s time to bring your reversible wood slice decoration to life! Follow these detailed instructions carefully to ensure a beautiful and durable finished product.
Instructions
Step 1: Preparing Your Wood Slices with Paint
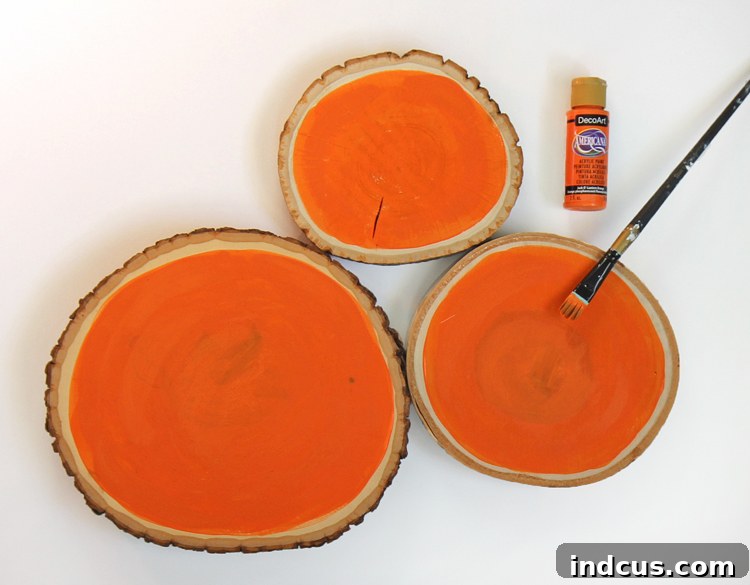
Begin by laying out your small, medium, and large wood slices on a protected work surface. On one side of each slice, carefully paint the center with your orange craft paint. Aim for smooth, even coats, allowing each coat to dry completely before applying the next if needed. This vibrant orange will form the base for your fall pumpkins. Once the orange paint is thoroughly dry to the touch, flip all three wood slices over. On the opposite side of each slice, paint the centers white. This white base will serve as the canvas for your cheerful snowman. Patience with drying times is crucial here to prevent smudging and ensure crisp, clean colors on both sides.
Step 2: Aligning and Marking for Snowman Assembly
Once both the orange and white paint layers are completely dry, it’s time to prepare for assembly. Carefully arrange the wood slices on a flat surface, stacking them in the order you envision your snowman: smallest on top, medium in the middle, and largest at the bottom. Adjust their positions until they form a pleasing, well-balanced snowman shape. Once satisfied with the alignment, use a pencil to mark the exact centers where the edges of the wood slices touch. For precision, a square arm ruler can be a fantastic tool to ensure your lines are perfectly straight, helping to achieve a stable and aesthetically pleasing stack. These marks will guide your drilling in the next step.
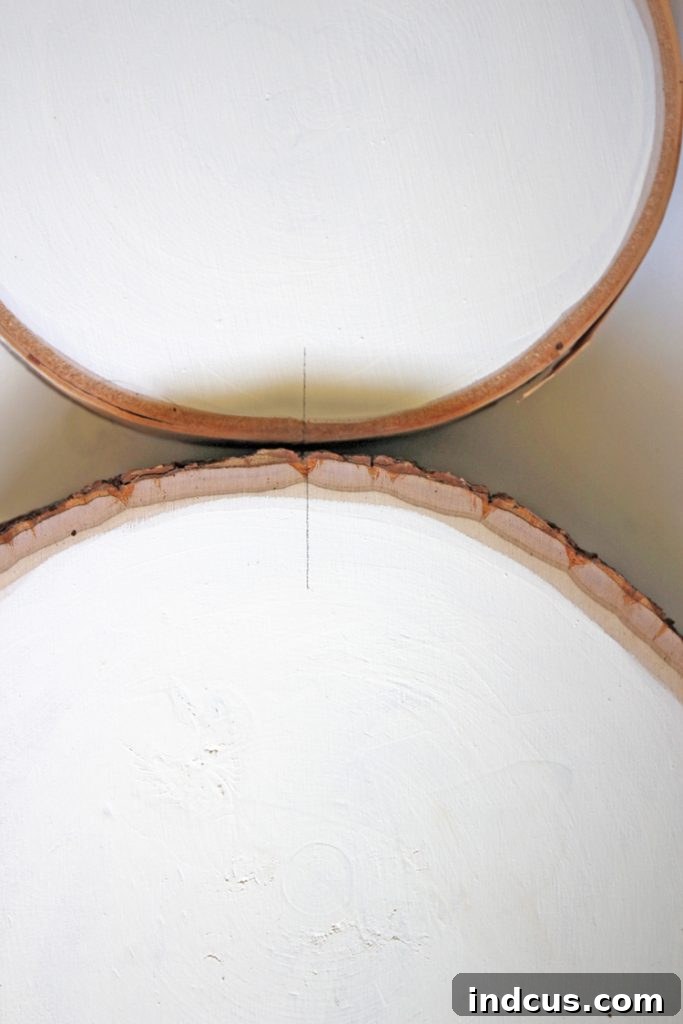
Step 3: Drilling and Securing the Stack
Safety first! When using an electric drill, always wear appropriate eye protection. Select a drill bit that is precisely the same size as your wooden dowel. This snug fit is essential for a secure connection. Carefully drill holes into the sides of each wood slice at the pencil marks you made in the previous step. Drill deep enough to accommodate the dowel securely but avoid drilling all the way through the slice. Once the holes are drilled, gently slip a piece of dowel into each set of holes, connecting the wood slices so they fit together snugly. This dowel system acts as an internal spine, ensuring your wood slices are robustly stacked and aligned. Finally, to anchor the entire structure, position the largest wood slice (the base of your snowman/pumpkin stack) onto your Basswood Country Round base. Using your electric drill, carefully drill one or two long screws up from the bottom of the base piece into the center of the largest wood slice. This provides superior stability, making your porch decoration resistant to wind and accidental bumps.
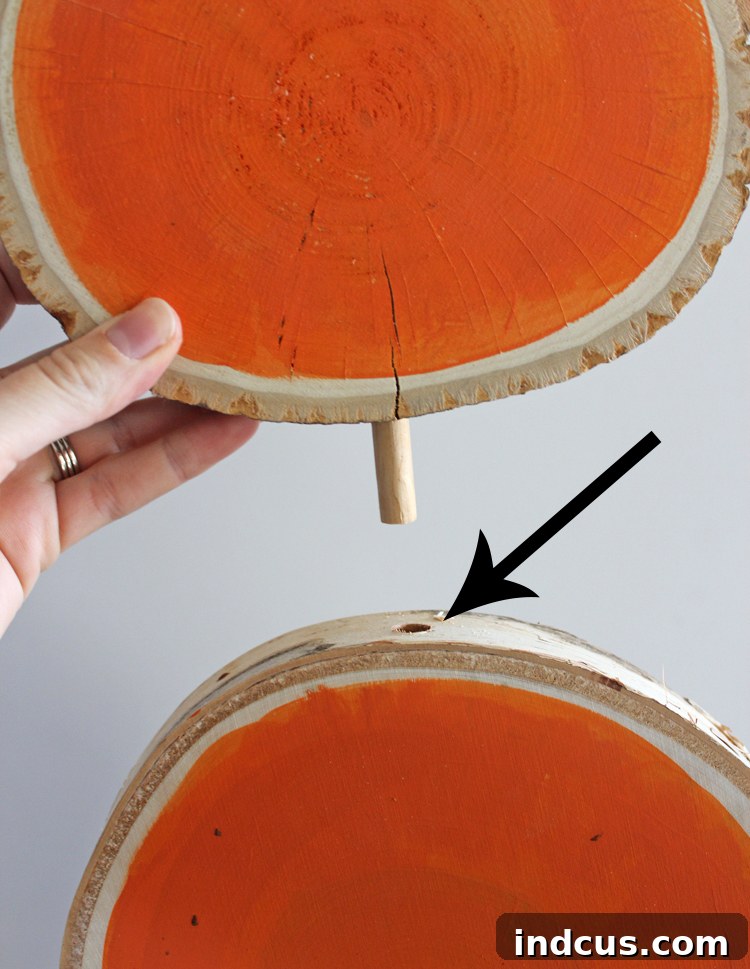
Step 4: Attaching the Pumpkin Stem
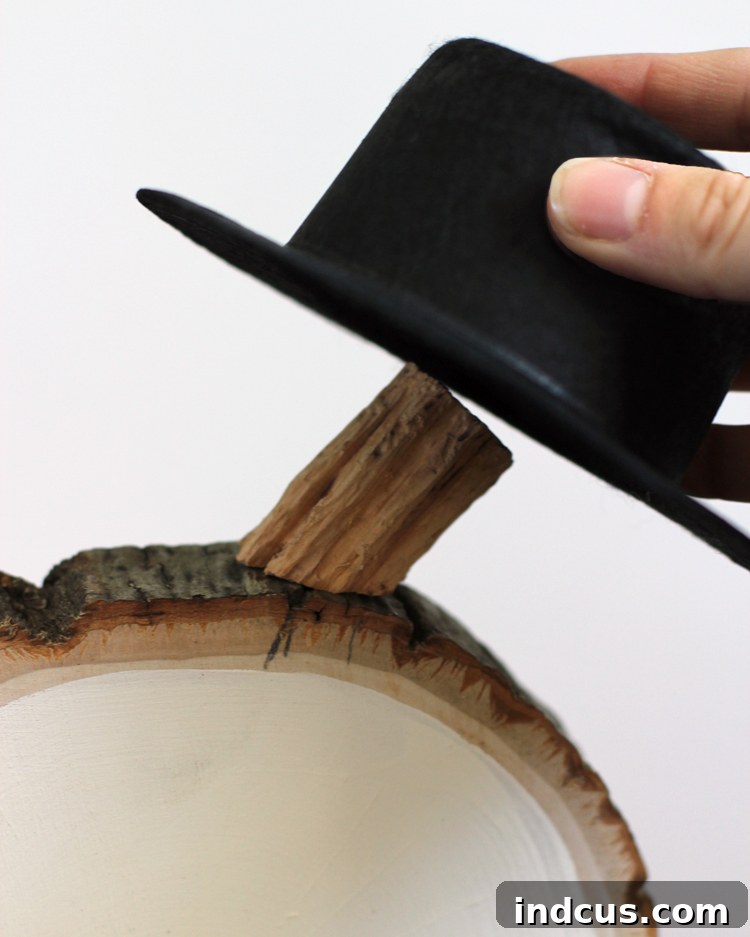
Now, let’s add a touch of natural elegance to the pumpkin side. Take your chosen twig or pumpkin stem. Apply a generous amount of wood glue or hot glue to the bottom of the stem. Carefully attach it to the top edge of your smallest wood slice – this is the piece that will serve as the top pumpkin and the snowman’s head. Position it centrally and hold it firmly until the glue sets. On the pumpkin side, this stem will be a beautiful, authentic detail. On the snowman side, this stem will be cleverly concealed later by the felt hat, ensuring a seamless transition between seasons.
Step 5: Adding the Artistic Details and Embellishments
This is where your creativity truly shines! It’s time to bring your pumpkins and snowman to life with painted features and charming accessories.
-
For the Pumpkin Side: Flip your stacked wood slices to the orange side. Using your darker orange craft paint and a fine-tipped brush, delicately paint subtle, curved veins onto each pumpkin. These veins add depth and realism, giving your pumpkins a more authentic, farm-fresh look. For an extra touch of seasonal cuteness, you might consider attaching a few faux fall leaves around the base of the pumpkin stem with a dab of hot glue. This simple addition enhances the autumnal theme and adds a delightful textural element.

-
For the Snowman Side: Now, flip your decoration to the white side. Using black paint and a fine brush, carefully paint a charming snowman face on the top wood slice. You can opt for traditional coal eyes and a carrot nose (using orange paint), or get creative with your own design. Below the face, paint a few black “coal” buttons down the front of the snowman’s body on the medium and large slices. Finally, tie your buffalo plaid ribbon around the neck of the snowman (where the top and middle slices meet) to create a cozy and stylish scarf. Secure it with a small knot or a dab of hot glue to keep it in place. Lastly, place the felt doll’s hat securely on top of the snowman’s head, covering the pumpkin stem you attached earlier.
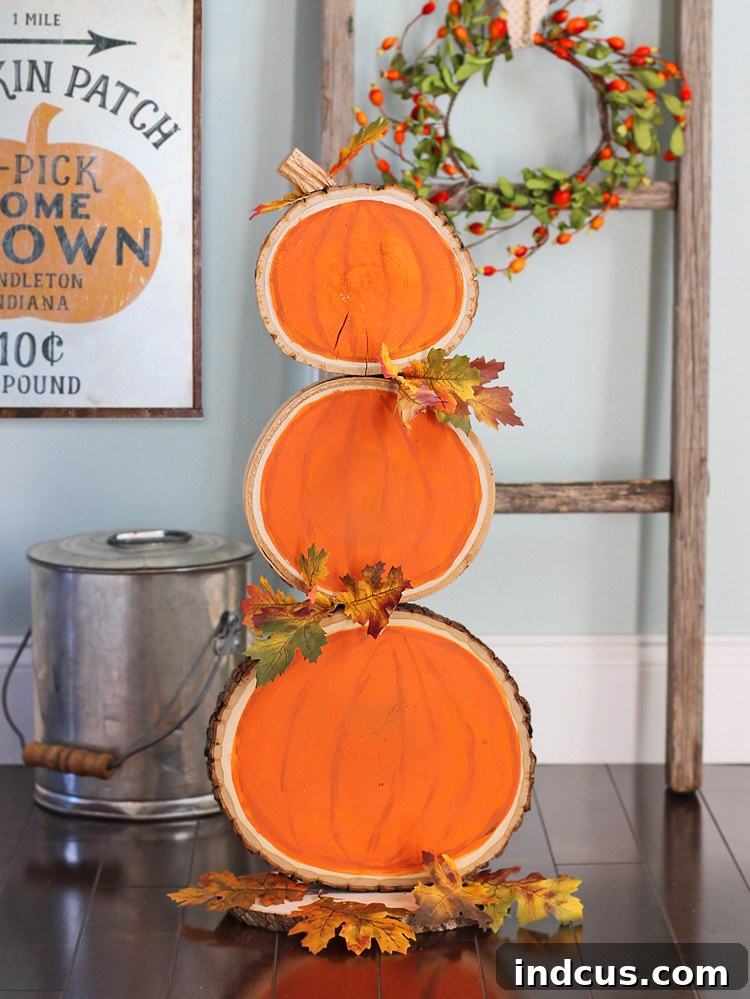
Watch Our Tutorial Video!
While we can’t embed the video directly in this text, we encourage you to imagine the satisfying flip from festive fall pumpkins to a cheerful winter snowman! Seeing this craft in action truly showcases its clever design and ease of transformation. Picture a short video demonstrating how effortlessly it transitions from one season to the next, highlighting the beautiful details on both sides. This visual guide would undoubtedly inspire and clarify the process even further!
We are absolutely delighted with this fun, rustic, and incredibly versatile craft! There’s something truly captivating about the natural texture of the wood slices, which lends an authentic, earthy feel to the decoration. But what we love most is the sheer practicality and extended enjoyment it offers: a single charming porch decoration that serves dual duty, beautifully adorning your home all the way from the crisp days of early fall through the cozy depths of winter. It’s a statement piece that celebrates two beloved seasons with handcrafted warmth and character.
If you’ve enjoyed creating this project, we invite you to explore more of our creative endeavors! Discover a wealth of other inspiring fall craft ideas to deck out your home for autumn. Additionally, delve into a collection of darling wood slice craft ideas for year-round inspiration and beautiful rustic projects.
FREQUENTLY ASKED QUESTIONS ABOUT THIS REVERSIBLE WOOD SLICE CRAFT
What are the recommended sizes for the wood slices?
- For a well-proportioned and visually appealing decoration, we recommend wood slices that are approximately 7 inches (small), 9 inches (medium), and 11 inches (large) in diameter. These graduated sizes create a classic stacked look for both the pumpkins and the snowman. The oval base piece should be around 11 inches across to provide a stable foundation. Crucially, all these slices should be about 2 inches thick to ensure durability and a substantial feel.
Where can I purchase good quality wood slices for this project?
- Hobby Lobby is an excellent resource and often has a wide selection in their wood crafting aisle, particularly during holiday seasons. Other large craft retailers like Michael’s or Joann Fabrics also typically stock various sizes of wood slices. For convenience, you can also find a good range of options online, including on Amazon. Remember, purchasing in person allows you to visually select pieces that fit together perfectly and have the desired thickness.
What can I use for the pumpkin stem?
- The most authentic option is a real dried stem from a pumpkin, which can often be saved from pumpkins purchased for carving or decoration. Alternatively, you can creatively carve a small, sturdy stick to resemble a pumpkin stem, or simply use a charming, naturally twisted twig. Another popular choice is to cut the stem off a fake decorative pumpkin, which offers a uniform and readily available solution.
Is it possible to cut my own wood slices from a fallen tree?
- Absolutely! If you have access to a fallen tree or logs in your yard, cutting your own wood slices can be a very satisfying and cost-effective approach. Just be aware that freshly cut wood, especially when thick, has a tendency to split and crack as it dries and cures. To minimize this, use wood from a tree that has been down for a while and has had time to air dry. Applying a wood sealer can also help reduce cracking, but some natural splitting adds to the rustic charm!
What size felt hat is recommended for the snowman?
- For the 7-inch diameter top wood slice, a 5-inch felt doll’s top hat typically works best. This size provides good coverage for the pumpkin stem and looks proportionally balanced on the snowman’s head, adding that classic wintertime flair.
How can I protect my reversible decoration for outdoor use?
- To ensure your beautiful craft withstands the elements, especially if placed outdoors on a porch, it’s highly recommended to apply a clear, outdoor-safe sealant. A marine-grade varnish or a clear acrylic spray sealer (like Mod Podge Outdoor or Rust-Oleum Clear Coat) will protect the paint and wood from moisture, UV rays, and general wear and tear. Apply several thin coats, allowing each to dry completely according to the product instructions, for optimal protection.
Can I customize the designs or colors?
- Definitely! This project is a fantastic canvas for your personal creativity. Feel free to experiment with different paint colors for your pumpkins (e.g., white, teal, or muted greens) or unique patterns for your snowman’s scarf. You could also add glitter, small craft buttons instead of painted ones, or even personalize the snowman with family initials. The possibilities are endless, allowing you to tailor the decoration to your unique style and home decor.







