
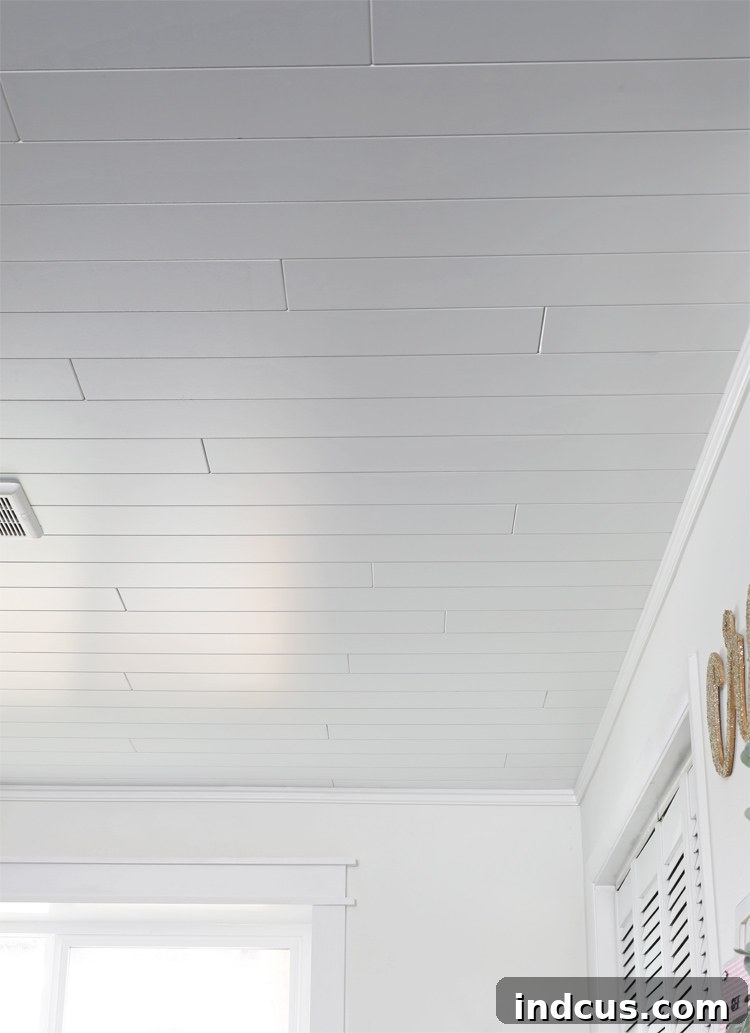
Transform Your Ceilings with WOODHAVEN Planks & Easy Up System: The Ultimate Drywall-Free, Mess-Free Makeover
Do you look up at your ceilings and sigh? Are you tired of outdated textures, unsightly cracks, or the looming dread of a full-scale ceiling renovation? For many homeowners, the thought of drywalling, scraping popcorn ceilings, or painting overhead is enough to postpone a much-needed refresh indefinitely. If you’re seeking a modern, hassle-free solution to breathe new life into your living spaces without the usual mess and labor, then this comprehensive guide is precisely what you need!
Say Goodbye to Ugly Ceilings: The Nightmare of Traditional Renovations
Our home’s downstairs main room suffered from a truly unfortunate ceiling situation. Not only did it feature inconsistent textures – ranging from barely-there to heavily dated popcorn – but it also bore the scars of past projects: several drywall holes from accessing wiring for upstairs renovations. We had tolerated this eyesore for years, primarily because the sheer thought of tackling a 14’x25′ drywall ceiling was overwhelmingly daunting. We confess, drywall work is our least favorite home improvement task. It’s notoriously dusty, incredibly tedious, and achieving that flawless, perfectly smooth finish feels like an impossible feat for even the most experienced DIYer.
Why Traditional Ceiling Renovations Are a Nightmare
- Intense Labor and Mess: Drywall installation involves heavy lifting, precise cutting, multiple layers of mudding, sanding (oh, the dust!), and then painting. Each step generates significant mess and requires specialized skills.
- Time-Consuming: The drying times for joint compound alone can stretch a project over several days or even weeks, rendering your space unusable for extended periods.
- Physical Strain: Working overhead for hours on end takes a toll on your neck, shoulders, and arms. Sanding drywall dust falling into your eyes and hair is hardly a pleasant experience.
- Imperfection is Inevitable: Unless you’re a seasoned professional, achieving a perfectly smooth, blemish-free ceiling can be incredibly challenging, often resulting in visible seams or uneven surfaces.
- Painting Overhead: The final touch of painting a ceiling is arguably one of the most dreaded tasks. Dripping paint, arm fatigue, neck strain, and the need for multiple coats make it a truly exhausting endeavor.
Our Personal Ceiling Nightmare & Discovery
For years, we lived with our patchwork ceiling, postponing the inevitable because the prospect of traditional renovation was simply too much to bear. That was until a few months ago when I serendipitously discovered the Armstrong Ceilings website. As I explored their innovative surface mount products, a lightbulb moment occurred: this was the elegant, efficient solution we had been dreaming of! I reached out to the company, and I’m incredibly grateful they agreed to partner with us on this blog. This product truly is a game-changer, simplifying a once-dreaded task and delivering stunning results. I am thrilled to share our experience and unveil our incredible new ceiling.
A Glimpse into the Past: Before the Transformation
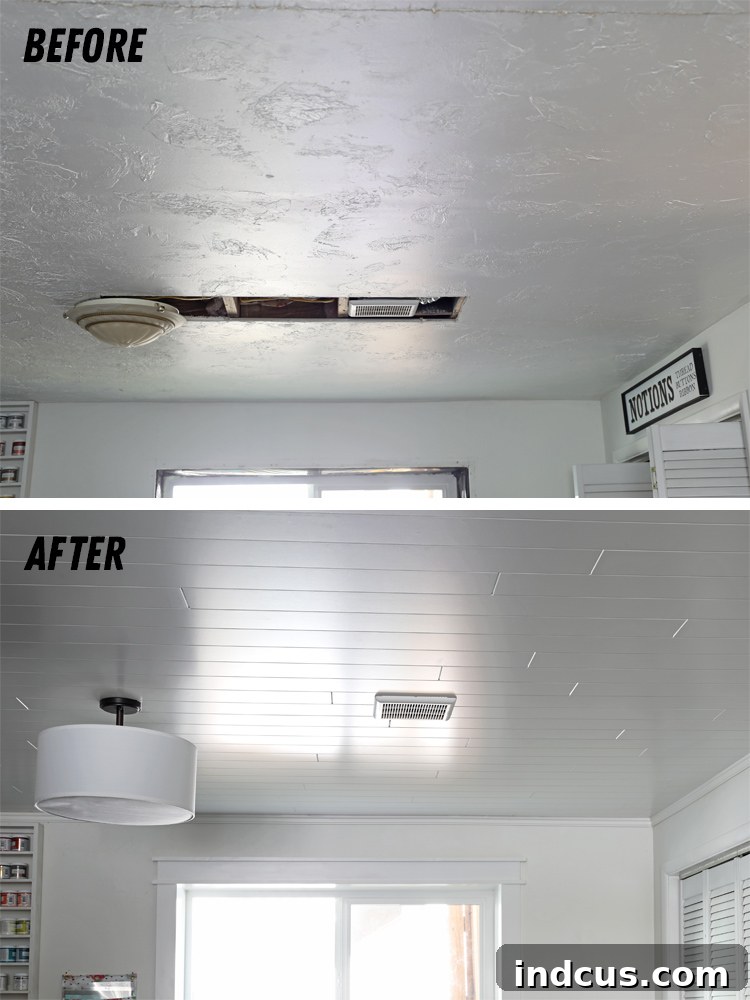
To truly appreciate the transformation, let’s start with some candid BEFORE photos, showcasing the challenges we faced:
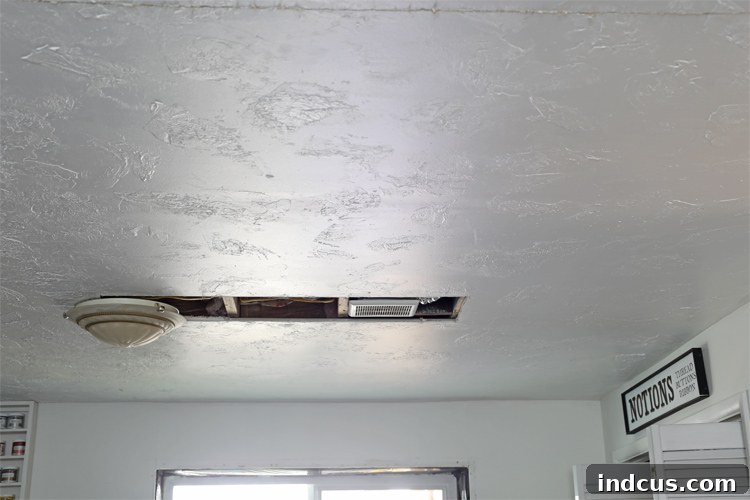
This particular section of the room had the least amount of ceiling texture. The rest of the space, however, boasted a really heavy, deeply dated texture that screamed for an update. You can clearly see the disparity and wear that plagued our ceiling.
Here’s a closer look, highlighting the stark differences in texture that marred our ceiling’s appearance:
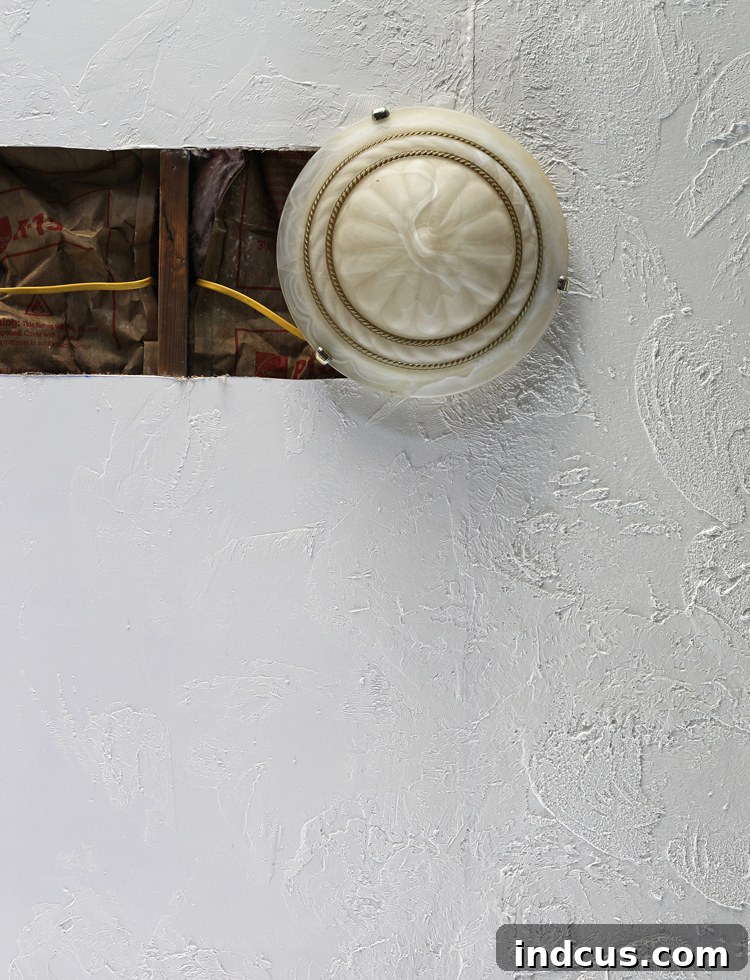
Imagine this level of inconsistency and wear spread across an entire 14×25 foot room – it was, to put it mildly, a whole lot of ugly. Our goal was to create a cohesive, clean, and modern aesthetic that would elevate the entire downstairs area, without resorting to the messy, labor-intensive methods we dreaded.
Unveiling the WOODHAVEN & Easy Up Installation Process: A DIY Dream
So, how does this revolutionary ceiling system work its magic? Let me guide you through the process, demonstrating just how straightforward it is to achieve a professional-looking finish with minimal effort.
Disclaimer: Please note that this is an overview of our installation experience, intended to help you decide if this system is right for your home. For comprehensive, detailed instructions and safety guidelines, always refer to the manufacturer’s official website.
Essential Tools & Materials for Your Ceiling Project
One of the beauties of the WOODHAVEN and Easy Up system is the minimal tool requirement, making it accessible for most DIY enthusiasts.
- WOODHAVEN Ceiling Planks: Available in a variety of styles and finishes to match any decor.
- Easy Up Surface Mount Ceiling Tracks and Clips: The innovative system that simplifies installation and conceals imperfections.
- Drill: For securing the Easy Up tracks to the ceiling joists.
- Screws: Specifically designed for ceiling installation to ensure a secure fit.
- Chop Saw or Compound Miter Saw: Essential for precise, clean cuts of the planks.
- Chalk Line: For accurately marking ceiling joists and ensuring straight track installation.
- Tape Measure & Pencil: For accurate measurements and markings.
- Level: Crucial for ensuring your tracks are perfectly level, creating a smooth finished ceiling.
- Shims (as needed): Small wedges used to level uneven ceilings beneath the tracks.
Choosing Your Style: WOODHAVEN Plank Options
WOODHAVEN planks offer a fantastic range of styles and colors to complement any interior design. For our project, we chose the timeless White painted shiplap style, which added instant charm and a bright, airy feel to our space. Here are just a few of the other beautiful options available, allowing you to customize your ceiling to perfection:
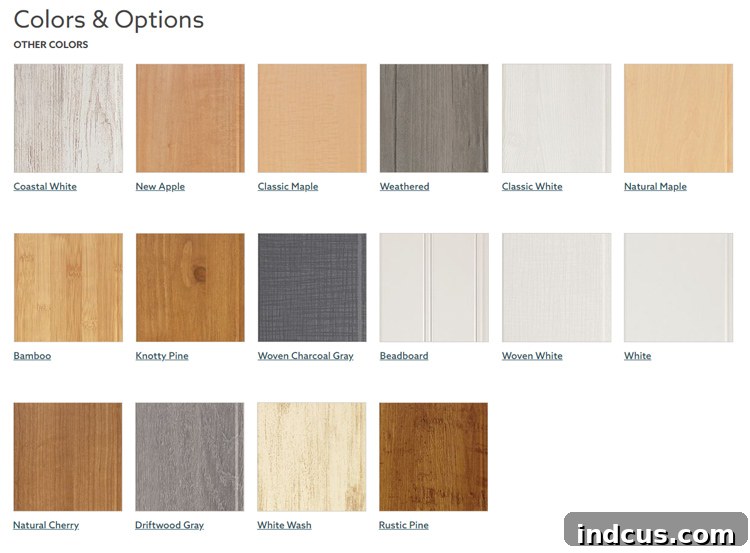
Whether you prefer a rustic farmhouse look, a sleek modern finish, or something in between, WOODHAVEN offers planks that can transform your ceiling into a true design feature.
Step-by-Step Installation Guide: Achieving Ceiling Perfection
Follow these simple steps to install your new WOODHAVEN ceiling and marvel at the rapid transformation of your room.
Step 1: Preparing Your Ceiling for Perfection
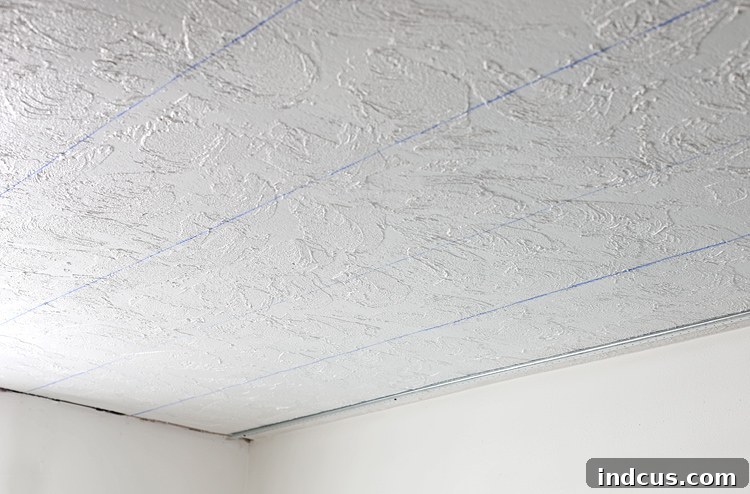
If you’re installing your new ceiling directly over existing drywall, the first crucial step is to locate and mark your ceiling joists. Use a stud finder to precisely identify these structural elements and then snap chalk lines along their length. These lines will serve as your essential guide for securely attaching the Easy Up tracks.
Step 2: Installing and Leveling the Easy Up Tracks
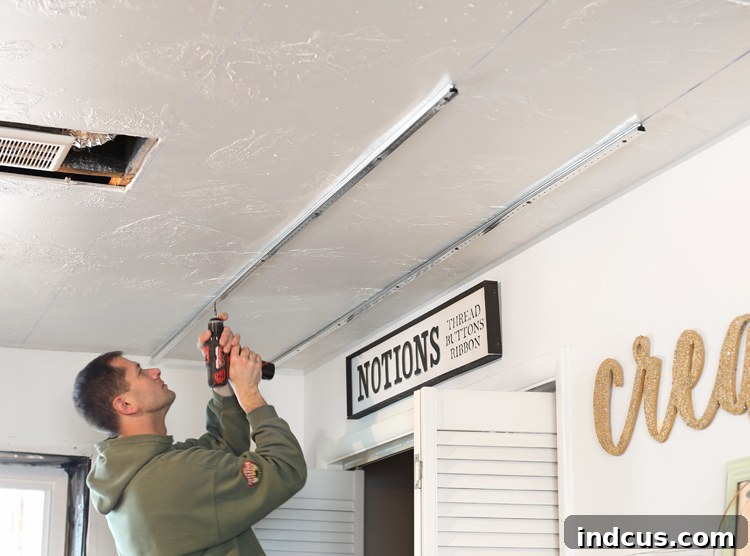
This step is paramount for a professional-looking result. If your existing ceiling is level, you can simply screw the Easy Up Ceiling Tracks directly into the joists, following your chalk lines. However, if your ceiling, like ours, has imperfections or is uneven, it’s critical to check that all tracks are level as you install them. Use shims as needed to create a perfectly flat and even plane. If you’re working with an unfinished ceiling (e.g., exposed joists), you’ll screw the tracks directly into the joists. Do not skip this leveling step; it ensures your new planks will lay perfectly flat, hiding any underlying unevenness.
Step 3: The First Row: Setting the Foundation
Carefully screw the first row of WOODHAVEN planks into place. Remember to leave a small expansion gap (typically about 1/4 inch) along all four walls of the room. This gap is essential to allow for natural material expansion and contraction due to temperature and humidity fluctuations. Don’t worry about the visible screws or the gap at this stage; they will be neatly concealed by crown molding at the very end of the project, providing a seamless and polished finish.
Step 4: The Magic of Easy Up Clips: Effortless Installation
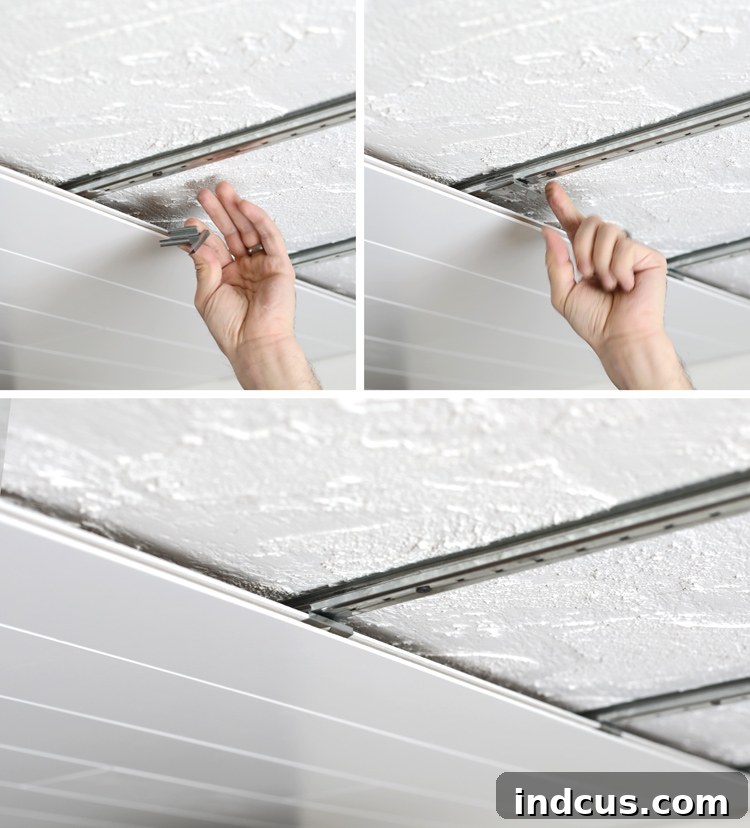
Here’s where the true genius of the Easy Up system shines! The remaining ceiling planks are installed with remarkable speed and simplicity using the innovative Easy Up clips. Begin by tapping a new plank into position, ensuring its tongue-and-groove mechanism fits snugly with the previously installed board. Once aligned, simply slide an Easy Up clip onto the plank wherever it intersects with a track. That’s it – the plank is securely installed! No need for cumbersome nail guns, messy adhesives, or visible screws. The tongue of the new plank effortlessly slides into the groove of the receiving plank, completely concealing the Easy Up clip for an immaculate surface.
Step 5: Finishing Strong: The Last Plank
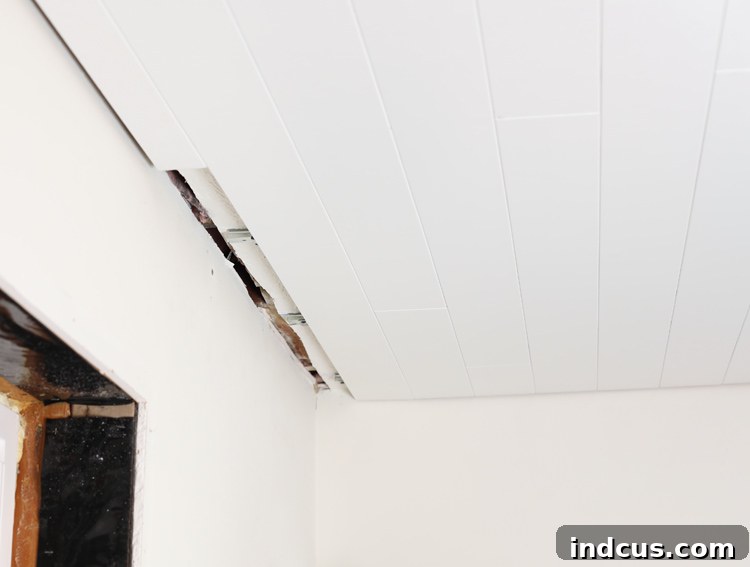
As you approach the final row, you’ll likely need to cut the last planks lengthwise to fit the remaining space. Once cut, gently place them into position and secure them to the Easy Up track with a single screw. It’s crucial to place this screw close enough to the edge of the plank so that it will be completely hidden by your chosen crown molding, maintaining the clean aesthetic.
Step 6: The Perfect Finish: Adding Crown Molding
The final touch that elevates your ceiling from good to absolutely stunning is the installation of crown molding. This elegant trim piece conceals the expansion gap and any screws from the first and last planks, providing a crisp, finished edge where the ceiling meets the wall. If your leveling work in Step 2 was meticulous, you might find you won’t even need to caulk! However, our ceiling had significant irregularities. Despite our best efforts to level it, we still had a few minor uneven spots. A small bead of caulk to fill any tiny gaps between the crown molding and the ceiling or wall worked wonders, creating an imperceptible transition that looks flawless to the eye.
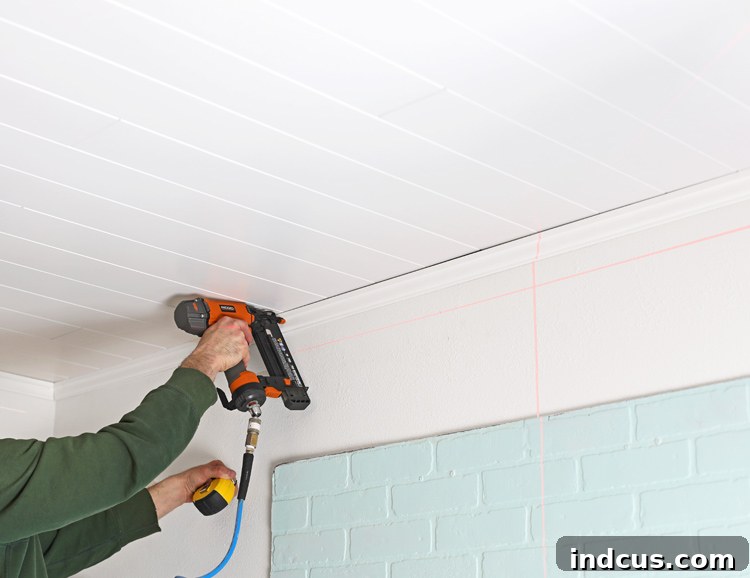
The Stunning Reveal: Our Transformed Ceiling
Now, the moment you’ve all been eagerly awaiting… the grand reveal of our completely transformed ceiling!
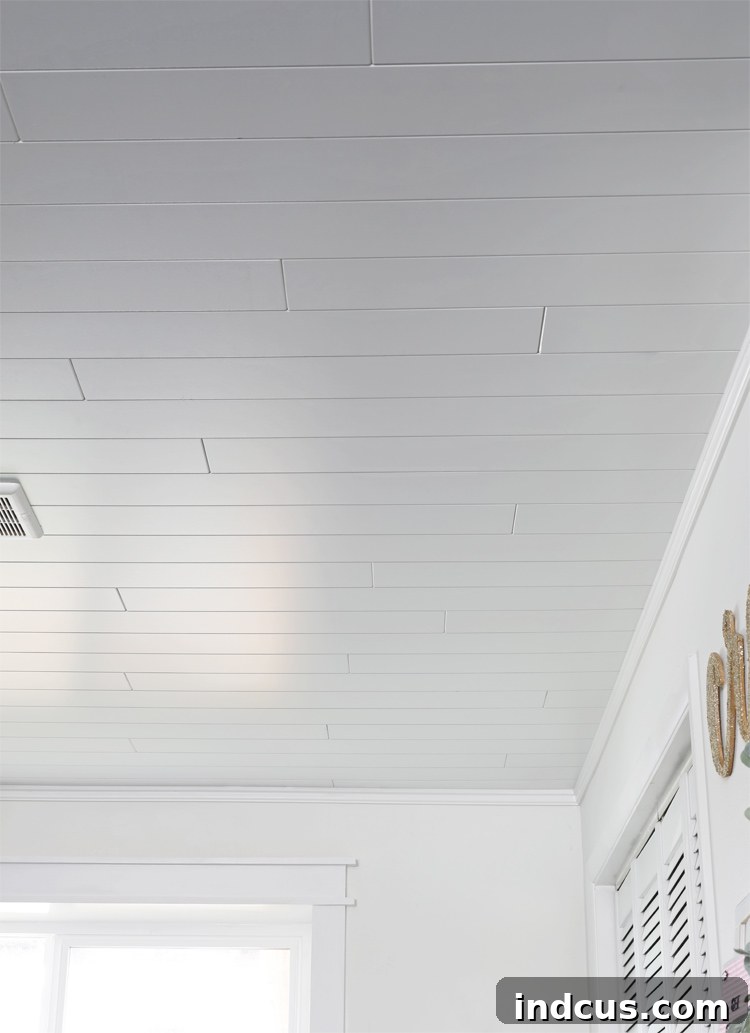
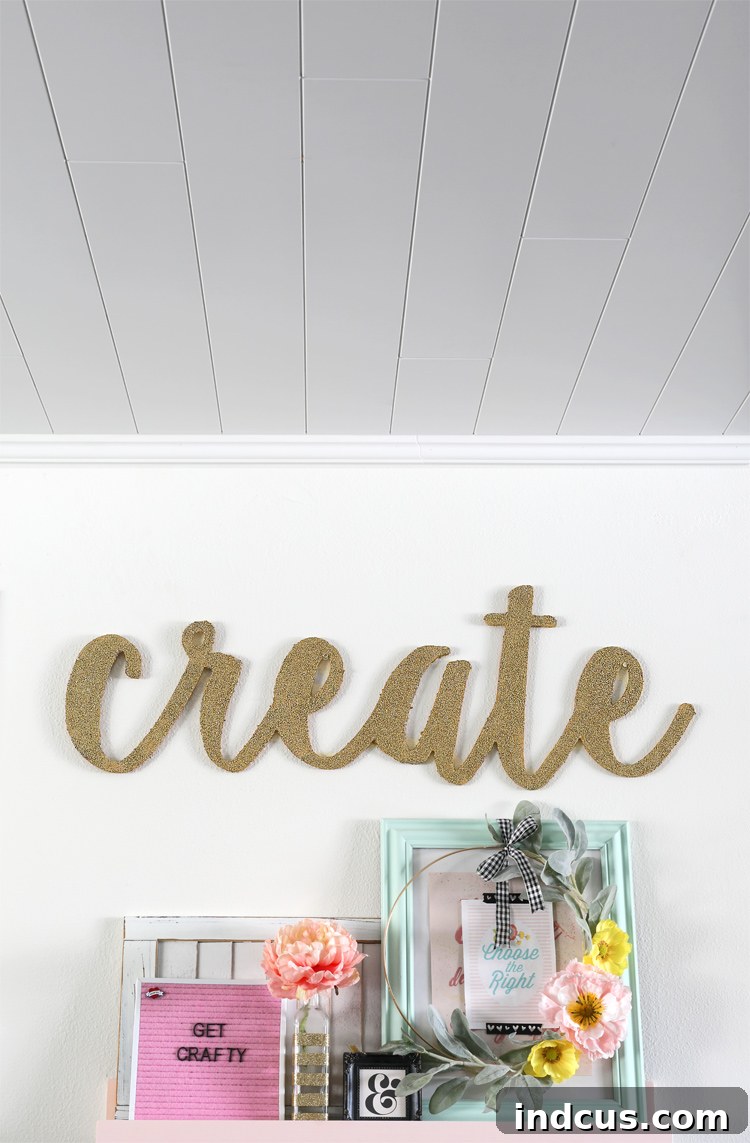
Can you believe the difference? What was once the most unattractive feature of the room has now become its crowning jewel. I am utterly amazed at how much this simple yet profound change has elevated the entire space. The room feels completely different – brighter, more polished, and infinitely more inviting. The visual impact is simply breathtaking, and I am absolutely blown away by the dramatic improvement.
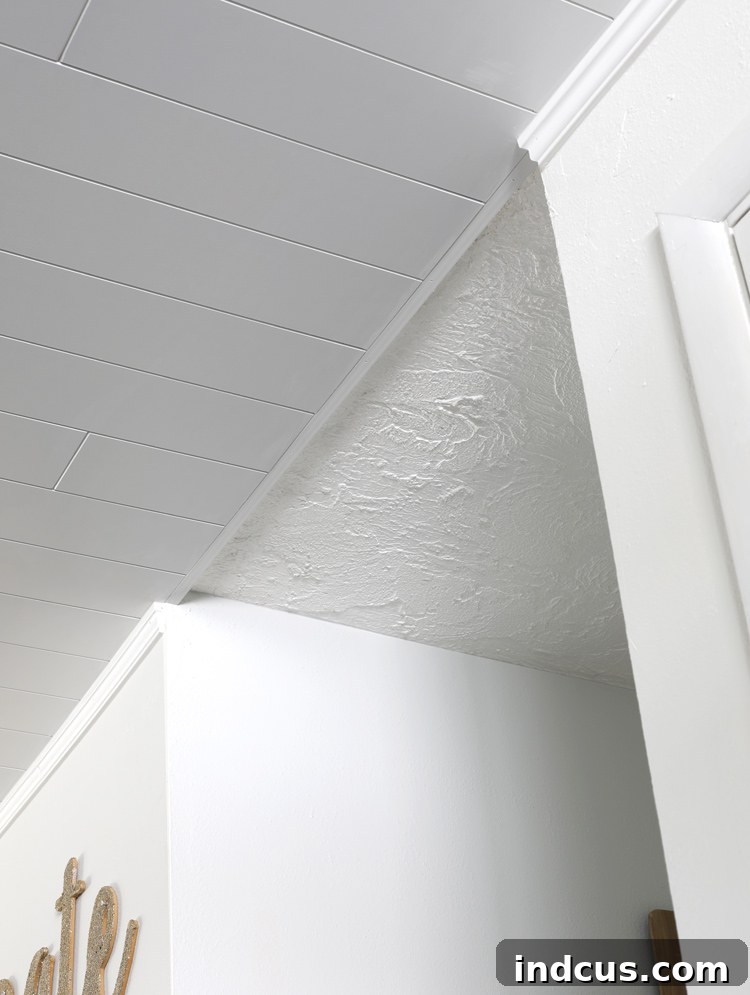
Our previously dated and neglected basement room is now a vibrant, charming, and thoroughly modern space. The shiplap ceiling adds character and a sense of bespoke craftsmanship that instantly enhances the room’s appeal. And yes, to answer your unspoken question, I am now seriously contemplating shiplapping every single ceiling in our house!
Why Choose WOODHAVEN Planks and Easy Up for Your Home?
Beyond the stunning aesthetic transformation, there are several compelling reasons why the WOODHAVEN Planks and Easy Up track clip system stands out as the superior choice for your next ceiling renovation project.
-
Effortless Installation: A DIY Dream
The Easy Up clips truly revolutionize the installation process. Forget the need for heavy, expensive pneumatic nail guns or countless screws. All you truly need is a drill for the tracks and a saw for cutting planks. The innovative clip system allows planks to simply slide into place, creating a secure and seamless fit with minimal effort. This significantly reduces the learning curve and makes a professional-quality ceiling makeover achievable for even novice DIYers, saving you both time and potential contractor costs.
-
Pre-Finished Perfection: No Painting Required
If you’ve ever undertaken the arduous task of painting a ceiling, you know the struggle: dripping paint, aching arms, an excruciating crick in your neck, and the endless search for missed spots. The beauty of WOODHAVEN planks is that they come pre-painted and pre-finished, completely eliminating the need for any post-installation painting. There are no nail holes to fill, no sanding to do, and no messy paint trays. Once the planks are up, your ceiling is DONE. This feature alone is a huge time-saver and a major relief from one of the most physically demanding aspects of ceiling renovation. Hallelujah indeed!
-
Mess-Free Makeover: Keep Your Space Tidy
Our installation took place in my home office and studio, a space filled with furniture and an abundance of craft supplies that would have been impossible to move entirely. The thought of a dusty, days-long drywall project was completely out of the question. With the WOODHAVEN and Easy Up system, we were able to install the entire ceiling over just a few evenings and a Saturday, working around existing furniture. The cleanup was minimal – a bit of chalk dust from marking joists and some sawdust from cutting planks. This starkly contrasts with the invasive, pervasive dust cloud that a traditional drywall installation would create, which typically infiltrates every corner of your home and requires extensive post-project cleaning.
-
Achieve a Flawless Finish: Leveling Uneven Ceilings
One of the most remarkable benefits of this system is its ability to effectively camouflage an uneven existing ceiling. By strategically shimming the Easy Up tracks during installation, you create a perfectly level and flat subsurface. Once the WOODHAVEN planks are clipped onto these leveled tracks, your new ceiling will appear perfectly smooth and uniform, regardless of the imperfections hiding beneath. Furthermore, this system adds minimal height reduction to your room, typically only about an inch, unlike traditional drop ceilings that can significantly lower your ceiling height.
-
Beyond Aesthetics: Durability and Longevity
WOODHAVEN planks are not just about beauty; they are engineered for lasting performance. Crafted from durable materials, these planks are designed to resist common issues such as sagging, warping, and cracking that can plague traditional drywall over time. Their robust construction ensures that your stunning new ceiling will maintain its integrity and pristine appearance for many years, offering a long-term, low-maintenance solution for your home.
-
Versatility and Design Freedom
With a wide array of styles, textures, and finishes, WOODHAVEN planks offer unparalleled design versatility. Whether your home aesthetic leans towards modern farmhouse, coastal chic, minimalist contemporary, or classic traditional, there’s a plank style to perfectly complement your vision. From the clean lines of shiplap to the subtle detailing of beadboard or a smooth, contemporary finish, these planks allow you to express your personal style and create a truly unique focal point in any room.
Where to Purchase Your Ceiling Transformation Solution
The highly acclaimed WOODHAVEN planks and Easy Up track systems are conveniently available nationwide. You can easily find a retailer near you by utilizing the locator tool on the Armstrong Ceilings website. While it’s true that the convenience and superior finish of this system come at a certain cost – and any shiplap ceiling will generally be more expensive than basic drywall – we firmly believe the price is an investment well worth the numerous benefits. When you factor in the avoided costs of hiring professionals for drywall work (which would have been our only option given our aversion to it), the savings in time and personal stress, and the current challenges of finding available contractors booked months in advance (not to mention our health-related preference to limit outside visitors), the WOODHAVEN and Easy Up system presents an incredibly compelling value proposition for a DIY-friendly, transformative home improvement.
Watch the Transformation: Installation Video
For a visual walkthrough of the entire installation process, watch this informative video! It perfectly illustrates just how simple and efficient it is to bring a beautiful new ceiling into your home:
Your Questions Answered & Final Thoughts
We hope this detailed guide has inspired you to consider the incredible potential of WOODHAVEN Planks and the Easy Up system for your own home. If you have any lingering questions about the products, the installation process, or our experience, please don’t hesitate to leave a comment below. We’ll do our absolute best to provide you with helpful answers and insights. And be sure to check back in a week or two for the grand unveiling of our entire craft room, where this stunning ceiling is just one piece of a much larger, equally amazing transformation!







