
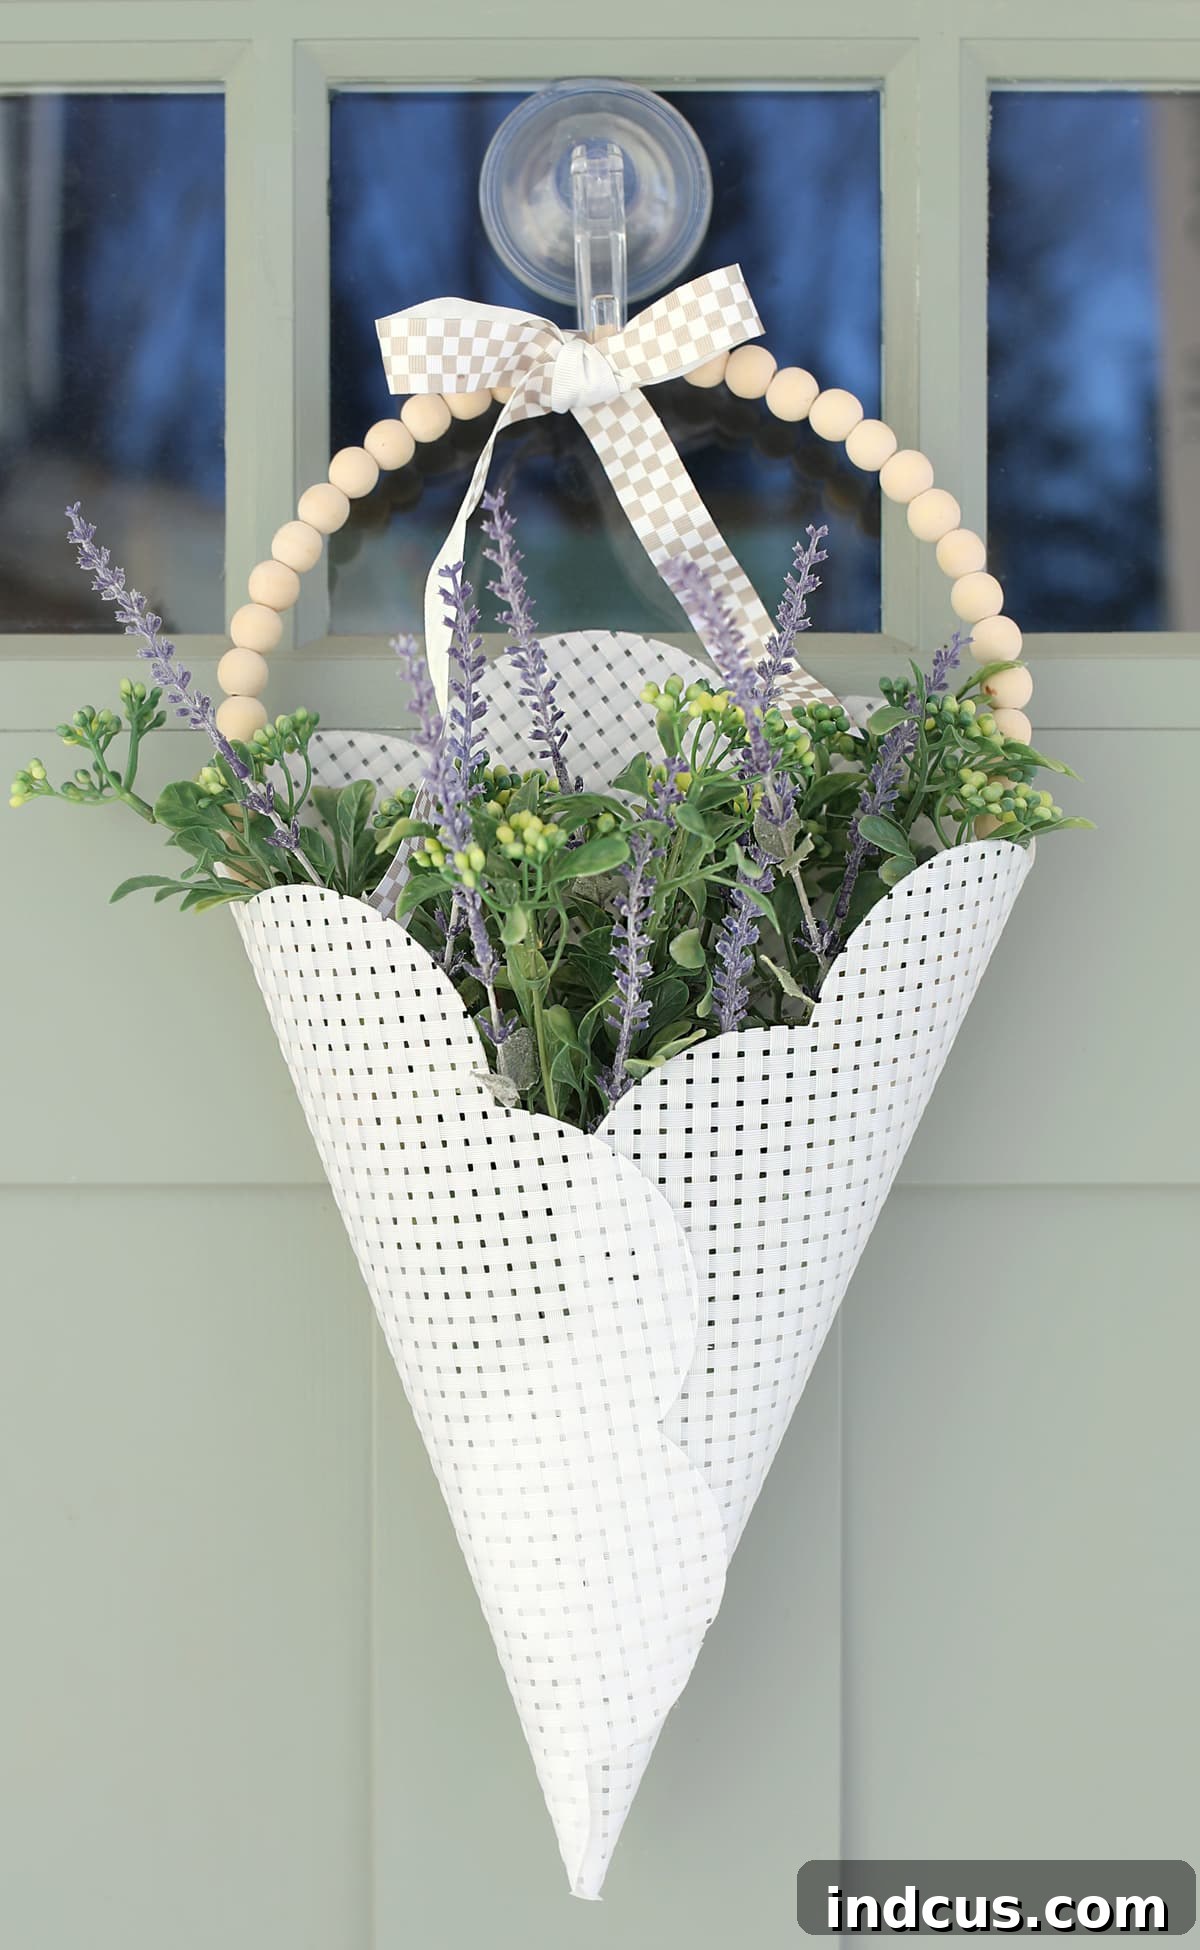
Transform an Ordinary Placemat into a Charming Front Door Basket
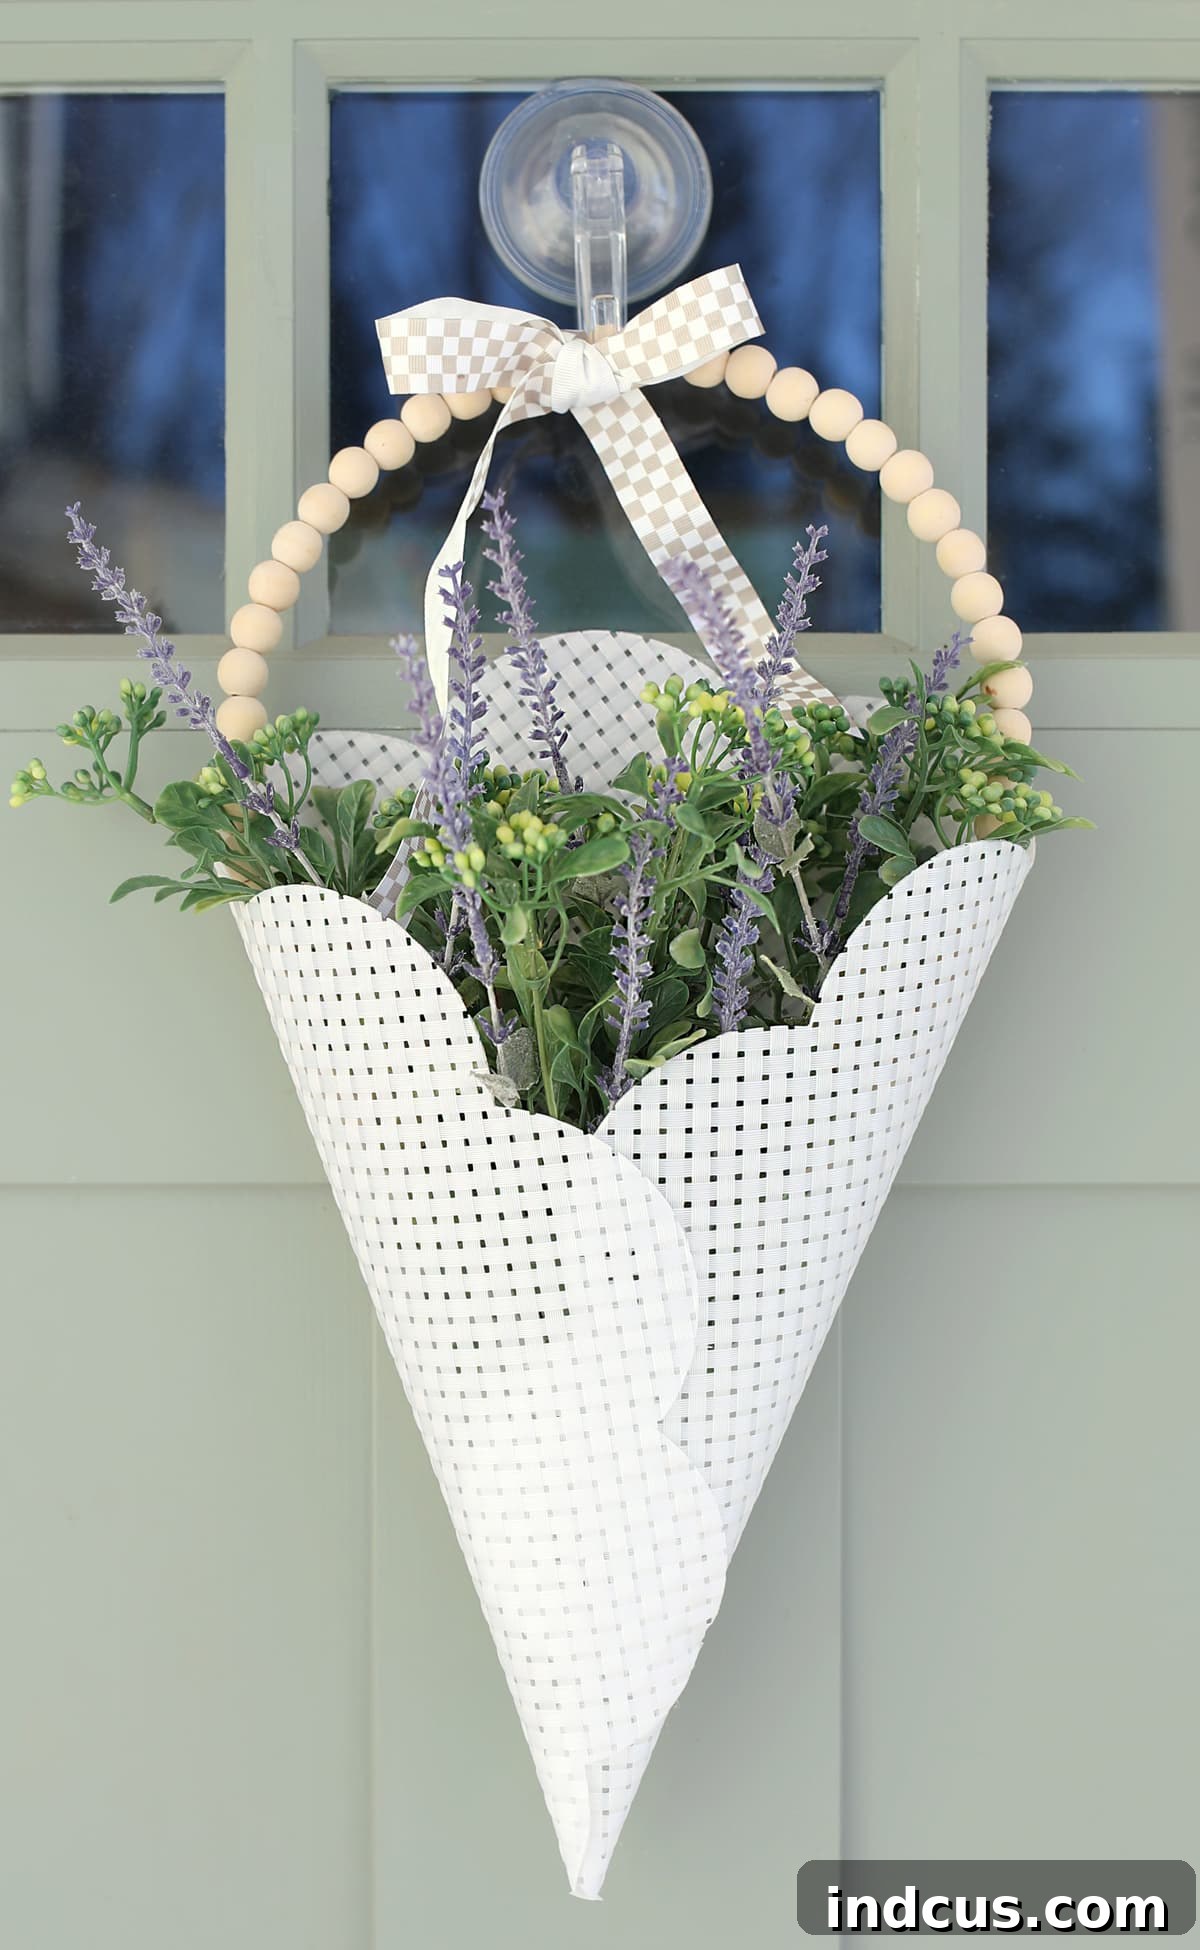
Welcome, crafters and home decor enthusiasts! Get ready to discover your next favorite DIY project. Today, we’re diving into an incredibly simple, budget-friendly, and utterly charming craft idea that will transform your front door. Forget traditional wreaths for a moment; we’re going to show you how to turn a humble round placemat into a beautiful, decorative basket, perfect for greeting guests and adding a touch of personalized flair to your home.
This project is not only easy enough for absolute beginners but also offers immense creative freedom. In just a few minutes, and with minimal supplies, you can create a unique front door accent that looks far more expensive than it is. Whether you’re looking to refresh your seasonal decor or simply add a welcoming touch, this placemat door basket is a fantastic alternative to conventional door hangers.
Why Choose a Placemat Door Basket?
There are countless reasons to fall in love with this DIY door decor idea:
- Unbeatable Affordability: Most of the core materials can be found at dollar stores or craft stores for just a few dollars, making this a truly budget-friendly craft.
- Quick to Create: You can complete this project in 15-30 minutes, making it ideal for busy schedules or spontaneous crafting sessions.
- Endless Customization: With a vast array of placemat designs, ribbon colors, and floral options available, you can tailor your basket to perfectly match your home’s aesthetic, any season, or specific holiday.
- Unique & Eye-Catching: Stand out from the crowd with a distinct piece of door decor that offers a lovely textural and dimensional appeal, moving beyond the traditional flat wreath.
- Seasonal Versatility: Easily change out the floral arrangements and ribbons to refresh your door basket for every season, holiday, or special occasion without having to buy a new hanger each time.
Ready to embark on this fun and rewarding crafting journey? Let’s gather our supplies and get started!
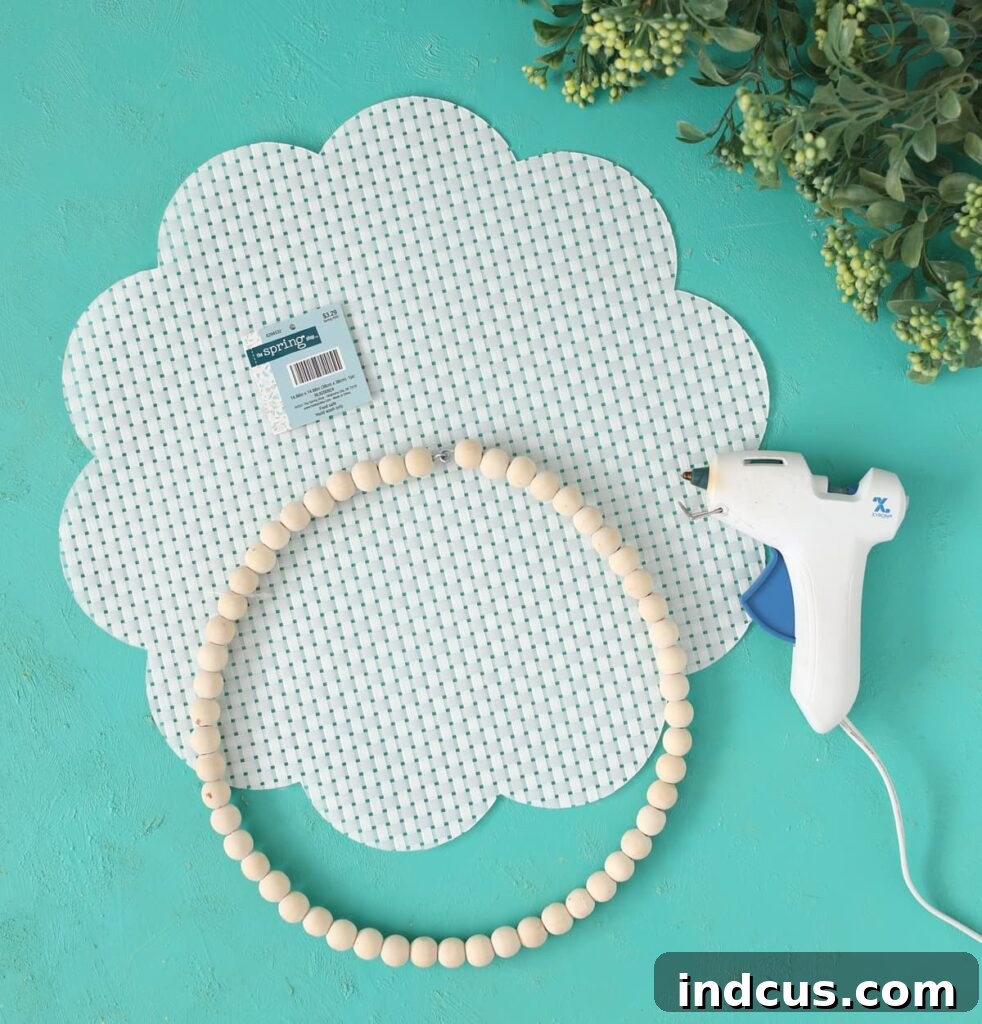
Materials You’ll Need
One of the best aspects of this craft is its simplicity in terms of materials. You only need a handful of items, most of which you might already have or can easily acquire.
- Round Placemat: The star of our show! Look for a placemat with a nice texture or design. Woven, braided, or even fabric placemats work wonderfully. I sourced mine from Hobby Lobby, where they have an amazing selection of colors, patterns, and materials. Consider the overall look you’re aiming for – rustic, modern, farmhouse, or colorful – as the placemat will set the tone.
- 10-Inch Wood Bead Wreath: This acts as the structural opening and decorative handle for your basket. The 10-inch size is perfect for most standard placemats, providing a sturdy and aesthetically pleasing top rim. Dollar Tree is a fantastic source for these, offering an unbeatable price.
- Hot Glue Gun + Glue Sticks: Your primary adhesive. A reliable hot glue gun will ensure a strong and lasting hold for your basket’s shape and components. Always exercise caution when using hot glue.
- Ribbon: To add a decorative flourish and a hanging mechanism. Choose a ribbon that complements your placemat and the seasonal theme of your floral arrangement. Wired ribbon often holds its shape best for bows.
- Greenery + Floral Stems: To fill your basket and bring it to life. Faux florals are recommended for durability and year-round use. Select stems that fit the scale of your basket and reflect your desired style. Think lavender, eucalyptus, sunflowers, berries, or even seasonal picks.
Where to Find Your Supplies:
As mentioned, I found my placemat at Hobby Lobby, which boasts an impressive variety of round placemats in different materials and styles, allowing for immense customization. The wood bead wreath, an absolute steal, came from Dollar Tree, proving that beautiful decor doesn’t have to break the bank. You might also find suitable items at other craft stores, home goods retailers, or even discount stores.
Here are a few types of round placemats that would be absolutely adorable for this project, offering different textures and vibes:
- **Braided Jute Placemats:** For a natural, rustic, or farmhouse look.
- **Scalloped Edge Fabric Placemats:** To add a touch of whimsy and elegance.
- **Textured Woven Placemats:** For depth and visual interest.
- **Solid Color Fabric Placemats:** Perfect for vibrant, modern, or minimalist designs.
Step-by-Step Instructions: Crafting Your Door Basket
This project is designed to be straightforward and enjoyable. Follow these simple steps, and you’ll have a stunning door basket in no time!
Step 1: Form the Placemat into a Cone Shape
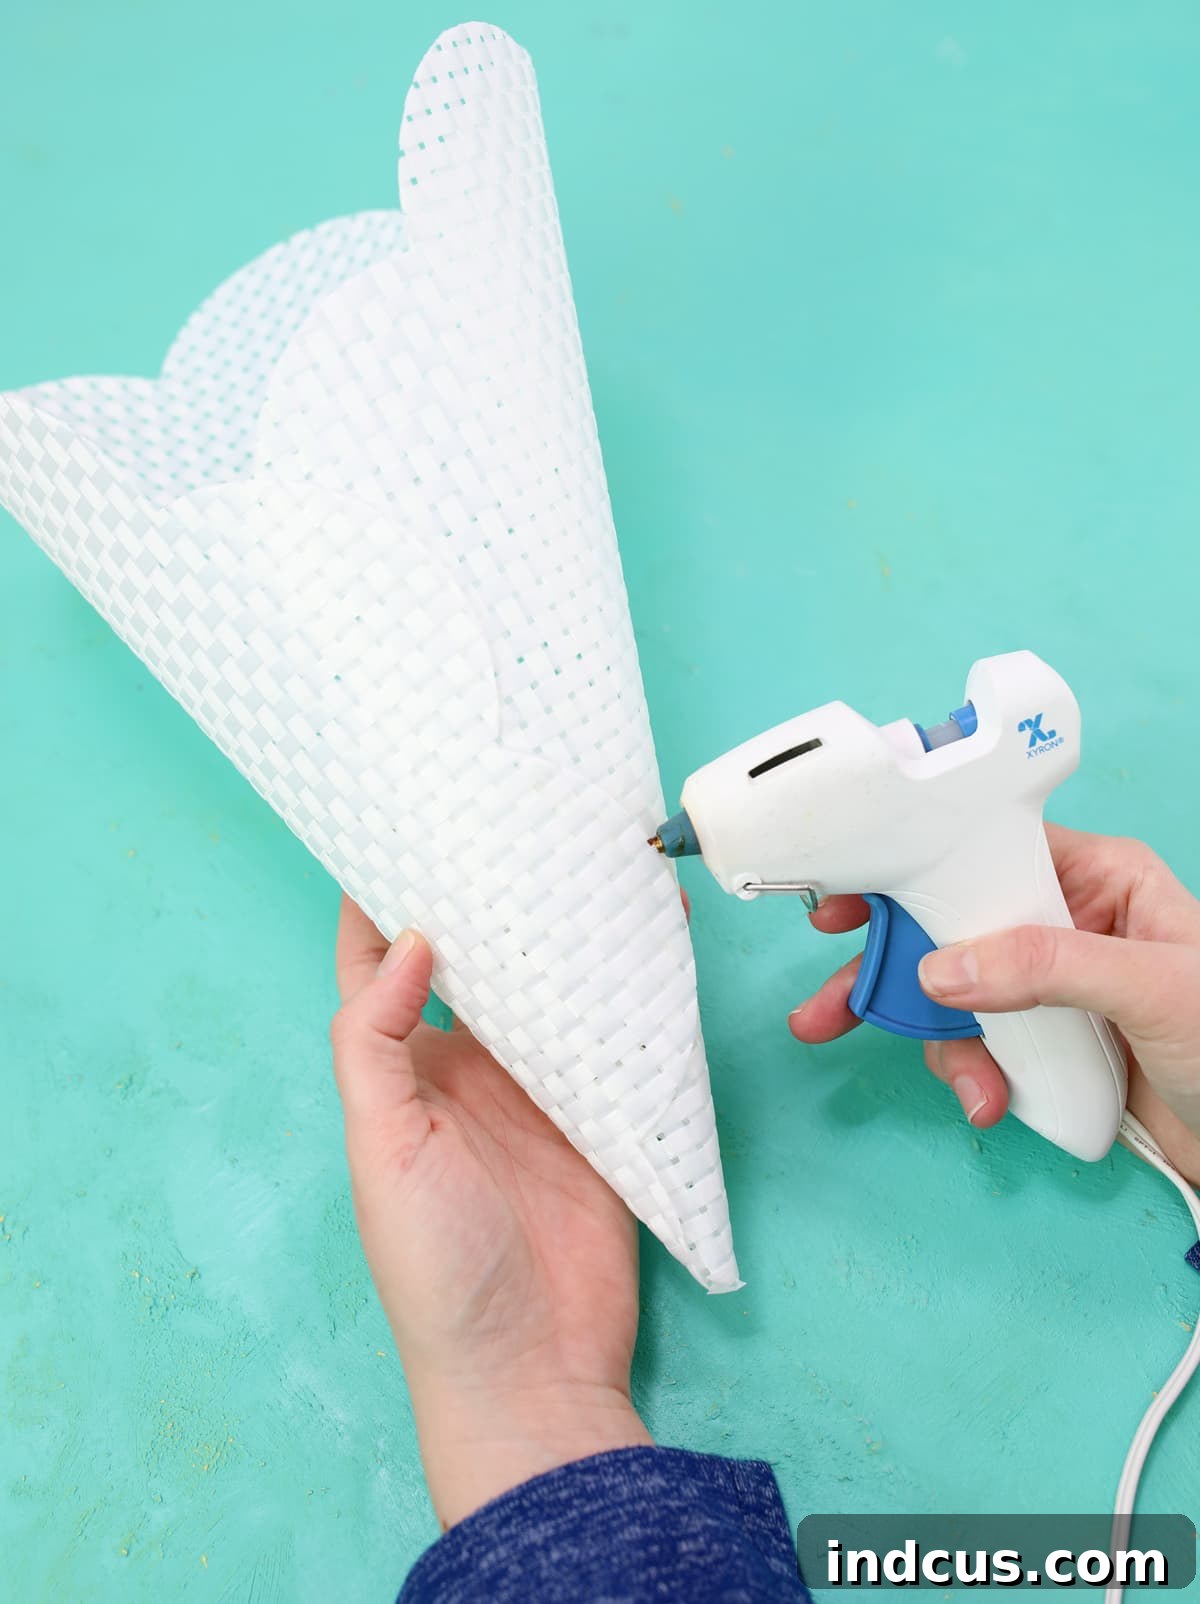
Begin by laying your chosen round placemat flat on a clean, protected surface. Carefully bring two adjacent edges of the placemat together, overlapping them to create a cone or funnel shape. The amount of overlap will determine the width of your basket’s opening. Experiment a bit to find a shape you like – you want it wide enough to hold your decorative elements but still maintain a distinct basket form. Once you’re happy with the shape, apply a generous bead of hot glue along the entire overlapping seam. Press firmly for several seconds to ensure the glue adheres strongly and the cone maintains its structure as it cools.
Step 2: Secure the Wood Bead Wreath as the Handle
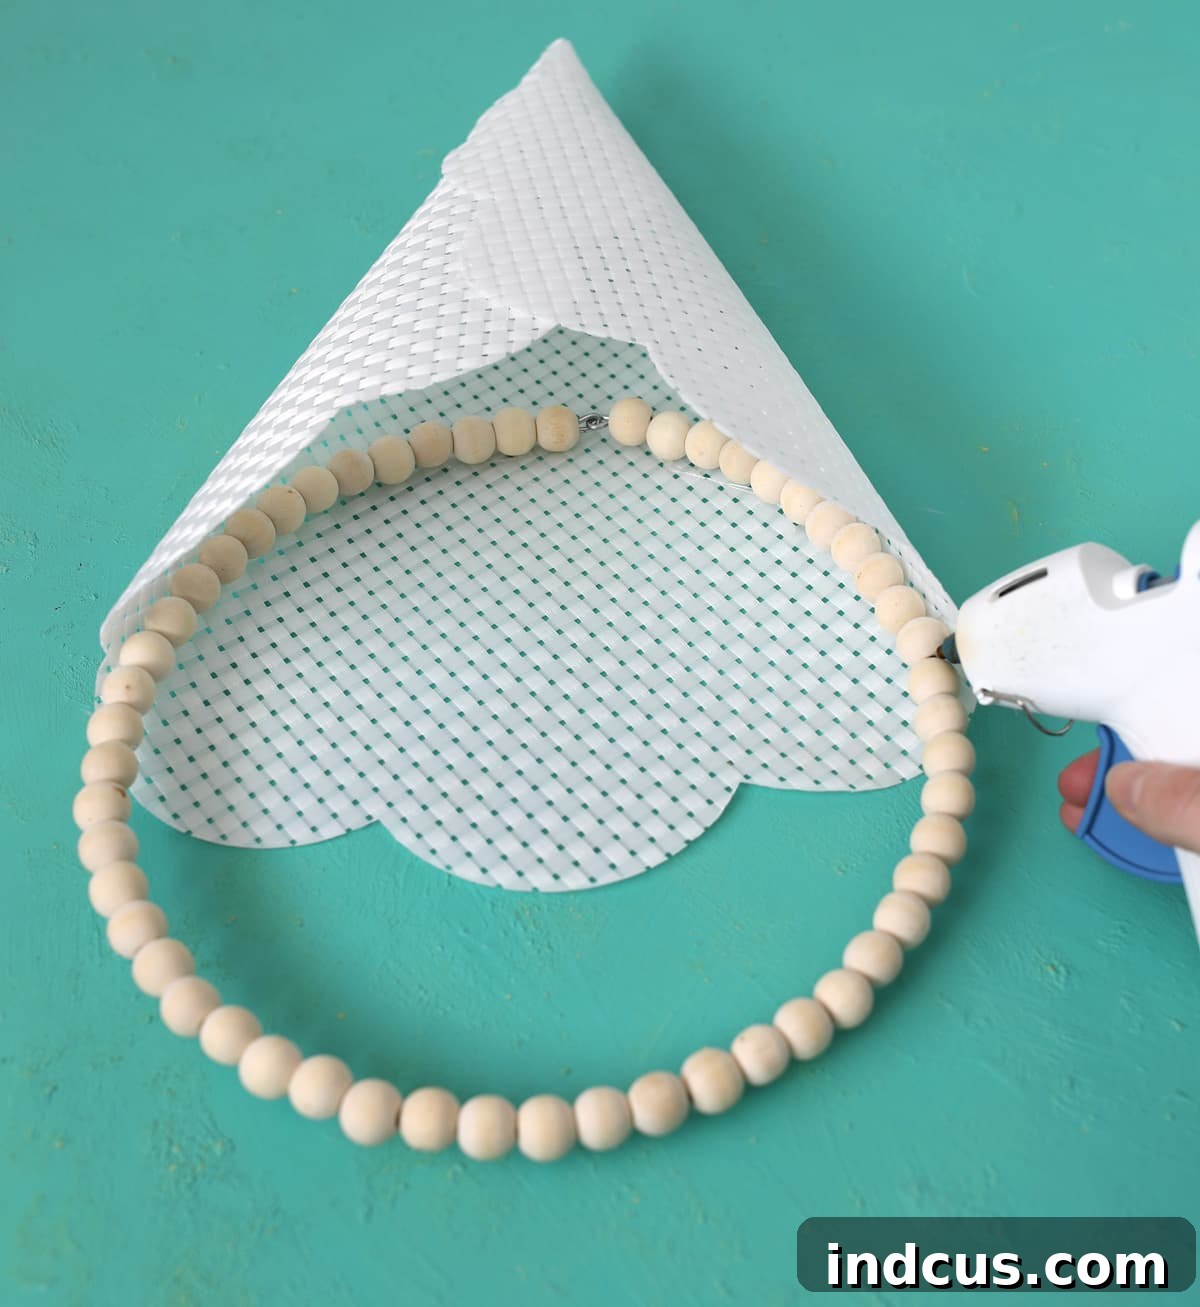
Now, take your 10-inch wood bead wreath. This wreath will serve as both the sturdy opening for your basket and its elegant handle. Carefully insert the wood bead wreath into the top opening of your newly formed placemat cone. Adjust its position until it sits snugly and evenly inside the rim of the cone. Apply hot glue all around the inner edge where the placemat meets the wreath, ensuring a secure bond. You may also want to add a few dabs of glue on the outer side for extra reinforcement. Hold it in place until the glue is completely set, creating a stable and durable basket structure.
Step 3: Fill Your Basket with Greenery and Florals
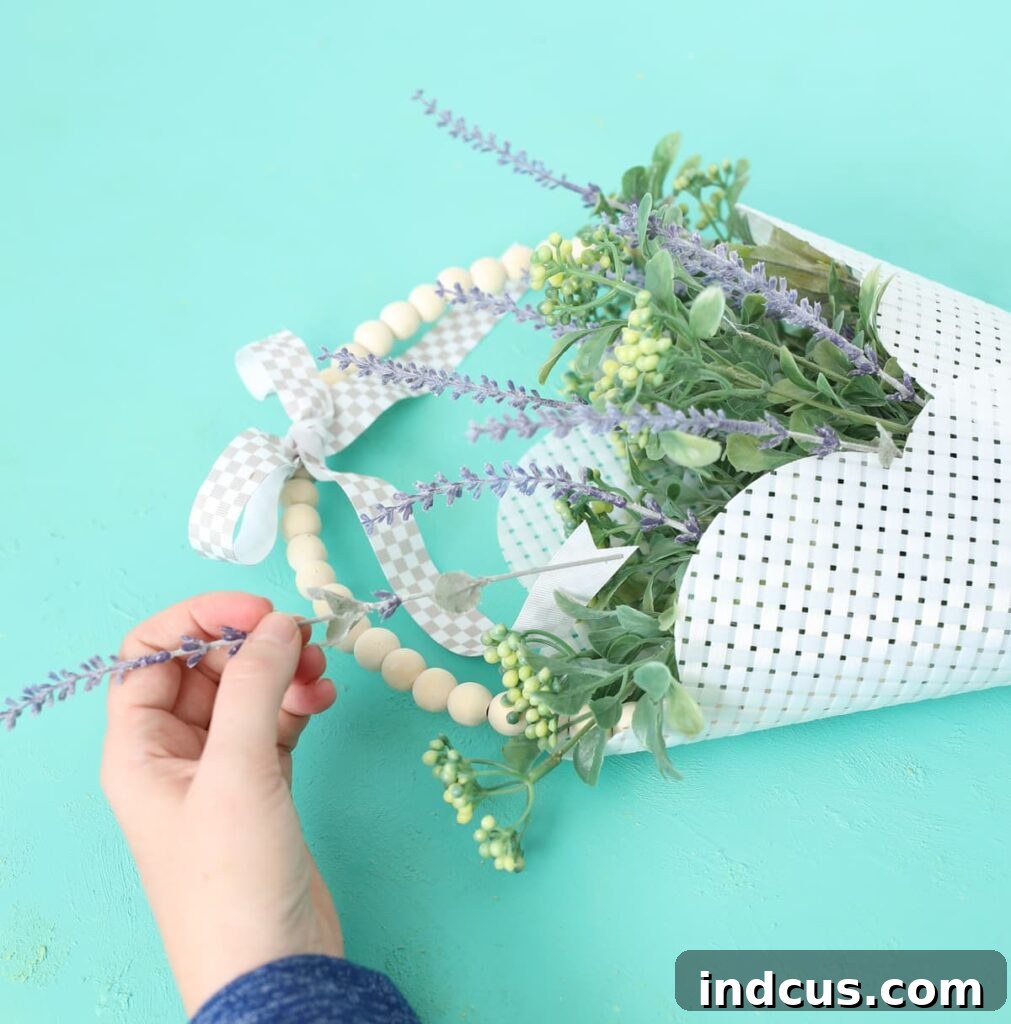
This is where your creativity truly shines! Begin filling the pocket you’ve created with your chosen greenery and floral stems. Start with larger, foundational greenery like eucalyptus or ferns to establish a base. Then, layer in your focal flowers. I personally adore the faux lavender I used for its soft color and texture. Trim your stems to various lengths to create depth and interest within the arrangement. For added stability, especially with heavier or shorter stems, you can place a small piece of floral foam or even some crumpled paper inside the very bottom of the basket before arranging your flowers. Play with the arrangement until you achieve a full, balanced, and aesthetically pleasing display.
Step 4: Add a Charming Bow and Prepare for Hanging
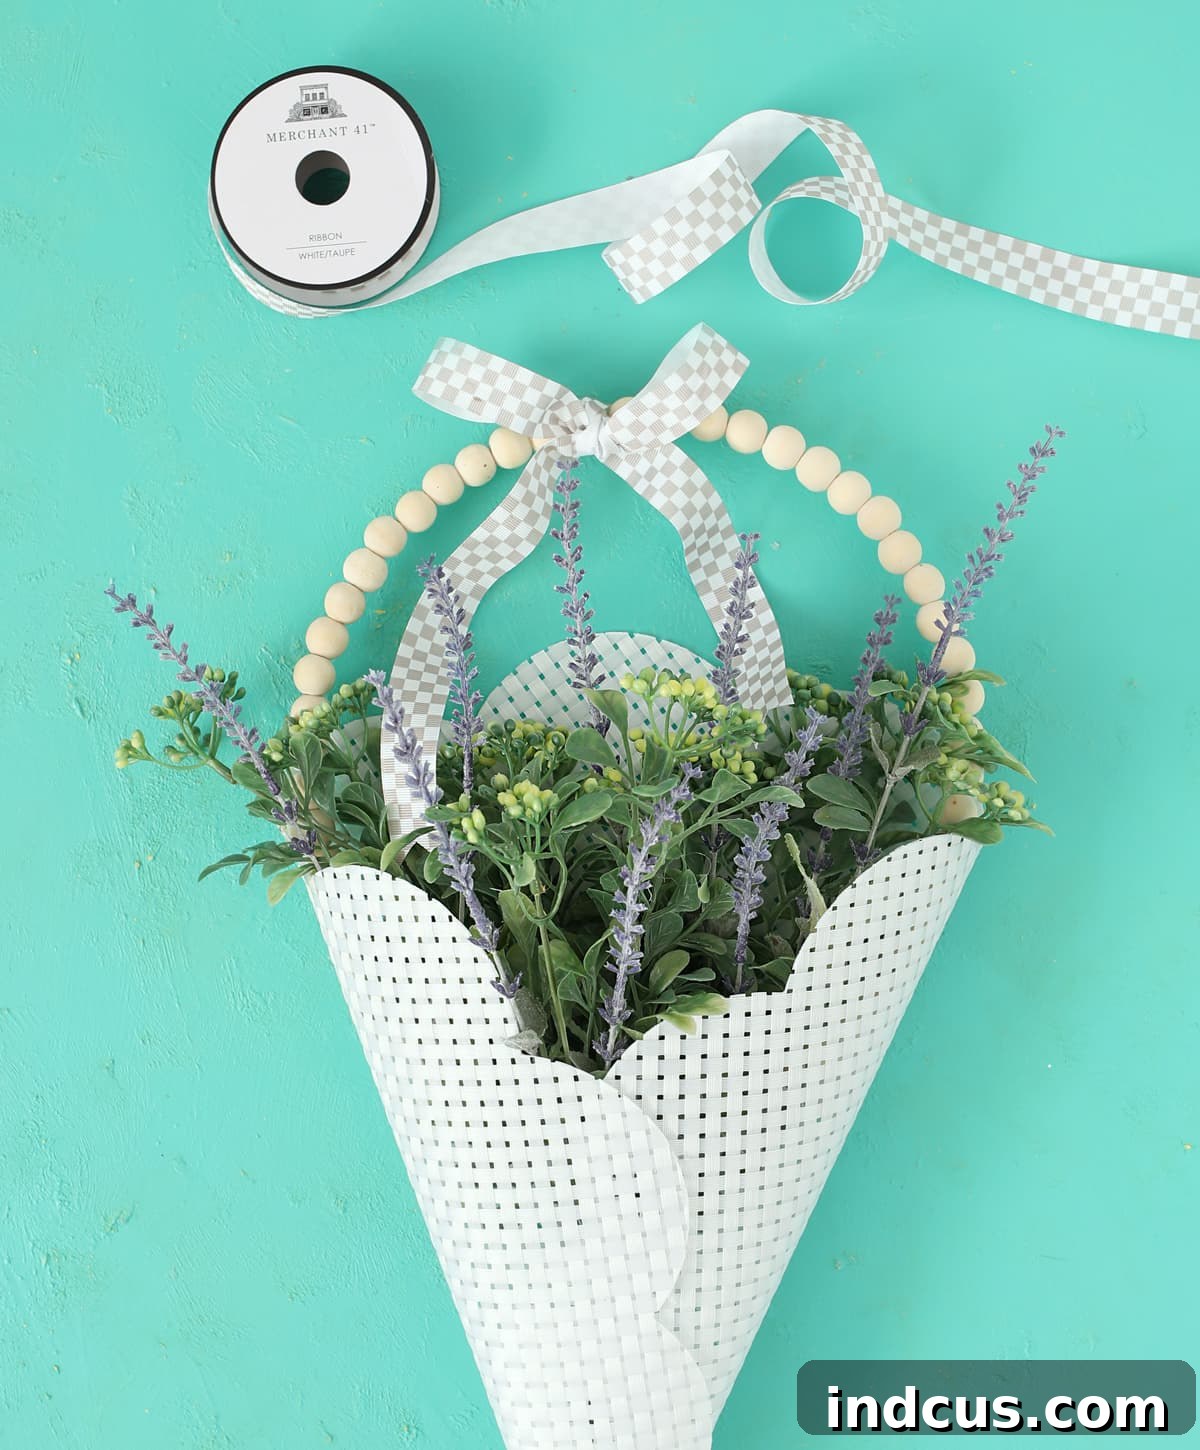
The final touch is a beautiful bow! Choose a ribbon that complements your floral arrangement and the placemat itself. Tie a cute bow and secure it to the top of the wood bead wreath handle, either centrally or slightly off to the side, depending on your preference. You can hot glue the bow in place to ensure it doesn’t shift. If your door hanger needs an easier way to hang, you can also tie or glue a small loop of ribbon to the back of the wood bead wreath. And just like that, your inexpensive, unique, and utterly charming placemat door basket is complete!
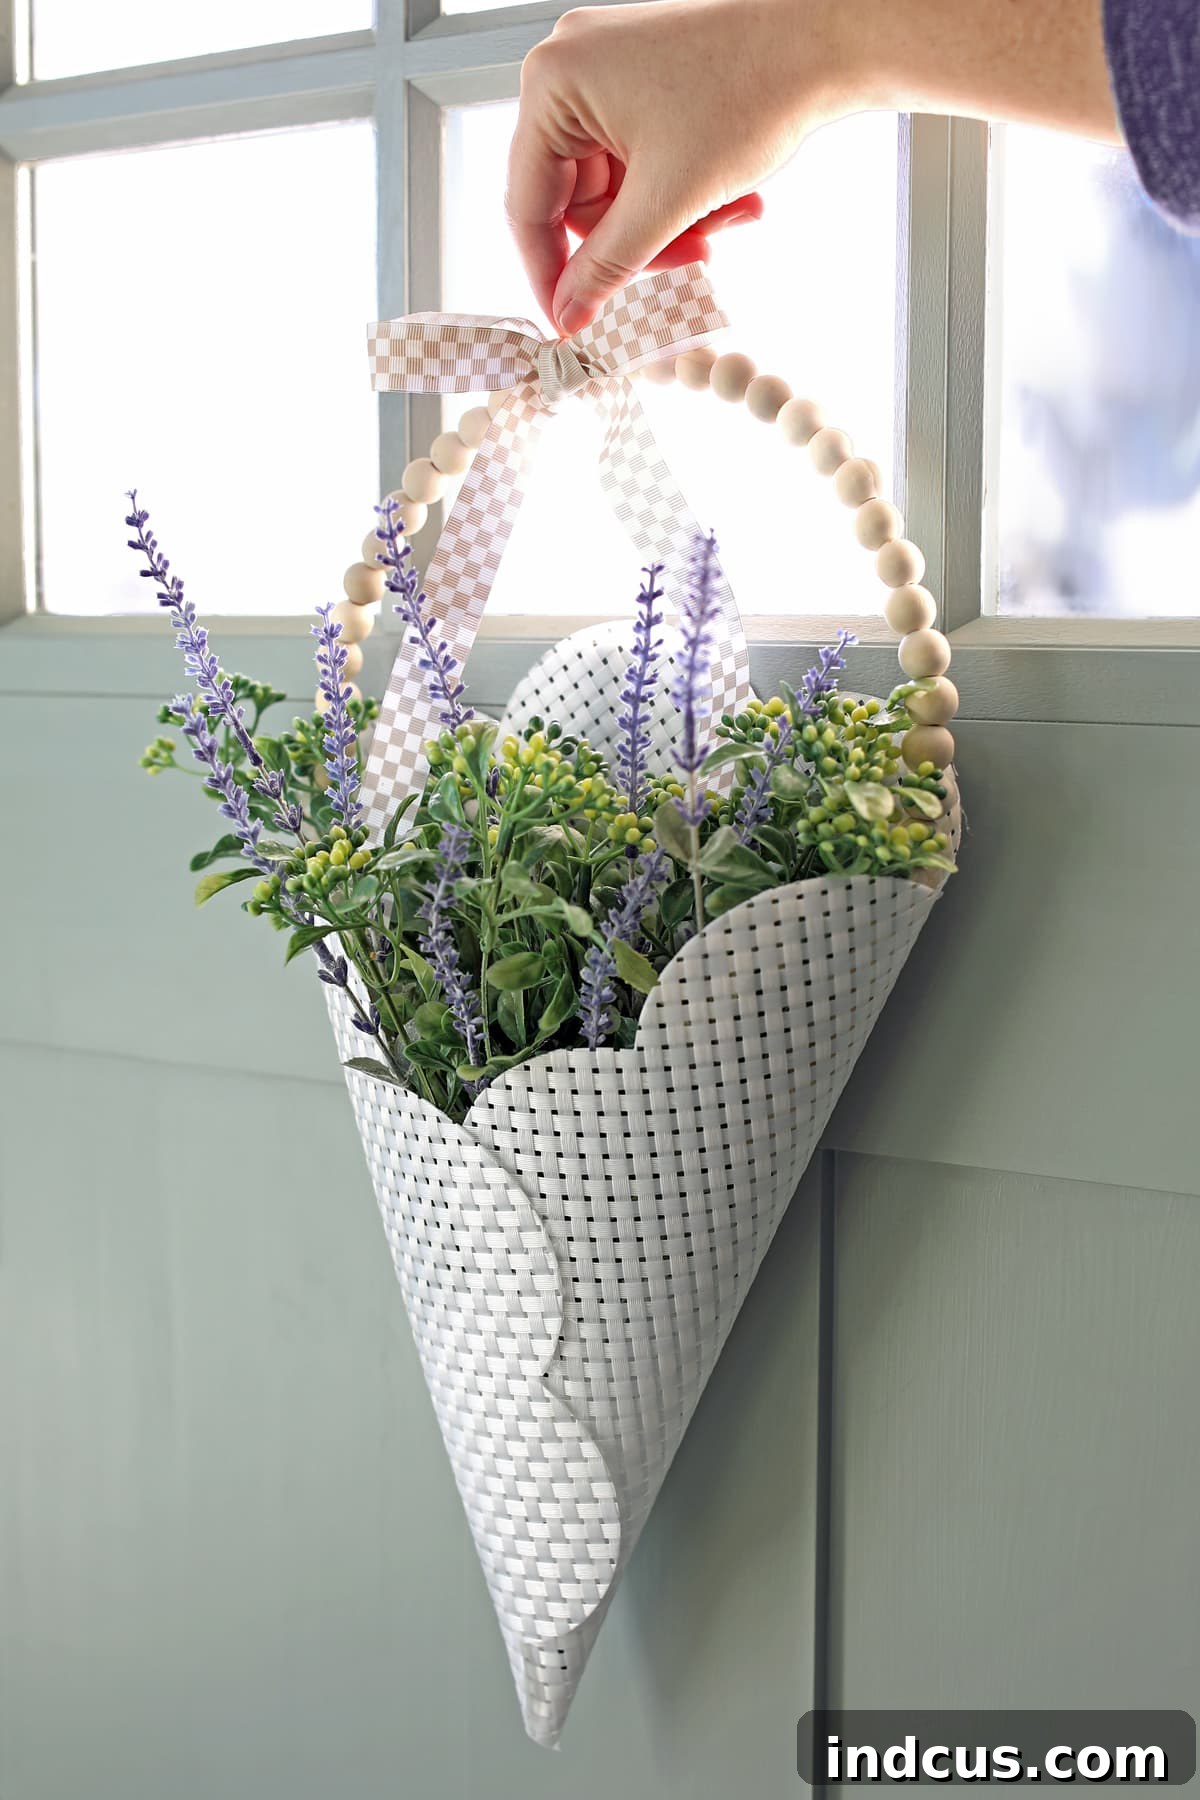
I’m confident you can complete this entire craft project in 15 minutes or less, truly making it one of the quickest and most rewarding DIYs around. The basket and handle cost me a mere $3.25! Even if you needed to purchase the ribbon and greenery, you could easily create this stunning door decor for less than $10. Talk about a fantastic return on your small investment of time and money!
Seasonal and Thematic Variations
One of the biggest joys of this placemat door basket is its incredible adaptability. You’re not stuck with one look! Here are some ideas to refresh your door decor throughout the year:
- Spring Refresh: Opt for placemats in pastel shades. Fill with faux tulips, daffodils, cherry blossoms, or lavender. Add a delicate satin or gingham ribbon.
- Summer Vibes: Choose bright, cheerful placemats. Arrange vibrant sunflowers, hydrangeas, or daisies. Consider incorporating small faux citrus slices or seashells for a coastal feel with a nautical ribbon.
- Autumn Charm: Select placemats in warm oranges, reds, or browns. Decorate with faux fall leaves, mini pumpkins, berries, wheat stalks, or sunflowers. A burlap or plaid ribbon would be perfect.
- Winter Wonderland: Go for a placemat in deep greens, whites, or metallics. Fill with faux pine sprigs, frosted berries, pine cones, or glittery ornaments. A rich velvet or buffalo plaid ribbon will add festive cheer.
- Holiday Specifics: Easily adapt for holidays like Valentine’s Day (red and pink florals, hearts), Easter (bunnies, eggs, lilies), or patriotic holidays (red, white, and blue flowers, flag ribbon).
This endless versatility ensures your front door always looks fresh, welcoming, and perfectly in sync with the season or your mood. It truly can be a year-round decorative staple!
Tips for Crafting Success
- Safety First: Always use your hot glue gun with care and keep it away from children and pets.
- Test the Fit: Before applying glue, dry-fit your wood bead wreath into the placemat cone to ensure it’s the right size and fits snugly.
- Less is More (Sometimes): While you want a full arrangement, avoid overloading your basket, which could cause it to sag or look cluttered.
- Outdoor Durability: If your door basket will be exposed to direct sunlight or elements, opt for UV-resistant faux florals to prevent fading. A clear UV-protective spray can also extend the life of your materials.
- Secure Hanging: Ensure you have a strong, reliable hook on your door to hang your finished basket.
DIY Placemat Door Basket Craft Video Tutorial
For those who prefer a visual guide, a comprehensive video tutorial is often available to walk you through each step of creating this beautiful placemat door basket. Check the original blog post or creator’s channel for the full video demonstration to see every detail in action.
We hope this detailed guide inspires you to create your own stunning placemat door basket! It’s a wonderful way to express your creativity, personalize your home, and welcome guests with a unique, handmade touch. Don’t be shy – dive into this fun project and transform your front door with style and ease!







