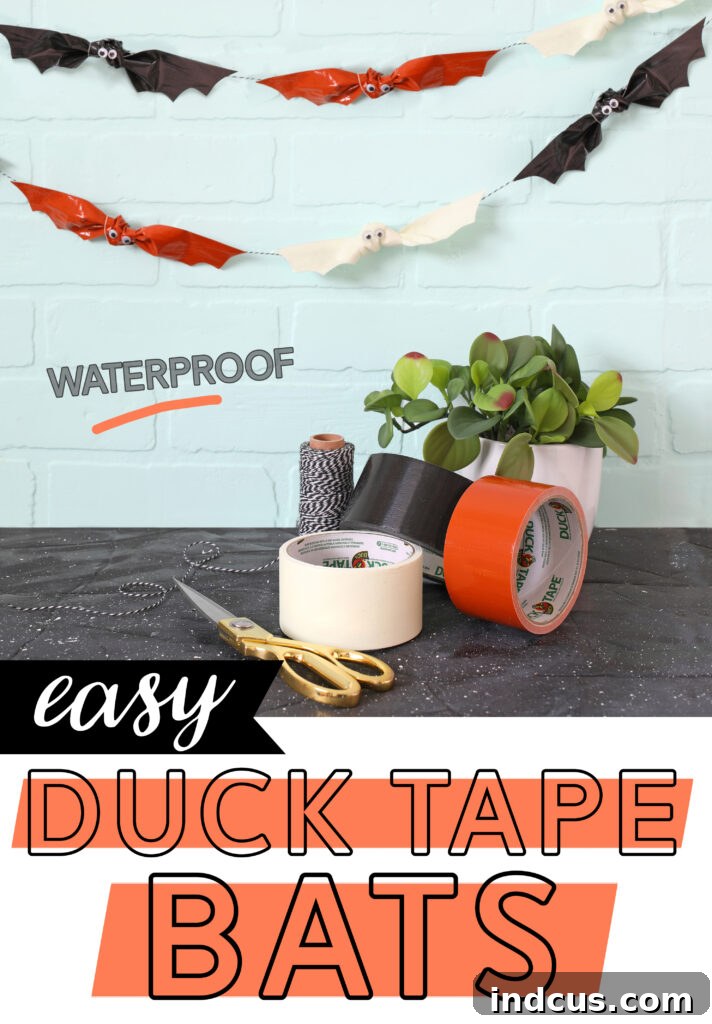
Craft Spooktacular DIY Duck Tape Bats for Outdoor Halloween Decor!
As the air turns crisp and the nights grow longer, Halloween creeps just around the corner, bringing with it the joyous anticipation of spooky decorations and creative crafts. If you’re searching for a simple, engaging, and incredibly durable Halloween project, you’ve landed in the right place! Today, we’re diving into the delightful world of Duck Tape to create charming DIY bats that are not only adorable but also remarkably robust. Perfect for adding a touch of whimsy and fright to your outdoor spaces, these weatherproof bats will withstand the elements, ensuring your festive display stays picture-perfect throughout the season.
This post is sponsored by Duck Brand. All ideas are my own.
Utilizing the incredible versatility of Duck Tape, these handcrafted bats boast exceptional durability, making them an ideal choice for outdoor Halloween decorating. Forget about flimsy paper decorations that wilt at the first sign of rain; these sturdy little creatures are designed to endure, promising a lasting festive touch to your yard, porch, or windows. Their waterproof nature means they’ll brave any autumn shower or early snowfall, looking as fresh and fun as the day you made them.
Transform Your Space with Versatile Bat Displays
The beauty of these DIY Duck Tape bats lies not just in their resilience but also in the myriad ways you can incorporate them into your Halloween landscape. Let your imagination take flight with these creative display ideas:
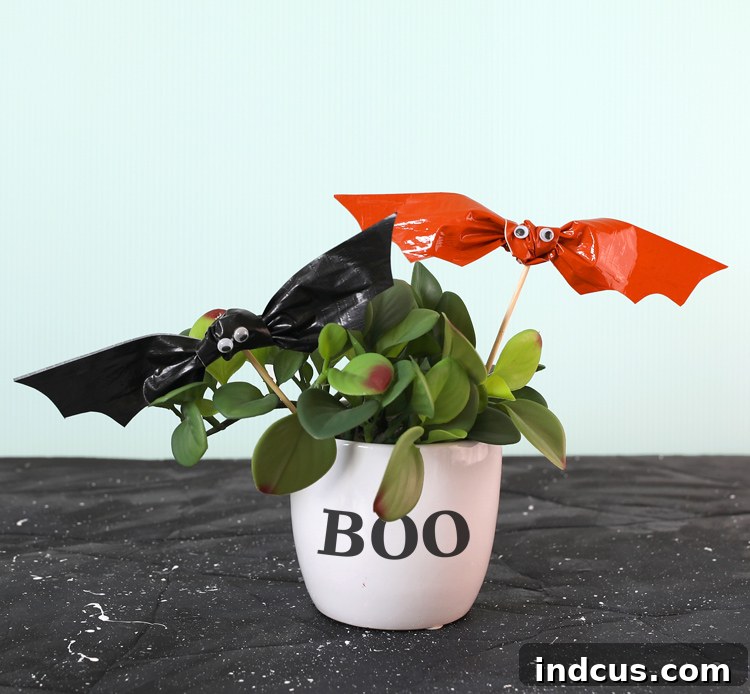
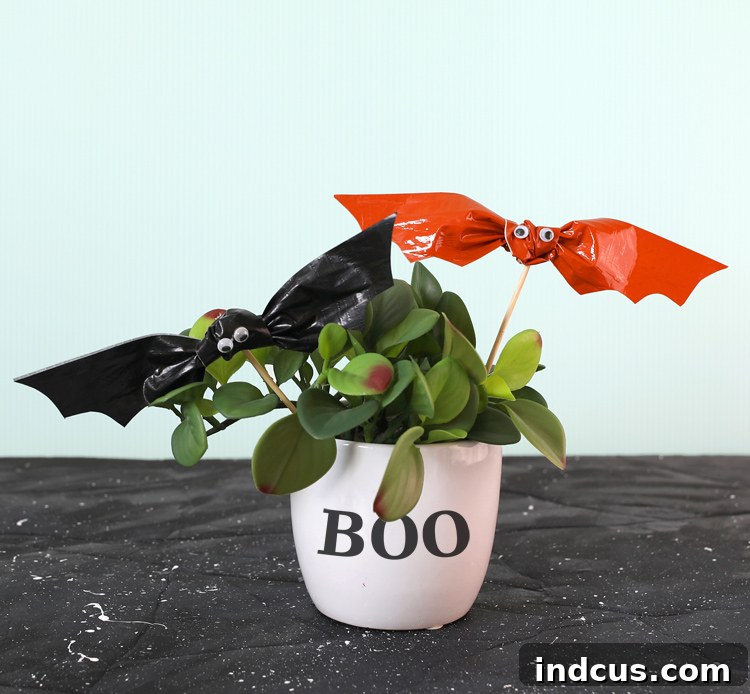
- Garden Stakes and Planters: Attach your finished bats to skewers or small sticks and simply plant them into your lawn, garden beds, window boxes, or potted plants. Create a dramatic, eerie swarm seemingly taking flight from your greenery, adding depth and movement to your outdoor scene.
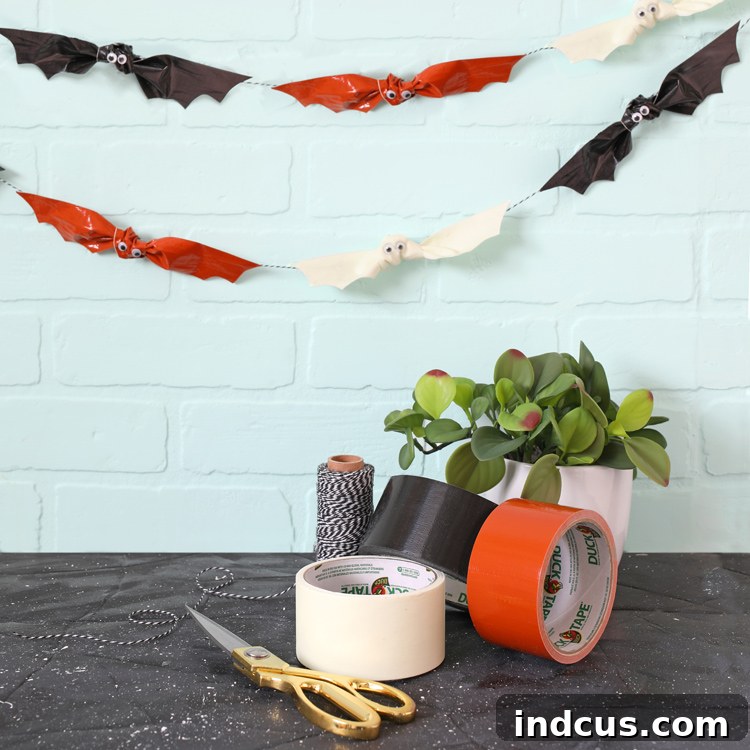
- Charming Garlands: String several bats together with twine, fishing line, or ribbon to craft a unique, eye-catching garland. Drape it across your porch railing, along a fence, or above a doorway for an instant festive welcome that won’t sag or tear in damp weather.
- Window and Door Adornments: Securely attach them to windows or doors using removable adhesive strips or a tiny dab of hot glue (if suitable for your surface) to create a captivating illusion of bats fluttering around your home. Arrange them in various sizes and angles for a dynamic, lifelike effect.
- Wreaths and Centerpieces: Incorporate these bats into a Halloween wreath for your front door or use them as playful accents in indoor centerpieces, adding a handcrafted touch to your festive arrangements.
The possibilities are genuinely endless! Unlike traditional paper bats that quickly succumb to moisture, these Duck Tape creations are built to withstand the elements, ensuring your Halloween spirit shines brightly, come rain or shine. This resilience not only saves you time but also allows you to reuse your favorite decorations year after year. Say goodbye to soggy decor and hello to enduring Halloween fun!
Crafting these delightful creatures is a remarkably straightforward process, suitable for crafters of all skill levels, from beginners to seasoned DIY enthusiasts. The simple steps make it a perfect project to enjoy with family and friends, adding a personal touch to your holiday preparations. Gather your materials, unleash your creativity, and get ready to conjure up a colony of these adorable and robust bats!
Essential Materials for Your Duck Tape Bat Project
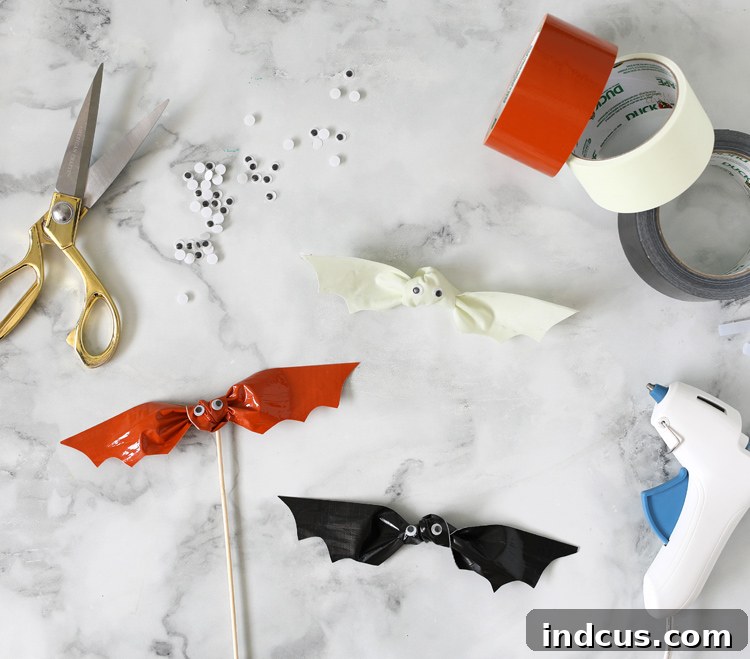
Before you begin your creative journey, ensure you have all the necessary supplies readily available. The beauty of this project lies in its minimal material requirements, making it an accessible and budget-friendly option for your Halloween decorating needs.
- Duck Tape: The star of our project! While black is classic for bats, don’t hesitate to experiment with other festive colors like orange for a vibrant pop, or even glow-in-the-dark Duck Tape to add an extra spooky dimension to your nocturnal creatures. The variety of patterns and colors available allows for endless customization.
- Small Googly Eyes: These instantly bring your bats to life, adding a playful and endearing quality to their otherwise spooky appearance. Choose various sizes for different bat personalities!
- Hot Glue Gun + Glue Sticks: Essential for securely attaching the googly eyes. A low-temperature glue gun is often recommended for crafts, especially if crafting with children.
- Scissors: A sharp pair of craft scissors will make cutting through the Duck Tape much easier and result in cleaner, more precise wing shapes.
- Ruler: Crucial for accurately measuring your Duck Tape strips, ensuring consistency in your bat sizes and overall neatness.
Having these tools at hand will streamline your crafting process, allowing you to focus on the fun of creation. Remember, a little preparation goes a long way in ensuring a smooth and enjoyable DIY experience.
DUCK TAPE BATS VIDEO TUTORIAL
For a visual guide to crafting these delightful bats, a detailed video tutorial demonstrating each step of the process is invaluable. While the full interactive video player is not displayed here, imagine a comprehensive walkthrough covering everything from tape measurement to the final wing cuts, ensuring you can follow along with ease and confidence. Such a tutorial would perfectly complement these written instructions, offering clear demonstrations of each technique.
Step-by-Step Guide: Crafting Your Duck Tape Bats
Now, let’s get down to the exciting part – bringing your Duck Tape bats to life! Follow these simple steps carefully, and you’ll soon have a charming collection of weatherproof bats ready to adorn your home.
Step 1: Preparing Your Duck Tape Strips
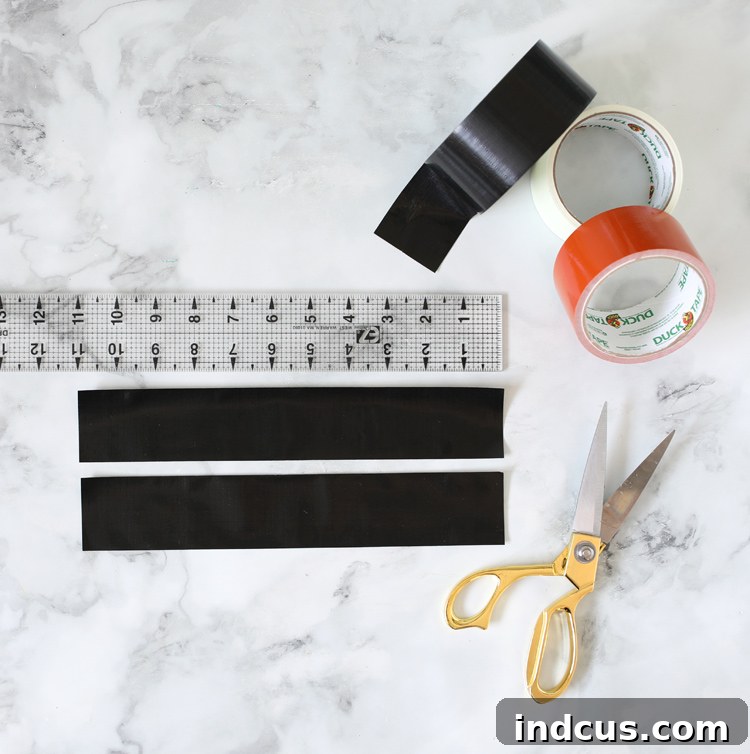
Begin by unrolling your chosen Duck Tape. Using your ruler for accuracy, cut two separate pieces, each precisely 11 inches long. The length of 11 inches provides a good foundation for a medium-sized bat, offering enough material for both the body and the wings. Carefully lay one strip of Duck Tape flat on your work surface, sticky side facing up. Now, take the second 11-inch strip and meticulously place it directly on top of the first, sticky side down. The goal is to align the edges as perfectly as possible, ensuring that the sticky sides adhere completely to each other. This creates a double-sided, non-sticky, and robust strip of Duck Tape, which will form the main body and wings of your bat. This technique is key to the bats’ durability and gives them a clean, finished look, eliminating any exposed adhesive.
Step 2: Forming the Bat’s Body
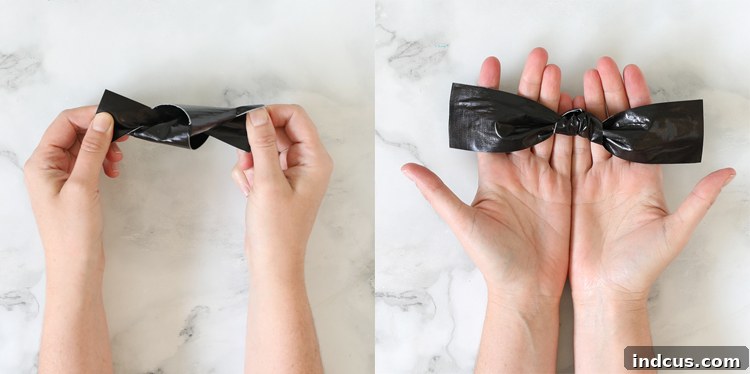
With your double-sided Duck Tape strip prepared, it’s time to create the bat’s distinctive body. Take the strip and carefully tie a single knot in its center. This might feel a little unusual with Duck Tape, but its flexibility allows for a surprisingly neat knot. Once the knot is formed, gently pull on both ends of the tape strip, slowly tightening it. The objective is to achieve a firm, compact knot that is centered along the length of the strip. This knot will serve as the bat’s head and body, providing a defined central point from which the wings will extend. Adjust and smooth the tape around the knot to make it as neat and symmetrical as possible.
Step 3: Adding Googly Eyes for Personality
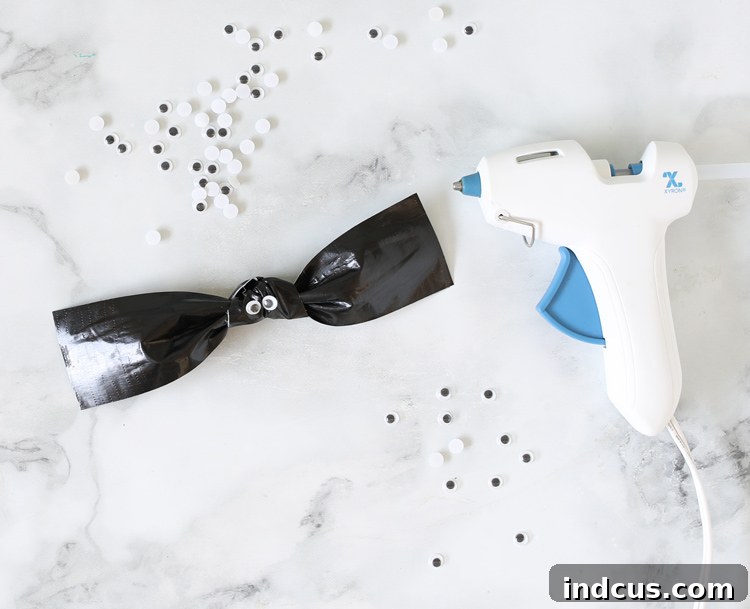
Now for the fun part that brings your bats to life! Carefully select two small googly eyes. Using your hot glue gun, apply a tiny dab of hot glue to the back of each googly eye. Immediately and gently press the eyes onto the front center of the Duck Tape knot you just created. Position them close together, giving your bat an endearing and slightly comical expression. Be mindful not to use too much glue, as a small amount is sufficient for a strong bond and prevents any unsightly overflow. Allow the hot glue to cool and set completely before moving on to the next step, ensuring the eyes are firmly attached and ready for action.
Step 4: Shaping the Bat Wings
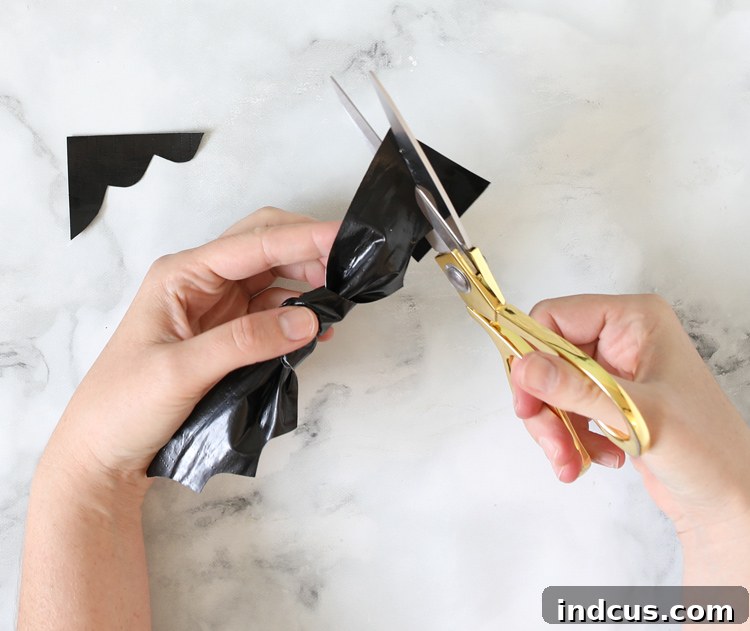
This final step transforms your knotted tape strip into a recognizable bat shape. Take your sharp pair of scissors. On each side of the central knot, you will now cut out the wing shapes. A classic bat wing typically has a scalloped or gently curved edge, mimicking the membrane and digits of a bat’s wing. Start from the knot and curve outwards, then back inwards towards the end of the tape strip, creating a distinct wing silhouette. You can experiment with different styles: deep scallops for a more traditional look, jagged cuts for a spooky vampire bat, or smoother, elongated curves for an elegant feel. Aim for symmetry between the two wings for a balanced appearance. Don’t be afraid to trim and refine the edges until you are happy with the shape. Once both wings are cut, your Duck Tape bat is complete!
And there you have it – a charming collection of the cutest little bats for Halloween, ready to transform your home into a festive and spooky haven! Once you’ve crafted your first one, you’ll discover just how quick, easy, and incredibly adorable these projects are. The addictive nature of this craft means you’ll soon be surrounded by a whole flock of these durable delights.
Pro Tips for Bat-Making Perfection
To elevate your Duck Tape bat creations and ensure they stand out, consider these helpful tips:
- Varying Sizes: Experiment with different initial tape lengths (e.g., 9 inches or 13 inches) to create bats of various sizes. A diverse flock adds more visual interest and realism to your display.
- Color and Pattern Play: Don’t limit yourself to just black. Duck Brand offers an incredible array of colors and patterns. Imagine iridescent bats, striped bats, or even bats with playful Halloween prints! Mixing and matching will create a truly unique display.
- Wing Design Variety: While scalloped wings are classic, try cutting jagged edges for a more menacing look, or sleek, smooth curves for a graceful bat. Sketch out a few designs on paper first to find your favorite.
- Secure Display: When attaching bats to surfaces, consider how easily they can be removed without damage. For windows, clear static cling tape or removable adhesive dots work well. For garden stakes, hot glue provides a strong hold.
- Storage Solutions: Thanks to their durability, these bats can be enjoyed for many Halloweens to come. Store them flat in a box or a large zip-top bag in a cool, dry place to prevent them from losing their shape or getting dusty.
Embrace the creative freedom that Duck Tape provides. These little bats are not just decorations; they’re an expression of your Halloween spirit, crafted with love and built to last. They’re a fantastic way to personalize your holiday decor and impress trick-or-treaters with your imaginative flair.
Get ready to transform your home into a truly memorable Halloween spectacle with these easy, charming, and incredibly resilient DIY Duck Tape bats. Happy crafting, and have a wonderfully spooky Halloween!
Like this idea? Pin it so you don’t forget it!