
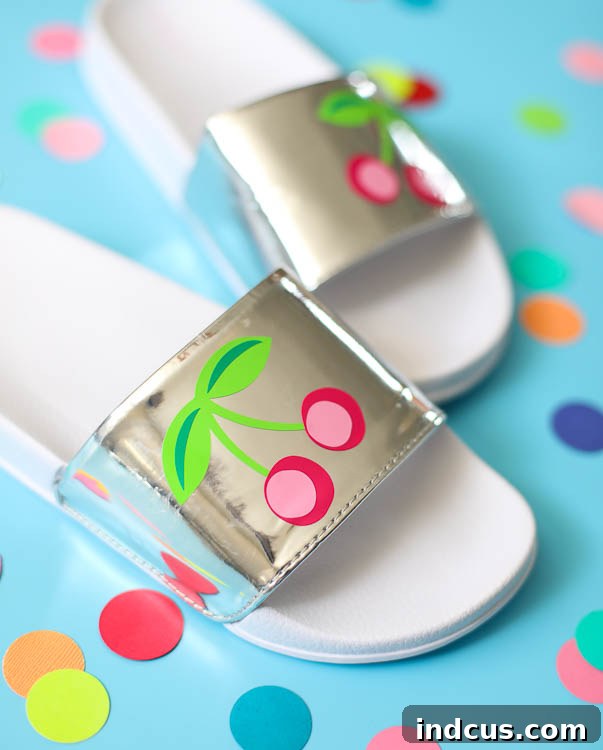
DIY Personalized Summer Sandals: Create Unique Footwear with Adhesive Vinyl
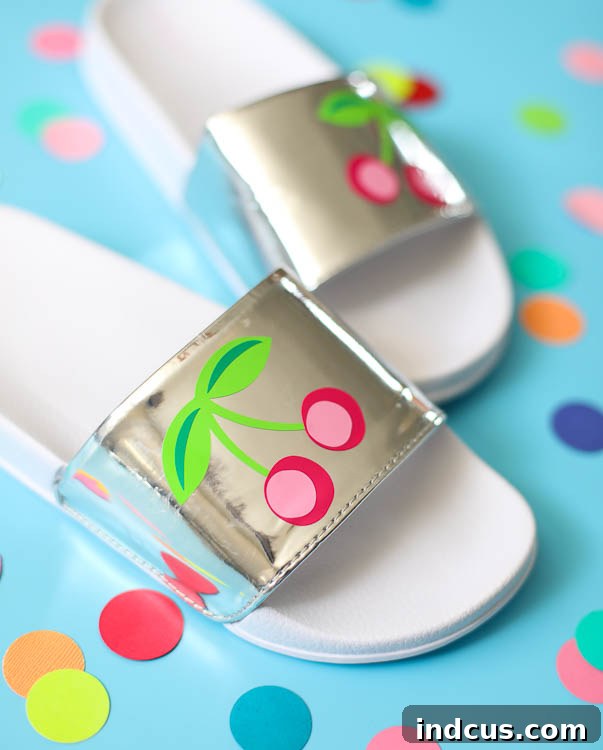
Are you looking for a fun, easy, and incredibly rewarding craft project to brighten up your summer wardrobe? Look no further! Customizing a pair of ordinary summer sandals with adhesive craft vinyl is a fantastic way to add a unique touch to your footwear. We recently took a simple pair of holographic slide sandals and transformed them into a one-of-a-kind accessory for my teenage daughter, and the results were absolutely adorable. This project is not only quick and straightforward but also guarantees a truly unique outcome that will set your style apart.
Imagine having sandals that perfectly reflect your personality, match your favorite outfits, or simply stand out from the crowd. With the magic of craft vinyl, you can achieve just that! This particular design features cheerful cherries, embodying the spirit of summer. It’s an ideal project for crafters of all skill levels, offering a personalized touch to an everyday item. Plus, who doesn’t love having something no one else has?
This comprehensive guide is proudly sponsored by Expressions Vinyl, providing the high-quality materials that make this project possible. Please note, this post contains affiliate links, meaning we may earn a small commission if you make a purchase through them, at no extra cost to you.
Why Customize Your Summer Sandals?
Personalization is all about expressing yourself, and what better way to do it than through your accessories? Customizing your summer sandals offers numerous benefits:
- Uniqueness: Stand out from the crowd with footwear that no one else has.
- Style Statement: Match your sandals perfectly with your swimwear, summer dresses, or casual outfits.
- Cost-Effective Fashion: Give new life to an old pair of sandals or make an inexpensive pair look high-end.
- Creative Outlet: Unleash your inner designer and experiment with different colors, patterns, and themes.
- Perfect Gift: Create thoughtful, personalized gifts for friends and family that they’ll cherish.
This project is especially appealing for teens and adults alike who love to add a playful and stylish flair to their everyday wear. The durable nature of permanent adhesive vinyl ensures your custom designs will last through countless summer adventures.
Essential Supplies for Your Custom Cherry Vinyl Decal Sandals:
To embark on this exciting DIY journey and create your custom cherry vinyl decals, gather the following essential supplies. Choosing quality materials is key to achieving a professional and long-lasting finish.
- Expressions Vinyl Series 51 Permanent Craft Vinyl: This high-quality permanent vinyl is crucial for designs that need to withstand wear and tear, moisture, and sunlight. For our cheerful cherry design, we recommend the vibrant shades of Flamingo Pink, Bright Berry, Caterpillar Green, and Clover. These colors provide excellent contrast and a truly summery vibe. Permanent vinyl ensures your design adheres strongly to the sandal material and won’t peel off easily.
- Silhouette Cameo (or other cutting machine): A cutting machine like the Silhouette Cameo is indispensable for intricate designs and precise cuts. It allows you to transform digital designs into perfectly cut vinyl decals, making complex patterns accessible even for beginners. If you have another brand of electronic cutting machine (like Cricut), the principles of cutting and layering vinyl remain the same.
- Cherry Cut File: Having a pre-designed cut file makes the process incredibly efficient. This specific cherry design is playful and perfect for summer footwear. You can find a vast library of designs in the Silhouette Design Store, or even create your own if you’re feeling adventurous!
- Weeding Tool: While listed in a later step, a good weeding tool is absolutely essential for removing excess vinyl. We highly recommend THIS weeding tool, which makes the intricate process of separating your design from the backing paper much easier.
- Cutting Mat: Ensure you have a clean and adequately sticky cutting mat for your machine. A worn-out mat can lead to shifting vinyl and imperfect cuts.
- Pair of Slide Sandals: Choose a clean, smooth pair of sandals that provides a good surface for vinyl adhesion. Holographic or solid-colored slides work wonderfully as a base.
- Rubbing Alcohol & Cotton Pad: For preparing the surface of your sandals.
Step-by-Step Guide: How to Personalize Your Summer Sandals with Vinyl
Step 1: Design Setup in Silhouette Studio
Begin by downloading the cherry cut file and opening it within your Silhouette Studio software. This is where you’ll prepare your design for cutting. Once opened, you’ll likely need to resize the shape to fit the strap of your sandals. Measure the width of your sandal strap to ensure the decal will be proportionate and look great. After resizing, duplicate the shape to create a second cherry for the other sandal. Since sandals typically have a left and right, you’ll want to mirror one of these duplicated shapes. Mirroring ensures that your designs will face outwards (or inwards, depending on your preference) symmetrically when applied to both sandals. This attention to detail will give your custom footwear a polished, professional appearance.
Step 2: Ungrouping for Multi-Color Application
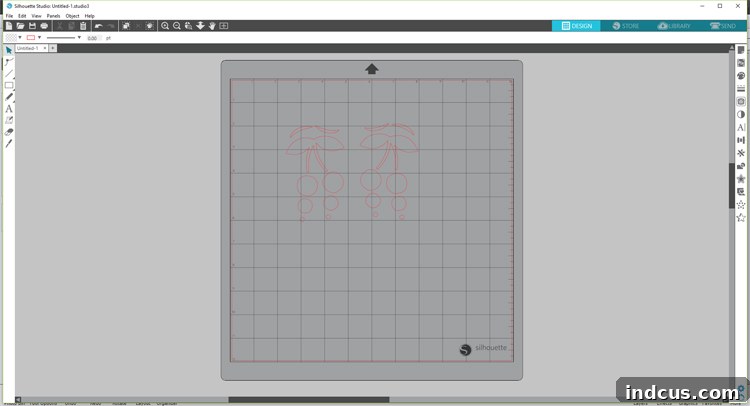
With your design ready, the next crucial step is to right-click on the cherry shape within Silhouette Studio and select the “ungroup” option. Ungrouping is essential for multi-color designs like our cherries, which have distinct elements such as the stem, the main cherry body, and the leaf. This action allows you to manipulate each component of the design independently. By ungrouping, you gain the flexibility to arrange each piece separately, which is vital when you want to cut different parts of the design from different colors of vinyl. This gives you complete control over the final aesthetic, ensuring each element can be cut from its intended vibrant hue.
Step 3: Efficient Vinyl Arrangement on the Design Mat
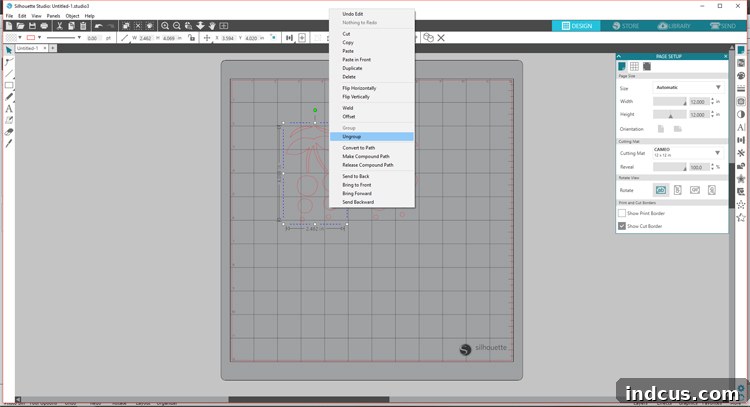
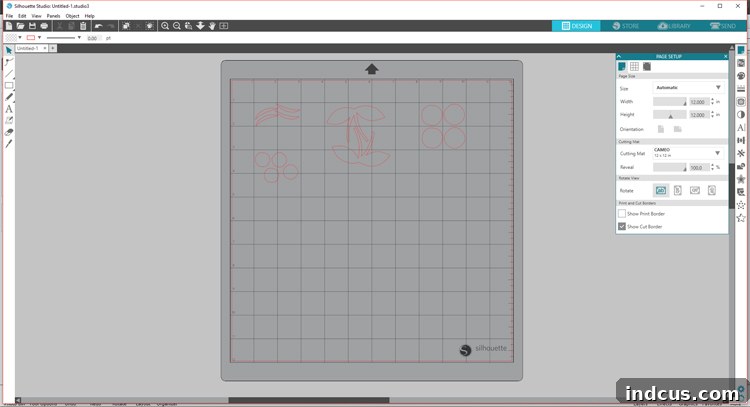
Now that your design is ungrouped, it’s time to arrange the individual pieces for cutting. A smart crafter always aims to minimize material waste! Move the pieces that will be cut from the same color vinyl close together on your digital mat. For instance, put all the “stem” pieces together, all the “leaf” pieces together, and all the “cherry” pieces together. This strategic arrangement directly correlates to how you’ll place your physical vinyl scraps on your cutting mat in the next step. By consolidating same-color elements, you can utilize smaller scrap pieces of vinyl more effectively, saving money and reducing waste. Think of it like a puzzle, fitting all the like-colored pieces into specific zones on your virtual mat.
Step 4: Placing Vinyl on the Cutting Mat
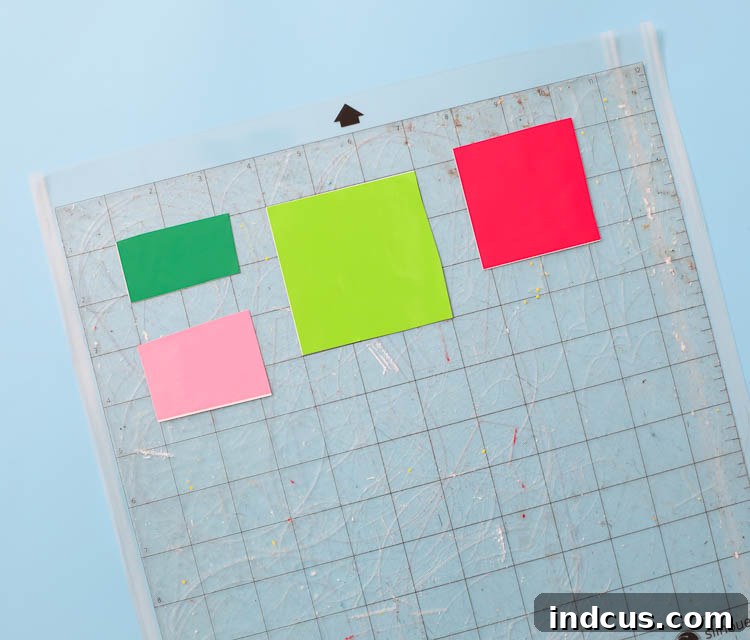
This step brings your digital arrangement to life. Carefully arrange your actual scrap pieces of permanent craft vinyl onto your physical cutting mat. Make sure they line up precisely with where you arranged the shapes in Silhouette Studio. For example, if you grouped all your green leaf pieces in the top left corner of your digital mat, place a small piece of green vinyl in the top left corner of your physical mat. Ensure the vinyl is pressed down firmly onto the mat to prevent it from shifting during the cutting process. A good, sticky cutting mat is paramount here; if yours is losing its stick, it might indeed be time for a fresh one! This meticulous alignment ensures that each color component is cut from its designated vinyl piece, streamlining the subsequent application process.
Step 5: Cutting and Weeding Your Vinyl Designs
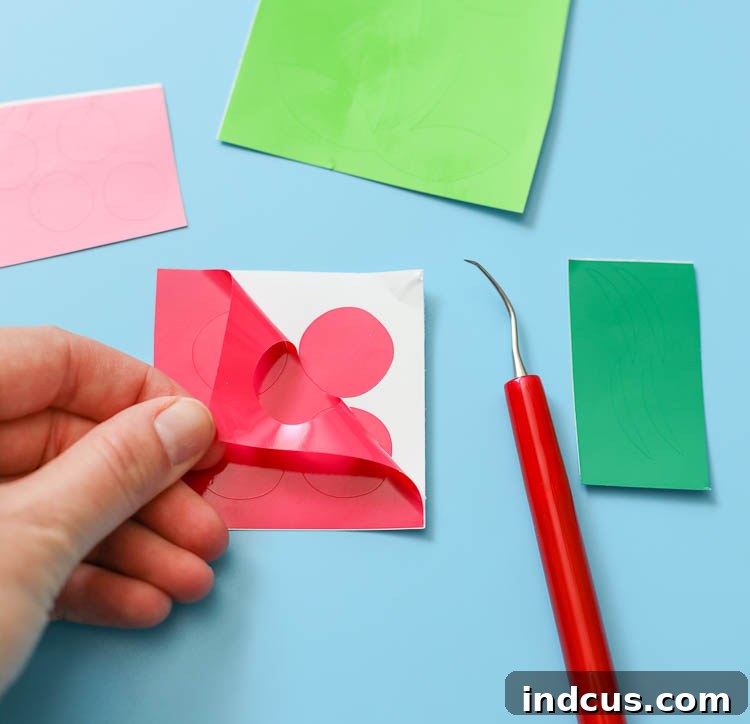
Load your cutting mat into your Silhouette Cameo and send the design to cut. Always double-check your machine’s settings to ensure they are appropriate for the type of permanent adhesive vinyl you’re using (e.g., blade depth, force, speed). Once the cutting is complete, carefully remove the vinyl from the cutting mat. Now comes the “weeding” process, which is where your weeding tool becomes your best friend! Weeding involves meticulously removing all the excess vinyl that is not part of your final design. This exposes the intricate details and clean lines of your cherry decals. A high-quality weeding tool, like THIS one from Expressions Vinyl, makes a significant difference, allowing you to easily pry away vinyl from the backing paper and pick out tiny, intricate designs with precision. Take your time with this step, especially with small elements, to ensure your decals are perfect.
Step 6: Applying the Vinyl to Your Sandals
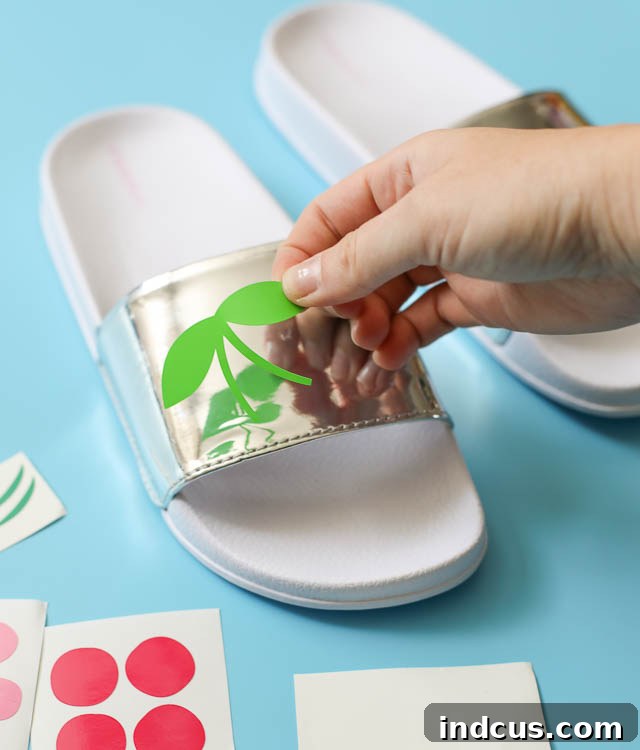
Before applying your vinyl decals, ensure your sandals are impeccably clean and dry. Use rubbing alcohol and a cotton pad to wipe down the area where the vinyl will be placed; this removes any oils or dirt that could prevent proper adhesion. Once clean, it’s time for application! Start by carefully peeling the vinyl pieces off their backing paper. For layered designs like these cherries, it’s often best to begin with the foundational elements. For our cherry design, start with the stems, positioning them accurately. Then, carefully apply the larger circular cherry body, followed by the smaller circular highlight or contrasting color, and finally the leaf lines. Press each piece firmly onto the sandal strap, working from the center outwards to smooth out any air bubbles. Use your fingers or a craft squeegee to ensure maximum contact and adhesion. Take your time with each layer, ensuring accurate placement for the best visual effect. The precision in this step is what will make your personalized sandals truly shine!
The Final Flourish: Your Custom Summer Sandals Are Ready!
And just like that, with a few simple steps, you’ve transformed an ordinary pair of slides into a custom, fashion-forward accessory! Aren’t these vibrant cherry decals just the epitome of summer joy? The bright colors and playful design instantly inject a sense of cheerfulness into your footwear. I’ll confess, after seeing how charming these turned out, I’m almost tempted to “borrow” them for myself! This project truly showcases how easy and impactful personalizing everyday items with craft vinyl can be.
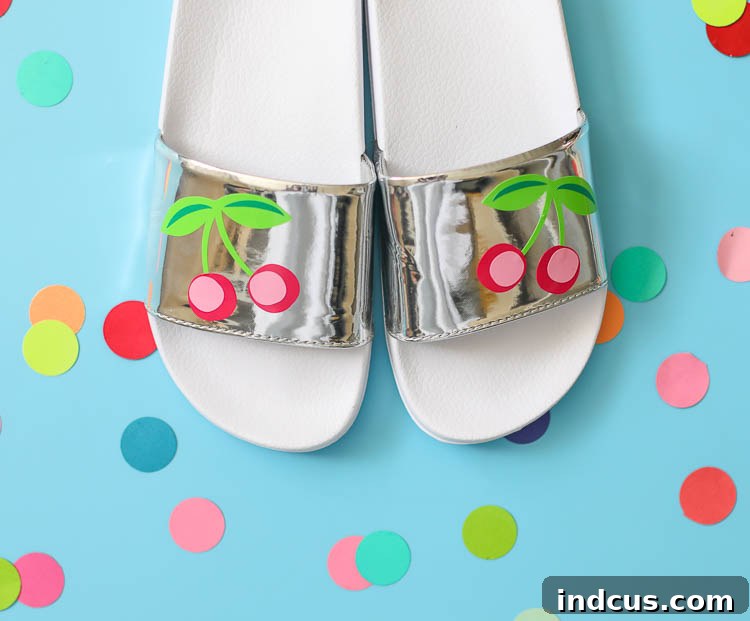
It’s fascinating how fashion trends circle back, isn’t it? These slide sandals, reminiscent of the pair I proudly wore in 7th grade, have made a stylish comeback. Customizing them with vinyl only adds to their timeless appeal, giving them a modern, personalized twist. Embrace the nostalgia while creating something fresh and exciting!
Tips for Long-Lasting Vinyl Sandals:
- Curing Time: After applying the vinyl, allow it to “cure” for at least 24-48 hours before wearing the sandals. This allows the adhesive to fully bond with the sandal material, ensuring maximum durability.
- Gentle Cleaning: When cleaning your customized sandals, avoid harsh scrubbing directly over the vinyl. Gently wipe them with a damp cloth and mild soap.
- Avoid Extreme Heat: Prolonged exposure to extreme heat (like leaving them in a hot car) can sometimes affect the vinyl’s adhesive.
- Test Adhesion: Before wearing, gently check the edges of your vinyl designs to ensure they are fully adhered. If any edges are lifting, press them down firmly.
Creative Variations for Your Custom Sandals:
The beauty of vinyl crafting is its versatility! Once you’ve mastered the cherry design, consider these ideas for your next custom sandal project:
- Initials or Monograms: A classic and elegant way to personalize.
- Geometric Patterns: Stripes, polka dots, or abstract shapes for a modern look.
- Floral Designs: Daisies, hibiscus, or tropical leaves for different summer vibes.
- Themed Decals: Seashells, anchors, or waves for beach lovers; fruit slices for a sweet touch.
- Mix and Match: Use different colors and patterns on each sandal for an eclectic style.
- Glitter or Specialty Vinyl: Elevate your design with dazzling glitter vinyl or textured options.
FAQs About Customizing Sandals with Vinyl:
- Q: What type of sandals work best for vinyl customization?
- A: Sandals with smooth, non-porous surfaces (like PVC, PU leather, or certain rubber/EVA materials) work best. Avoid heavily textured fabrics or suede, as vinyl may not adhere well.
- Q: Is permanent vinyl truly waterproof?
- A: Yes, permanent adhesive vinyl is designed to be water-resistant and durable, making it suitable for items that may get wet, like summer sandals. Ensure proper application and curing for best results.
- Q: Can I use iron-on vinyl for this project?
- A: No, iron-on vinyl (HTV) requires heat to activate its adhesive, which can damage most sandal materials. Always use self-adhesive permanent craft vinyl for this type of project.
- Q: What if I don’t have a cutting machine?
- A: While a cutting machine offers precision, you can still customize sandals with vinyl! Look for pre-made vinyl decals, or carefully cut simpler shapes by hand using a craft knife and a cutting mat.
- Q: How do I remove the vinyl if I want to change the design?
- A: Permanent vinyl is designed for long-term adhesion, but it can often be removed with some effort. Gently heat the vinyl with a hairdryer (on low setting) to soften the adhesive, then carefully peel it away using a weeding tool or your fingernails. Any sticky residue can usually be removed with rubbing alcohol or a specialized adhesive remover.
Happy crafting, and enjoy stepping out in your fabulous, custom-designed summer sandals!







