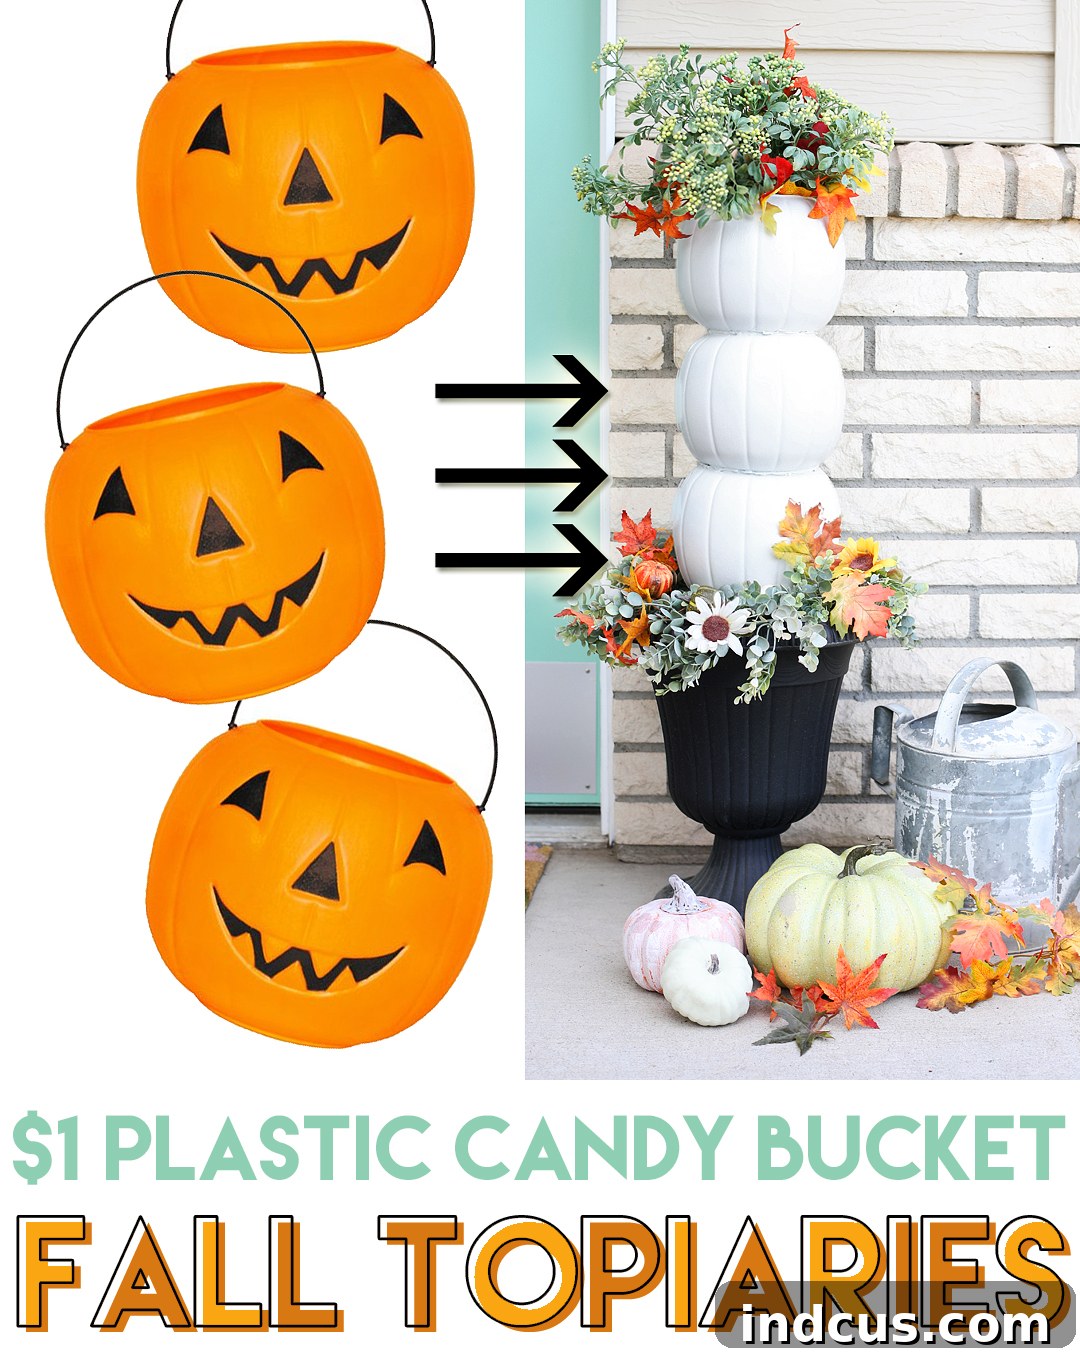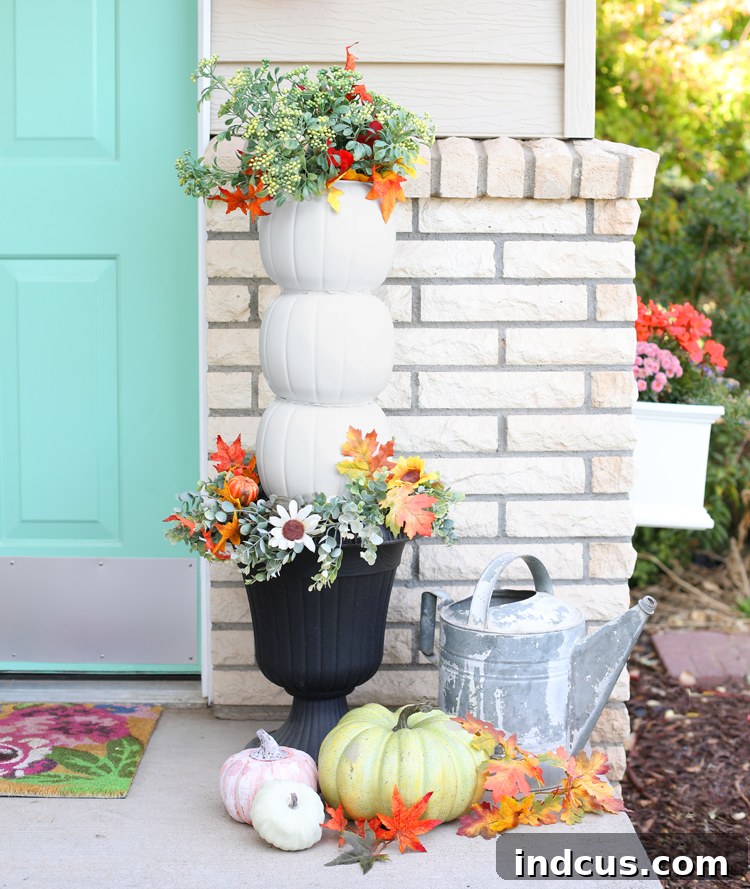
Elevate Your Fall Decor: Craft Stunning Topiaries from Dollar Store Plastic Pumpkins
As the vibrant hues of autumn begin to paint the landscape, it’s the perfect time to infuse your home and outdoor spaces with the cozy charm of fall. One of the most effective ways to add elegance and vertical interest to your seasonal decor is through topiaries. But why spend a fortune on store-bought versions when you can create truly gorgeous and impressive pieces yourself? This guide will show you how to transform inexpensive plastic pumpkin candy buckets, readily available at any dollar store, into captivating fall topiaries that will leave your guests admiring your DIY prowess. This project is not only incredibly budget-friendly but also surprisingly simple, making it an ideal Fall DIY for crafters of all skill levels. Get ready to add a touch of sophisticated whimsy to your porch, entryway, or even indoor displays.
For those who prefer a visual guide, a quick video tutorial is available further down the page to walk you through each step.
Gather Your Materials: What You’ll Need for Your Pumpkin Topiary Project
Before diving into the creative process, gathering all your materials will ensure a smooth and enjoyable crafting experience. The beauty of this project lies in its simplicity and the affordability of the supplies. Here’s a comprehensive list of what you’ll need for each topiary:
- Plastic Pumpkin Buckets: You’ll need at least three for a classic stacked topiary look, though you can adjust this number based on your desired height. One or two buckets can create a smaller, charming topiary, while four or more can achieve a truly grand statement piece. Consider different sizes if you want a graduated look.
- Heavy Filling Material: This is crucial for stability, especially if your topiaries will be displayed outdoors where wind might be a factor. Good options include large rocks, gravel, sand (sealed in a bag), or even small bricks. Collect these from your yard or purchase inexpensive bags from a home improvement store.
- Strong Adhesive: While hot glue might seem convenient, its bond on plastic can sometimes fail, especially under stress or varying temperatures. For a lasting topiary, we highly recommend a more permanent and durable adhesive like E6000 or a strong construction adhesive specifically designed for plastic. This will prevent your stacked pumpkins from separating.
- Spray Paint (Plastic-Bonding): The right spray paint is key to transforming your dollar store pumpkins into elegant decor. Look for paints explicitly formulated to bond to plastic surfaces, as these will provide excellent adhesion and a professional finish without flaking. Consider various finishes like matte, satin, glossy, or even textured “stone” or “aged metal” effects for a unique touch. Popular color choices include classic white, sophisticated matte black, various shades of gray, or even metallic gold or copper for a touch of glamour.
- Optional: Urns or Planters: If you plan to display your topiaries in decorative urns or large planters, have these ready.
- Optional: Decorative Elements: Faux or real flowers, branches, berries, small gourds, or even battery-operated fairy lights to fill the top pumpkin and add a finishing touch.
- Protective Gear: Gloves and a face mask are recommended when spray painting, and ensure you work in a well-ventilated area.
- Newspaper or Drop Cloth: To protect your work surface during painting.
Step-by-Step Guide to Crafting Your DIY Pumpkin Topiaries
Step 1: Preparing and Weighting the Base Pumpkin
The foundation of a stable topiary is a well-weighted base. Begin by selecting your bottom pumpkin bucket. It’s essential that this bucket is heavy enough to prevent the entire topiary from tipping over, especially if it’s placed outdoors where it might encounter wind. Find a few substantial rocks in your yard, gravel, or even use a small bag of sand or concrete mix. Place these heavy items inside the bottom pumpkin. Ensure the weight is evenly distributed to maintain balance. This simple step is critical for the longevity and safety of your DIY fall decoration.
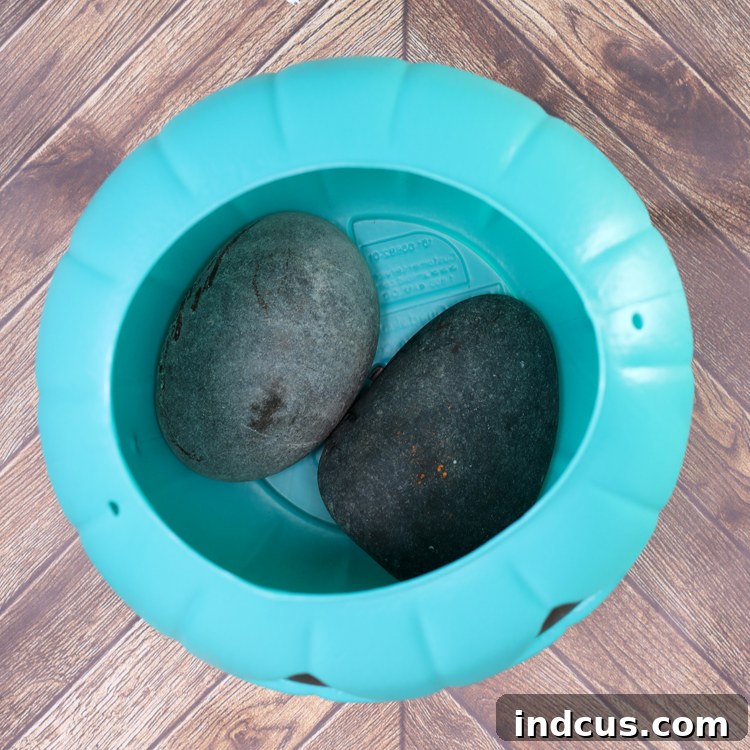
Once you’ve added the weight, do a quick stability check. The bucket should feel sturdy and resistant to easy movement. This preparatory step is often overlooked but is the cornerstone of a successful and durable topiary.
Step 2: Securely Assembling Your Pumpkin Stack
This is where your topiary truly begins to take shape. You will be joining your plastic pumpkin buckets together to form a vertical stack. As previously mentioned, a strong, permanent adhesive is paramount for this step.
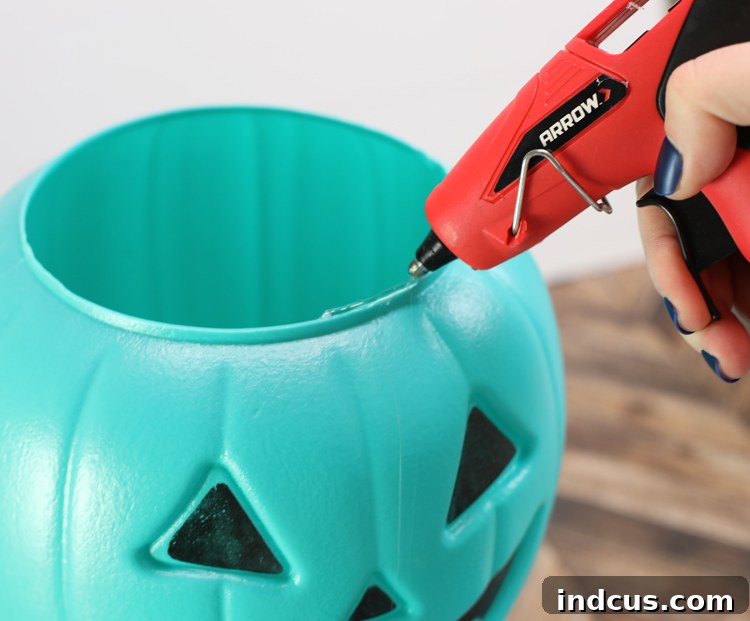
UPDATE & IMPORTANT NOTE: Previous recommendations for hot glue have proven to be insufficient for long-term durability. We strongly advise against using hot glue for joining the buckets, as it can be brittle and may come apart, especially when lifting or moving the topiary. Instead, opt for a more permanent and robust glue such as E6000, Gorilla Glue for plastic, or a similar construction adhesive specifically formulated to bond plastic. These types of glues create a much stronger and more lasting bond, ensuring your beautifully crafted topiaries stay intact for many seasons to come.
To assemble, apply a generous bead of your chosen permanent adhesive around the rim of the bottom pumpkin bucket (the one you just weighted). Carefully center the second pumpkin bucket on top of it, pressing down firmly to ensure good contact between the two surfaces. Hold the buckets in place for a minute or two, allowing the glue to begin setting. Depending on the adhesive you choose, you may want to use painter’s tape to secure the buckets while the glue cures, or even clamp them together if possible. Repeat this process for the third pumpkin bucket, adhering it to the top of the second one. Allow the glue to fully cure according to the manufacturer’s instructions, which might take several hours or even overnight. Patience during this step will pay off with a stable and durable topiary.
Step 3: Transforming with Paint – The Art of the Finish
Once your buckets are securely glued and the adhesive has fully cured, it’s time for the most transformative step: painting. This is where your inexpensive plastic pumpkins truly elevate to impressive decorative pieces. Select a well-ventilated area for spray painting, preferably outdoors, and lay down newspaper or a drop cloth to protect your surroundings. Wearing gloves and a mask is highly recommended.
Choose a spray paint specifically designed to bond to plastic. These paints contain special agents that allow them to adhere properly without flaking or peeling. While I opted for a classic white spray paint for a clean, elegant look, the possibilities are endless. Consider a “stone” spray paint for a more rustic, textured appearance, or perhaps a matte black, charcoal gray, or even a deep bronze or copper for a sophisticated touch. You could also experiment with metallic finishes for a touch of glamour. I’m linking to Amazon merely to provide visual examples of the types of cans and finishes available; however, for the best value, you’ll often find spray paint significantly cheaper at local stores like Walmart, Home Depot, or other hardware retailers.
Apply the paint in several light, even coats rather than one thick coat. This technique prevents drips and ensures a smoother, more durable finish. Allow each coat to dry to the touch before applying the next. This might take 15-30 minutes between coats, depending on humidity and temperature. Once you’ve achieved full coverage and are happy with the color and finish, allow the topiary to dry completely for at least 24 hours (or as directed by the paint manufacturer) before handling or decorating. This curing time is crucial for the paint to harden and become resistant to scratches.
Step 4: The Finishing Touches and Display
With the paint fully dry and cured, your pumpkin topiaries are almost ready for their grand debut! This final step involves adding decorative elements and placing them in their desired location.
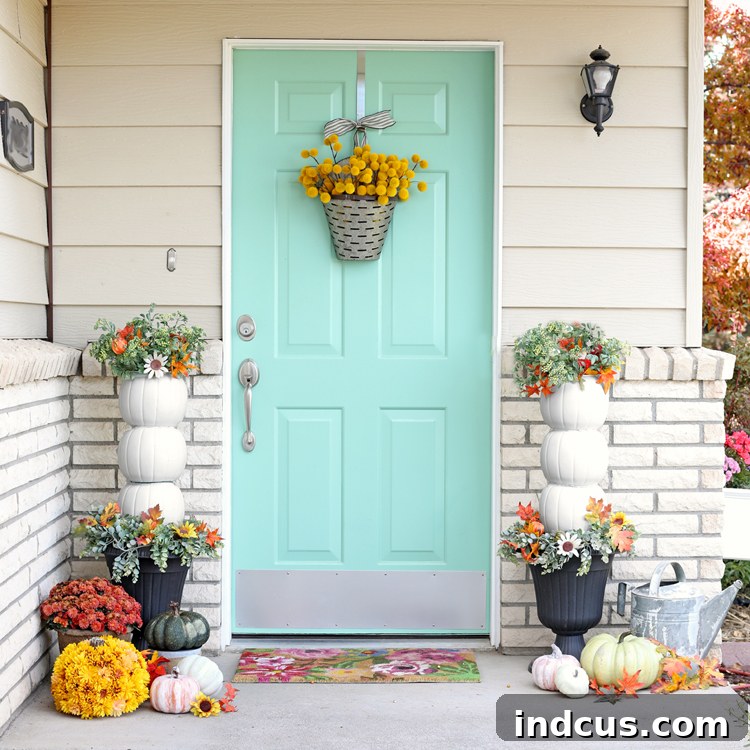
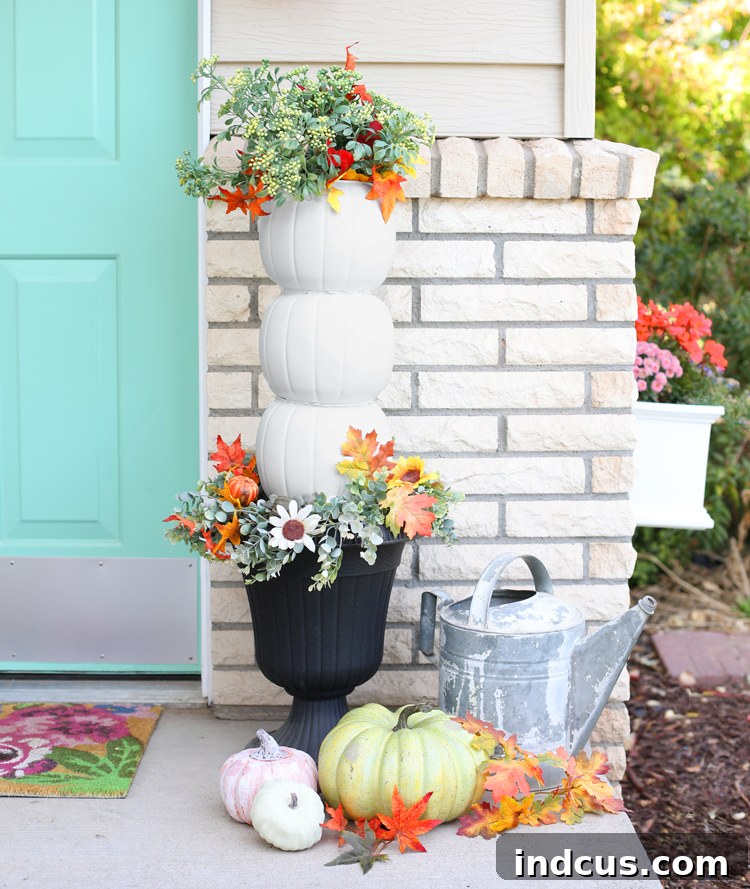
One popular way to display these topiaries is by stacking them in elegant urns or large planters. If using urns, you can simply place the weighted base into the urn. For added stability, especially if the urn is large, you can fill the surrounding space with sand, gravel, or even decorative mulch. Alternatively, you can place your topiaries directly on your front porch steps, patio, or any flat surface that needs a festive fall accent.
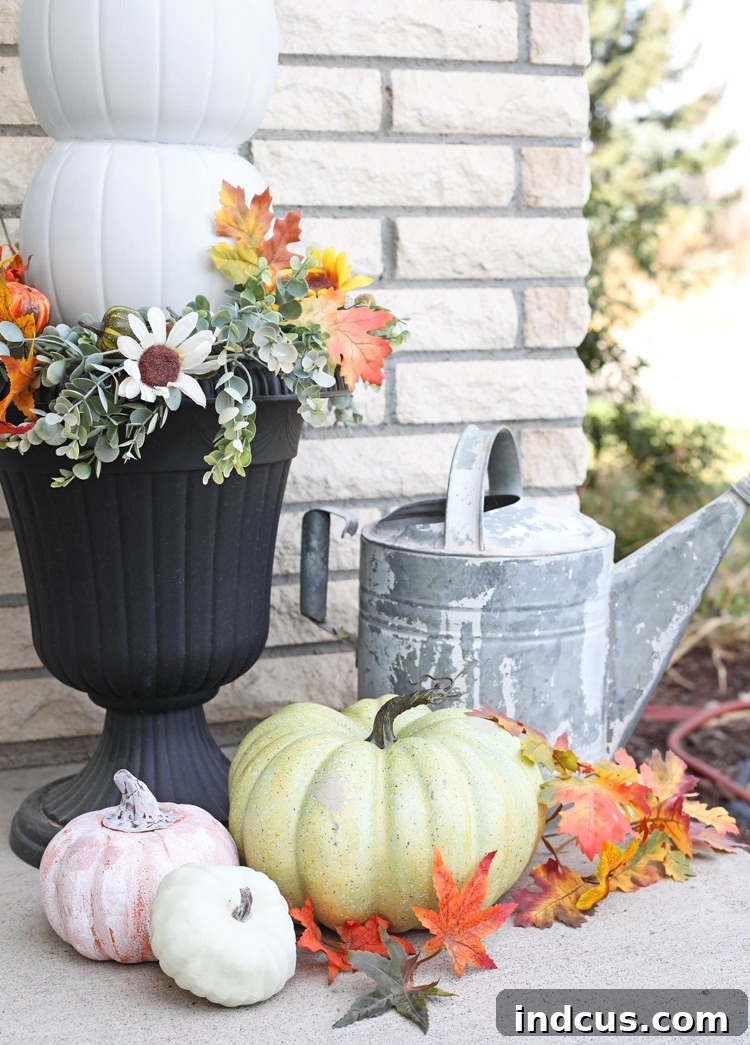
The top bucket of your topiary offers a wonderful opportunity for customization. Fill it with real or faux flowers – mums, sunflowers, hydrangeas, or fall foliage are excellent choices. You can also add natural elements like pinecones, mini gourds, decorative berries, or colorful branches. For an enchanting evening glow, consider tucking in a string of battery-operated fairy lights or a flameless LED candle. The possibilities for personalizing your topiaries are endless, allowing you to match them perfectly with your existing fall decor theme. Whether you opt for a minimalist look or a bountiful display, these topiaries will undoubtedly become a focal point of your autumn decorating.
Plastic Pumpkin DIY Topiary Video Tutorial
For those who are visual learners or simply want to see the process in action, a helpful video tutorial is available. It provides a quick, step-by-step demonstration of how to create these charming pumpkin topiaries, offering additional insights and tips.
Why This DIY Project is a Must for Fall
This DIY pumpkin topiary project stands out for several compelling reasons. It’s incredibly easy to execute, making it accessible even for those new to crafting. The cost-effectiveness is unbeatable; transforming dollar store finds into high-end looking decor saves you a significant amount compared to purchasing similar items from specialty stores. Beyond the savings, there’s immense satisfaction in creating something beautiful and unique with your own hands. These topiaries are versatile, fitting perfectly into various decor styles, from rustic farmhouse to elegant modern. Plus, by reusing plastic buckets, you’re engaging in a small act of creative sustainability. Easy, cheap, and so much fun – these topiaries are truly a fantastic addition to your autumn decorating arsenal.
Loved this idea? Don’t forget to pin it to your Fall Decor or DIY board for future reference and inspiration!