
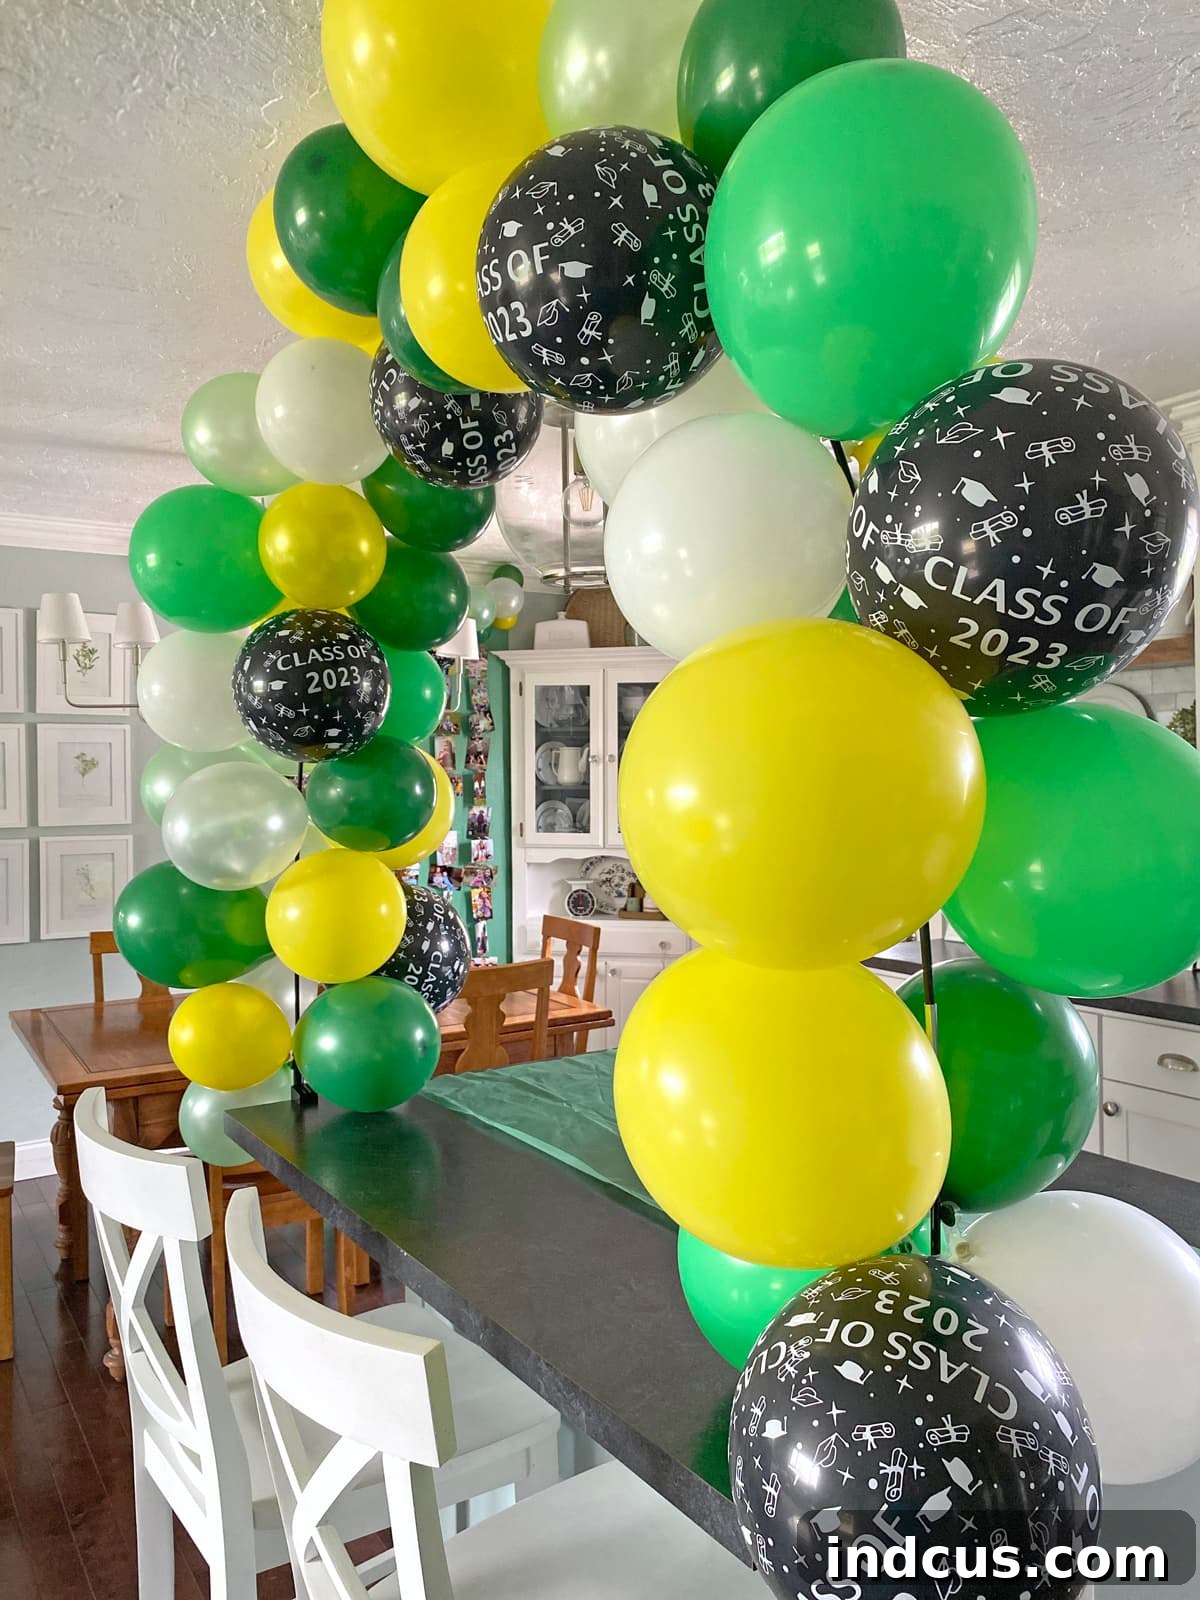
Craft the Perfect Tabletop Balloon Arch: A Stunning, Budget-Friendly DIY Guide
Transforming any celebration into an unforgettable event doesn’t have to break the bank. With a few simple supplies and a dash of creativity, you can create a show-stopping decoration that will impress all your guests: a DIY tabletop balloon arch. This elegant and versatile decor piece is perfect for adding a festive touch to any gathering, from intimate family dinners to grand celebrations.
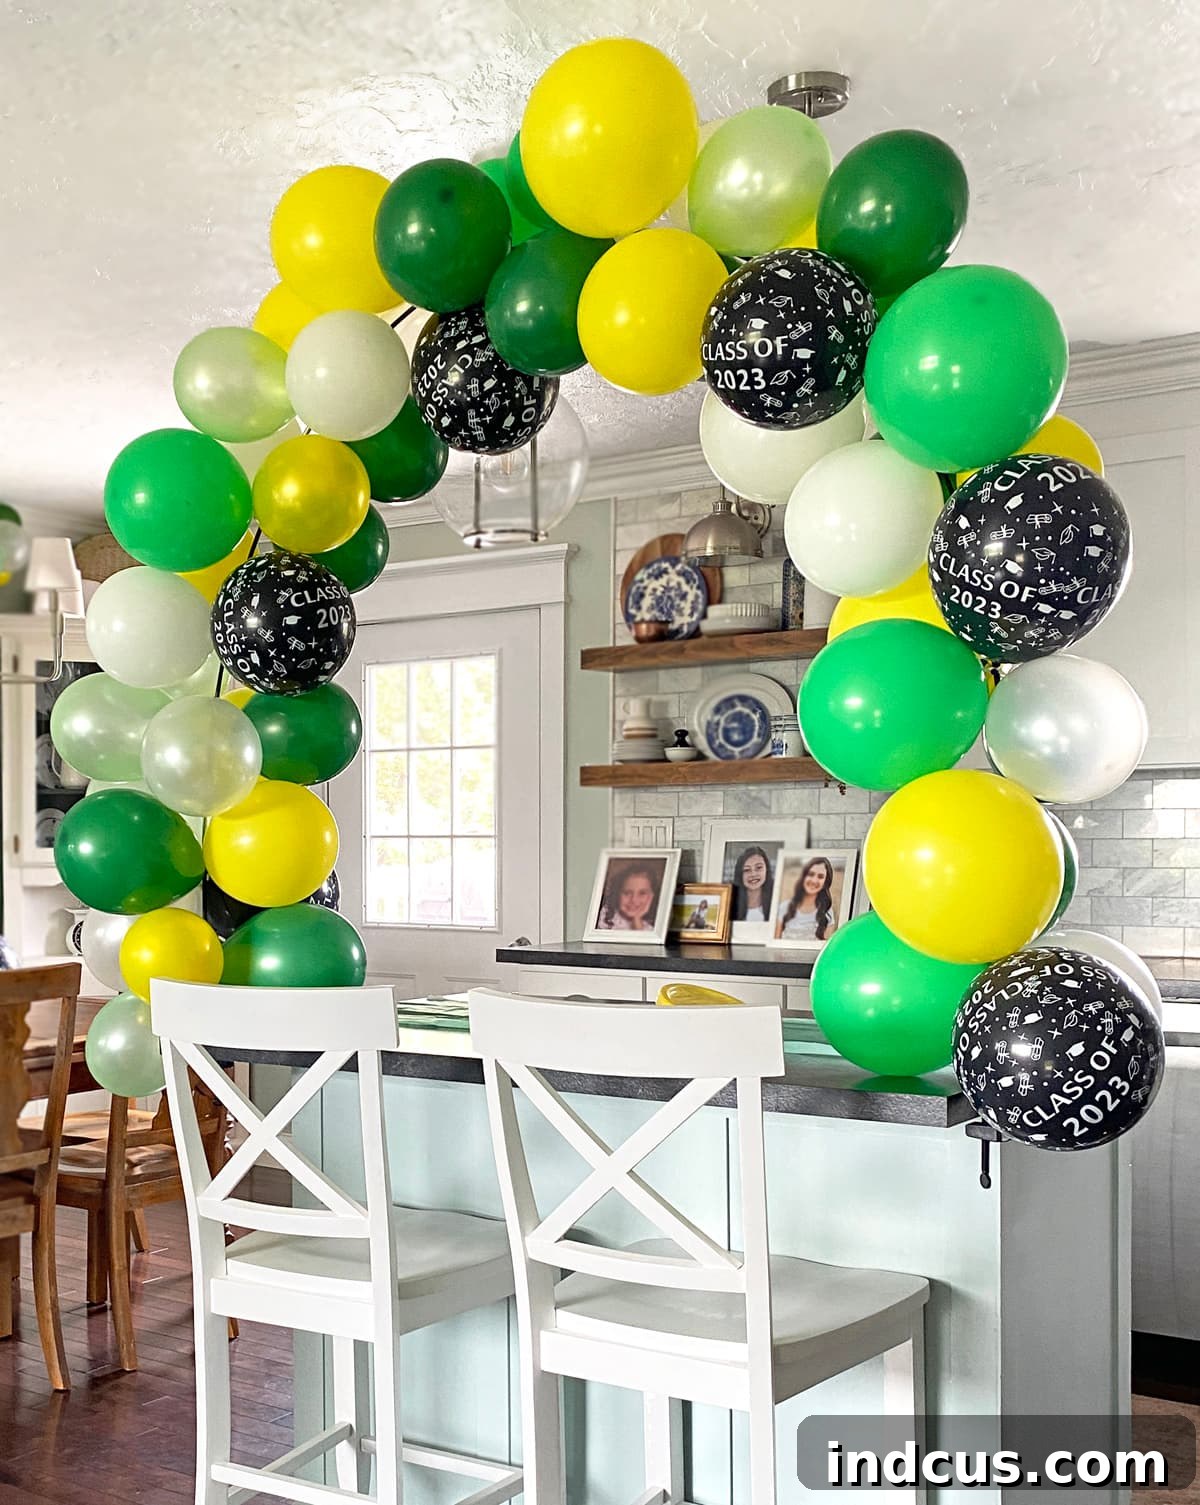
Recently, I hosted a graduation luncheon for my daughter, and I wanted to create a memorable backdrop without spending a fortune. That’s when I discovered the magic of the tabletop balloon arch. It was incredibly simple to assemble, yet its visual impact was immense, instantly elevating the party atmosphere. The best part? It’s wonderfully budget-friendly! Today, I’m thrilled to share a comprehensive guide on exactly what you’ll need and how to construct your own stunning balloon arch that easily clamps onto a tabletop or kitchen island.
Why Choose a Tabletop Balloon Arch for Your Next Event?
A tabletop balloon arch offers numerous advantages, making it an ideal choice for various occasions:
- High Visual Impact: It creates an instant focal point, drawing attention and adding a celebratory feel to any space.
- Budget-Friendly: Compared to professional decorations or elaborate floral arrangements, a DIY balloon arch is significantly more economical.
- Versatility: Perfect for birthdays, graduations, baby showers, bridal showers, holidays, or even simple family gatherings. It can adorn a dessert table, buffet line, gift station, or even a kitchen island.
- Customizable: Easily adapt the colors, balloon sizes, and added embellishments to perfectly match your party theme and personal style.
- Space-Saving: Unlike large, freestanding arches, this tabletop version utilizes existing furniture, making it ideal for smaller venues or homes.
- Relatively Easy to Assemble: With the right tools, the process is straightforward and enjoyable, even for crafting novices.
Essential Supplies for Your DIY Tabletop Balloon Arch
Before diving into the fun of creation, gather these key items. While some kits include basic pumps, investing in an electric pump is a game-changer you won’t regret.
- Balloon Arch Kit: This essential kit typically includes adjustable clamps, a collapsible metal rod (similar to camping tent poles), and a set of plastic balloon clips. The clamps secure the arch to your table, the rod provides the arch shape, and the clips are crucial for attaching balloons efficiently.
- Electric Balloon Pump: This is the most important upgrade you can make! While kits often come with a small handheld pump, an electric pump will save you hours of effort and energy, especially when inflating 60-80+ balloons. It’s a worthwhile investment (often around $18-$25) that you’ll use for countless parties to come.
- Assorted Balloons (roughly 60-80 count): The quantity will vary based on desired fullness and balloon sizes. Aim for a mix of sizes (5-inch, 9-inch, 12-inch, and even a few 18-inch balloons can add depth). Latex balloons are standard, but consider incorporating chrome, confetti, or agate balloons for extra flair. I found that local retailers like Walmart and Hobby Lobby often offer the best selection of colors and patterns at competitive prices.
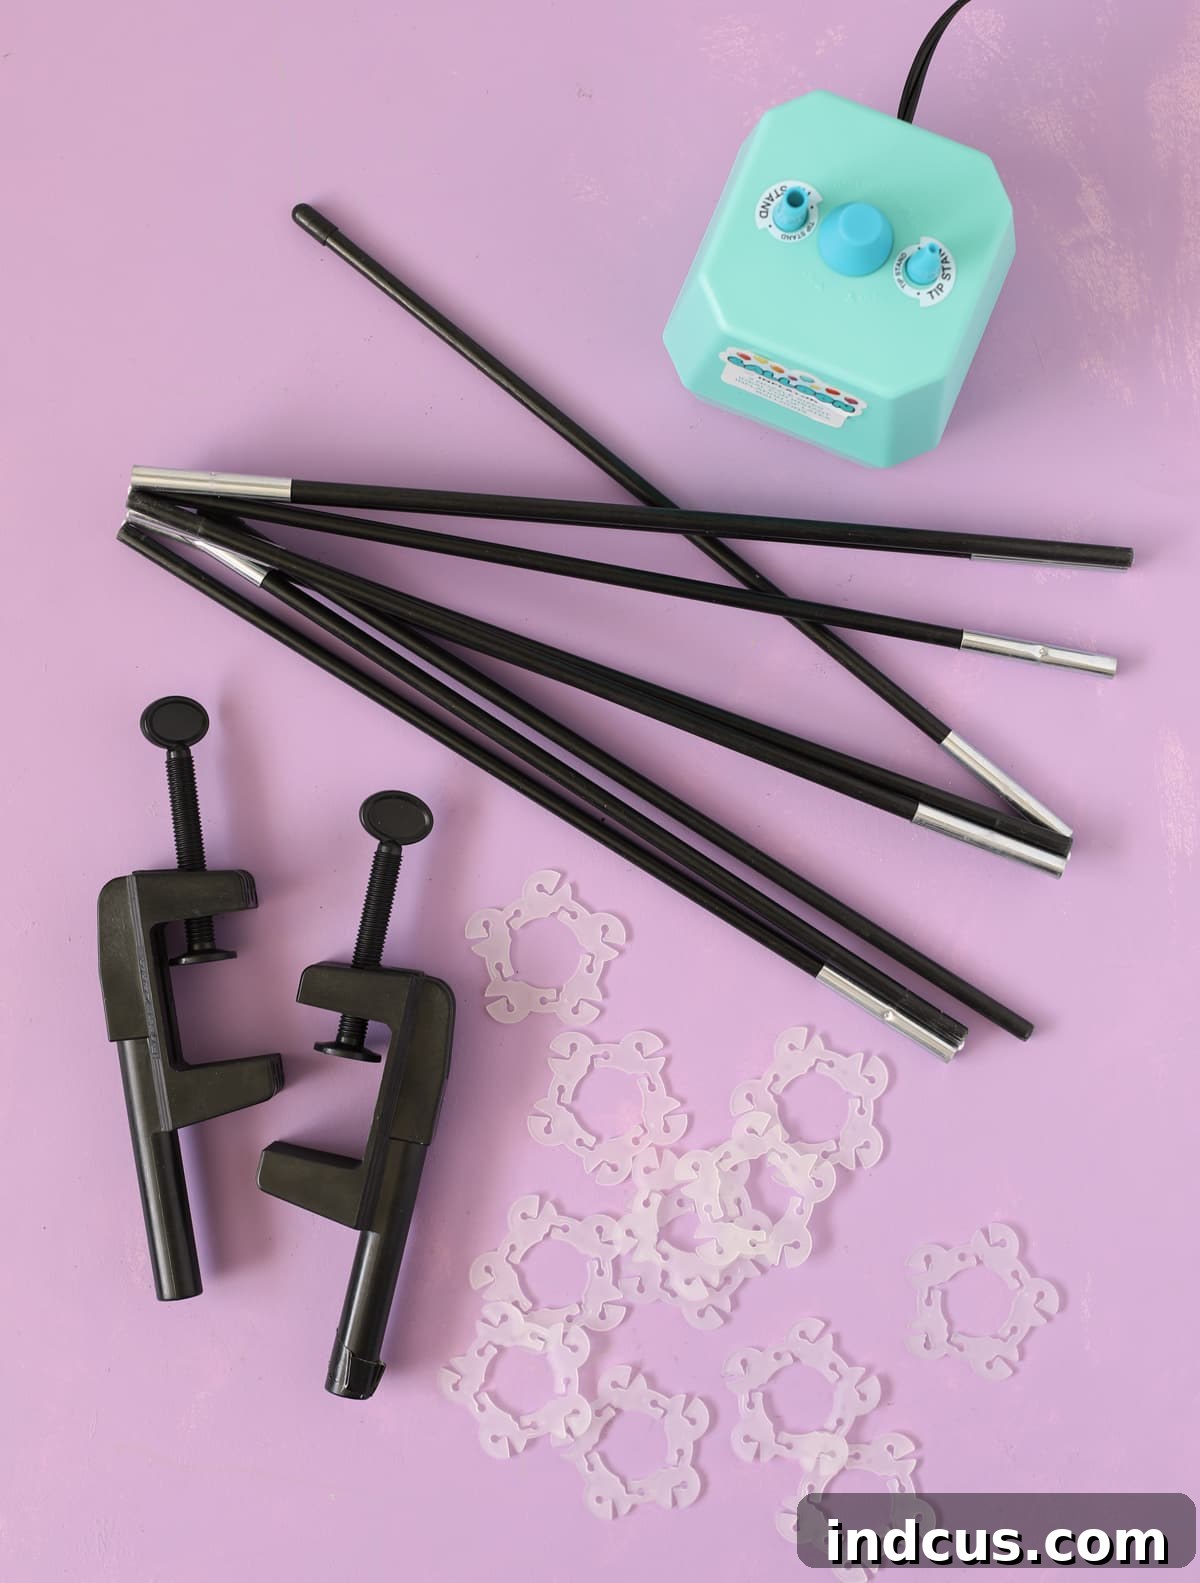
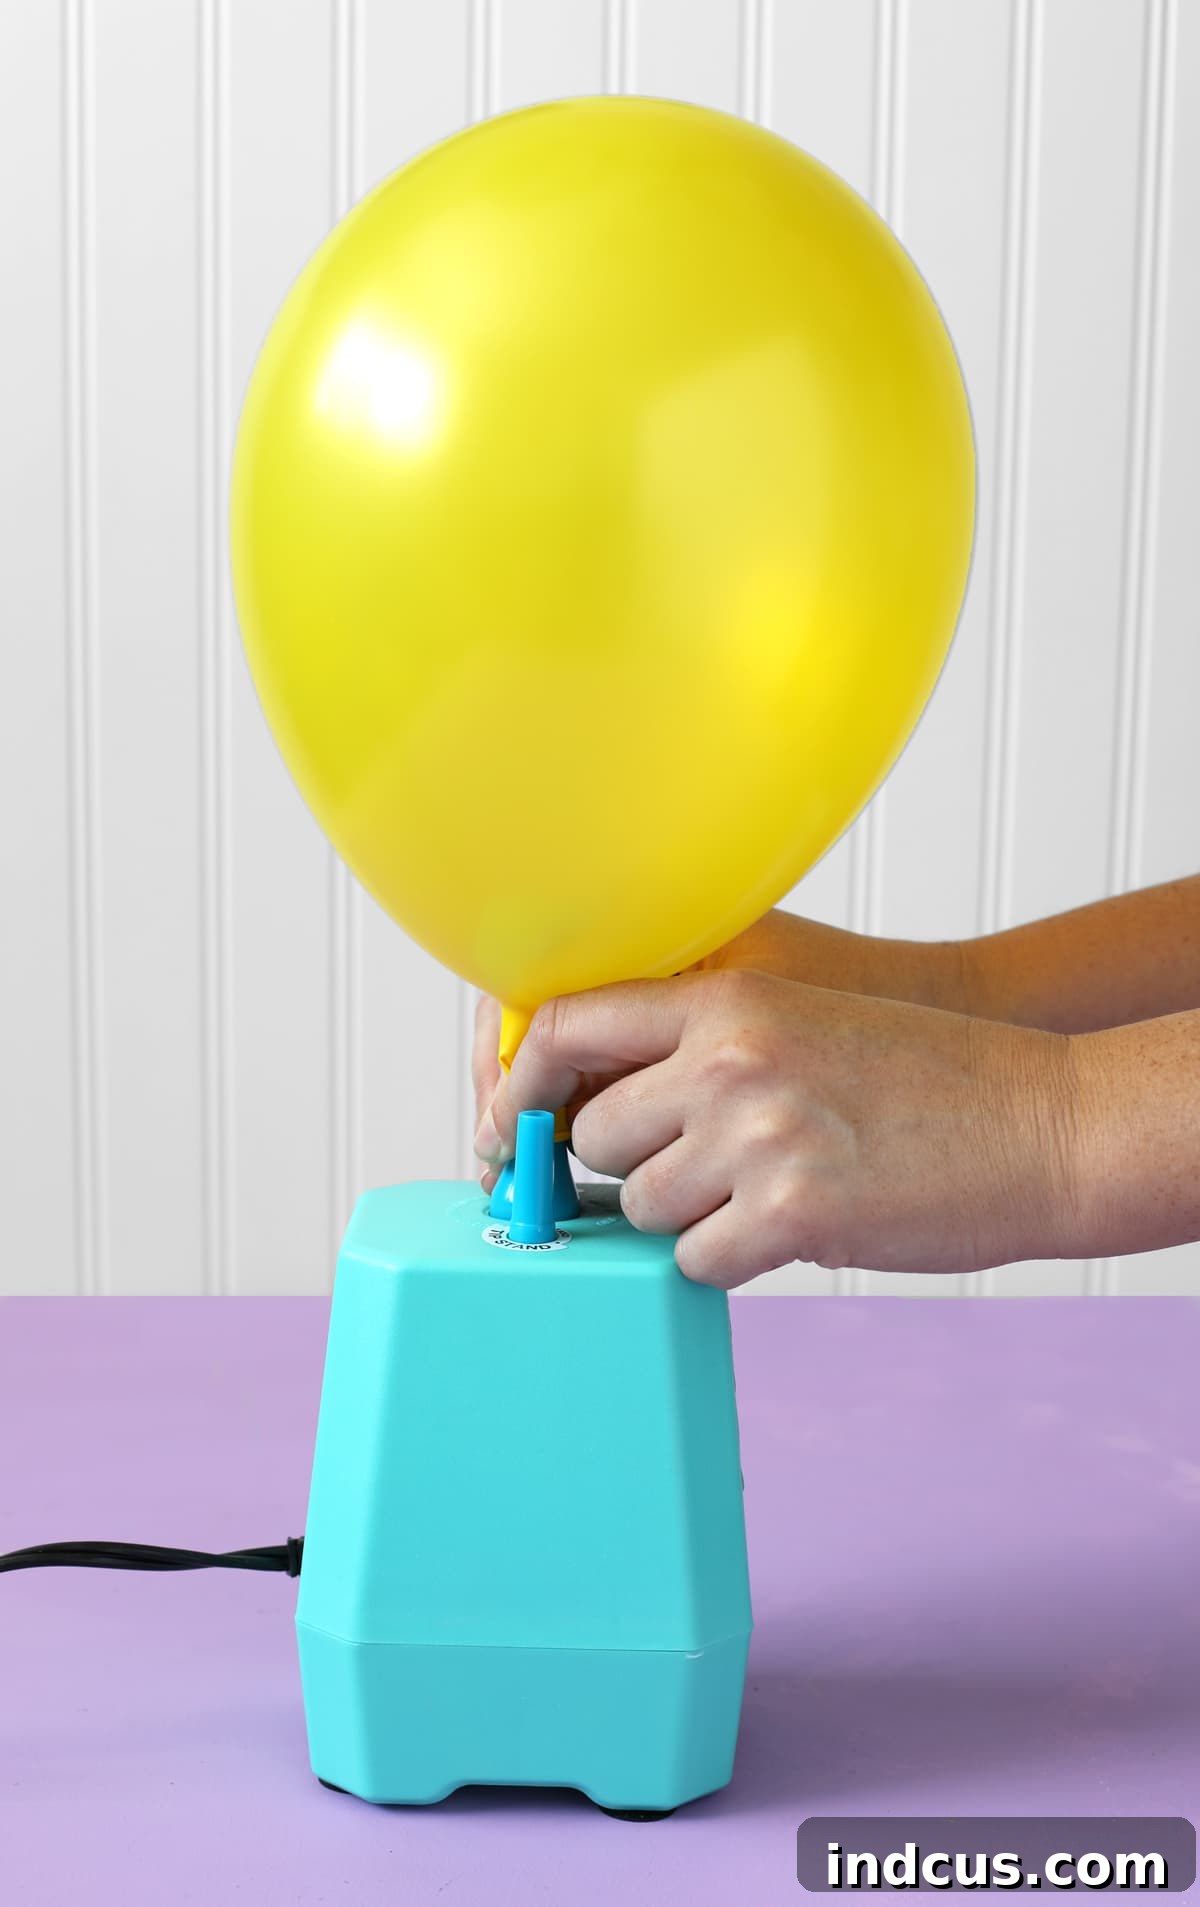
A Note on the Electric Pump: Trust me on this one. The thought of hand-pumping dozens of balloons is enough to deter anyone from this project. An electric pump inflates balloons in seconds, allowing you to breeze through Step 1 and focus on the creative assembly. It’s a small investment with a huge return in terms of time and enjoyment.
Step-by-Step Guide: Crafting Your Stunning Tabletop Balloon Arch
Creating your balloon arch is a fun and rewarding process. Follow these steps for a seamless setup:
Step 1: Inflate Your Balloons with Ease
This is where your electric balloon pump shines! Plug it in and start inflating. To make the process more enjoyable, put on your favorite music or a movie. You’ll be surprised how quickly you get through a large batch.
- Vary Sizes: For a professional, organic look, inflate balloons to different sizes. Don’t make them all uniform. Some smaller, some medium, and a few larger ones will add dimension and texture to your arch.
- Don’t Overinflate: Inflate balloons until they are plump but still slightly soft. Overinflating makes them prone to popping and gives them a less appealing, ‘egg’ shape.
- Create an Inflation Zone: Designate a clean, clear area for inflation. Keep pets away from popped balloons, and ensure your pump has good ventilation. Avoid placing the electric pump directly on thick carpet, as it can overheat. A hard floor or tabletop is ideal.
- Estimate Quantity: It always takes more balloons than you think! Start with your estimated 60-80, but be prepared to inflate more as you assemble.
Step 2: Assemble Balloon Clusters onto Clips
Once your balloons are inflated, it’s time to prepare them for the arch rod using the plastic balloon clips provided in your kit.
- Knotting Balloons: Ensure each balloon is securely knotted.
- Attaching to Clips: The plastic clips have small holes or slots. Gather 2-4 inflated balloons, gently pull their knotted necks through the holes on a single clip. Twist them to secure. I aimed for three or four balloons per clip to create a full look.
- Design Variety: If you want a random, organic design, mix assorted colors and sizes on each clip. For a more structured look, you could alternate colors or create ombre sections.
- Pre-Assemble: It’s often easier to create all your balloon clusters on clips first, before you start adding them to the arch rod. This allows for a smoother assembly process later on.
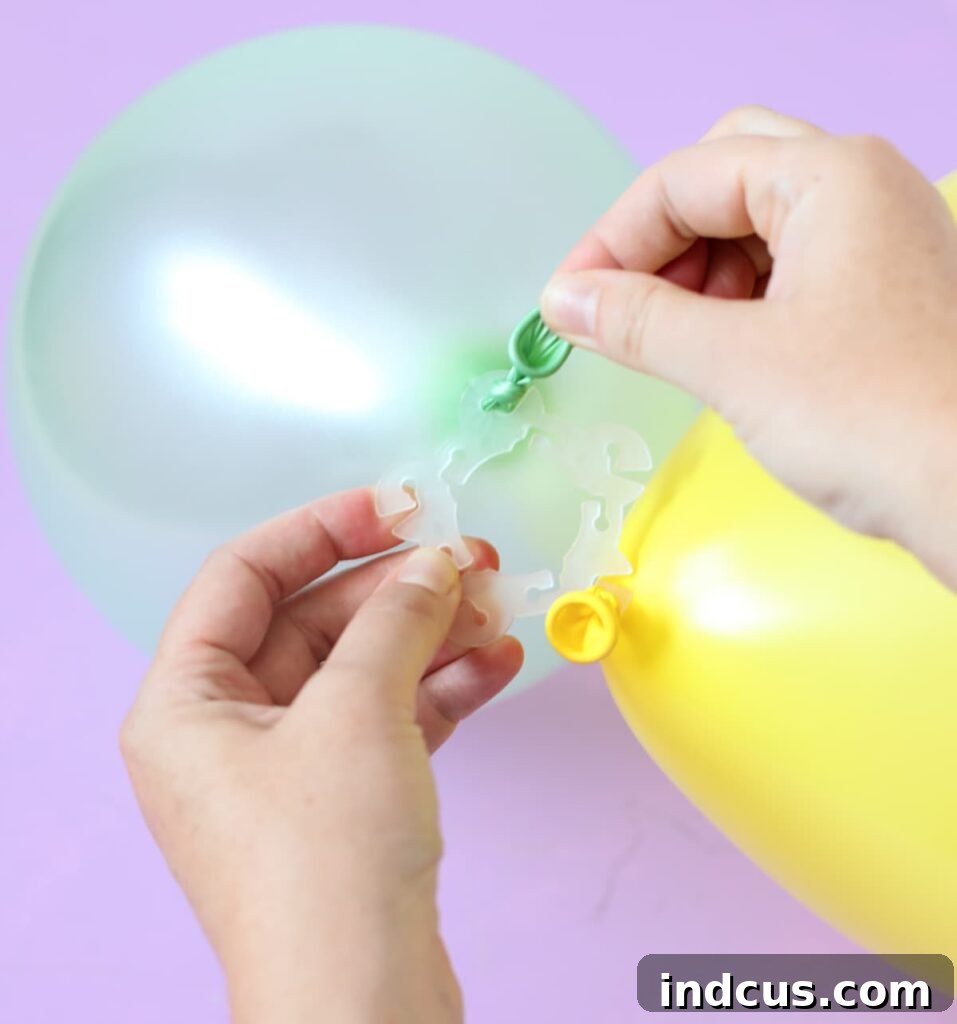
Step 3: Secure the Arch Clamps to Your Table
Position your table or kitchen island where you want the arch to be displayed. The clamps provide the foundational stability for your arch.
- Placement: Secure one clamp to each end of your chosen surface. Ensure they are firmly tightened and spaced appropriately for the desired arch width. The distance between the clamps will dictate the height and curve of your arch.
- Surface Protection: Most clamps have rubber padding, but if you’re concerned about your tabletop, you can place a small piece of felt or cloth between the clamp and the table.
- Stability Check: Give the clamps a gentle tug to ensure they are completely stable and won’t slip during assembly or the party.
Step 4: Constructing and Filling the Arch Rod
This step involves assembling the collapsible rod and then sliding your balloon clusters onto it. The rod segments typically slot together, similar to tent poles.
- Two-Person Method (Recommended): This is the easiest way. Once the rod is assembled, slip one end into the hole of a secured clamp. Have a second person gently hold the other end of the arch rod, creating a slight curve. While they hold it, you can smoothly slide your prepared balloon groupings onto the rod, distributing them as desired.
- Single-Person Method: If you’re working alone, assemble the rod completely. Lay the rod flat on the ground. Slide all of your balloon clusters onto the rod, arranging them as you go. Once all balloons are on, carefully lift the entire rod, gently bend it into an arch, and insert each end into the clamps. This method requires a bit more care to prevent balloons from slipping off.
- Even Distribution: As you add clusters, try to distribute them evenly along the rod to ensure a balanced and full arch.
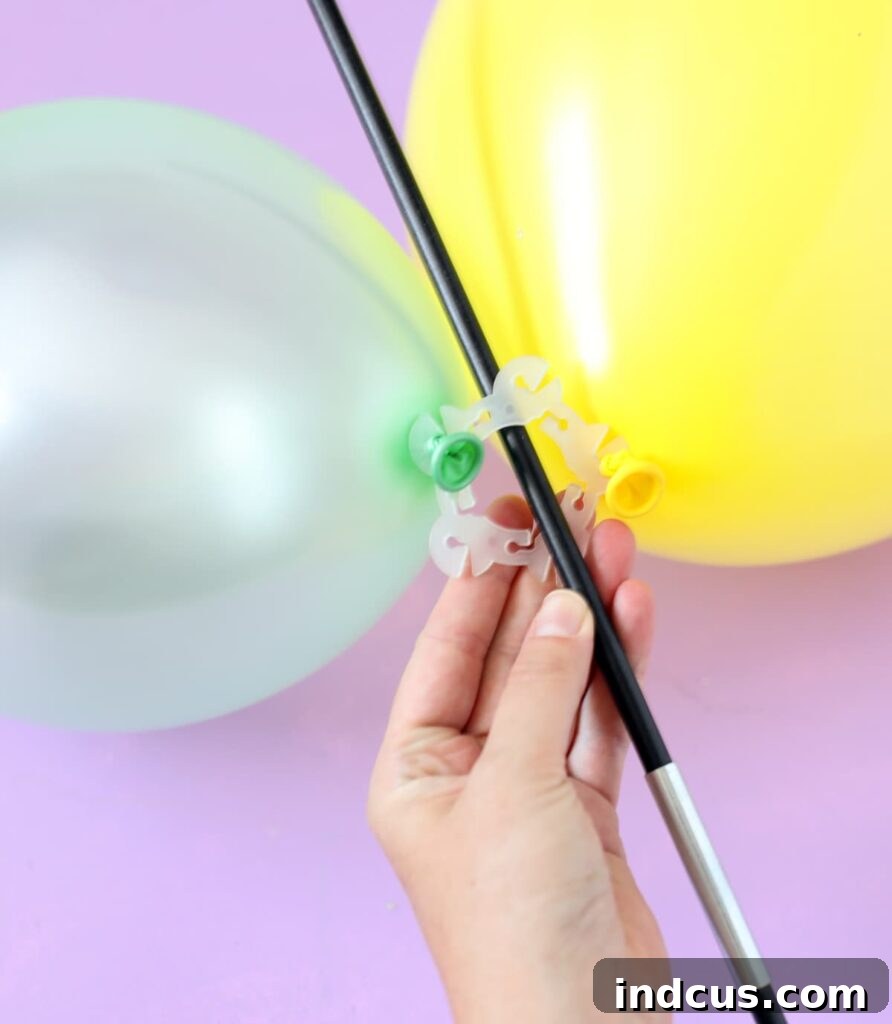
Step 5: Final Touches and Stabilization
With all your balloons on the rod, it’s time for the finishing touches to ensure your arch is picture-perfect and party-ready.
- Assess Fullness: Step back and observe your arch. Do you see any significant gaps? This is the point where you might realize you need to blow up a few more balloons (LOL, it happens to everyone!). Inflate more as needed and fill in any sparse areas by simply sliding new clips onto the rod.
- Secure the Rod: To prevent the rod from accidentally slipping out of the clamps during the festivities, take pieces of black Duck Tape (or any strong tape that blends in) and tape the ends of the rod to the clamps. This small step provides added security, especially in high-traffic areas where guests might accidentally bump the arch.
- Aesthetic Adjustments: Gently rotate or adjust individual balloon clusters to hide any clips or fill small gaps, creating a seamless, lush appearance.
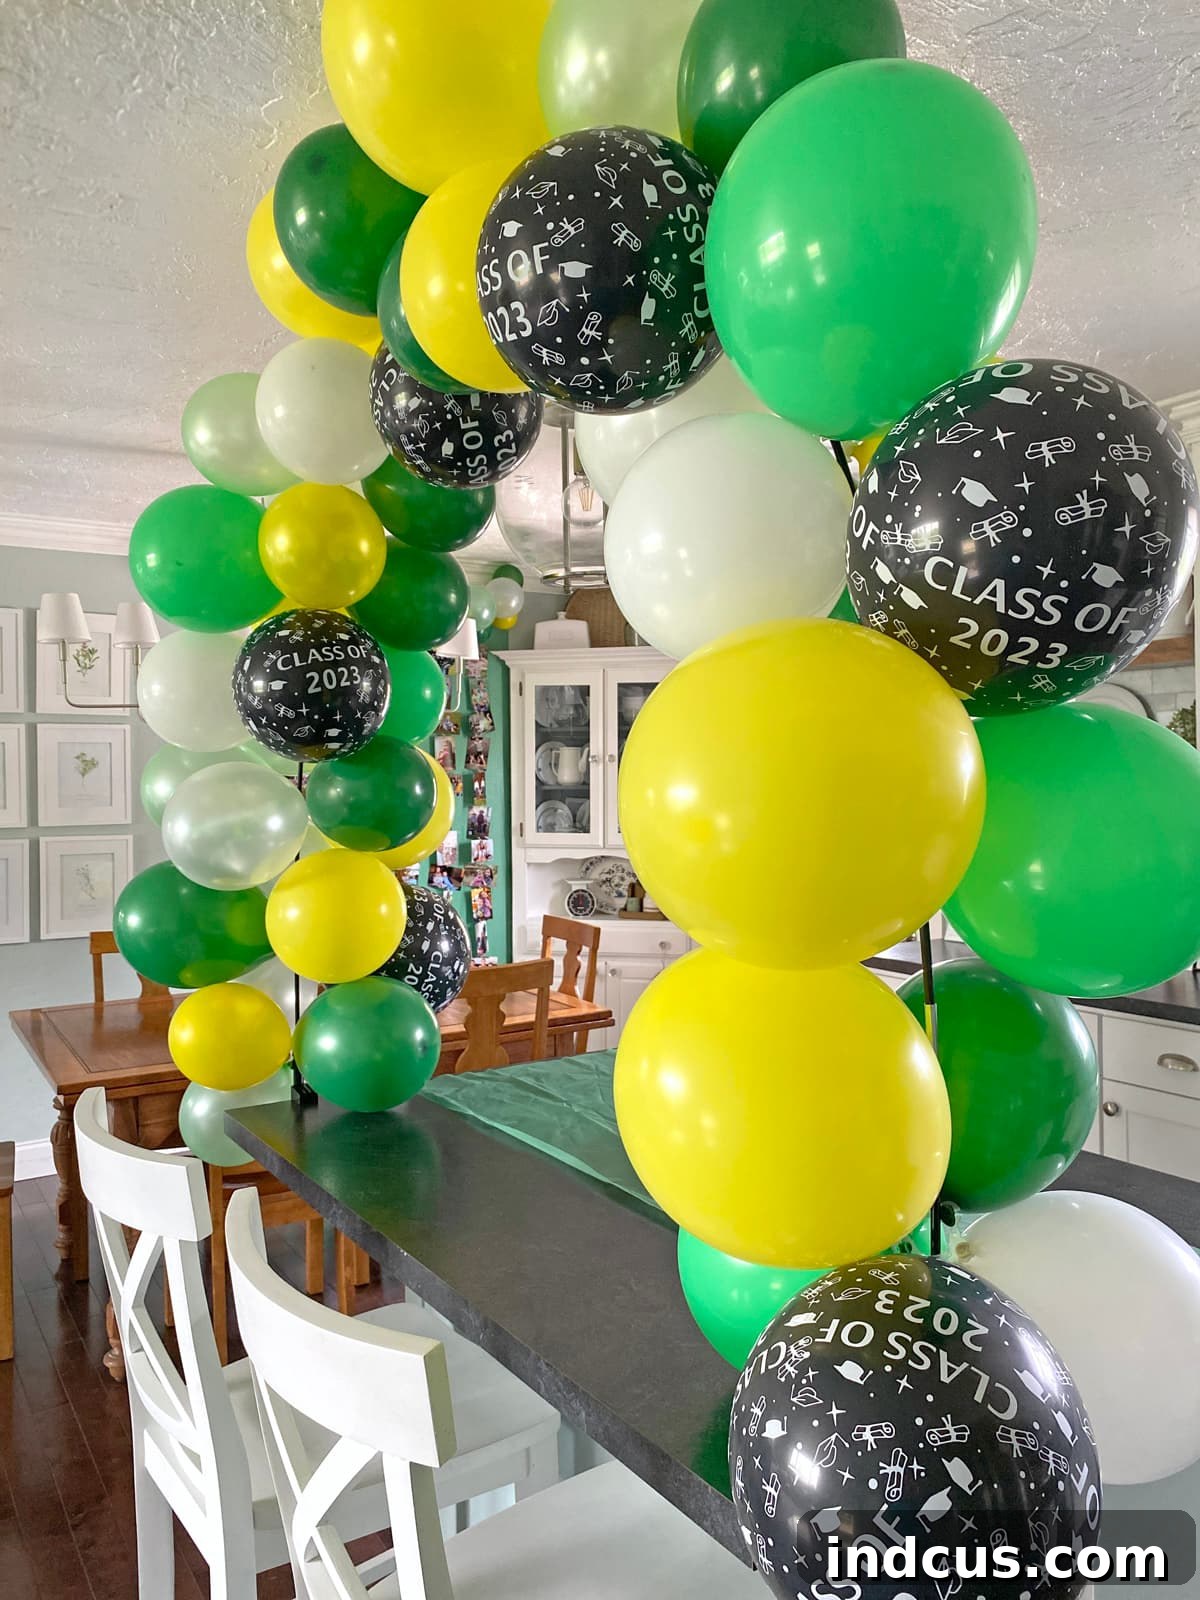
Doesn’t it look absolutely fantastic?! I was incredibly pleased with the significant impact this arch had on the overall ambiance of the graduation party. The house felt SO festive and ready for a grand celebration. It truly adds that special touch!
Customization Ideas for Your Unique Arch
The beauty of a DIY balloon arch is its adaptability. Here are some ideas to make yours truly unique:
- Color Palettes: Experiment with ombre effects, rainbow themes, metallic accents, or specific color schemes to match your event’s branding or guest of honor’s favorite colors.
- Adding Embellishments: Weave in fresh or faux flowers, greenery like eucalyptus or ferns, fairy lights for an evening glow, elegant ribbons, or even small banners and cut-out shapes (stars, hearts, letters) for a personalized touch.
- Varying Balloon Types: Don’t limit yourself to standard latex. Incorporate foil balloons (stars, letters, numbers), confetti-filled balloons, or chrome balloons for extra sparkle.
- Themed Arches: For a themed party, integrate small plush toys (for a baby shower), superhero logos, or specific character cutouts within the arch design.
Troubleshooting Common Balloon Arch Issues
Even with careful planning, sometimes minor challenges arise. Here’s how to address them:
- Balloons Popping: This can happen due to overinflation, extreme temperature changes (hot sun), or sharp objects. Inflate balloons slightly less full, keep them out of direct sunlight, and ensure a clear workspace.
- Arch Sagging or Instability: Double-check that clamps are tightly secured, the rod segments are fully connected, and the ends are taped to the clamps as instructed in Step 5.
- Gaps in the Arch: If you notice large gaps, it usually means you need more balloons! Inflate a few more of varying sizes, attach them to clips, and slide them into the sparse areas until the arch looks full.
- Time Management: Inflating all balloons can be time-consuming. Start this process a day before the event, if possible, especially if you’re using an electric pump. Assemble the arch rod the day of.
Beyond the Tabletop: Exploring Other Arch Ideas
If you’re now inspired to tackle larger or more formal projects, consider expanding your DIY decorating skills. For a wedding or a more formal event, you might want to explore an elegant, freestanding arch. Check out my floral party arch for a sophisticated, dressed-up cousin of this project, offering a different aesthetic while maintaining that beautiful arch shape.
Creating your own tabletop balloon arch is a rewarding experience that combines creativity with practicality. It’s a powerful way to add significant decor impact without the high cost, leaving you more budget for other party essentials. Give it a try for your next celebration!







