
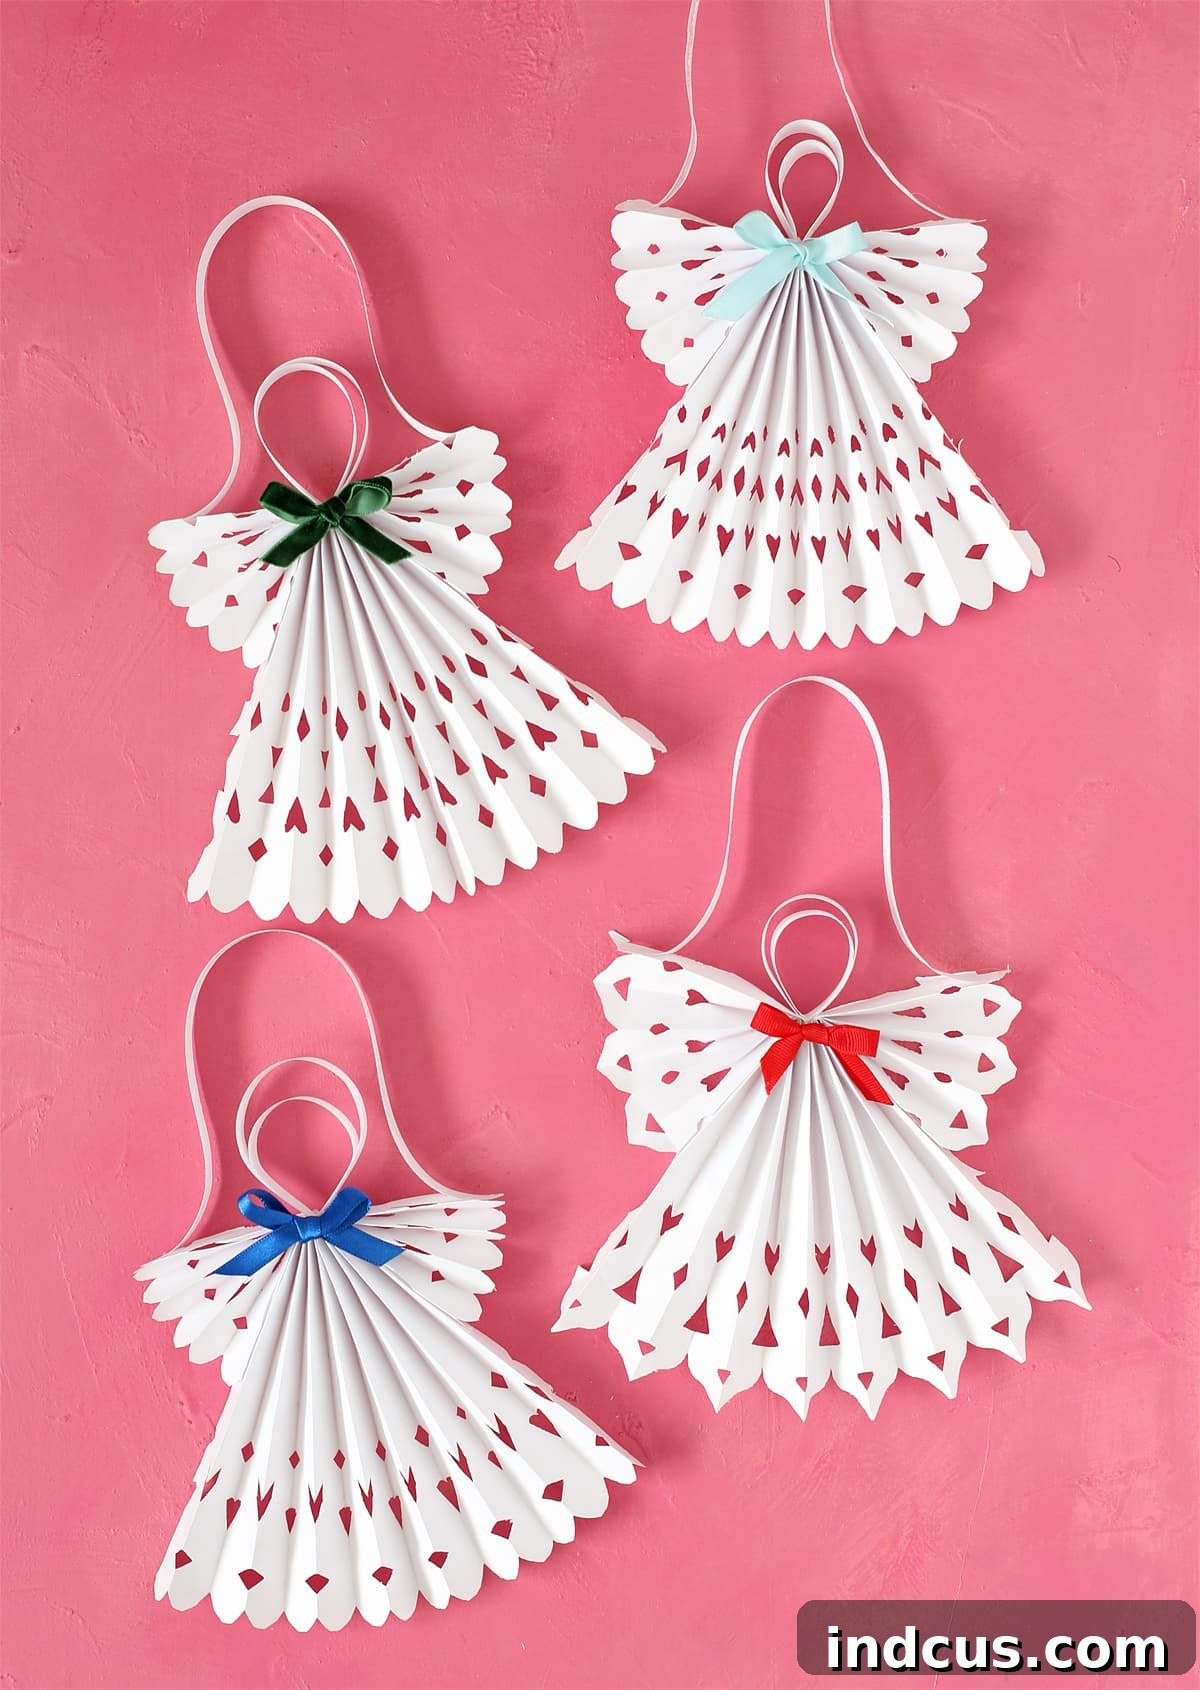
Craft Beautiful Folded Paper Christmas Angels: An Easy DIY Guide for Festive Decor
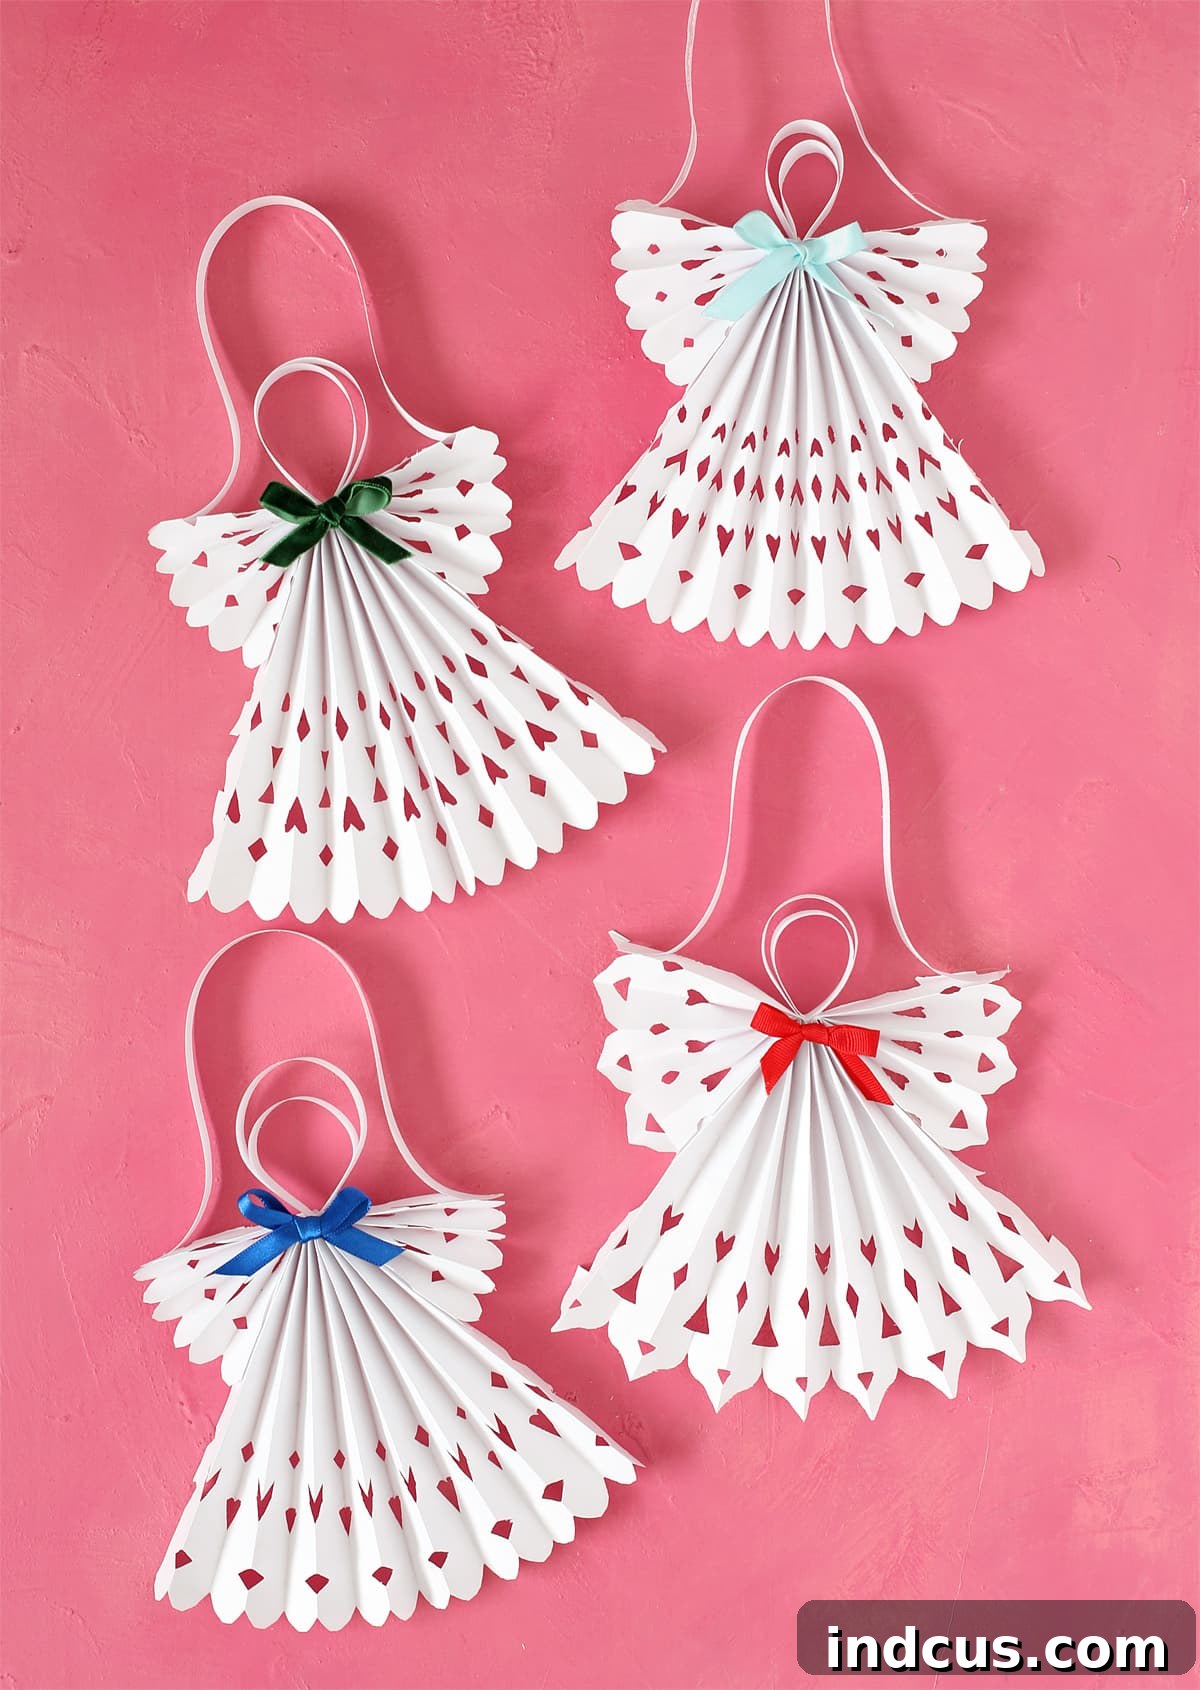
Embrace the magic of the holiday season by creating your own enchanting paper Christmas angels. If you enjoy the delicate artistry of crafting paper snowflakes, you’ll absolutely adore bringing these charming angels to life. This delightful paper craft is not only incredibly fun but also surprisingly simple, resulting in unique and adorable decorations every time. Each angel possesses its own subtle character, making them perfect for a wide array of festive applications.
Imagine these graceful figures adorning your home: strung together to form a captivating garland, acting as a serene centerpiece for a holiday wreath, or adding a touch of elegance as Christmas tree ornaments. They also make thoughtful and personalized gift toppers or unique place cards for your festive dinner table, adding a handcrafted touch that guests will surely appreciate. For a truly grand statement, you can even craft extra-large angels from wrapping paper, transforming your space with their ethereal presence. We’re thrilled to share our step-by-step guide to making these cute paper angels, and we’re confident you’ll become as captivated by this creative holiday craft as we are.
Essential Materials for Your Paper Christmas Angels Craft
Gathering your supplies is the first step towards creating these lovely folded paper angels. The beauty of this DIY project lies in its simplicity and affordability, requiring just a few basic items you likely already have around the house or can easily acquire.
Materials You Will Need:
- Plain White Copy Paper: Standard 8.5 x 11 inch, 20 lb. weight paper is ideal. Its light yet sturdy nature makes it perfect for precise folding and intricate cutting, giving your angels a delicate, ethereal quality.
- Sharp Scissors: The sharper your scissors, the cleaner and more intricate your cuts will be. This is especially important for creating detailed designs similar to those found on paper snowflakes.
- Hot Glue Gun -OR- School Glue Sticks: A hot glue gun offers quick drying and strong adhesion, perfect for impatient crafters. However, school glue sticks are an excellent, safer alternative, especially when crafting with children.
- Thin Ribbon: Optional, but highly recommended for creating hanging loops if you plan to use your angels as ornaments or garland components.
When involving children in this festive activity, always prioritize safety. We strongly recommend using school glue sticks instead of a hot glue gun to prevent accidental burns on little fingers. While school glue sticks take a bit longer to dry, they provide a perfectly secure bond for your paper angels. For adults who appreciate instant gratification (and might, like me, have lost a few fingerprints to the hot glue gun!), the hot glue gun is a fantastic tool for speed and efficiency.
Step-by-Step Guide to Crafting Your Paper Christmas Angels
Ready to bring your paper angels to life? Follow these detailed instructions to fold, cut, and assemble your beautiful holiday decorations. If you prefer visual learning, you’ll find a video tutorial link at the end of this guide!
Step 1: Prepare Your Folding Guidelines
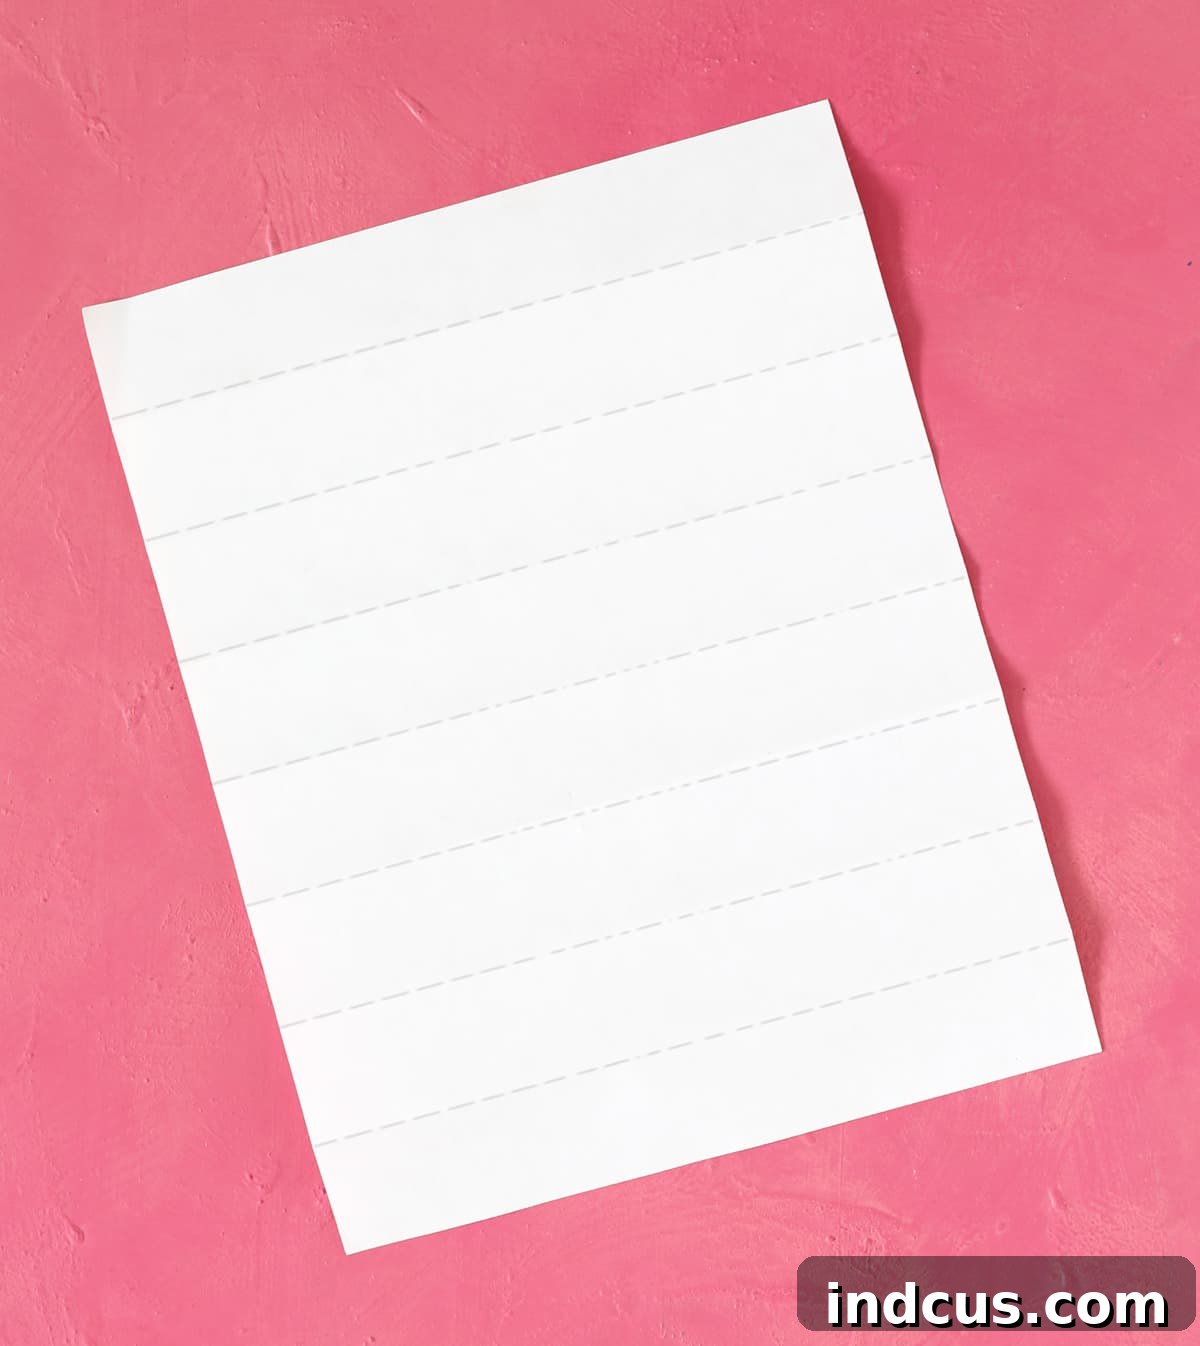
Begin by taking a single sheet of standard copy paper. Carefully fold the paper in half lengthwise, ensuring the edges align perfectly. Crease it firmly. Unfold it, then fold it in half again, perpendicular to your first fold. Unfold it once more, and repeat the process for a third time, folding it in half again. When you finally unfold the paper completely, you will notice eight equally sized rectangular sections, clearly delineated by crisp fold lines. These lines are crucial as they will serve as your precise folding guides for the next step, ensuring a uniform accordion fold.
Step 2: Master the Accordion Fold
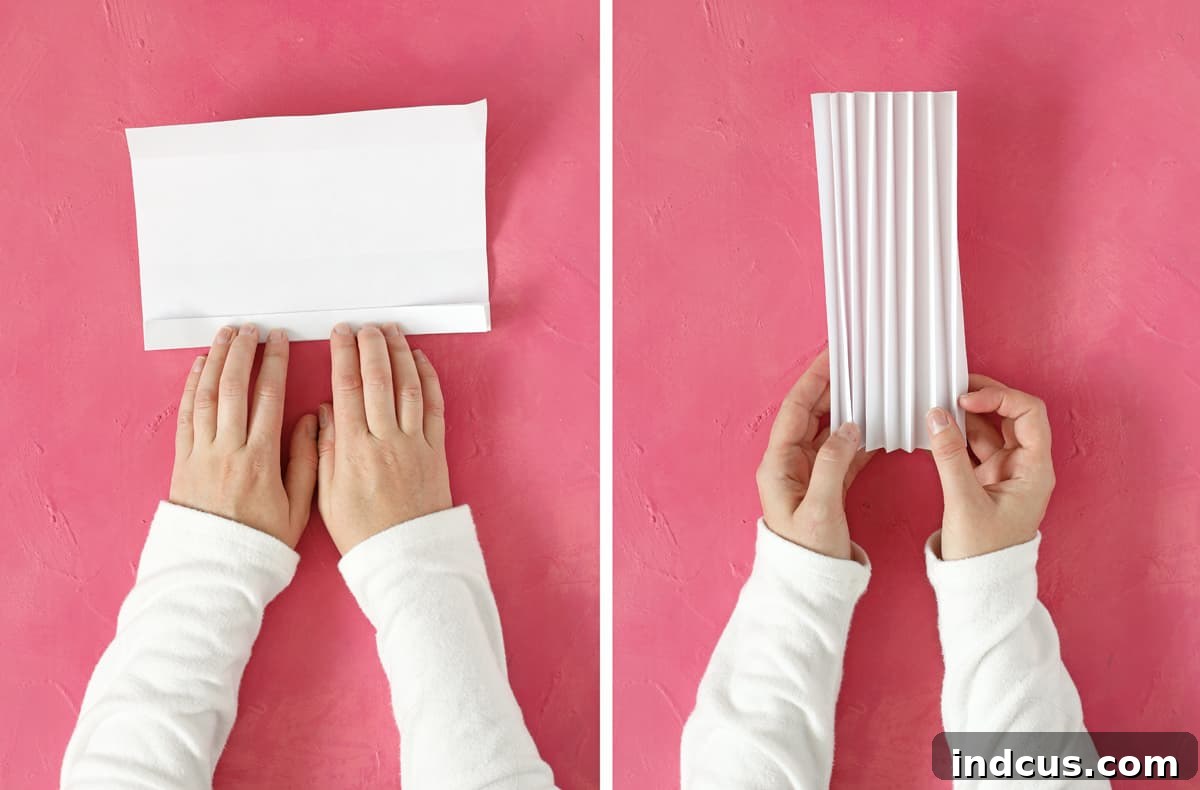
Now, using the guidelines you just created, begin accordion folding your paper. An accordion fold means you will fold the paper back and forth, like a fan. Each of the eight sections should be folded in half, creating a total of 16 smaller, even pleats. Start by folding the first section forward, then the next section backward, and continue this alternating pattern across the entire sheet. Precision here is key for a symmetrical and beautiful angel. Press each fold firmly to ensure sharp creases that will hold their shape.
Step 3: Unleash Your Creativity with Cutting Designs
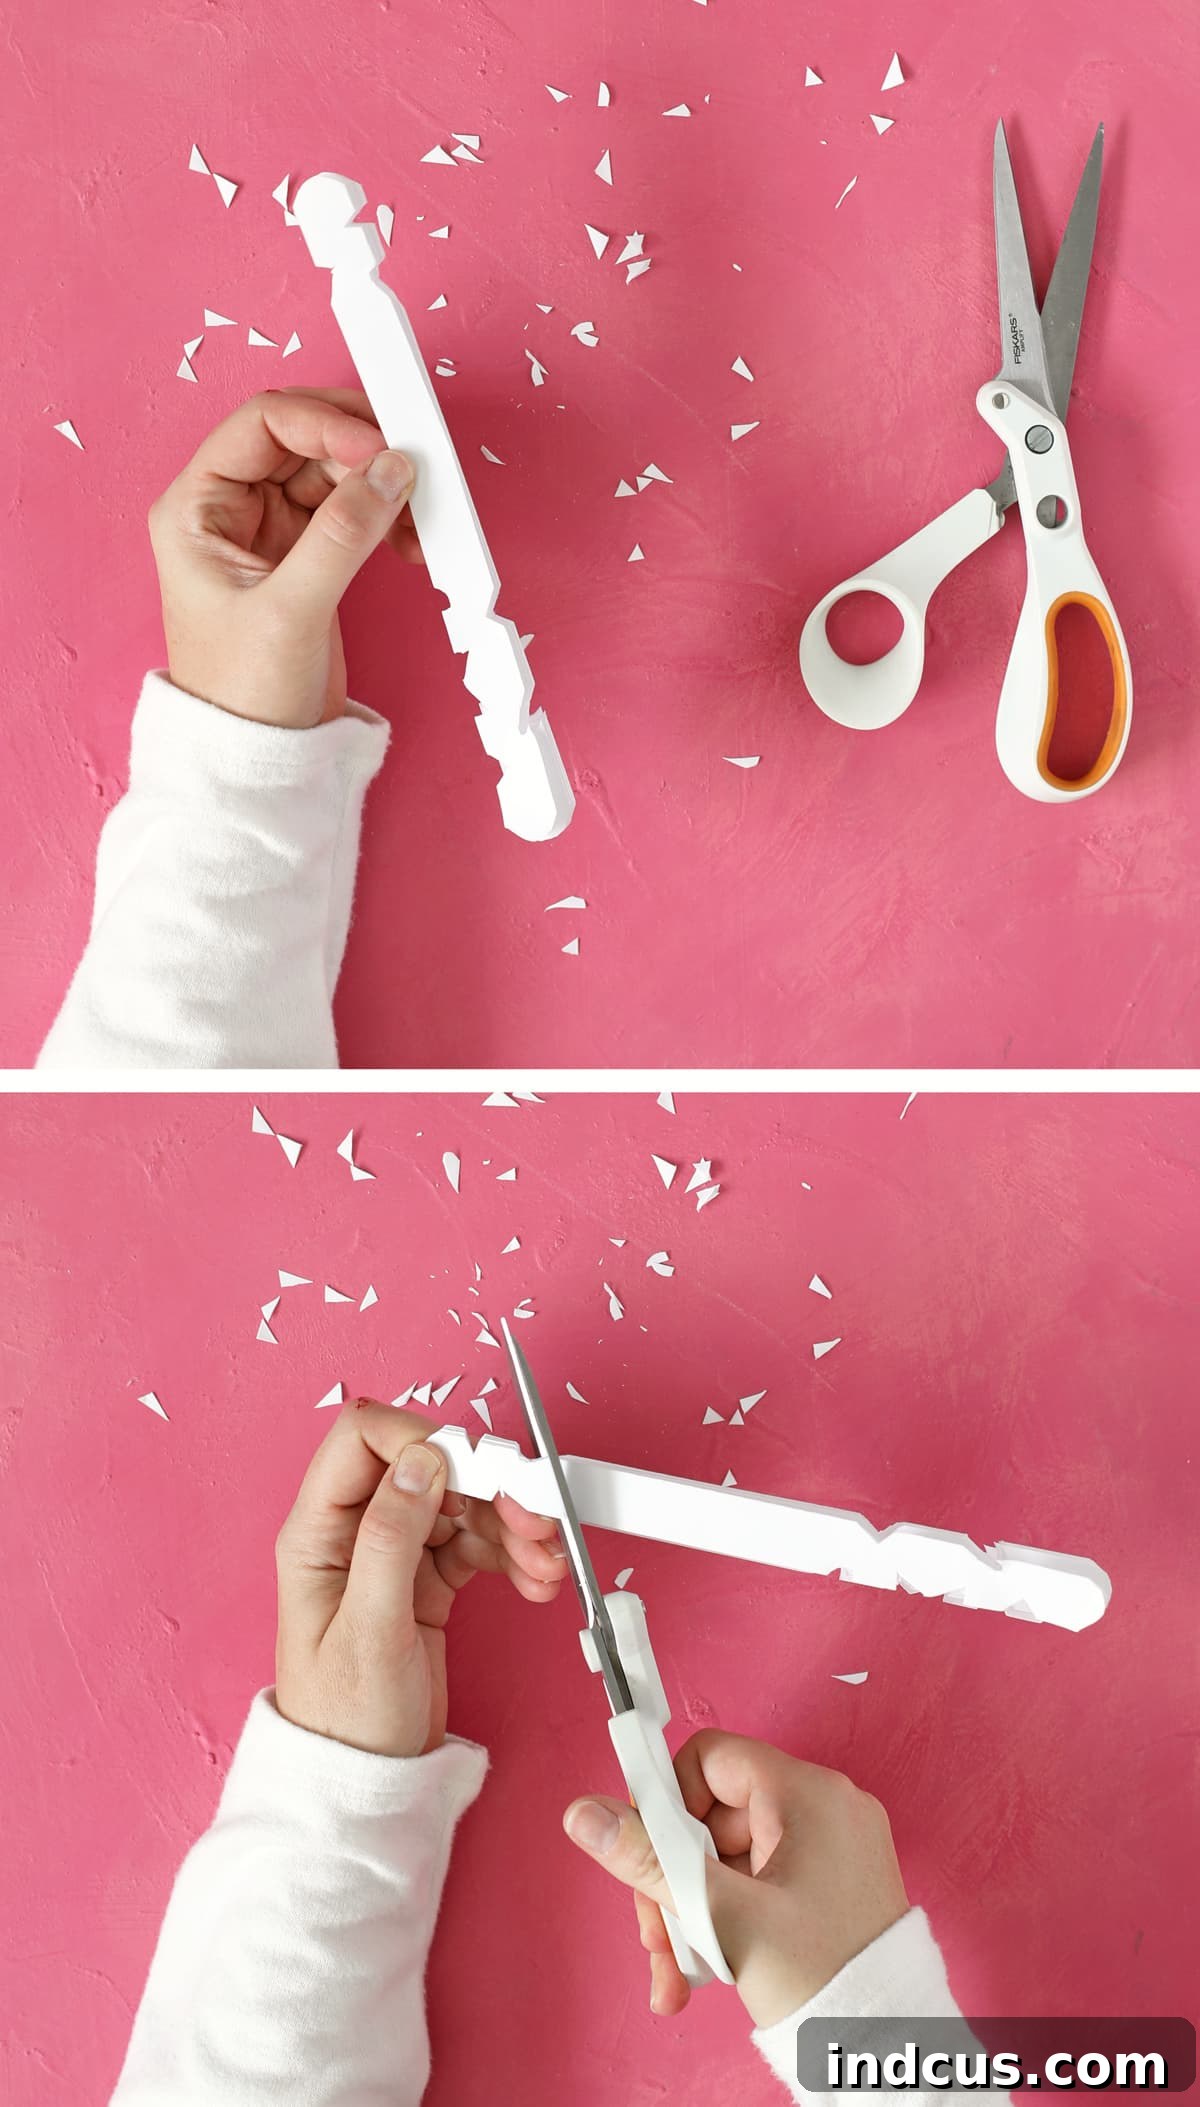
This is where the magic truly happens and your angel gains its unique character! With the paper still accordion-folded, begin cutting small designs into the sides. Think of this step much like making paper snowflakes – you’re removing small pieces to create intricate patterns when unfolded. Importantly, do not cut all the way through the paper; aim for decorative nips and snips along the folded edges. Pay special attention to the two flat ends of your folded paper. Cut these into elegant, pretty shapes, such as scallops, points, or gentle curves. For a more dynamic angel, try making more cuts and intricate designs on one end (this will become the flowing dress) and fewer, simpler cuts on the other end (which will form the delicate wings). This variation in design will add depth and visual interest to your finished angel.
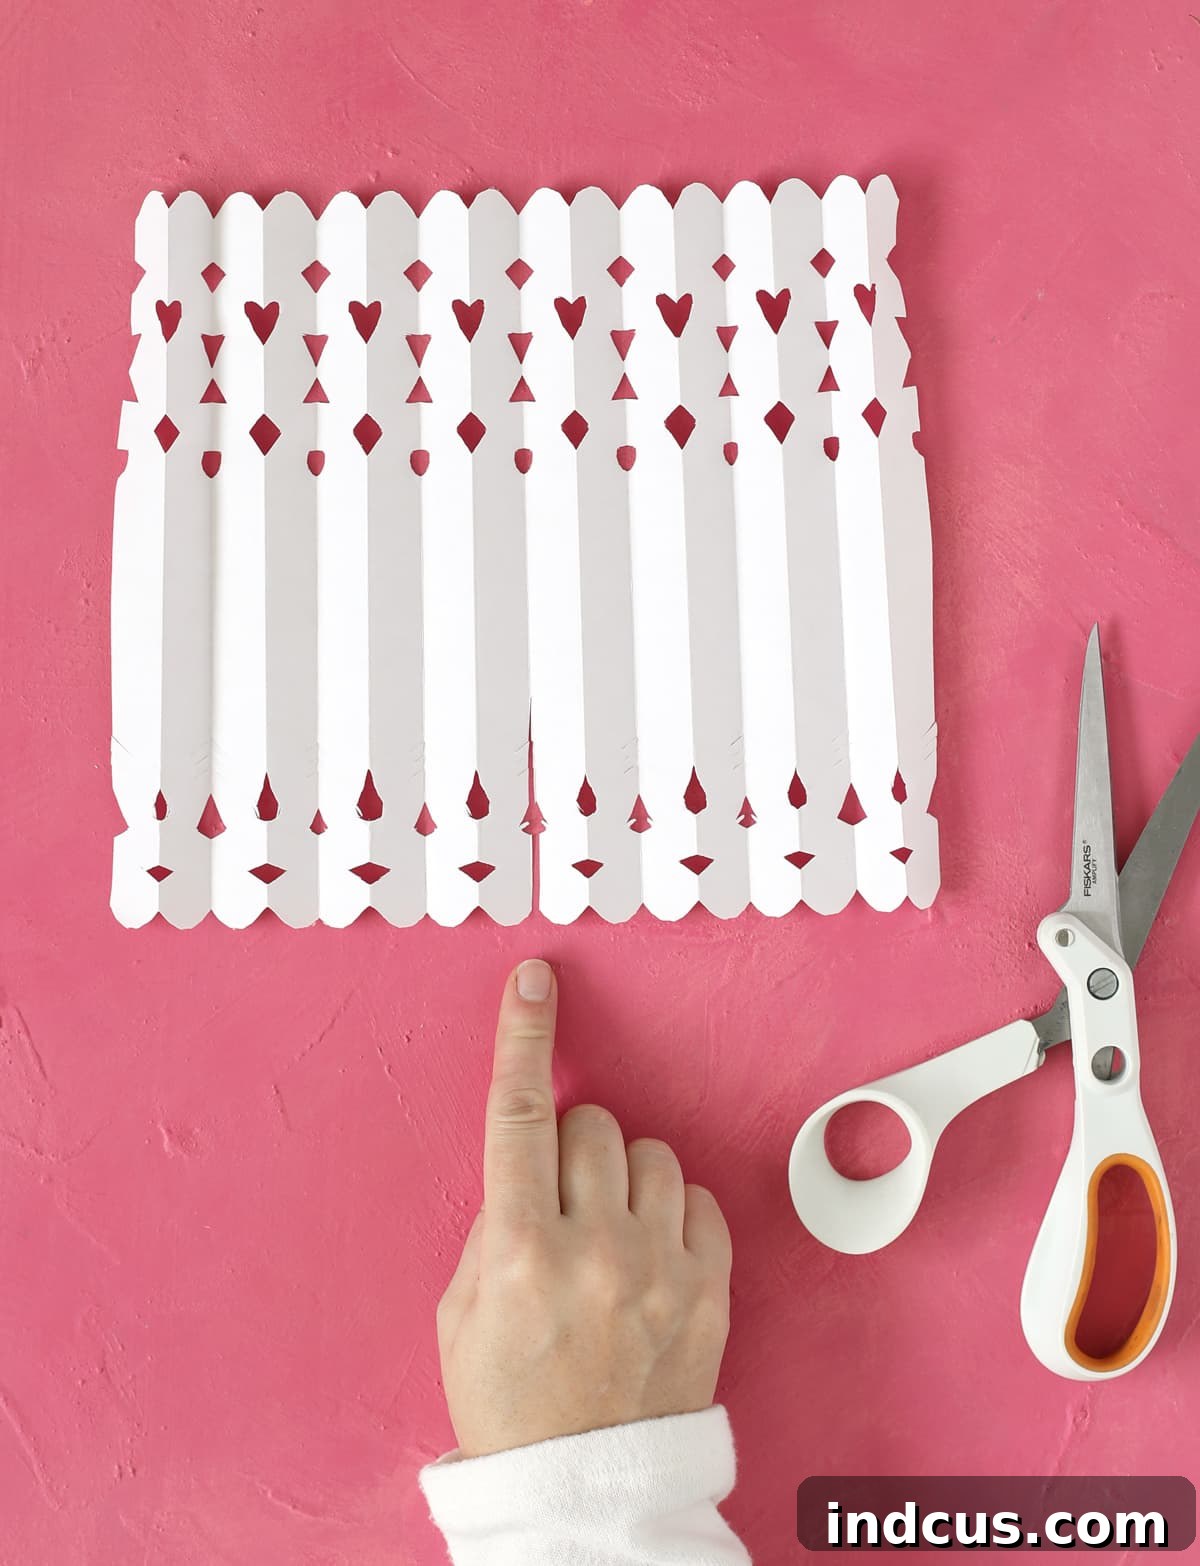
Step 4: Form the Angel’s Wings
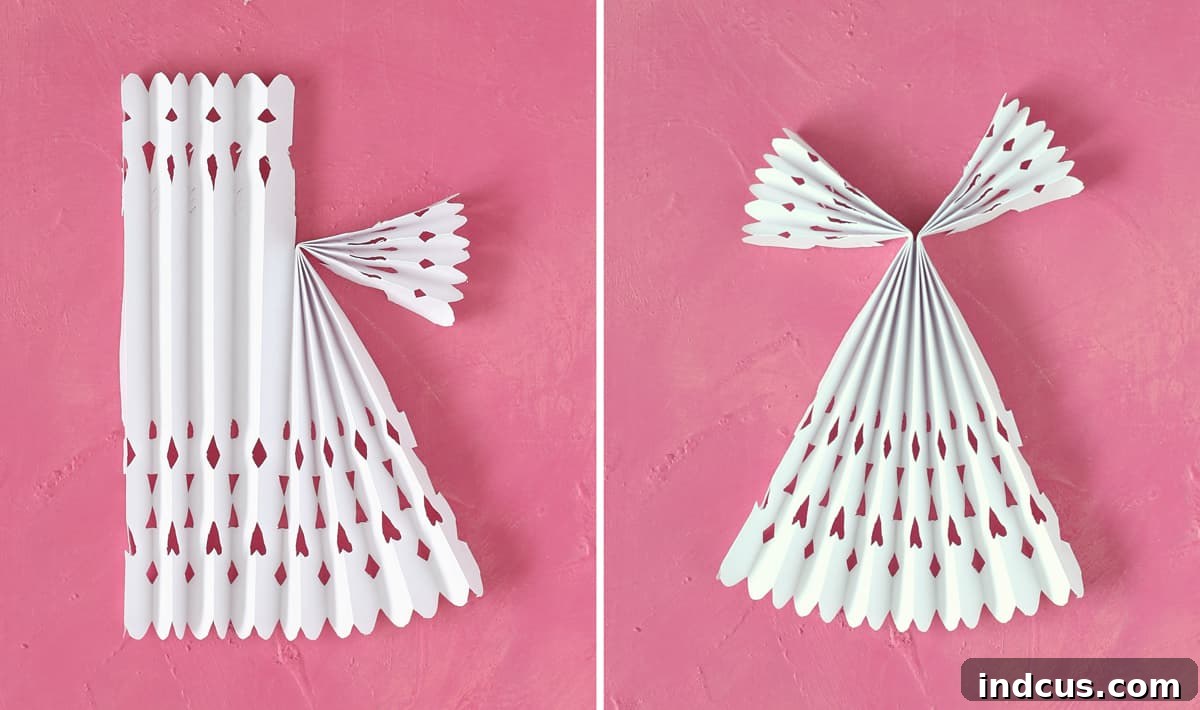
Gently unfold your elaborately cut paper. Lay it flat and carefully locate the precise center fold line. Along this central line, cut a straight slit approximately 2 to 3 inches long. This slit is fundamental for shaping the angel’s upper body and wings. Once the slit is made, one side of your paper will now be divided into two distinct sections. Carefully fold these two sections down and away from each other, ensuring they are even and symmetrical. These folded-down sections will gracefully transform into the angel’s majestic wings. Adjust them slightly until they fan out beautifully.
With the wings now taking shape, gently manipulate them to achieve the desired spread and elegance. The accordioned paper provides a natural texture that enhances the feathery look of the wings. Ensure that both wings are folded symmetrically to maintain balance and visual appeal. This step is critical in defining the classic angel silhouette.
Step 5: Prepare the Angel’s Head and Halo Strips
Take a second fresh sheet of paper. Using scissors, carefully cut two thin strips, each measuring approximately 1/2 inch in width and 11 inches in length (the full length of the paper). These strips are versatile; if you plan to craft multiple angels, you can efficiently cut all the necessary strips from the same sheet of paper to save time and material. These strips will be used to form the angel’s head (which doubles as the halo) and the optional hanger.
Step 6: Construct the Angel’s Head (Halo)
Take one of the 1/2 x 11-inch paper strips. Carefully roll it into a double loop, essentially creating a small circle with an inner ring. Secure the end with a dab of glue, ensuring the loop holds its shape firmly. Once the glue is dry, gently pinch the glued ends together to form a subtle teardrop shape. This unique shape will not only serve as the angel’s head but also beautifully frames it like a halo. Allow adequate drying time if using school glue to ensure the structure is stable.
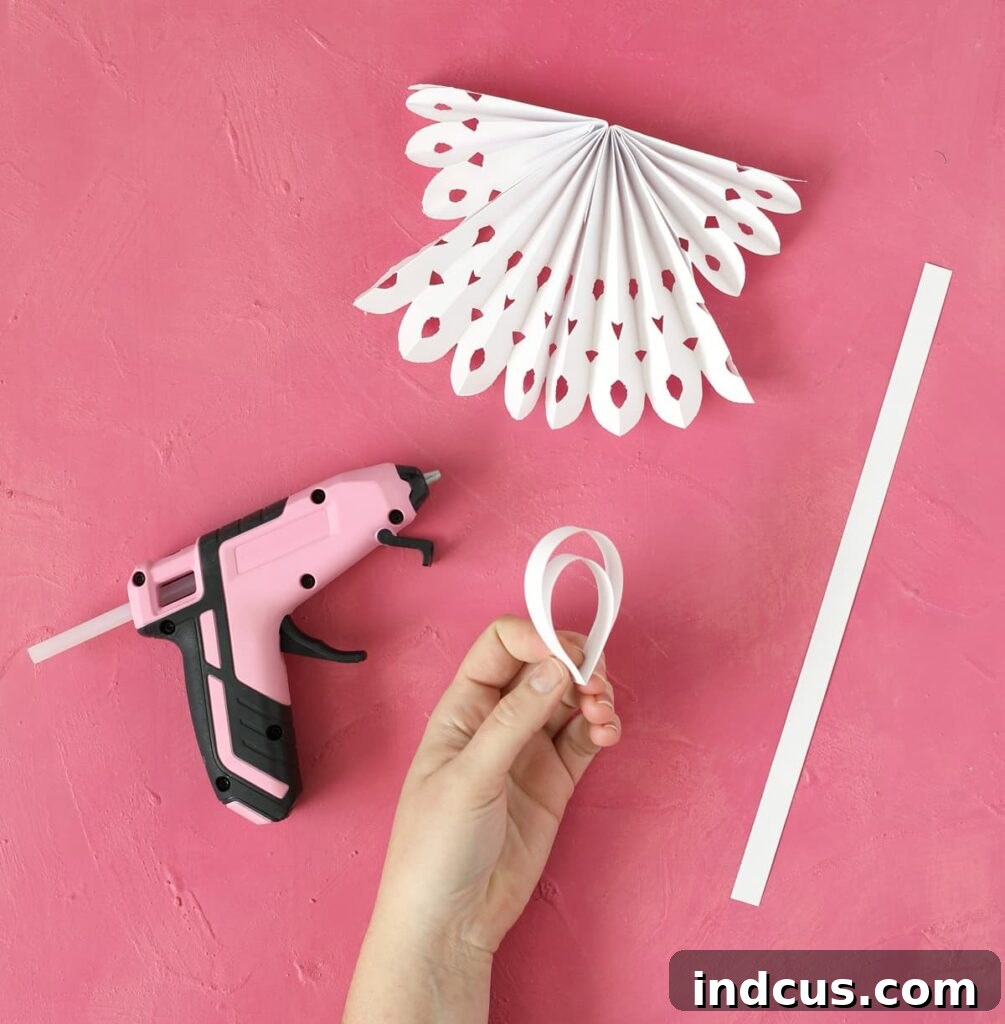
Step 7: Attach the Head to the Angel’s Body
Return to your main angel body. Locate the central section near the slit you cut in Step 4. Gently open this central fold just enough to apply a small amount of glue. Carefully insert the pinched, teardrop-shaped tip of the angel’s head/halo into this glued fold. Press the fold closed firmly, sandwiching the tip of the head in place. Hold it for a few moments to ensure a strong bond. This step connects the angelic head to the body, completing the upper silhouette.
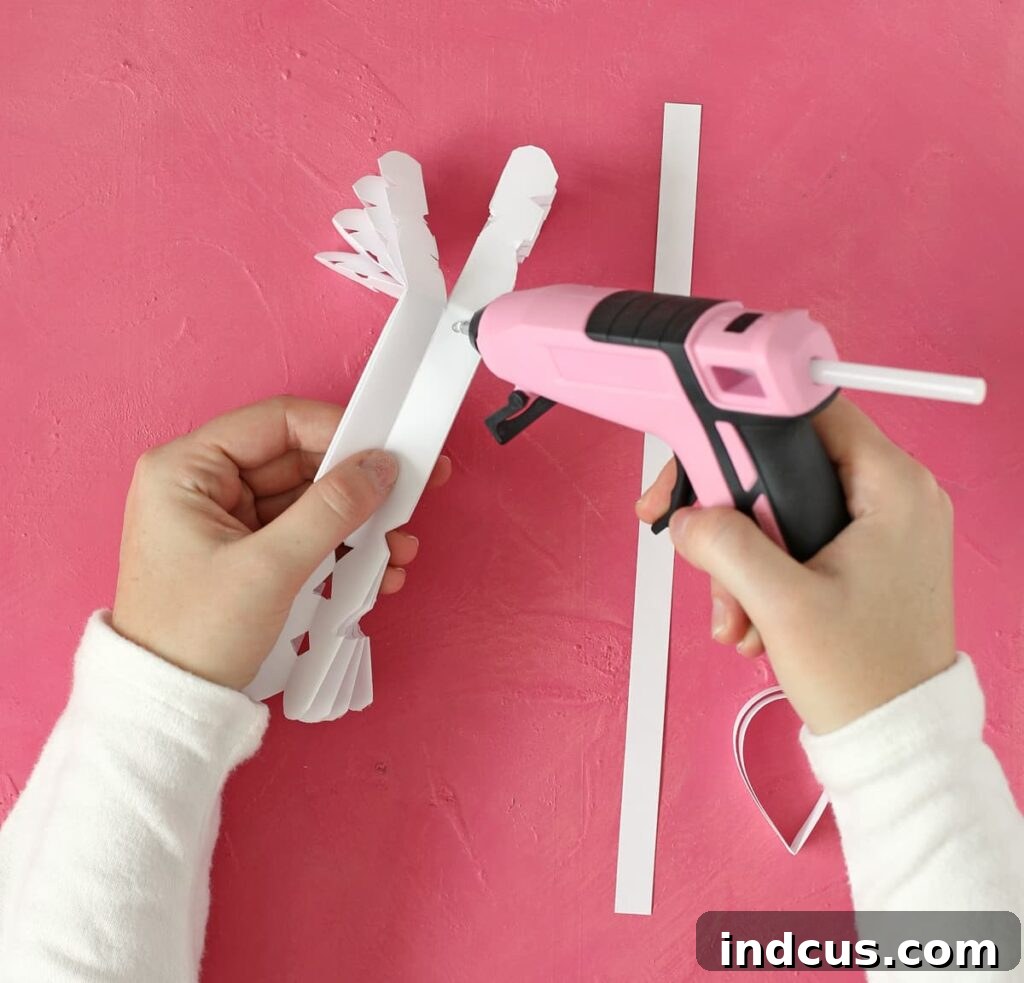
Step 8: Secure the Wings
For a more cohesive and refined look, it’s time to secure the wings. Gently bring the bottom tip of each wing inwards towards the main body of the angel. Apply a small dot of glue to the underside of each wing tip and press it firmly onto the angel’s “dress” or lower body. This action will give the wings a graceful, upward sweep and prevent them from flapping freely. Ensure the wings are secured symmetrically on both sides for a balanced appearance.
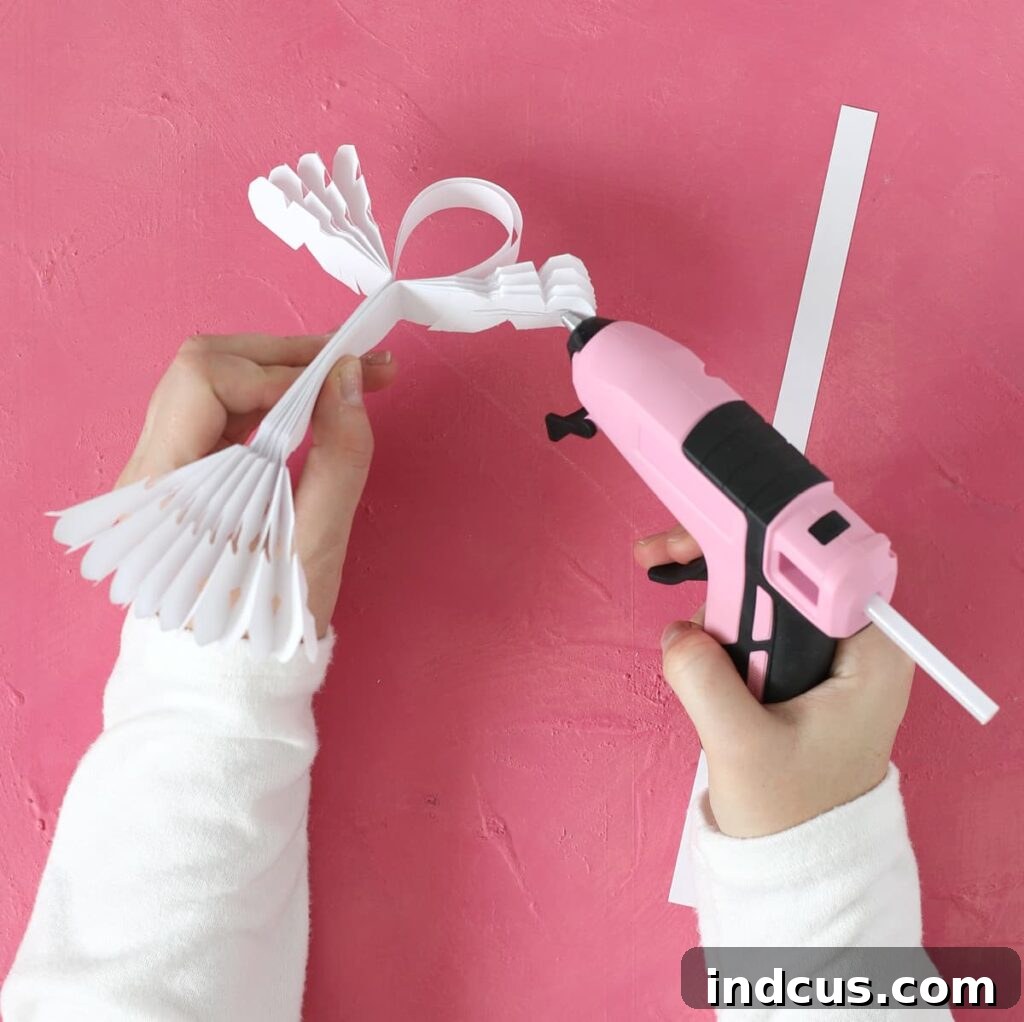
Step 9: Add the Hanger (Optional) and Final Touches
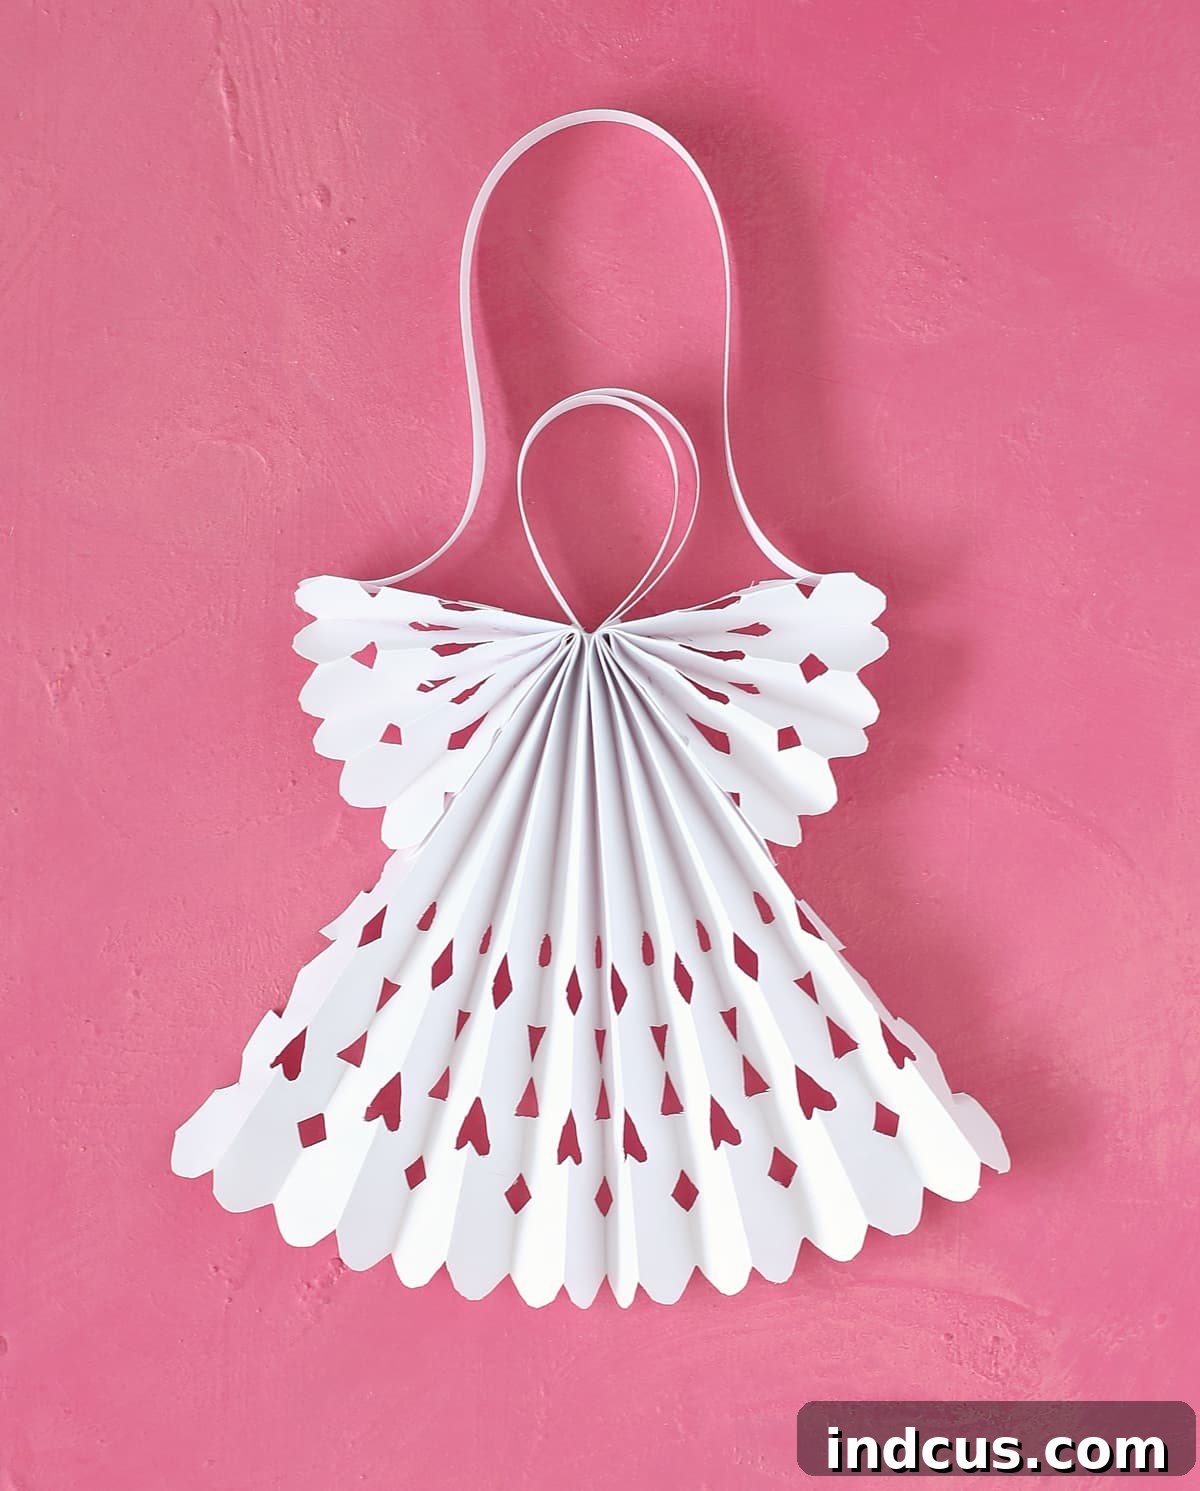
If you intend to hang your angel, take the second thin paper strip you cut in Step 5. Carefully glue one end of this strip to the tip of one wing, loop it gracefully over the angel’s head (behind the halo), and then secure the other end to the tip of the opposite wing. This creates a sturdy and discreet hanger. Once the glue is completely dry, your exquisite paper Christmas angel is officially complete! Gently fluff out her accordioned dress and wings to maximize their volume and beauty. Take a moment to admire the adorable craftsmanship you’ve just created.
Creative Variations and Expert Tips for Your Paper Angels
During my extensive crafting experiments with these folded paper angels, I’ve discovered several tips and variations that can enhance your creative journey and the final outcome of your projects:
Experimenting with Different Paper Types
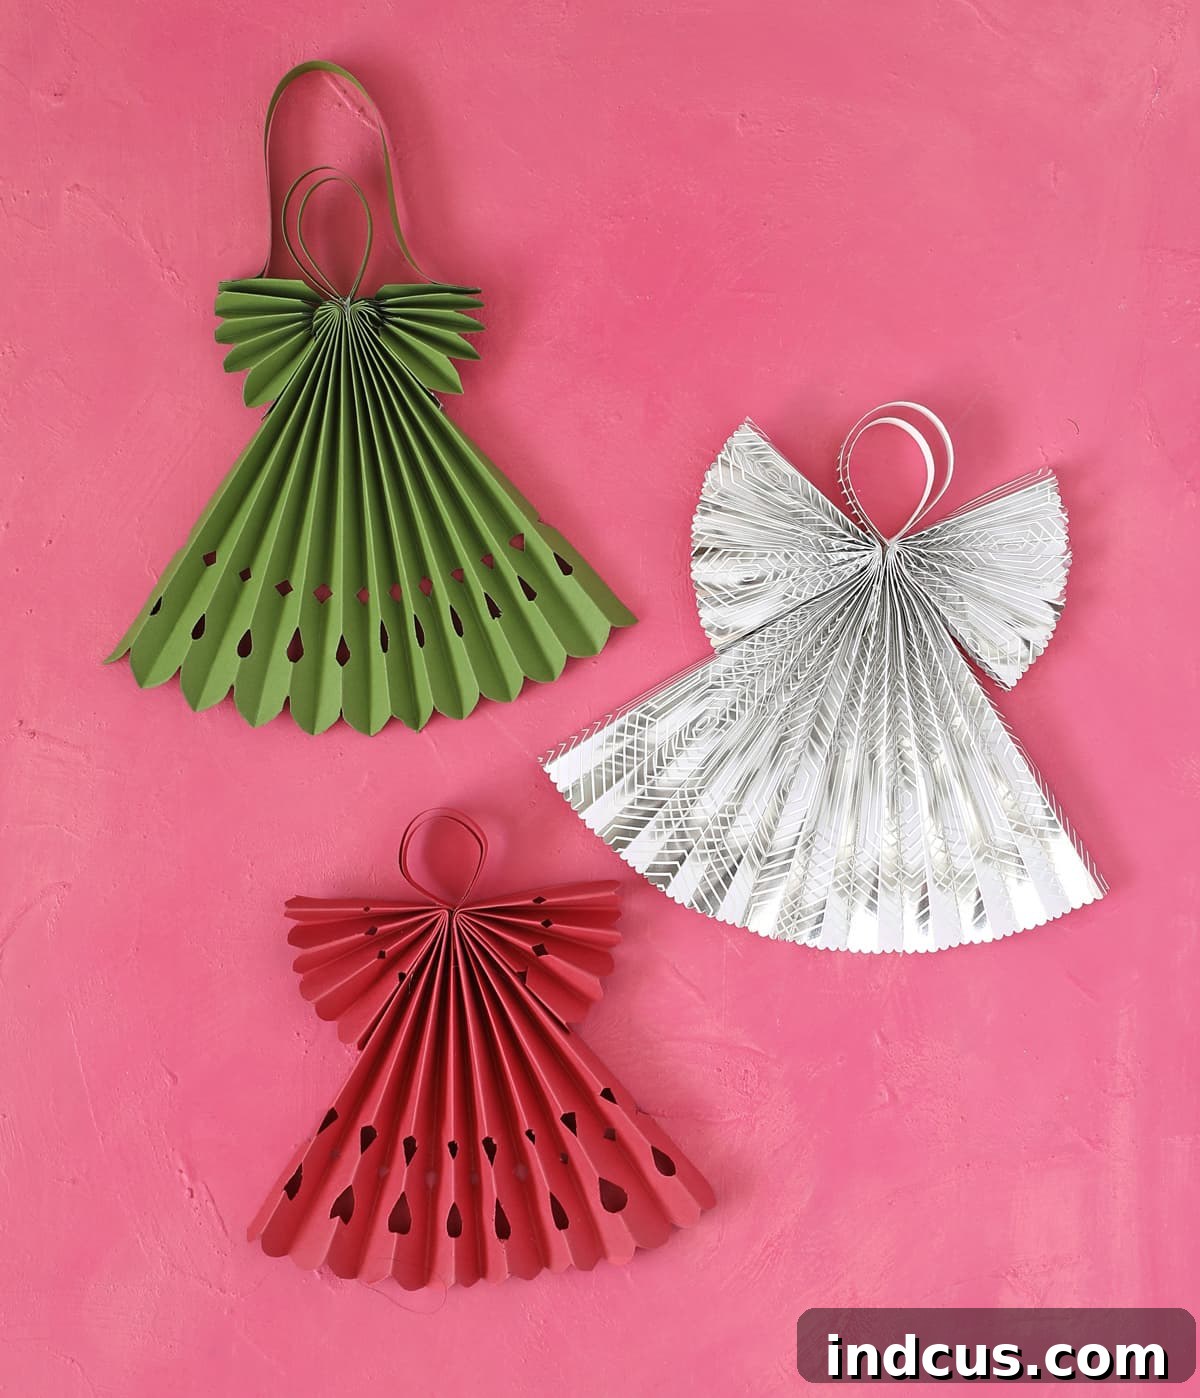
While standard copy paper is ideal for its ease of use and delicate finish, you might be tempted to try heavier materials like cardstock or scrapbook paper. While it’s definitely challenging, it’s not impossible! I found success by using a scoring tool to pre-mark the accordion fold lines on thicker paper instead of trying to fold it by hand. This ensures crisp, straight folds that are difficult to achieve with thicker material alone. When cutting designs, avoid attempting to cut through all layers at once. Instead, cut through just a few folds at a time, carefully lining up subsequent cuts to maintain the pattern. Thicker paper is inherently more difficult to cut, so I recommend keeping your designs simpler and bolder for cardstock angels.
Go Big with Wrapping Paper Angels
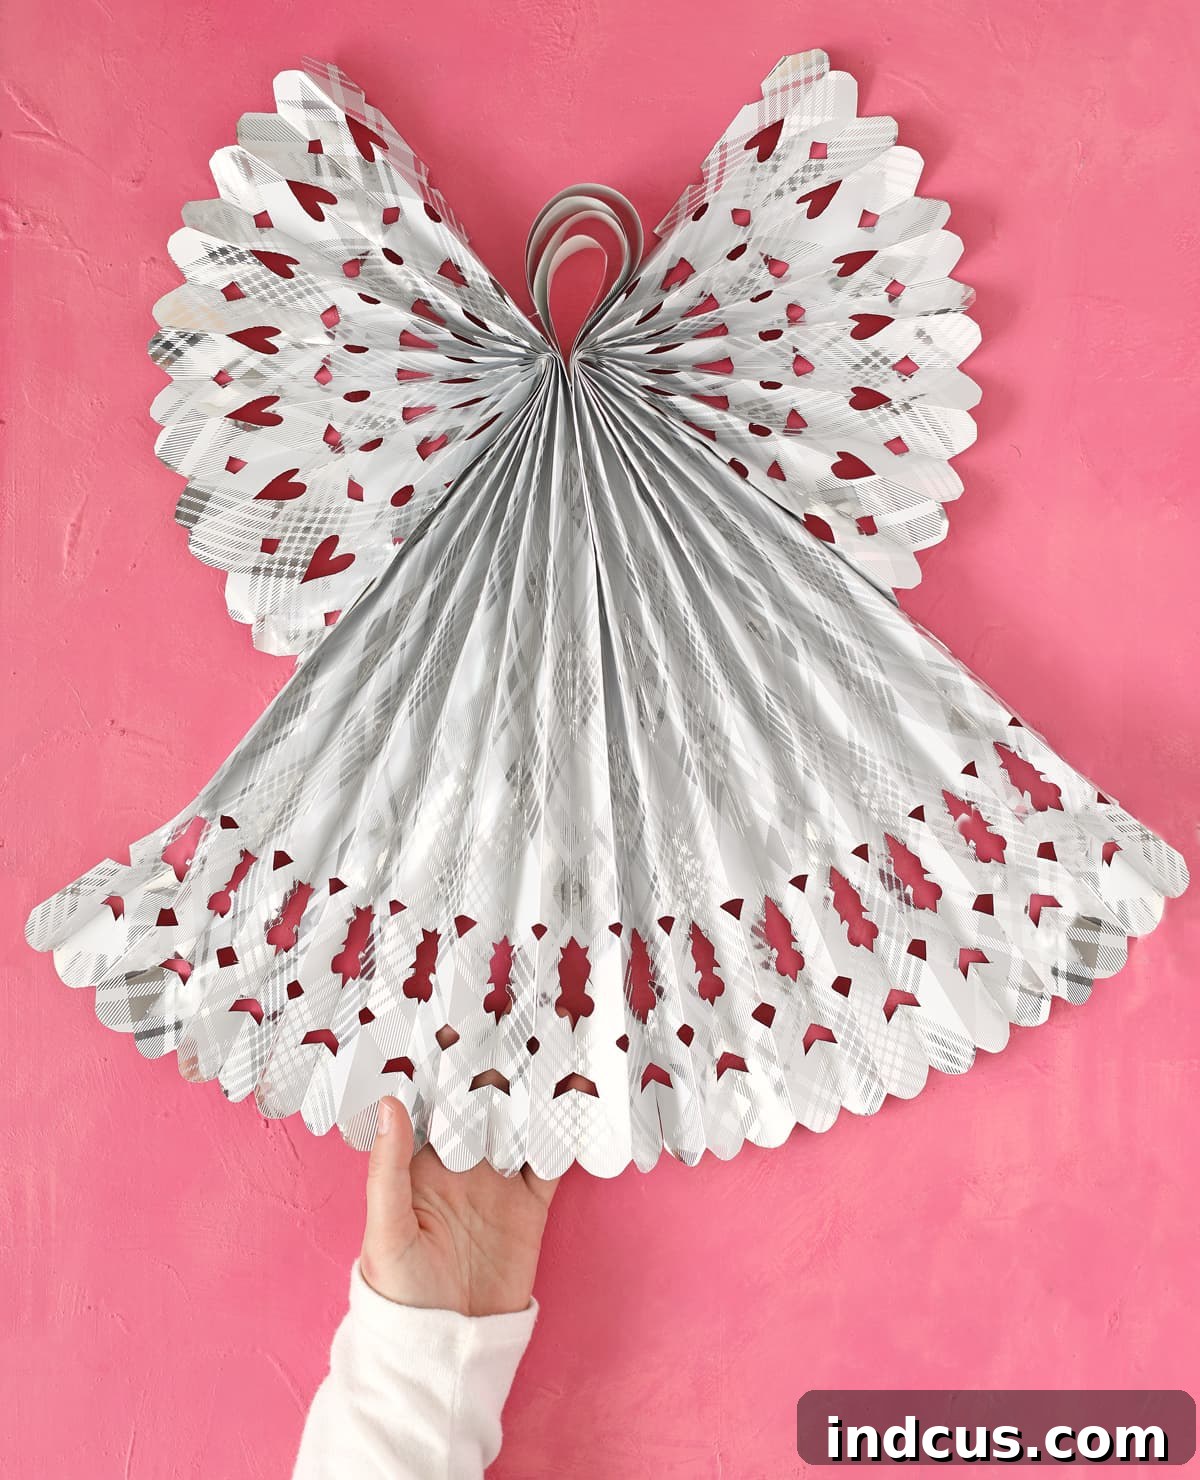
For a truly dramatic effect, consider crafting a giant paper angel! I successfully made one using wrapping paper, and the result was incredibly cool. It’s hard to convey the scale in a photo, but this particular angel stood approximately 20 inches tall! The grid lines often found on the back of wrapping paper proved to be an invaluable guide for achieving perfectly even accordion folds. Larger angels made from patterned wrapping paper can become stunning focal points in your holiday decor, perfect for an entryway, above a mantel, or as a unique tree topper.
Enhance with Embellishments
Don’t stop at just paper! You can elevate your angels with various embellishments. Try dusting them with glitter glue for a sparkling effect, or adding small beads to the center of the head loop to create a more defined “face.” Use metallic markers or fine-tipped paint pens to add intricate details to the wings or dress. Ribbons of different colors and textures can be tied around the neck or used as more decorative hangers. Imagine a whole choir of angels, each with a unique personality!
Versatile Holiday Decor
These paper Christmas angels are incredibly versatile. Beyond being charming tree ornaments, consider stringing a dozen or more together to create a breathtaking garland that can drape across a doorway, mantelpiece, or banister. They can be attached to a plain wreath for a divine touch or used as elegant gift toppers that double as a keepsake. For your holiday feast, a personalized angel at each place setting serves as a beautiful and memorable place card. They also make fantastic, inexpensive decorations for office parties, classroom displays, or any festive gathering.
A Joyful Craft for All Ages
While kids will undoubtedly love creating these angels, don’t let them have all the fun! This craft is wonderfully engaging and therapeutic for adults too. There’s a unique satisfaction in making the intricate cuts and then unfurling the paper to reveal your finished design. I can easily spend a cozy afternoon with a stack of paper, creating a dozen angels while enjoying my favorite Christmas movies. It’s a peaceful, creative escape that embodies the spirit of the season.
Paper Christmas Angels Video Tutorial
For those who prefer a visual guide, you can watch the step-by-step video tutorial on how to make these beautiful paper Christmas angels. Simply search for “How to Make Paper Christmas Angels” on YouTube, or check the original article’s platform for the embedded video.







