
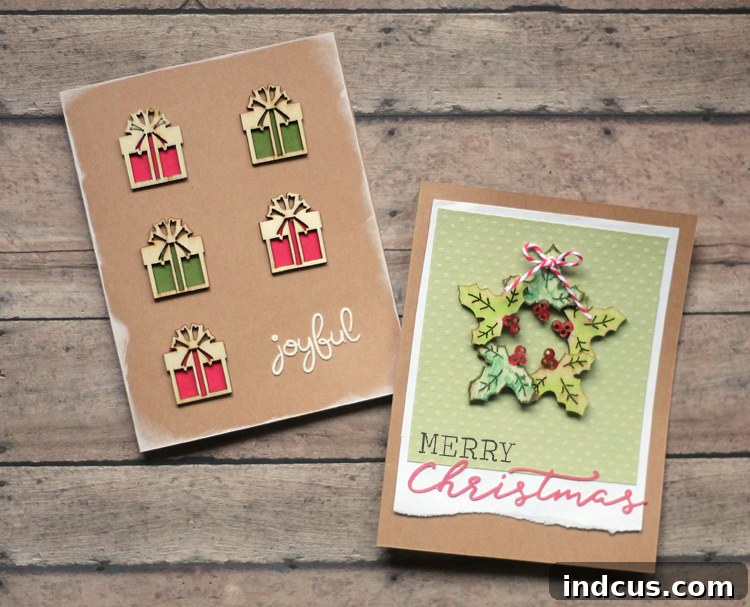
As the holiday season draws near, the desire to create meaningful connections grows stronger. This year, I’m embarking on a new tradition: meticulous planning for Christmas, long before the last-minute rush can bring its usual wave of stress. Instead of frantic dashes, I’m aiming for joyful anticipation and thoughtful creation.
Believe it or not, my Christmas card preparations are already well underway! This proactive approach feels incredibly liberating for someone who often succumbs to procrastination. It’s a journey towards a more serene and fulfilling festive season.
Today, I’m thrilled to share a versatile crafting technique: how to design and create five distinct Christmas cards using the very same core set of supplies. This method not only simplifies the card-making process but also encourages creative exploration with limited resources, proving that stunning results don’t require an overwhelming array of materials.
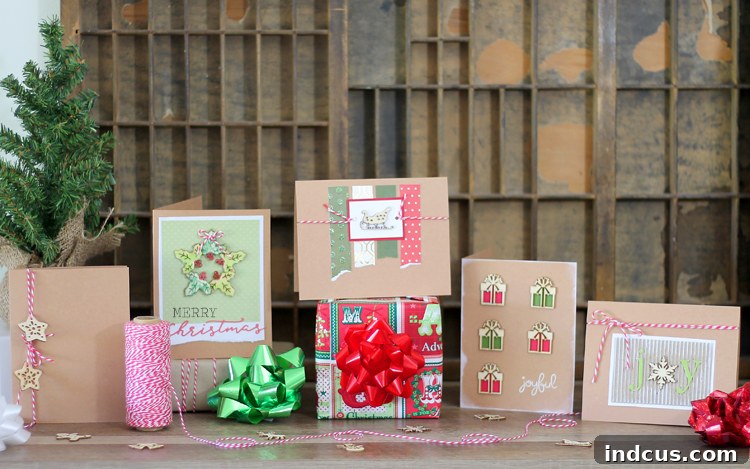
The beauty of this project lies in its simplicity and the rustic charm of the chosen materials. These are the primary supplies I’ll be utilizing, supplemented by various small embellishments and forgotten scraps from my extensive craft stash. This approach not only makes the project budget-friendly but also a fantastic way to utilize those leftover bits and pieces you’ve been saving.
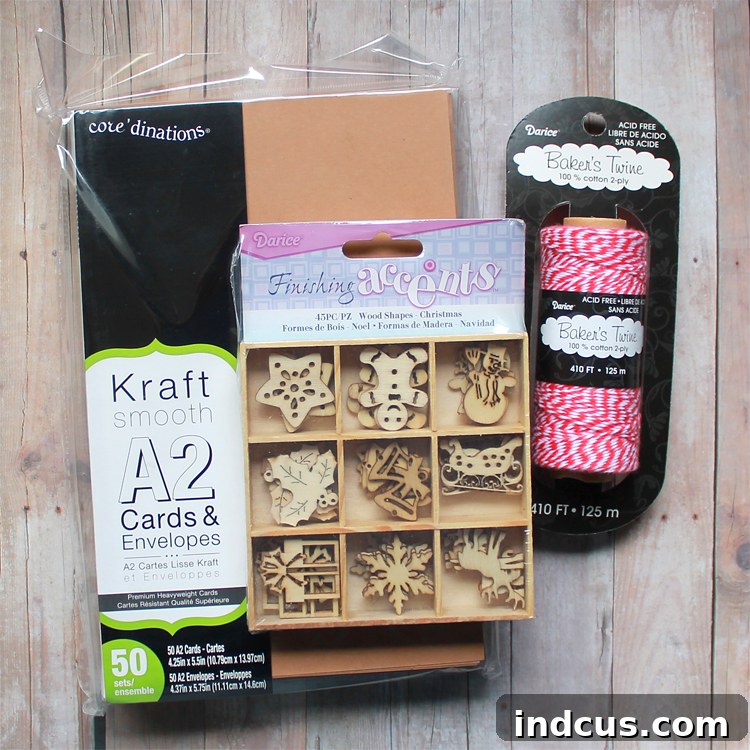
Essential Supplies for Rustic Christmas Cards
Creating beautiful, personalized Christmas cards doesn’t require an arsenal of expensive tools or an endless supply of exotic papers. Our focus for these five unique designs centers around a cohesive, natural aesthetic, making the most of a few key items:
- Kraft Paper Cards and Envelopes: The foundation of our rustic theme. Kraft paper offers a wonderfully earthy, natural look that provides a perfect canvas for our designs. Its slightly textured surface adds an inherent warmth, making each card feel truly artisanal. Opt for pre-folded cards with accompanying envelopes to save time and ensure a professional finish.
- Wooden Christmas Shapes: These small, charming embellishments are the stars of our designs. Think delicate snowflakes, miniature stars, tiny reindeer, or festive trees. Their natural wood grain complements the kraft paper beautifully, adding a touch of Scandinavian-inspired minimalism and tactile interest.
- Red Baker’s Twine: This simple yet effective addition brings a pop of traditional Christmas color and a delightful textured element. The twisted red and white strands evoke a sense of nostalgic festivity, perfect for tying bows, wrapping around cards, or hanging small ornaments.
Beyond these core items, feel free to dive into your existing craft supplies. Scraps of patterned paper, tiny buttons, a touch of glitter, or even a simple stamp set can elevate these designs further, personalizing them to your unique style. The goal is to maximize creativity with minimal new purchases.
Unleashing Creativity: Five Distinct Card Designs
The true magic happens when these simple components combine to form stunning and diverse designs. Here are the five unique handmade Christmas card ideas I’ve crafted, demonstrating how versatile a limited supply list can be. Each design plays with arrangement, emphasis, and subtle details to create a unique festive message.
Let’s explore each design in detail, offering guidance and inspiration for your own holiday crafting.
1. The Elegant Snowflake Embrace
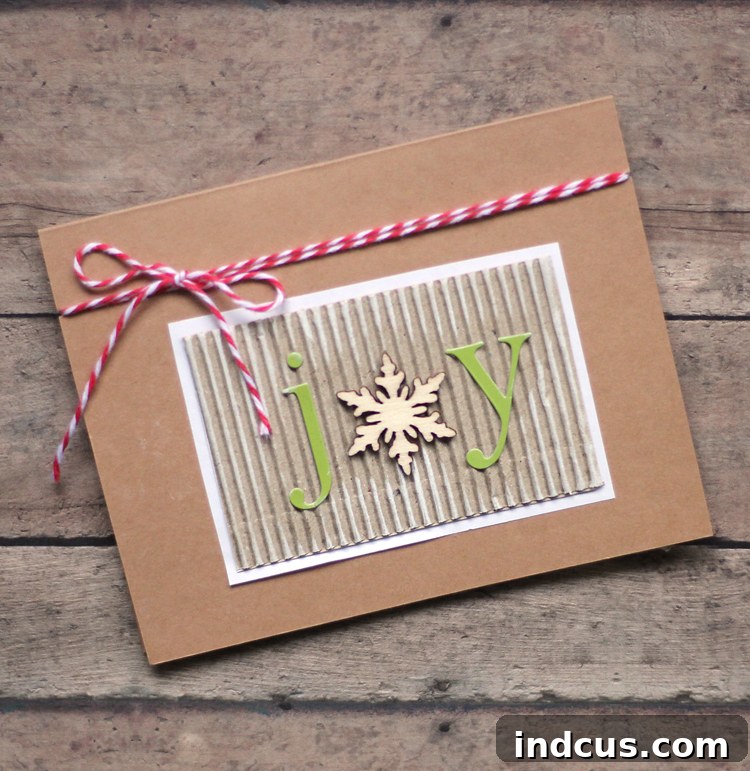
This design celebrates the serene beauty of winter with a single, commanding wooden snowflake at its heart. The simplicity of this card speaks volumes, embodying understated elegance. To create this look, begin by positioning your chosen wooden snowflake centrally, or slightly off-center for a more dynamic feel, on the kraft card front. Secure it firmly with a strong craft glue or a small glue dot. Next, take a length of red baker’s twine. You can opt to tie a small, neat bow and adhere it just above or below the snowflake, or for a more integrated look, wrap the twine vertically or horizontally around the card, securing it on the inside flap. This creates a visually appealing “frame” that highlights the central embellishment. The contrast between the natural wood, the warm kraft, and the vibrant red twine is simply captivating.
2. Festive Twine & Wood Medley
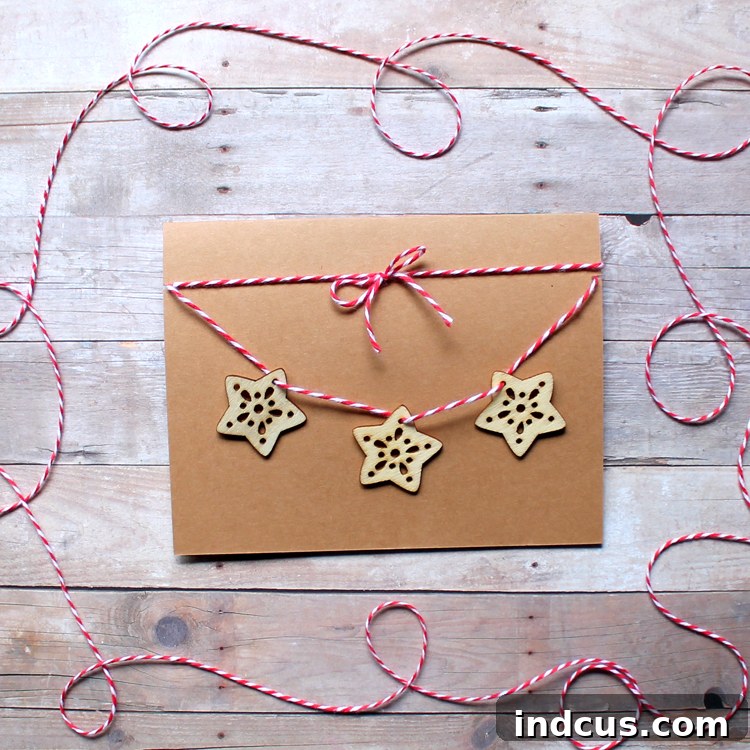
For this design, we embrace a more playful and clustered approach, combining multiple wooden shapes with creative twine usage. Instead of a single focal point, arrange a small group of wooden elements – perhaps three snowflakes of varying sizes, or a star, a tree, and a reindeer – in a pleasing composition. Experiment with overlapping them slightly for added depth. Once satisfied with the arrangement, glue them securely. Now, for the twine element: consider wrapping the baker’s twine around a portion of the card multiple times, creating stripes of red and white, or tying small, individual bows around the stems of wooden trees if you’re using them. Another lovely idea is to thread a piece of twine through the center of a larger wooden shape, then tie it to create a hanging effect, mimicking a small ornament. This design allows for more spontaneity and can feel wonderfully handcrafted.
3. Minimalist Charm with a Twist
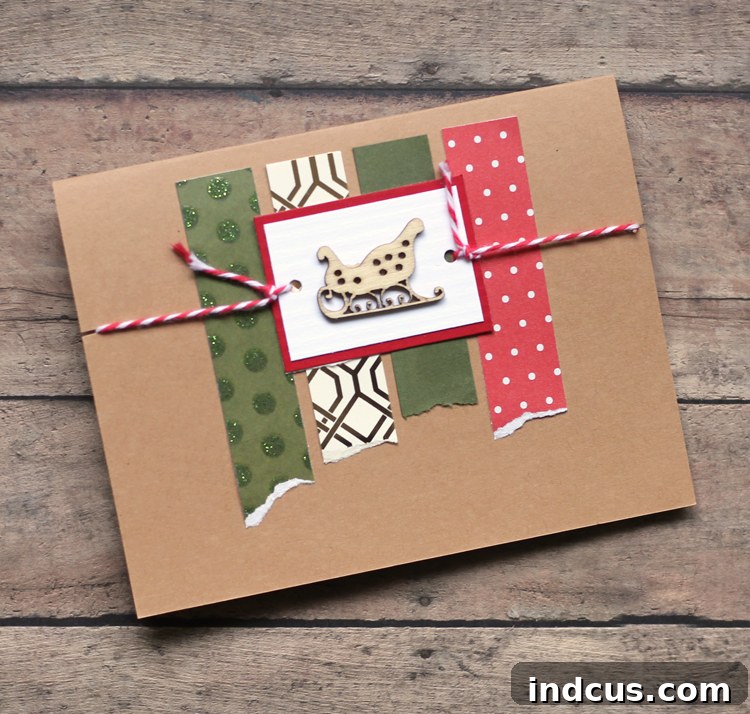
Sometimes, less is truly more. This design champions a minimalist aesthetic, making a powerful statement with carefully chosen elements. Select one unique wooden shape – perhaps a detailed reindeer or a delicate star – and place it prominently on the card. The “twist” comes from how you incorporate the baker’s twine. Instead of a bow, try creating a small, intricate knot just below the wooden shape, letting the ends dangle loosely. Or, for an even more subtle effect, gently wrap a single strand of twine around a specific part of the wooden shape itself, such as the antlers of a reindeer or one point of a star, securing it with a tiny dab of glue. The starkness of the kraft paper against the natural wood and the delicate twine creates a sophisticated and modern rustic look. This design is perfect for those who appreciate clean lines and understated beauty.
4. Layered Kraft & Twine Accent
This design introduces a subtle layering technique to add depth and interest without additional paper. While we’re still using only our core supplies, imagine creating a “strip” effect with the baker’s twine. Begin by taking a longer piece of twine and wrapping it horizontally across the lower third of your kraft card multiple times, ensuring the lines are parallel and neatly spaced. Secure the ends firmly on the inside of the card. This creates a textured band of festive red and white. On top of this twine band, adhere one or two wooden shapes. A single wooden star or a small cluster of tiny wooden shapes would work perfectly here. The twine acts as a subtle background texture, lifting the wooden elements and giving them a more defined presence. This technique adds visual weight and a sense of thoughtful construction to a simple card, making it appear more complex than it truly is.
5. Personalized Stamped & Embellished
While the focus is on our core supplies, adding a stamped sentiment can truly personalize your handmade cards. For this design, choose one of the previous layouts (for instance, the Elegant Snowflake Embrace or the Minimalist Charm). Before adhering your wooden shape, select a small, festive stamp – perhaps “Merry Christmas,” “Joy,” or a simple snowflake pattern – and stamp it onto the kraft cardstock in a complementary color (black, dark brown, or even white ink can look stunning on kraft). Ensure the sentiment is placed where it won’t be completely covered by your wooden embellishment. After the ink dries, proceed with attaching your wooden shape and baker’s twine as planned. The combination of the clean stamped message with the natural elements creates a balanced and deeply personal card. This design allows you to convey your message directly while maintaining the rustic aesthetic.
I believe these visual tutorials, just by observing the finished cards, are quite self-explanatory. However, my deepest hope is that these handmade Christmas card ideas ignite your creative spark and get your scrapbook or card-making juices flowing. The process of making these cards should be enjoyable, a moment of calm and creativity amidst the holiday hustle. Enjoy the process of crafting and spreading joy!
Tips for a Seamless Christmas Card Crafting Experience
To make your journey into handmade Christmas cards as joyful and stress-free as possible, consider these practical tips:
- Gather All Supplies First: Before you begin, lay out all your kraft cards, wooden shapes, baker’s twine, glue, scissors, and any optional embellishments. This prevents interruptions and helps maintain your creative flow.
- Work in Batches: If you’re making multiple cards of the same design, try a batch approach. Cut all twine pieces, then glue all wooden shapes, then add all sentiments. This often proves more efficient than completing one card at a time.
- Embrace Imperfection: Handmade items inherently carry unique quirks. Don’t strive for machine-like perfection; those small irregularities are what give your cards their distinct charm and personal touch.
- Personalize Each Card: Even with a common design, a small handwritten note inside or a slightly different twine knot can make each card feel uniquely special for its recipient.
- Start Early: As I’ve done this year, beginning your Christmas card crafting early is key to avoiding stress. It allows you to savor the creative process rather than rush through it.
- Adhesive Choices: For wooden shapes, strong liquid craft glue or glue dots work best. For twine, a tiny dab of liquid glue at the ends will prevent fraying and secure it neatly.
- Cleanliness is Key: Keep a damp cloth handy to wipe away excess glue or stray ink. A clean workspace contributes to a clearer mind and a neater final product.
- Experiment and Play: Don’t be afraid to deviate from the suggested designs. Mix and match elements, try different twine patterns, or even lightly color your wooden shapes with markers for a personalized twist.
Beyond the Cards: Extending Your Holiday Crafting Joy
The beauty of these simple supplies extends far beyond just Christmas cards. Utilize your leftover kraft paper, wooden shapes, and baker’s twine to create coordinated holiday items:
- Gift Tags: Miniature versions of your card designs make charming gift tags, adding a cohesive and personal touch to your presents.
- Small Ornaments: Attach a loop of twine to a wooden shape, and you have a rustic little ornament perfect for hanging on a tree or adorning a gift package.
- Scrapbook Embellishments: These elements are fantastic for holiday-themed scrapbook layouts, adding texture and warmth to your cherished memories.
- Involve the Family: Card making is a wonderful activity for all ages. Gather loved ones, put on some festive music, and create memories while creating cards. Children can help with simple gluing or twine wrapping, fostering their creativity and holiday spirit.
Ultimately, the act of making something with your own hands, especially during the holidays, carries immense satisfaction. These handmade Christmas cards are more than just paper and wood; they are tangible expressions of care, effort, and affection. They stand as a warm alternative to store-bought greetings, carrying a personal message that a mass-produced card simply cannot convey.
So, take a deep breath, gather your simple supplies, and immerse yourself in the delightful world of rustic Christmas card making. May your creative journey be filled with joy, peace, and plenty of festive inspiration. Happy crafting, and may your handmade cards bring smiles to many faces this holiday season!







