
Create Stunning DIY Paper Flowers: Hand-Cut or Machine-Crafted with Free Templates
Transform ordinary paper into extraordinary blooms! Discover the joy of crafting beautiful paper flowers, perfect for enhancing any space or special occasion. This comprehensive guide provides step-by-step instructions for both hand-cutting and using electronic cutting machines like Silhouette or Cricut, along with access to a collection of free paper flower templates.
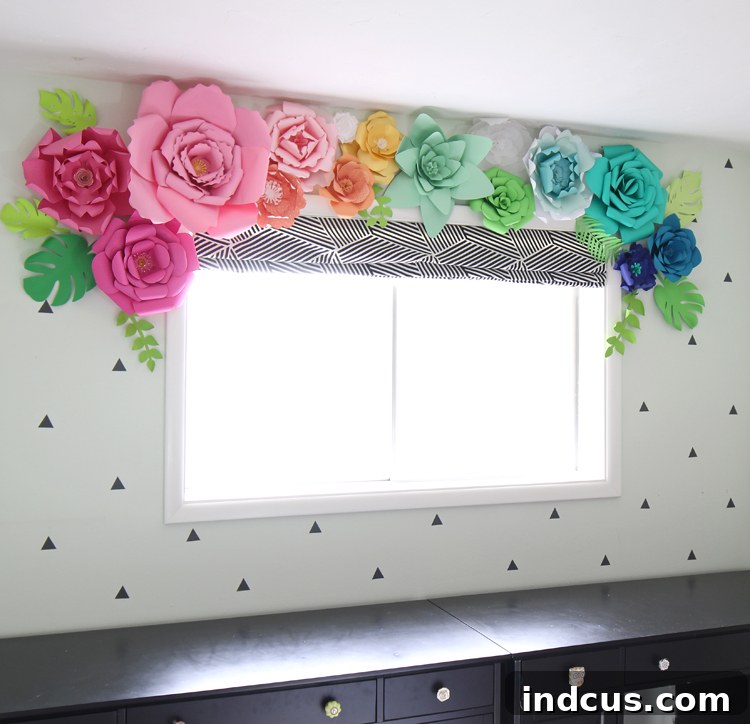
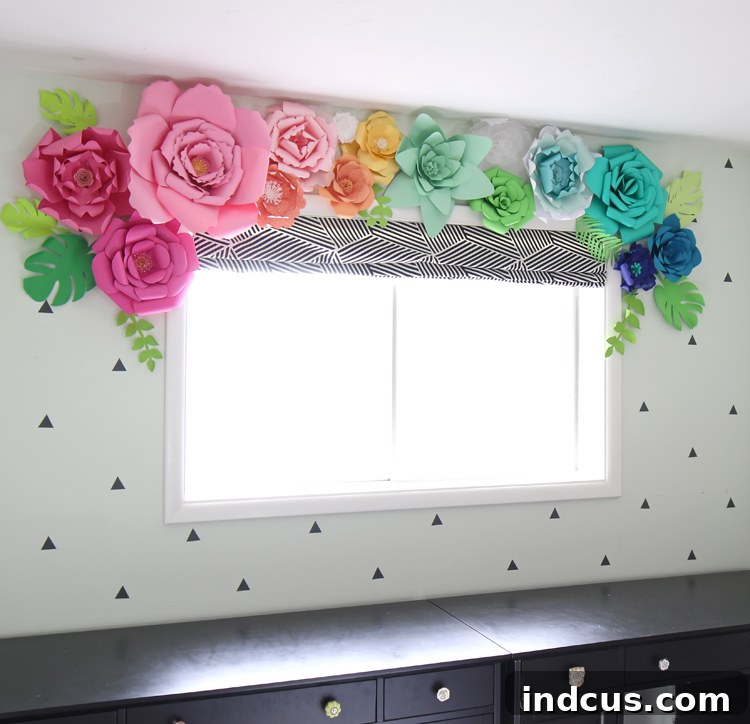
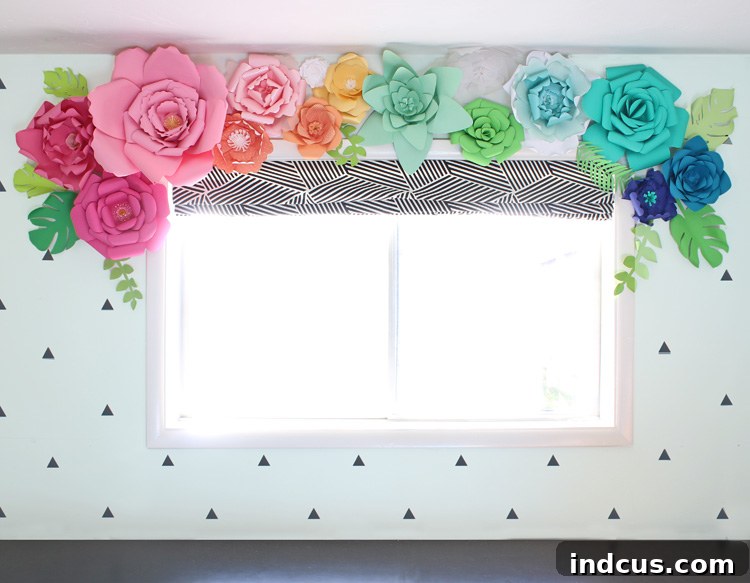
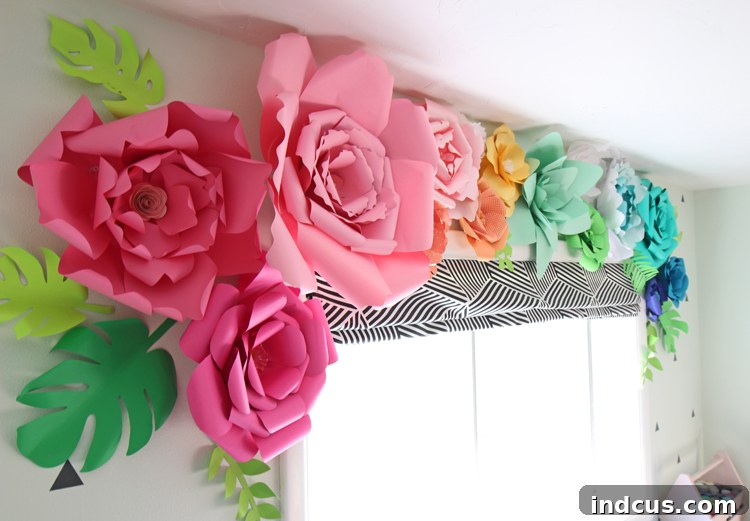
The addition of these vibrant paper flowers has completely transformed my craft room into a whimsical, inspiring haven. They serve as a magnificent focal point, infusing the space with bright colors and a playful spirit that truly reflects my happy place. Every glance at these giant, colorful blossoms brings a smile and ignites new creative ideas.
The Allure of Paper Flowers: Versatile, Beautiful, and Budget-Friendly
Paper flowers are an incredibly rewarding DIY project for countless reasons. Their versatility is unmatched; they can be used in a myriad of ways, from elegant wall decor and stunning centerpieces to unique gift toppers and festive party backdrops. Imagine the endless color combinations you can explore to perfectly match your home decor style or the theme of any event. They make exceptional decorations for weddings, baby showers, bridal showers, birthdays, and virtually every special occasion imaginable. Unlike fresh flowers, paper blooms last indefinitely, offering a permanent touch of beauty without wilting or requiring maintenance.
Perhaps the best part about crafting paper flowers is their affordability. The primary materials are simple: paper and hot glue. This means you can create breathtaking decorations on a budget, allowing you to achieve a luxurious look without the hefty price tag associated with real floral arrangements. This accessibility makes paper flower crafting a fantastic hobby for everyone, regardless of experience level.
Gathering Your Essential Paper Flower Materials
Before diving into the creative process, it’s essential to gather your supplies. For my vibrant rainbow display, I stocked up on an array of colorful cardstock, literally spanning every shade of the rainbow. When purchasing paper, consider the scale of your project:
- For the largest flowers shown, you will need approximately 8 sheets of 8.5×11 inch cardstock per flower.
- For the smallest flowers, expect to use about 3 sheets of 8.5×11 inch cardstock per flower.
Always buy a little extra cardstock than you think you’ll need. There’s nothing more frustrating than running out of a specific color mid-project and having to make an unplanned trip back to the store. Keep an eye out for sales on open stock paper or paper packs at craft stores; it’s a great way to save money while building your collection. While cardstock is generally recommended for its sturdiness, experiment with other papers like vellum or pearlescent cardstock for unique textures and effects. I used beautiful pearlized paper for some of my flowers, adding a subtle shimmer, and vellum for another, which created an ethereal, almost translucent look.
How to Make Paper Flowers: Step-by-Step Guide
Making paper flowers is a delightful and straightforward process. Whether you prefer the precision of an electronic cutting machine or the hands-on satisfaction of cutting by hand, the core steps remain simple. I’ve prepared a video tutorial to walk you through the entire process, making it easy to follow along.
Paper Flower Video Tutorial
Crafting Paper Flowers with a Silhouette or Cricut Machine
Using an electronic cutting machine can significantly speed up the petal cutting process, especially if you plan to make many flowers or very intricate designs. These machines offer incredible precision and consistency, allowing you to scale patterns effortlessly.
Materials Needed:
- Free SVG Files (download instructions below)
- Colored Cardstock (medium to heavy weight recommended)
- Hot Glue Sticks
- Silhouette Cameo, Cricut Explore Air, or Cricut Maker Machine
- Cutting Mat (StandardGrip or LightGrip, depending on paper weight)
- Hot Glue Gun
- Pencil or dowel (for curling petals)
Instructions:
- Download and Import Templates: Obtain the free paper flower SVG files (instructions below). Import them into your machine’s design software (e.g., Silhouette Design Studio, Cricut Design Space).
- Scale and Arrange: Trace around the shapes if necessary (for older files) and resize the flower petals to achieve your desired flower size. Arrange multiple petals on your digital mat to optimize paper usage.
- Adjust Cut Settings: Select the appropriate material settings for your cardstock (e.g., “Cardstock, Textured,” “Heavy Cardstock”). Perform a test cut if you’re unsure to ensure clean cuts without tearing. Send the design to your machine to cut the petals.
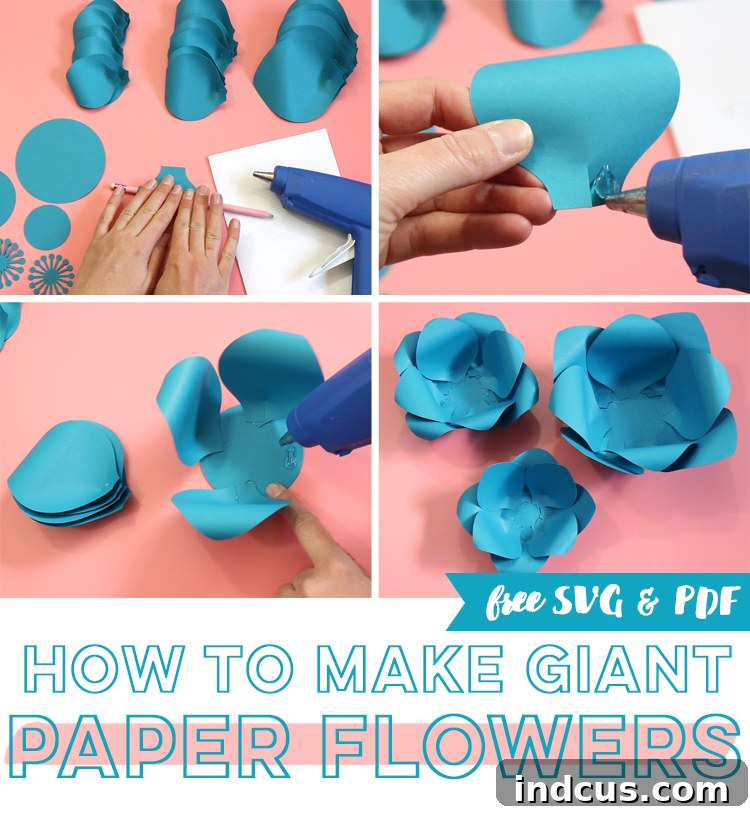
- Curl Petal Edges: Once cut, gently curl the edges of each flower petal using a pencil, dowel, or a specialized quilling tool. This adds dimension and natural movement to your petals.
- Form Petal Base: Locate the small slit at the bottom of each petal. Fold one side of the slit over the other and secure it with a small dab of hot glue. This creates a small cup-like shape at the petal’s base, giving it volume.
- Assemble the Layers: Begin by gluing the smallest petals onto a circular cardstock base. Overlap them slightly to form a tight center. Repeat this process for the medium-sized petals, gluing them around the first layer, and then again for the largest petals, forming the outermost layer.
- Layer and Secure: Carefully layer the three rounds of petals together, starting with the largest at the bottom, followed by the medium, and finally the smallest at the top. Secure each layer with hot glue, ensuring the petals are offset for a fuller look.
- Add a Center Embellishment: If desired, add a decorative center to your flower. This could be a rolled paper center, a gem, a pearl, or a cluster of smaller petals.
Crafting Paper Flowers by Hand: A Traditional Approach
If you don’t own an electronic cutting machine, or simply enjoy the tactile experience of working by hand, creating paper flowers with scissors is entirely doable and just as rewarding. It allows for a more organic, unique feel to each petal.
Materials Needed:
- Free Printable Template (download instructions below)
- Colored Cardstock (medium weight is easiest to cut by hand)
- Hot Glue Sticks
- Hot Glue Gun
- Sharp Scissors (craft scissors or detail scissors work best)
- Pencil (for tracing and curling petals)
Instructions:
- Download and Print Template: Get your free printable paper flower template (instructions below). You can resize the petals on your computer using software like Paint, Photoshop, Illustrator, or even basic image viewers before printing to achieve different flower sizes.
- Cut Out Templates and Trace: Carefully cut out the paper petal templates. Place these templates onto your chosen cardstock and trace around them with a pencil. To save time, you can stack several sheets of cardstock (2-4 depending on thickness) and cut through them simultaneously, ensuring your scissors are sharp.
- Cut Petals: Using sharp scissors, meticulously cut out all your traced flower petals. Take your time to ensure clean edges.
- Curl Petal Edges: Gently curl the edges of each paper petal around a pencil, dowel, or the edge of your scissors (with caution). This step is crucial for giving your flowers a realistic, soft look.
- Form Petal Base: Fold the small slit at the bottom of each petal on top of itself and secure it with a small amount of hot glue. This creates a slight curve and volume at the petal’s base.
- Assemble the Layers: Starting with a small cardstock circle as your base, glue the smallest central petals onto it, overlapping them to create the flower’s core. Proceed with the medium-sized petals, gluing them around the first layer, and finally, attach the largest petals around the outside, creating the fullest layer.
- Layer and Secure: Stack the three rounds of petals (largest at the bottom, then medium, then smallest) and glue them securely in place. Arrange them so the petals in each layer are offset from the layer below, filling in gaps and creating a lush appearance.
- Add a Center Decoration: Embellish the center of your flower with a chosen decoration, such as a contrasting rolled paper disc, a cluster of mini petals, or a sparkling rhinestone.
Designing Your Dream Floral Display
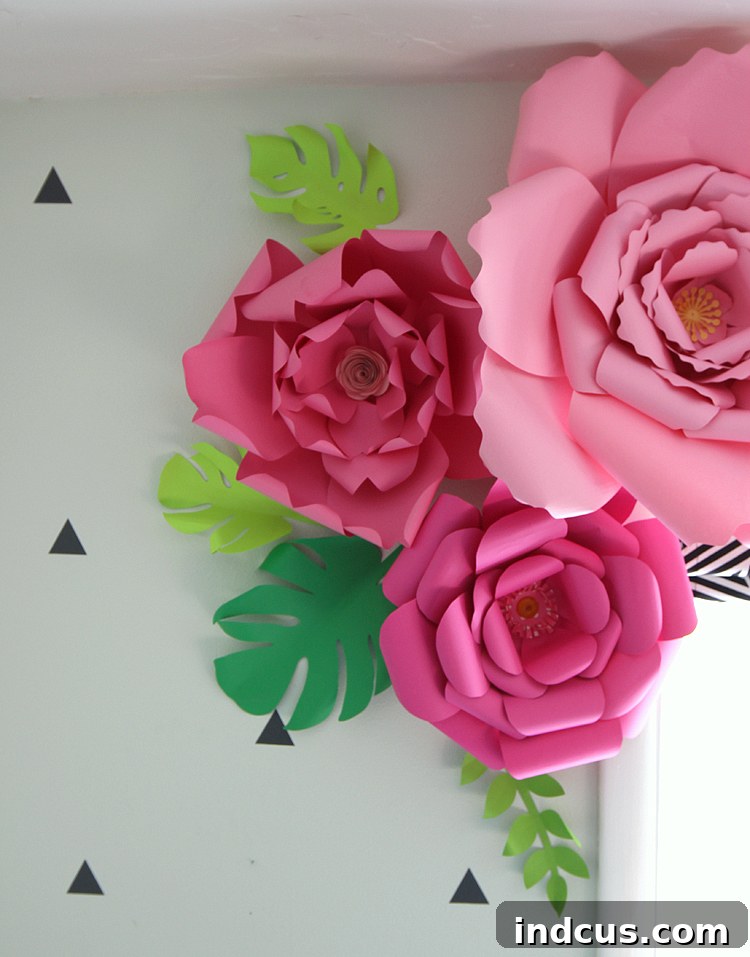
For my own paper flower display, I envisioned a dynamic mix of sizes and tropical greenery. I carefully planned which colors from my rainbow palette would be used for larger and smaller flowers, then combined different flower shapes (roses, peonies, cabbage roses) to ensure ample variety. This thoughtful approach creates visual interest and depth.
Don’t be afraid to experiment with different paper types! While it’s hard to capture in photos, I incorporated some beautiful pearlized paper from Hobby Lobby for my lightest pink and ombre aqua flowers. This added a subtle, elegant shimmer that I absolutely adore. I also crafted an entire flower from vellum paper; it almost disappears in pictures but creates a delicate, translucent effect in real life, adding another layer of texture to the display. Mixing textures and finishes will elevate your paper flower arrangements from simple crafts to sophisticated decor.
Accessing Your Free Paper Flower Templates and SVG Files
To help you get started on your paper flower journey, I’m delighted to share a collection of free paper flower templates and SVG files. These resources are designed to make your crafting experience as easy and enjoyable as possible.
There are four unique files available:
- One printable PDF file for hand-cutting, perfect for those without an electronic cutting machine.
- Three SVG files specifically designed for use with Silhouette or Cricut machines, including patterns for easy paper roses, charming cabbage roses, and elegant peonies.
You’ll find all four templates conveniently located in a Google Drive folder. To gain access to these valuable resources, simply provide your email address in the box below. You’ll then receive an email with a direct link to download all the templates.
To get the free paper flower templates, please enter your email address in the sign-up form on this page. You will receive an email shortly with a link to download the templates from a Google Drive folder.
Beyond these free templates, I also sourced some fantastic cut files from the Silhouette Design Store, particularly for intricate flower centers. I often modify these by adding small slits to the bottom of each petal to enhance their 3D effect.
The Enduring Charm of Paper Blooms
This project was an absolute delight from start to finish. Each paper flower, whether hand-cut or machine-made, felt like a miniature work of art. The process of watching the rainbow of flowers gradually come together was immensely satisfying and incredibly inspiring. My craft room now boasts a vibrant, joyful atmosphere that constantly encourages creativity.
How could anyone not feel inspired when looking up to see such a breathtaking, colorful display? These paper flowers aren’t just decorations; they’re a testament to the beauty of handmade creations and a continuous source of joy and motivation.
DIY Paper Flowers: Frequently Asked Questions
Here are answers to some common questions about making and displaying paper flowers:
How do you attach the paper flowers to the wall securely?
For a discreet attachment, I typically use clear thumb tacks, carefully hiding them under one of the petals. This method offers strong support. If you prefer to avoid putting holes in your walls, Command strips (the velcro-like kind) are an excellent alternative. They adhere strongly but can be removed without damaging paint. I generally advise against using regular tape, as its adhesive tends to weaken over time, especially with the weight of larger flowers, leading to them falling off.
What type of paper is best for making paper flowers?
Cardstock is undoubtedly the best material for crafting durable and visually appealing paper flowers. Its weight and stiffness allow the petals to hold their shape beautifully. I often purchase cardstock in multi-packs from craft stores like Hobby Lobby, as it’s typically more cost-effective per sheet. While you can technically use any paper, thinner options like flimsy printer paper tend to result in droopy or less substantial flowers. You don’t necessarily need a specific weight, but anything from 65lb to 110lb cardstock works wonderfully. This pack of assorted cardstock on Amazon is a great starting point for beginners.
How do I download the free paper flower templates?
To access the free templates, simply locate the teal-colored sign-up box above this section. Enter your email address there, and you will receive an automated email from me. This email will contain a direct link to a Google Drive folder where all the printable and SVG paper flower templates are stored, ready for you to download.
What size should I cut out the flower petals?
The beauty of these templates is their versatility – you can cut the petals to any size you desire! If you’re using a Silhouette or Cricut machine, you can easily adjust the size of any template within your design software (Silhouette Studio or Cricut Design Space) before cutting. If you’re cutting by hand, you can resize the pattern on your computer using programs like Paint, Photoshop, Illustrator, or PicMonkey before printing it out. As a reference point, the largest flowers shown in my photographs were scaled so that their largest outer petals fit one per standard 8.5×11 inch sheet of paper. These are truly giant petals!
What size should I cut out the circle bases for the flowers?
Determining the exact size for your circular base isn’t an exact science, as it depends on the overall size and desired fullness of your flower. However, as a good starting point: for a very large flower (like one where the largest petals fit on an 8.5×11″ sheet), a circular base of approximately 3 inches in diameter is a good size. For smaller flowers, progressively decrease the diameter of your base circle. The base primarily provides a sturdy foundation for gluing your petals, so it shouldn’t be visible once the flower is assembled.
Where did you find the leaf patterns for the greenery?
I purchased several excellent cut files for various leaf patterns from the Silhouette Design Store. They offer a vast selection of greenery designs that can complement almost any floral arrangement. If you’re cutting leaves by hand and looking for free options, a quick Google search for “jungle leaves SVG” or “leaf outline printable” will yield numerous results you can print and use as patterns.
I’m having trouble opening the free files. What could be wrong?
The most common reason people encounter difficulty accessing the free files is due to workplace or school network restrictions. Many corporate or educational servers block access to external cloud storage services like Google Drive. If you’re trying to download the templates from a work or school computer, try accessing the link again from your home computer or a personal device with an unrestricted internet connection. This often resolves the issue.
Aren’t these large paper flowers huge dust collectors? How do you clean them?
While any decorative item can collect some dust, I’ve found that paper flowers aren’t significantly more prone to it than other decor. When I notice a light layer of dust, I simply give them a quick spray with canned air (the kind used for cleaning keyboards) or gently blow air from my shop vac. The dust typically dislodges easily, and then I just vacuum the floor underneath. It’s a quick and easy cleaning process!
Can’t-Miss Crafts for Paper Flower Lovers
If you’ve fallen in love with paper flower crafting, here are some more inspiring projects and tutorials to fuel your creativity:
- Discover this delightful tutorial for making charming tissue paper flowers.
- Learn how to create smaller, intricate Rolled Paper Flowers, perfect for embellishments.
- Turn your paper flowers into a darling Paper Flower Mason Jar Sign for rustic decor.
- Make delightful Crepe Paper Flowers with Candy Centers for a sweet treat.
- Deck your halls with a unique Giant Paper Flower Christmas Tree.
- Craft cheerful Giant Paper Sunflowers with a free pattern.
- See how I utilized these same giant paper flowers to create a show-stopping 4th of July Party Backdrop.
- Explore even more free paper flower templates and tutorials here!







