
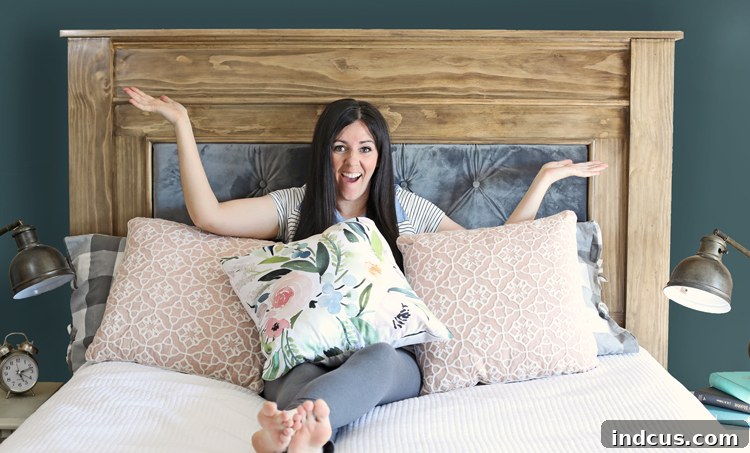
Craft a Stunning DIY Wood & Velvet Tufted Headboard: Free Plans for a Luxurious Bedroom Upgrade
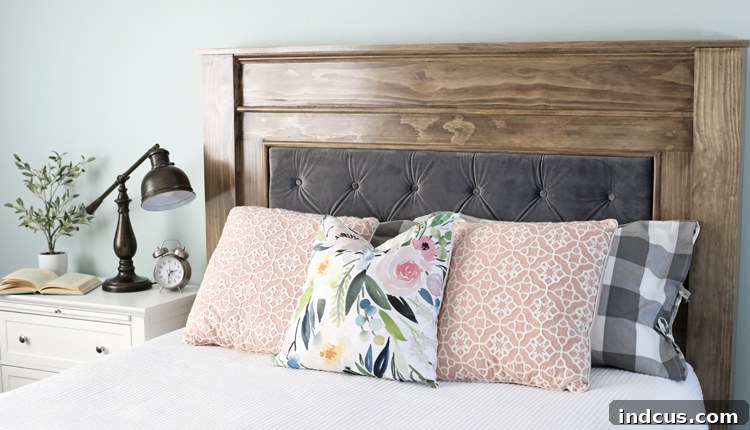
Are you ready to transform your bedroom with a touch of elegance and custom craftsmanship? We’re thrilled to unveil our latest DIY project: a magnificent queen-sized wood headboard featuring a plush, velvet tufted upholstered center. This isn’t just any headboard; it’s a statement piece designed to add luxurious comfort and sophisticated style to your sleeping sanctuary. Today, we’re sharing the complete, step-by-step instructions, including free building plans and a comprehensive video tutorial, to guide you through creating your own stunning upholstered headboard.
This detailed guide is perfect for DIY enthusiasts looking to elevate their home decor with a rewarding woodworking project. From selecting your materials to the final tufting, we’ll walk you through every phase of building this custom headboard that blends classic woodworking with soft, inviting upholstery. Get ready to impress yourself and your guests with this beautiful and budget-friendly bedroom upgrade!
This post is proudly brought to you by our partners at Arrow Fastener, whose reliable tools were instrumental in bringing this project to life.
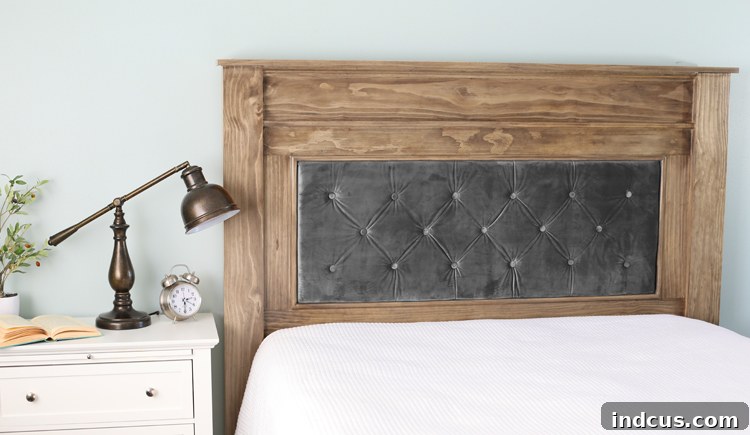
Let’s dive right into the detailed tutorial! If you prefer a visual guide, feel free to scroll to the bottom of this post for our comprehensive video instructions. We’ve meticulously planned out each section to ensure a smooth and enjoyable building experience for all skill levels.
Essential Materials List for Your Custom Headboard
Gathering all your materials before starting is crucial for a seamless building process. For this elegant DIY wood headboard, we opted for high-quality select pine to ensure a beautiful finish. Here’s everything you’ll need:
- Wood – We used Select Pine (S4S) for its smooth finish and ease of work:
- Four – 1″x2″x6′ pieces
- Two – 1″x4″x6′ pieces
- Two – 4″x4″x6′ posts (ensure these are not pressure treated for indoor use)
- Eight – 1″x6″x6′ pieces
- One – 1″x8″x6′ piece
- One – 5′ length of Crown Molding
- One – ¼ Inch Plywood sheet (for the upholstered panel backing)
- Wood Glue (a strong, reliable brand is recommended)
- Sandpaper (various grits, from coarse to fine, e.g., 80, 120, 180, 220)
- Wood Conditioner (essential for even stain application)
- Wood Stain – We chose a layered look with Varathane Early American and Minwax Classic Gray
- Polycrylic Protective Finish in Satin (for durable protection and a soft sheen)
- Foam Brush and Rubber Gloves (for staining and finishing)
- Velvet Upholstery Fabric (a cost-saving tip: consider purchasing a curtain panel on Amazon as we did!)
- 1 inch Upholstery Foam (for plush comfort)
- Quilt Batting (adds softness and smooths out the foam)
- Upholstery Button Cover Kit (to create custom matching buttons)
- Large Flat-Backed Buttons (for securing the tufts from behind)
- Long Needle and Upholstery Thread (heavy-duty for tufting)
Having these materials on hand will prevent interruptions and keep your project on track. Quality materials are the foundation of a beautiful, lasting custom headboard.
Tools You’ll Need for This DIY Headboard Project
The right tools make all the difference, ensuring precision, efficiency, and safety in your woodworking and upholstery tasks. Here’s a comprehensive list of the tools used to build this exquisite upholstered headboard:
- Arrow Compact Electric Staple Gun (invaluable for upholstery work)
- 1/4″ Arrow Staples (for securing fabric)
- Arrow Pneumatic Brad Nailer (for quick and secure assembly)
- 1 1/2″ Arrow Brad Nails (for general assembly)
- 5/8″ Arrow Brad Nails (for delicate trim work)
- Arrow MiniPlus Glue Gun (perfect for finishing touches in upholstery)
- Table Saw (for precise cuts and dado operations)
- Dado Blade Set (for creating the mortises in the posts)
- Miter Saw (for accurate angle cuts, especially for trim and post wrapping)
- Router (for creating decorative edges)
- 3/8″ Roundover Router Bit (to soften edges for a refined look)
- Pocket Screw Jig + Pocket Hole Screws (for strong, concealed joinery)
- Drill (for pre-drilling and pocket screws)
- 1/4″ Drill Bit (for tufting holes)
- 3/4″ Chisel (for refining mortise corners)
- Clamps (various sizes, essential for holding pieces during gluing and nailing)
- Band Clamp (crucial for securely joining the headboard frame)
Ensure all your tools are in good working order before you begin, and always prioritize safety by wearing appropriate protective gear.
Your Detailed Headboard Cut List
To simplify your building process and ensure accuracy, we’ve prepared a free printable version of our comprehensive cut list. This document provides precise measurements for every piece of wood required for your DIY headboard.
Download your free printable cut list here.
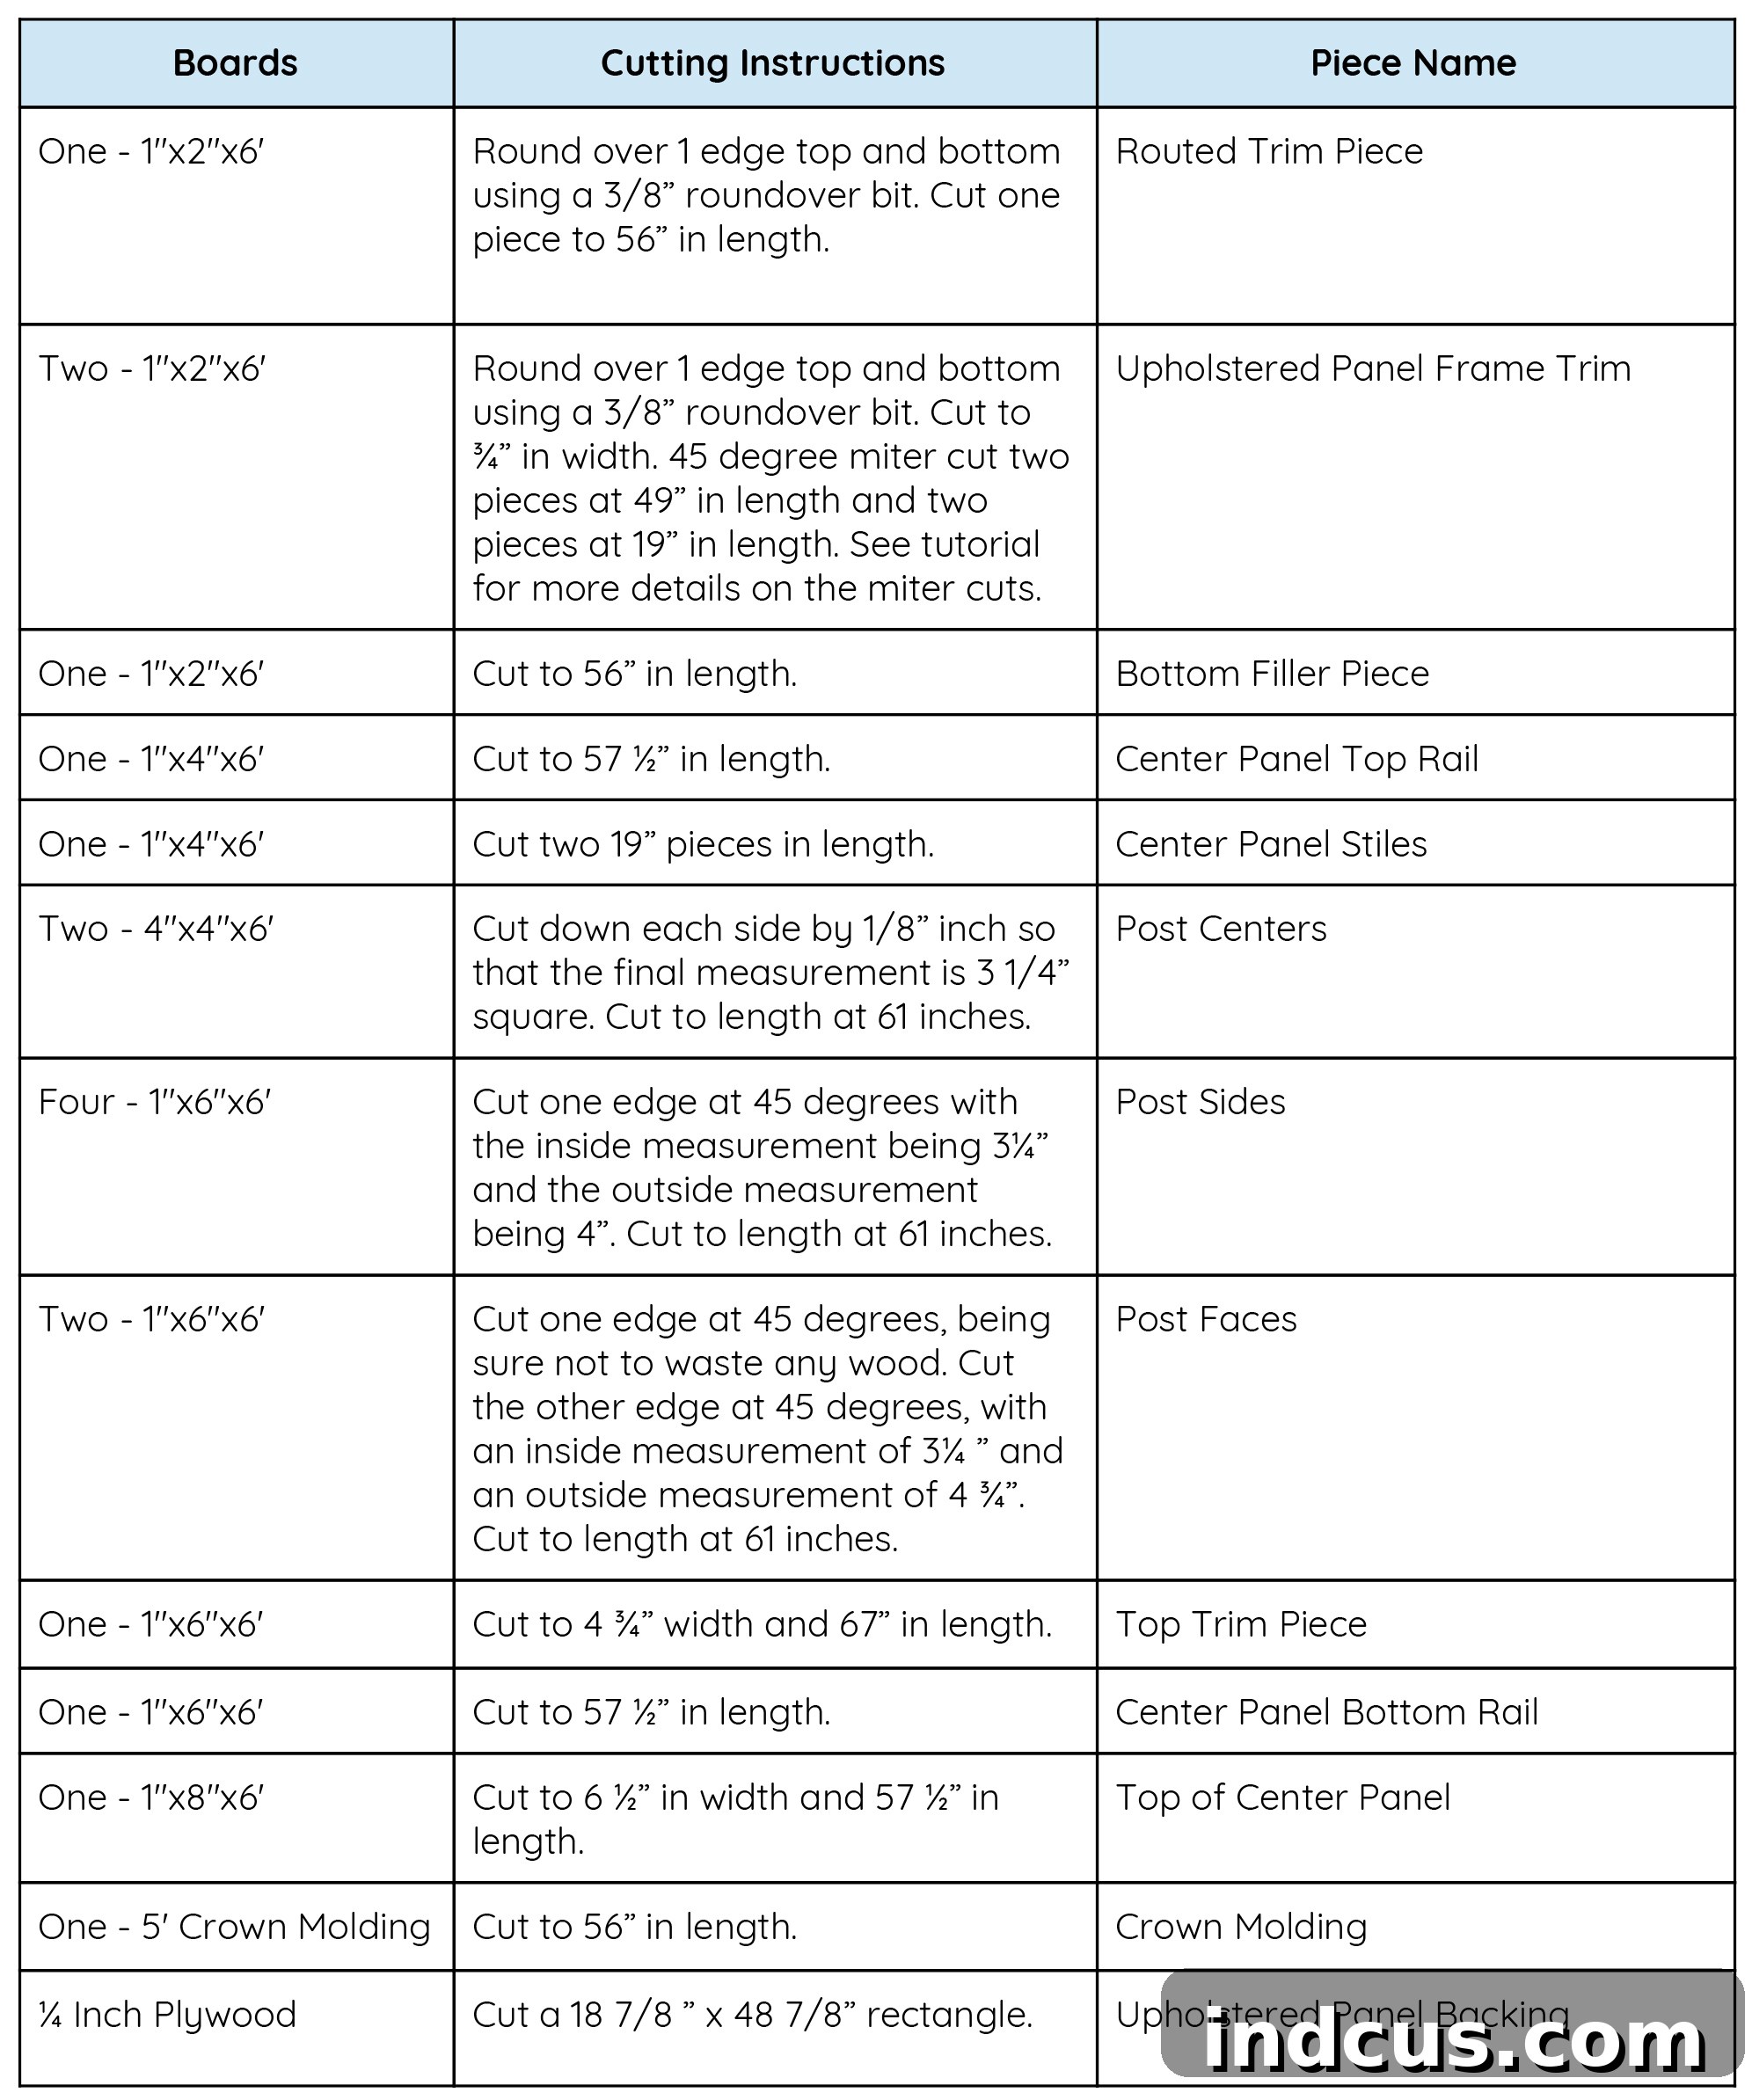
Before proceeding to the assembly stage, it is highly recommended to cut all your wood pieces according to the provided list. Each component will be referred to by the specific name listed in the third column of the cut list. Precision in this initial step will save time and ensure a professional finish for your custom upholstered headboard.
Constructing the Robust Outside Posts for Your Headboard
The outside posts are a critical structural and aesthetic element of your DIY headboard. To give this project a more refined and substantial feel, we decided to wrap standard 4×4 pine posts with higher-grade select pine. This technique not only enhances the visual appeal but also adds a solid, thick design element that elevates the entire piece.
Once your 4×4 Post Centers are cut to the specified size, the next step involves preparing the cladding. Miter six 1×4 pieces at a precise 45-degree angle. These pieces, detailed in your cut list, will elegantly wrap around the front and two sides of each 4×4 post, creating a seamless, custom-built look. Accuracy in your miter cuts is paramount here for tight, professional-looking joints.
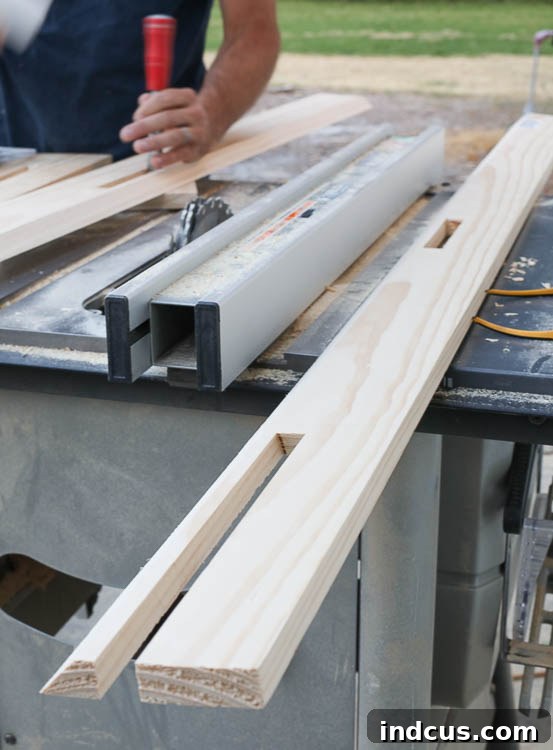
Beyond aesthetics, two of these 1×4 Post Sides will serve a crucial functional purpose: they will house the mortises (slots) necessary for securely attaching the center upholstered panel to the outside posts. These mortises are specifically designed to create a strong, interlocking joint. Carefully follow the detailed guide below for precise mortise placement and dimensions.
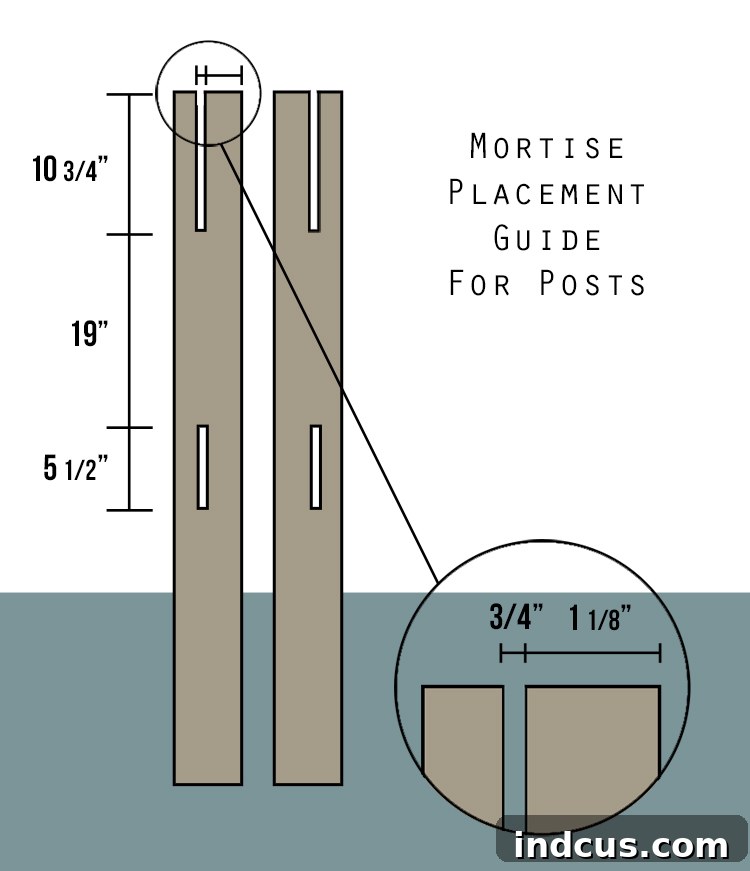
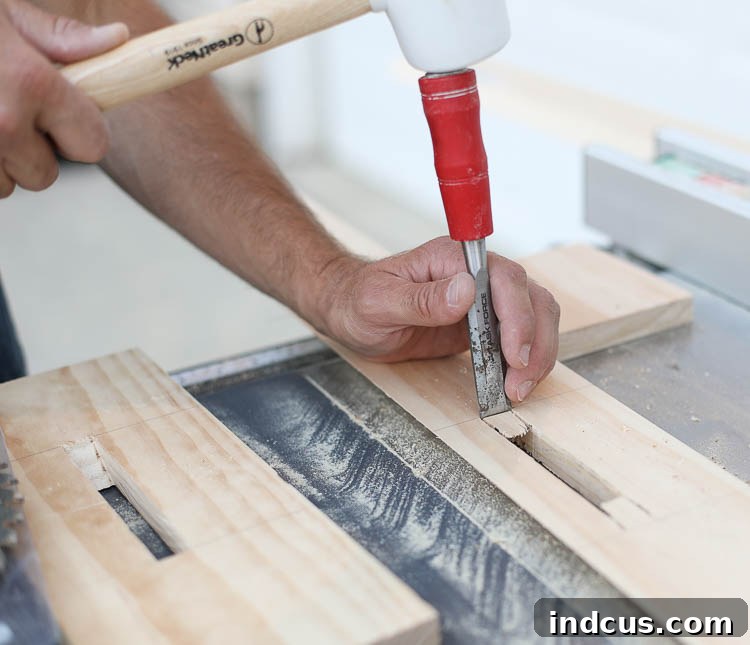
Remember that the two mortised pieces must be mirror images of each other, one for the left post and one for the right. We utilized a dado stacked blade on a table saw to cut these mortises, which efficiently removes material. However, due to the circular nature of dado blades, they leave slightly rounded corners. To achieve perfectly square corners for a snug fit, carefully chisel out the remaining material by hand. This attention to detail ensures a professional and robust connection.
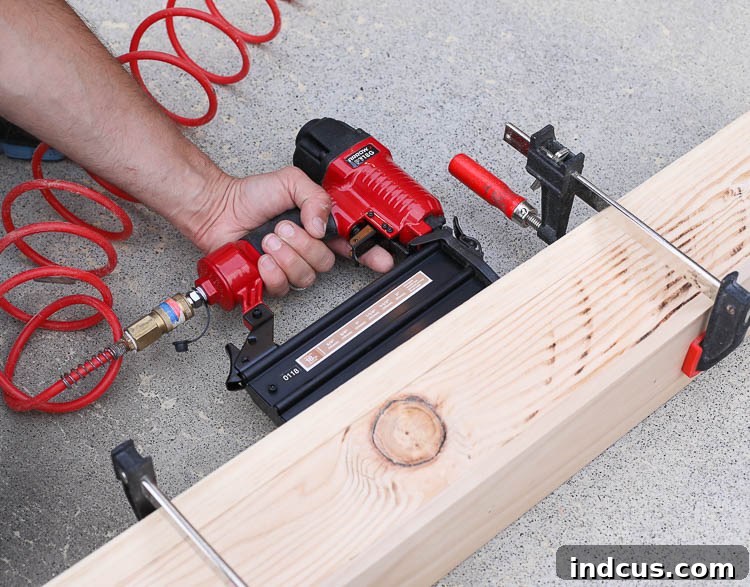
Now, let’s assemble these impressive posts! For quick and efficient assembly, our trusty Arrow Brad Nailer will be your best friend. Begin by applying a generous amount of wood glue to the backs of the two Post Sides that will wrap around the 4×4 center. Carefully clamp them in place around the Post Center, ensuring they are perfectly aligned with the mitered edges meeting cleanly.
Once clamped, secure these pieces together using 1.5-inch brad nails. Next, apply glue to the top cap piece, slide it into position, and secure it firmly with more finish nails. Repeat this process for the second post, meticulously ensuring each joint is tight and square. This methodical approach will result in strong, beautifully finished outside posts for your tufted headboard.
Building the Sturdy Center Panel of Your Headboard
With the posts complete, our focus now shifts to constructing the main frame for the upholstered section of your headboard. This center panel will not only provide the structure but also frame the luxurious velvet tufted insert.
Begin by carefully lining up three key pieces: the top center panel piece, the routed trim piece, and the center panel top rail. It’s crucial to ensure a precise 3/4-inch offset on each side of the routed trim piece as it sits against the top center panel. This offset creates a subtle shadow line and adds depth to the design, contributing to the overall refined appearance of your DIY headboard.
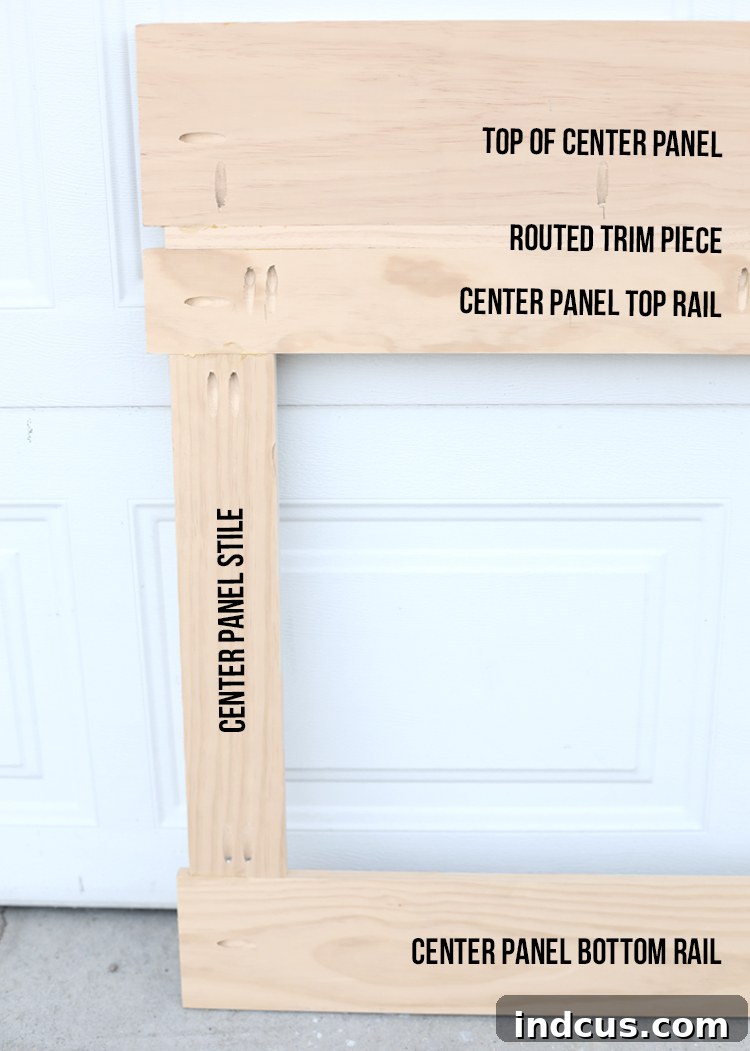
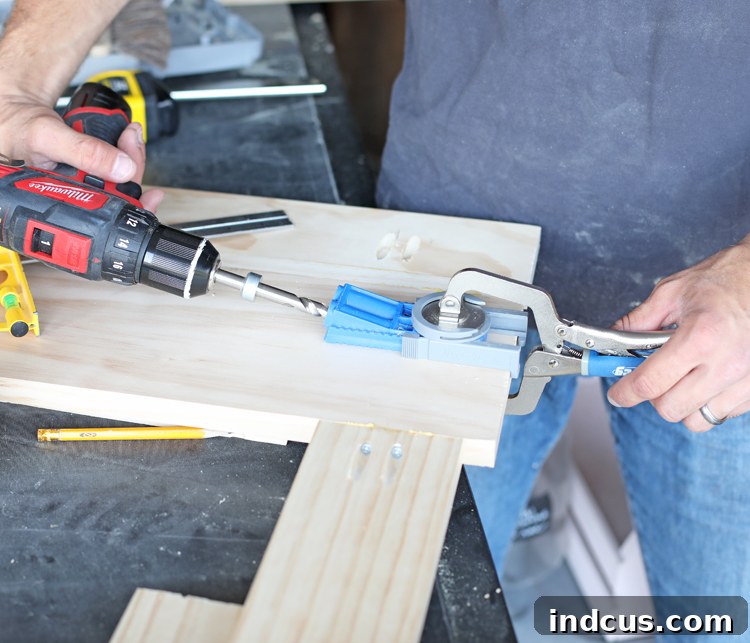
Once you have achieved perfect alignment, apply wood glue to the joining surfaces. Clamp these pieces together securely, allowing the glue to set. For a strong and lasting connection that remains concealed, use pocket screws from the back side of the assembly. Pocket hole joinery is an excellent choice for this application as it provides exceptional strength without visible fasteners on the front face of your headboard.
Bringing It All Together: Headboard Assembly
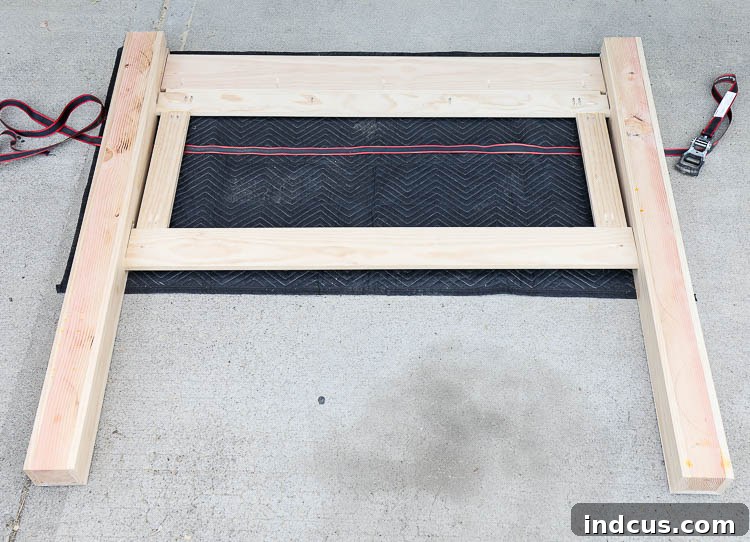
The core structure of your DIY upholstered headboard truly begins to take shape in this assembly phase. Start by attaching the Center Panel Stiles to the Center Panel Top Rail. Apply wood glue to the joint surfaces, then secure them firmly with pocket screws. Ensure the Stiles are offset 3/4 inch from the ends of the rail; this precise offset is critical for the subsequent integration with the outside posts. Next, attach the Stiles to the Center Panel Bottom Rail using the same glue and pocket screw method, maintaining the identical 3/4-inch offset.
Once these steps are complete, your center panel, viewed from the back, will clearly display the sturdy frame. The large rectangular opening in the middle is specifically designed to accommodate the luxurious upholstered panel you’ll create later.
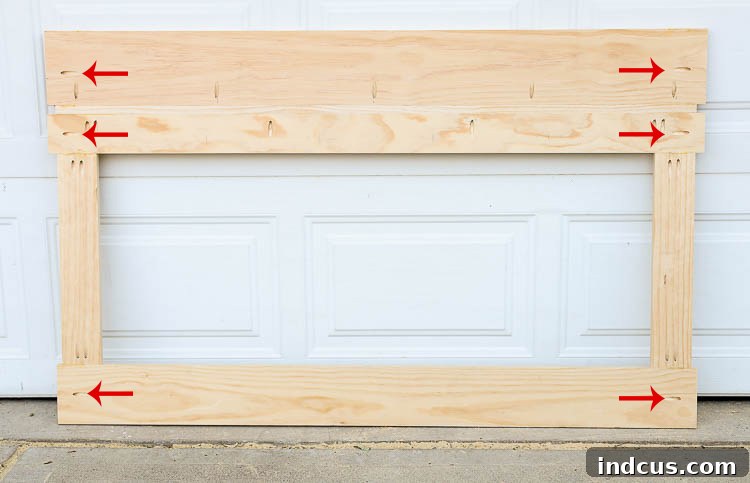
Notice the pre-drilled, empty pocket screw holes indicated by the red arrows in the diagram above. These are intentionally left open at this stage and will be vital for attaching the entire center panel assembly to the outside posts, providing a robust and invisible connection.
The next crucial step is to merge the center panel with the two outside posts. Apply a generous amount of wood glue into the two mortise slots on one of the prepared posts. Carefully slide the center panel’s stiles into these mortises, ensuring a snug fit. This interlocking joint, reinforced with glue, forms a very strong connection.
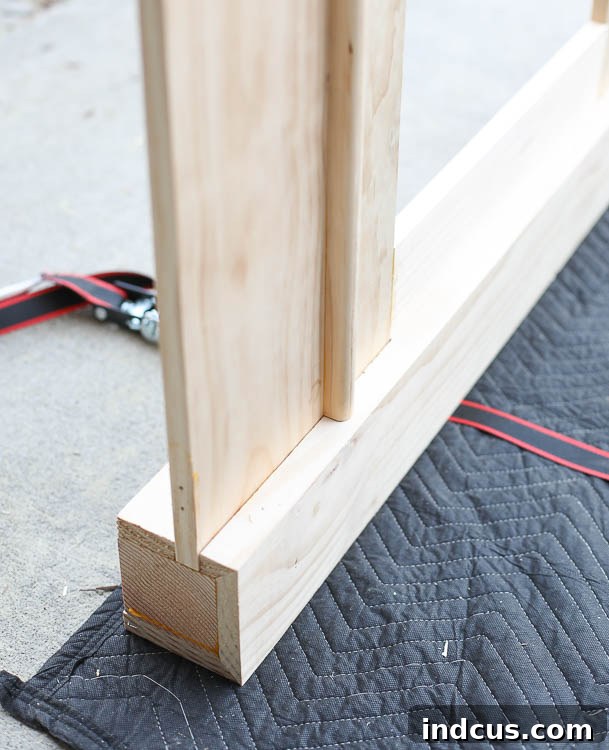
Repeat this process for the other side, attaching the second outside post to the center panel. Once both posts are in place, use a sturdy band clamp to draw the entire headboard assembly together, ensuring all joints are tight and square. While the band clamp holds everything securely, insert and tighten screws into those previously mentioned empty pocket holes on the back of the center panel. This creates a powerful, hidden connection between the center frame and the posts, making your headboard incredibly stable.
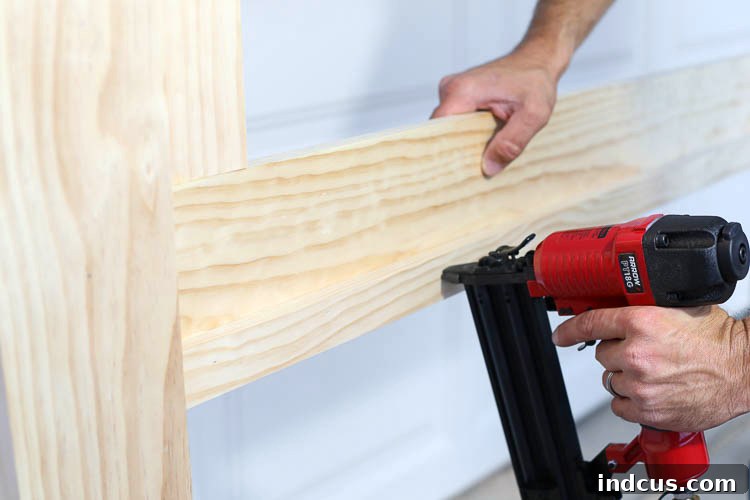
With the main structure assembled, stand the headboard upright. Apply wood glue along the top edge of the headboard and carefully align the top trim piece. This piece adds a finished look and provides the foundation for the crown molding. Nail it securely into place using your Arrow brad nailer, ensuring the nails are flush with the surface.
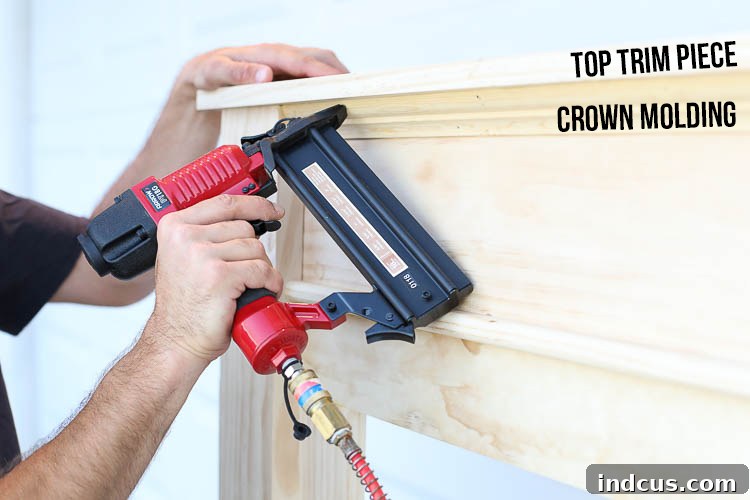
For an extra touch of classic elegance, add the crown molding. Apply glue to the back of the Crown Molding piece. Fit it snugly underneath the lip of the top trim piece, ensuring a seamless transition. Once perfectly positioned, nail it down with your brad nailer. This detail significantly enhances the luxurious appearance of your wood headboard.
We also incorporated an optional Bottom Filler Piece along the very bottom edge of our headboard. This serves a practical purpose: it helps to close any potential gap between the headboard and your mattress, preventing small items from falling into inaccessible spaces behind the bed. It’s a thoughtful addition for both aesthetics and functionality.
Next, we added interior trim to the inside edges of the center opening. This trim serves a dual purpose: it’s decorative, providing a neat frame for the upholstered panel, and it also creates a surface to which the upholstered panel will be securely attached. Cut picture frame style molding with precise 45-degree mitered corners to fit perfectly around all four sides of the opening.
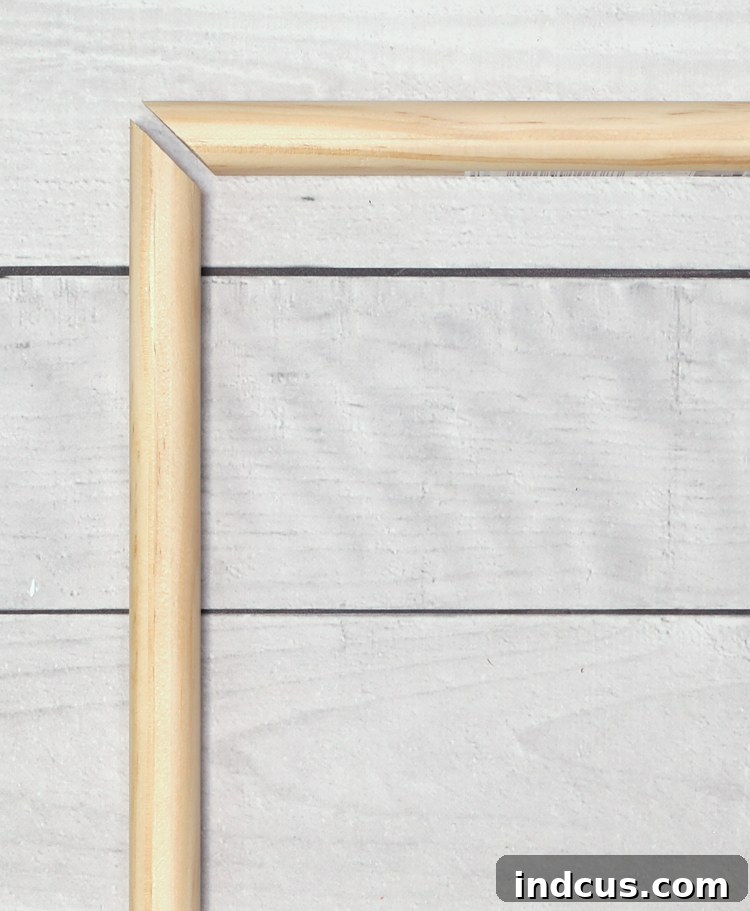
Attach this interior trim to the center panel stiles and rails with a 3/8-inch offset from the back of the wood. This intentional offset creates a small, recessed groove or lip. This groove is where your finished upholstered panel will sit, allowing it to be securely mounted flush with the front of the trim, resulting in a clean and professional appearance for your velvet tufted headboard.
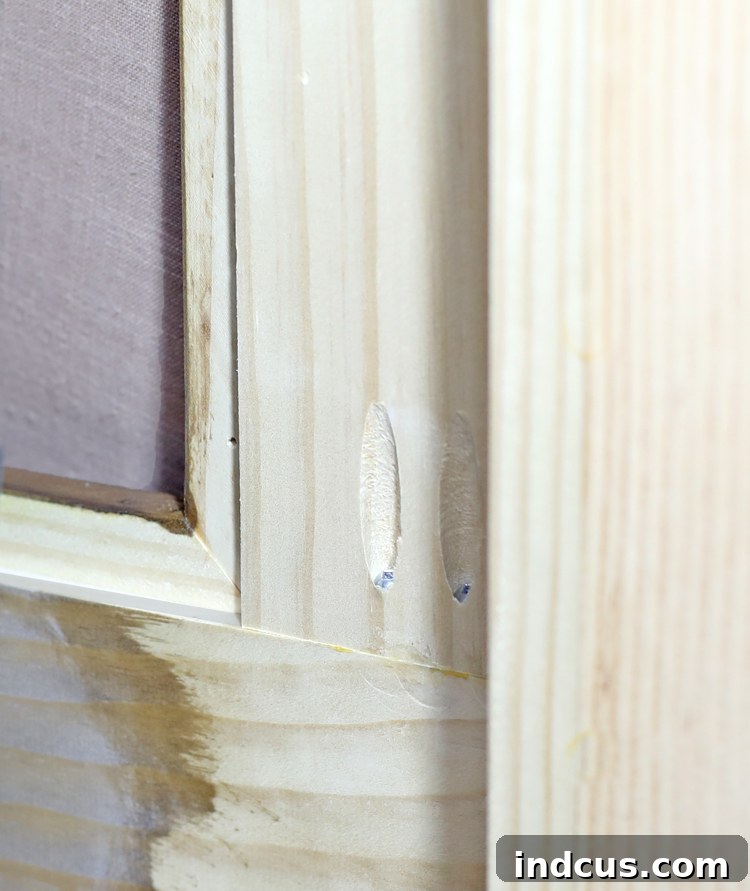
Finishing Touches: Preparing Your Headboard for Staining
With the structural assembly complete, it’s time to prepare your DIY wood headboard for its stunning finish. This stage is crucial for achieving a professional, smooth, and beautiful appearance. Start by meticulously filling any nail holes, minor gaps, or other imperfections with wood putty. Allow the putty to dry completely according to the manufacturer’s instructions.
Once dry, begin sanding the entire headboard. This should be a gradual process, starting with a coarser grit sandpaper (e.g., 80 or 100) to remove any major marks or unevenness, and progressively working your way up to finer grits (like 120, 180, and finally 220 grit). The goal is to achieve an incredibly smooth surface, which is essential for even stain absorption and a luxurious feel. After sanding, thoroughly clean the headboard to remove all dust, as any lingering particles can affect the stain application.
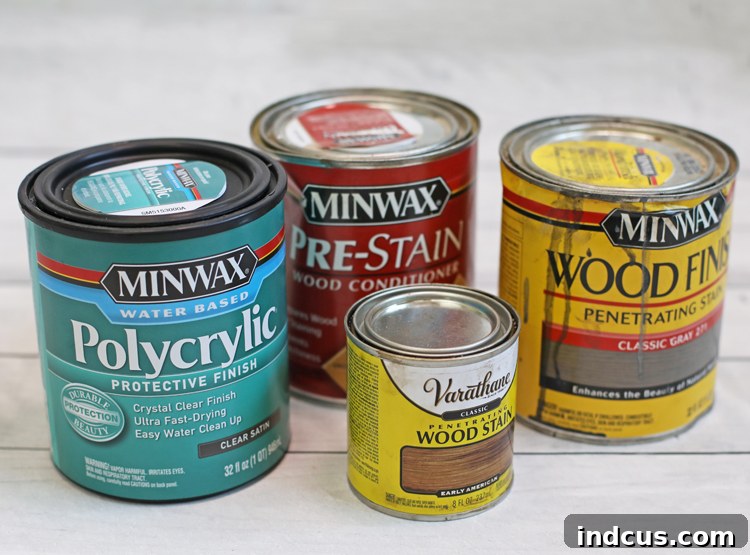
Next, apply a coat of wood conditioner. This step is often overlooked but is vital, especially when working with pine, which can sometimes absorb stain unevenly, leading to blotchiness. The conditioner helps to prepare the wood fibers, ensuring a more consistent and beautiful stain application. Allow the conditioner to penetrate for the recommended time before wiping off any excess.
Now, apply your chosen wood stain. We achieved a rich, layered effect by first applying Varathane Early American, allowing it to dry, and then following up with a coat of Minwax Classic Gray. This combination created a sophisticated, aged look that perfectly complements the velvet upholstery. Experiment with stain colors on scrap wood to find your ideal shade.
Finally, protect your beautiful work with a top coat of Polycrylic in a satin finish. Apply several thin coats, allowing each to dry completely and lightly sanding with a fine-grit sandpaper (e.g., 320 or 400) between coats for maximum smoothness and durability. This protective layer will shield your headboard from wear and tear, ensuring it remains a stunning centerpiece for years to come.
Crafting the Luxurious Velvet Tufted Upholstery Panel
The velvet tufted center is the heart of this luxurious headboard, adding unmatched comfort and sophistication. This section will guide you through creating this exquisite upholstered panel.
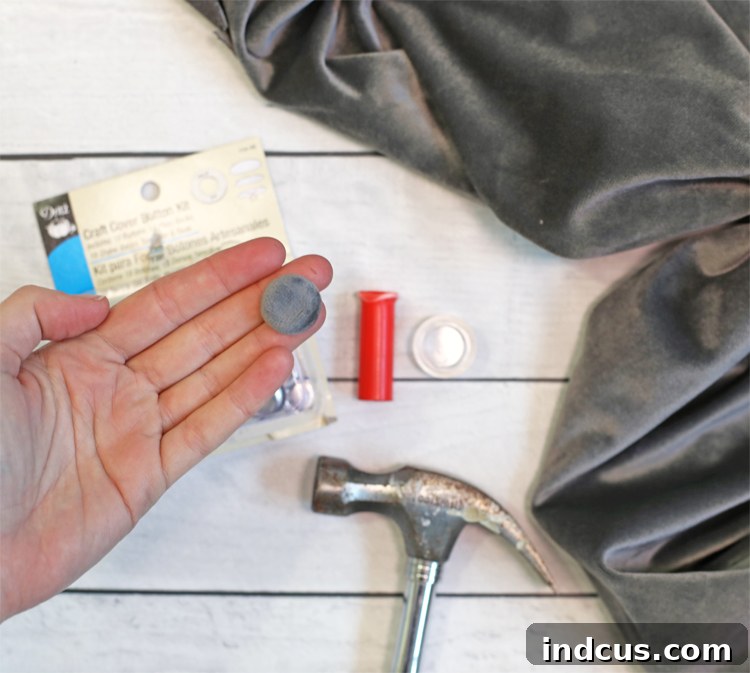
The first step is to create custom covered buttons that perfectly match your chosen upholstery fabric. You can easily find an upholstery button covering kit at any craft store. These kits typically come with straightforward instructions; simply follow the directions on the back of the package. You’ll be amazed at how simple it is to produce beautiful, professional-looking buttons that seamlessly blend with your velvet fabric. This small detail makes a huge difference in the overall finished look of your tufted headboard.
Next, it’s time to prepare the base for your tufted panel. Decide on your desired tufting pattern—a classic diamond pattern is always elegant—and meticulously mark out the placement of each button onto your cut plywood piece. Precision here is key for an even and aesthetically pleasing tuft. Using a drill with a 1/4-inch drill bit, create holes through the plywood at each marked point. These holes will serve as guides for your tufting needle.
Cut a piece of 1-inch upholstery foam approximately 3/4 of an inch smaller than the plywood on all sides. This slight reduction allows the foam to compress and conform without spilling over the edges when the fabric is pulled taut. Securely glue the foam in place onto the plywood. Once the glue has dried, poke through the foam at each drilled hole from the back of the plywood; this makes it much easier to guide your long upholstery needle through the layers later.
Now, lay a layer of quilt batting smoothly over the foam. The batting helps to soften the edges of the foam and creates a smooth transition for the fabric, preventing any sharp lines. Finally, drape your elegant velvet upholstery fabric over the batting, ensuring it is centered and smooth, ready for the tufting process.
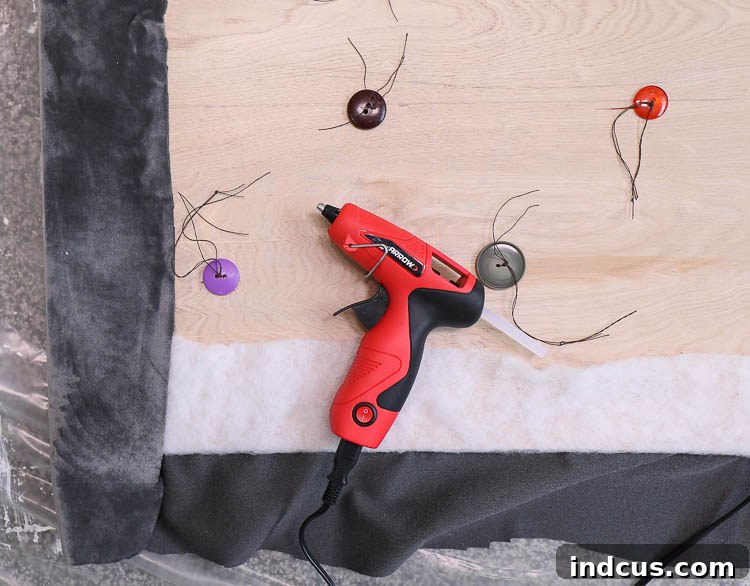
Now comes the exciting part: tufting! Using strong upholstery thread and a long, sharp upholstery needle, begin working from the back of the plywood. Push the needle up through the drilled hole, piercing through the foam, batting, and fabric. Thread one of your custom-covered buttons onto the needle, then push the needle back down through the fabric, batting, foam, and out through the same hole in the plywood, or a very close adjacent one.
On the back side of the plywood, thread both ends of the upholstery thread through a large, flat-backed button. Pull the thread tightly, applying firm pressure until the covered button on the front side is deeply recessed, creating the characteristic tufted dimple. This tension is crucial for achieving that luxurious, sculpted look. Secure the thread with a strong double knot around the flat-backed button for durability. Repeat this process for all button holes, starting from the center of your panel and working your way outwards. As you go, continuously smooth out the upholstery fabric, ensuring there are no unwanted puckers or wrinkles between the tufts. Patience and attention to detail here will result in a flawlessly tufted velvet headboard.
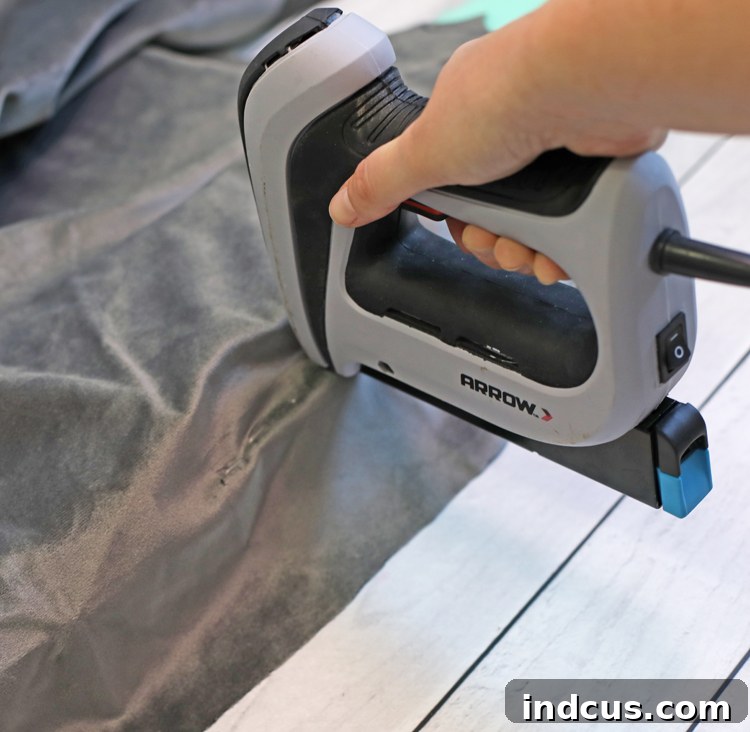
Once all the tufting is complete, it’s time to secure the fabric around the edges of your panel. Load your Arrow Electric Staple Gun with 1/4-inch staples and begin stapling the excess fabric down to the back of the plywood, working your way around the perimeter. As you staple, continuously pull the fabric taut and smooth, ensuring there are no loose areas or bumps on the front side of the panel. Don’t hesitate to remove staples and re-staple if you encounter any bunched-up fabric; a smooth, clean edge is paramount for a professional finish.
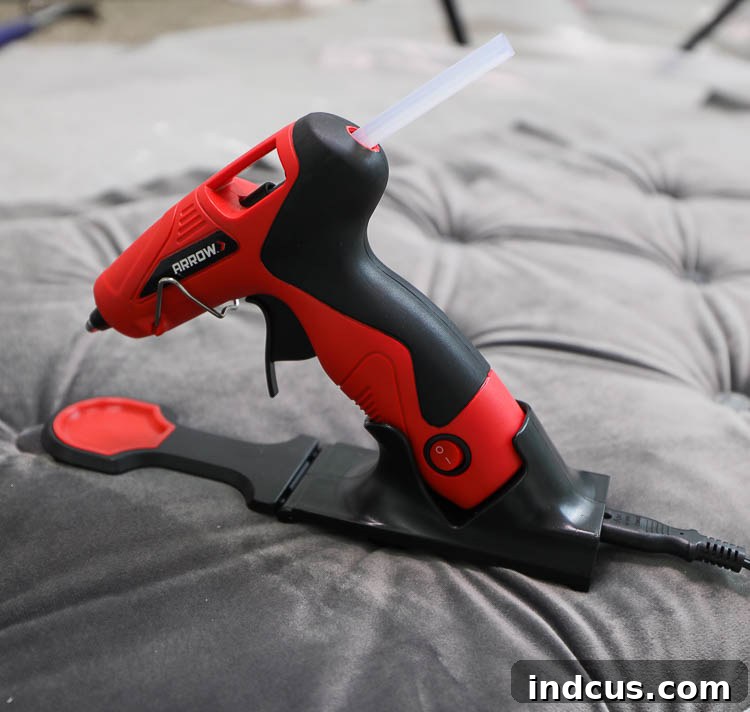
For the final neatening touch on the back of your upholstered panel, our Arrow MiniPlus Glue Gun truly shines. This particular model is a game-changer; it features a corded base that allows you to plug it directly into the gun for continuous use, or unplug it to go cordless for up to five minutes of uninterrupted work. Crucially, it boasts a drip-free design, which is a blessing when working on upholstery projects! This exceptional tool is perfect for gluing down any excess batting and fabric on the back of the panel, ensuring it lies flat and doesn’t flap around. This creates a tidy, finished look even on the unseen side.
The very last step in completing your DIY upholstered headboard is to permanently attach the finished velvet tufted panel into the center opening of your wooden frame. Carefully set the upholstered panel into the recessed groove created by the interior trim. Ensure it sits flush and centered. Then, working from the back of the headboard, use 5/8-inch brad nails to shoot through the plywood backing of the upholstered panel and into the Upholstered Panel Frame Trim. These smaller nails provide a secure, yet discreet attachment, locking your plush panel firmly into its elegant wooden frame.
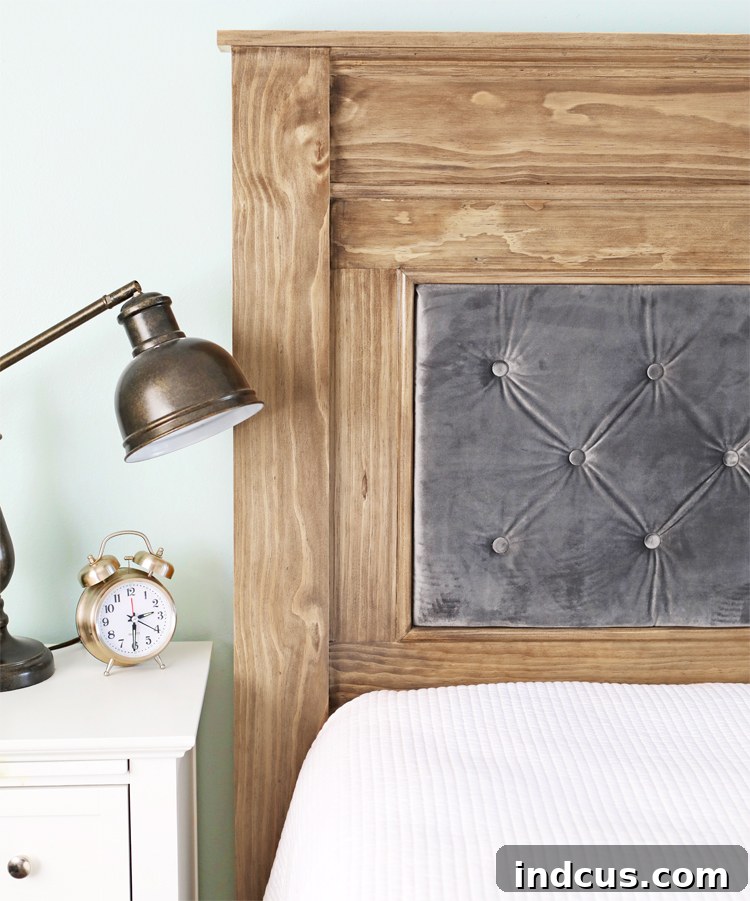
Once your exquisite DIY wood and velvet tufted headboard is complete, you have a couple of options for installation. You can either attach it directly to your wall for a floating look or, for a more traditional setup, screw standard bed rails into the sturdy outside posts. No matter which method you choose, ensure it’s securely fastened for safety and stability.
Finally, all that’s left is to make your bed with fresh linens and stand back to admire your beautiful new custom headboard! Enjoy the luxurious comfort and sophisticated style you’ve brought to your bedroom with your own hands. This handmade piece will undoubtedly be a cherished addition to your home decor for years to come.
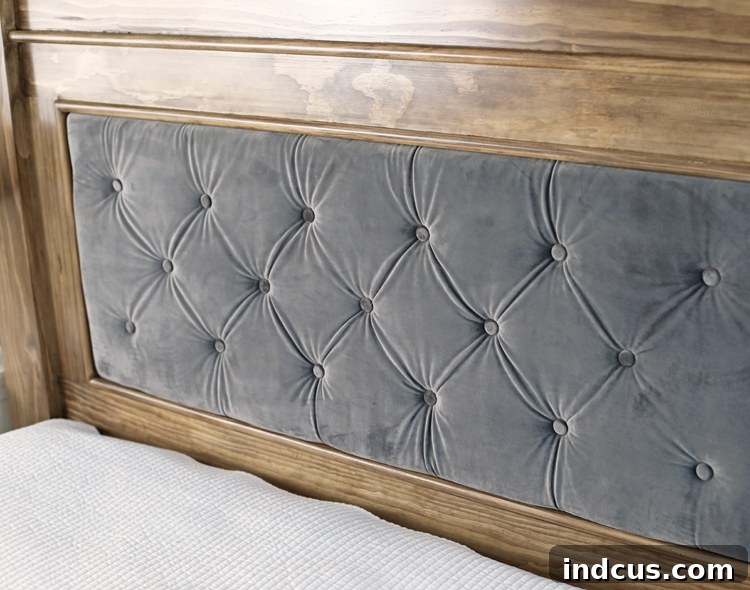
DIY Headboard VIDEO Tutorial: Watch the Process Unfold
Prefer to see the steps in action? Our comprehensive video tutorial walks you through every stage of building this elegant wood and velvet tufted headboard. From cutting the wood to the final upholstery details, this video provides visual guidance to complement our written instructions, ensuring you have all the support you need for your DIY project.
Be sure to visit Arrow Fastener for more awesome DIY building project ideas and discover tools that empower your creativity.







