
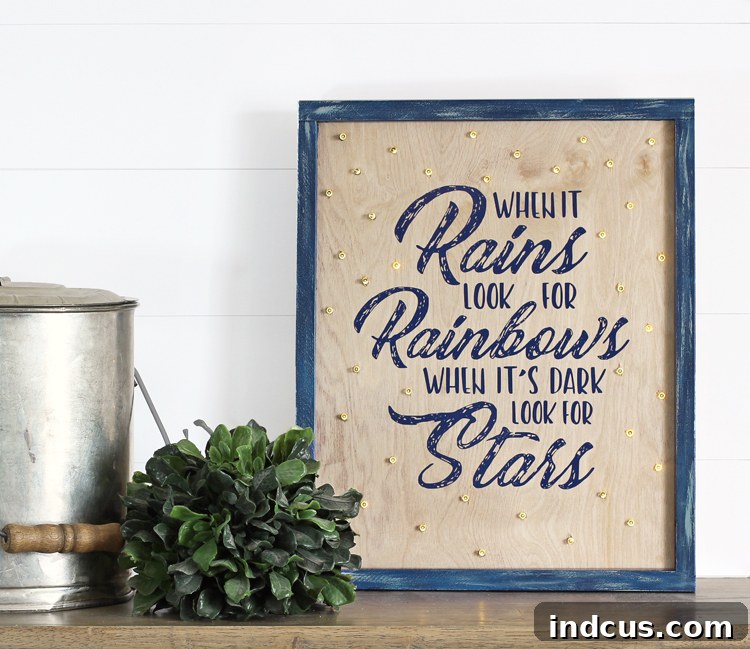
Craft Your Own Enchanting Farmhouse Sign with Twinkling LED Lights – A Comprehensive DIY Guide
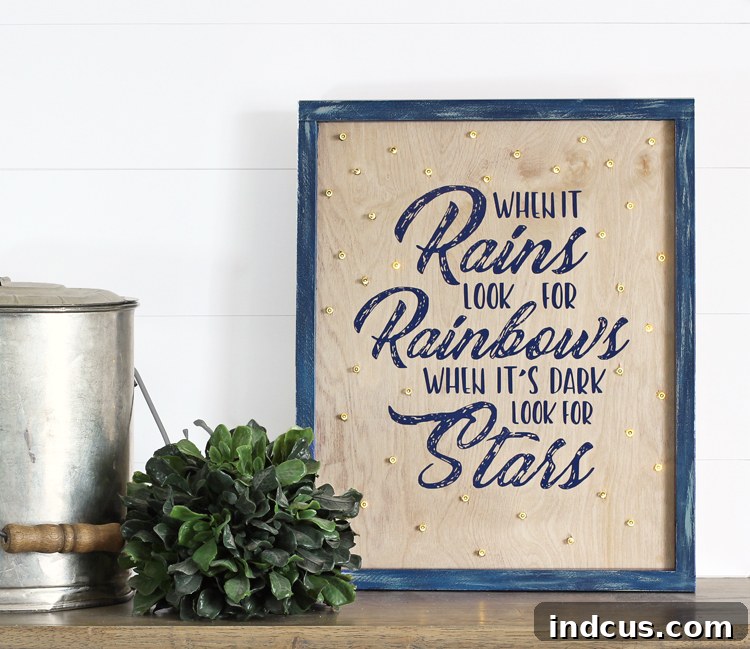
There’s an undeniable charm that a beautifully crafted wooden sign brings to any home. From rustic farmhouse aesthetics to modern minimalist designs, these personalized pieces of decor effortlessly add warmth, character, and a touch of individuality to your living space. My fascination with wooden signs runs deep; I find immense joy in creating them, whether to adorn my own home or to gift them to loved ones. The possibilities for personalization are truly endless, allowing each sign to tell its own unique story.
Today, we’re taking this popular craft project to the next level by incorporating a magical element: twinkling LED lights. Imagine the cozy glow and inviting ambiance a lighted sign can create, transforming a simple piece of wood into an eye-catching focal point. This guide will walk you through the surprisingly simple steps to create your very own lighted farmhouse sign, a project perfect for beginners and seasoned crafters alike. Get ready to illuminate your creativity and bring a touch of enchantment into your home!
Before we dive into the creative process, let’s gather all the essential materials you’ll need. Preparing everything beforehand ensures a smooth and enjoyable crafting experience.
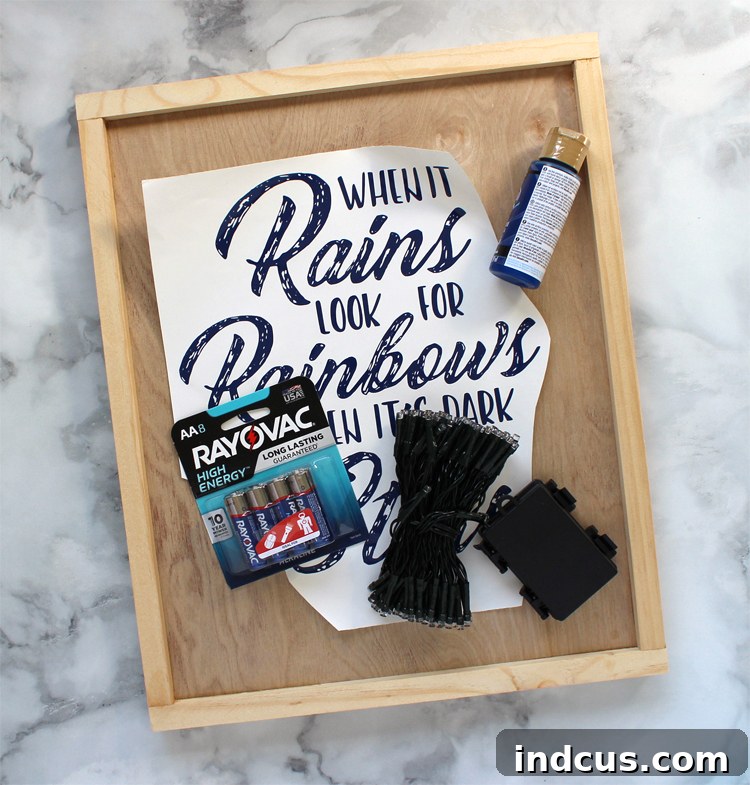
Materials You’ll Need:
- Vinyl Quote Design: DOWNLOAD THE FREE PNG DESIGN HERE. This design is perfect for use with popular craft cutting machines like Silhouette or Cricut. If you don’t have a cutting machine, consider using stencils or pre-cut vinyl letters.
- Wooden Sign Blank: You can purchase a ready-made wooden sign from most craft stores, often available in various sizes and finishes. Alternatively, if you’re handy with wood, you can easily DIY one from a suitable piece of lumber. Ensure it has enough depth to accommodate the lights.
- Craft Paint/Stain: Choose colors that complement your home decor or the intended recipient’s style. Acrylic paints are versatile and widely available. Consider chalk paint for a distressed look or wood stain for a more natural finish.
- Battery-Operated LED Twinkle Lights: This is a crucial element for safety and aesthetic. *Always use cool-touch LED lights* to prevent overheating, which can pose a fire risk. Opt for a shorter strand (e.g., 20-50 lights) for most standard signs to avoid excess wiring and a cluttered back.
- Batteries: Ensure you have the correct type and quantity of batteries for your chosen LED light strand.
- Craft Cutting Machine & Supplies (Optional but Recommended): For cutting the vinyl quote (e.g., Silhouette Cameo, Cricut Explore Air), permanent adhesive vinyl, weeding tools, and transfer tape.
- Drill & Drill Bits: You’ll need a drill and a drill bit that matches the size of your LED light bulbs.
- Pencil: For marking light placement.
- Strong Adhesive Tape: To secure the battery pack to the back of your sign.
- Sandpaper (Optional): For smoothing wood surfaces or distressing finishes.
- Protective Eyewear: Essential for safety when drilling.
My husband kindly crafted the wooden sign blank for this project, but as mentioned, buying one is a perfectly valid and convenient option. Most craft stores carry a diverse selection of unpainted wooden signs, allowing you to choose the perfect size and style for your project. When selecting your lights, I initially made the mistake of buying a 100-light strand, which was far too many for a single sign! A shorter strand will give you a cleaner finish and prevent overcrowding. Remember, the golden rule for this project is to *only use cool LED lights* to ensure safety and longevity.
Step-by-Step Instructions to Create Your Lighted Farmhouse Sign:
Step 1: Prepare Your Sign’s Background (Paint or Stain)
This is where your sign’s personality begins to shine. If you desire a specific background color or finish, now is the time to apply it. Begin by lightly sanding the wooden surface if it feels rough, then wipe away any dust. If you’re working with raw wood, you might want to apply a wood conditioner before staining for a more even finish. For paint, apply thin, even coats, allowing each layer to dry completely before adding the next. If you’re opting for a distressed look, chalk paint works wonderfully, or you can apply a base coat, then a top coat, and sand areas to reveal the underlying color. My sign had a beautiful natural wood grain, so I chose to leave its background raw, embracing its organic beauty.
Step 2: Apply Your Vinyl Design
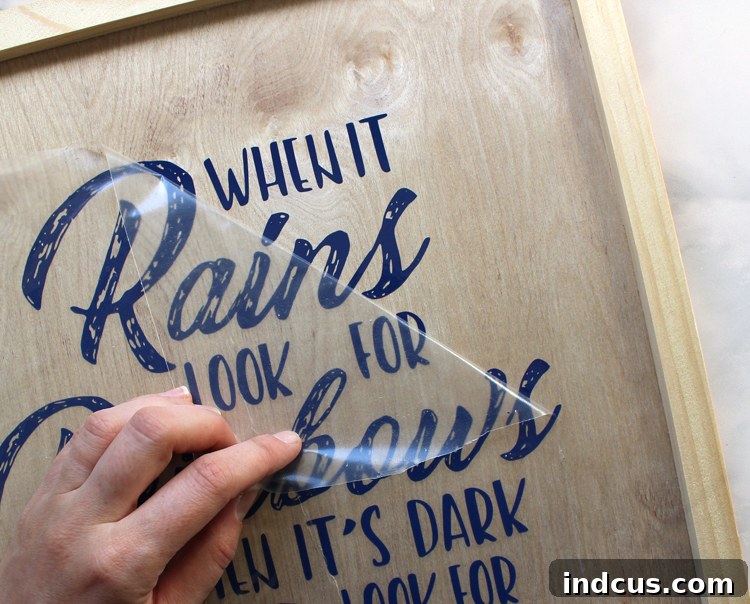
Download the free PNG design provided in the materials list. Open this design in your craft cutter’s software (like Silhouette Studio or Cricut Design Space). Trace the image to create cut lines, then size it appropriately for your sign. Cut the design from permanent adhesive vinyl. Permanent vinyl is recommended for signs that will see continuous display, as it offers better durability. Once cut, carefully “weed” the excess vinyl, leaving only your desired quote on the backing paper. Use transfer tape to meticulously lift the vinyl design and apply it smoothly to your prepared sign. Take your time during this step to ensure proper alignment and to prevent air bubbles.
Step 3: Mark the Light Placement
With your vinyl design in place, it’s time to decide where your lights will twinkle. Use a pencil to lightly mark the spots where you want each LED bulb to emerge. You can aim for an evenly spaced grid pattern or a more organic, random scattering around the words. Achieving a visually pleasing, balanced distribution can be trickier than it sounds, so don’t be afraid to experiment with your pencil marks and erase as needed. Consider where the lights will best highlight the message or add to the overall aesthetic without overwhelming the text.
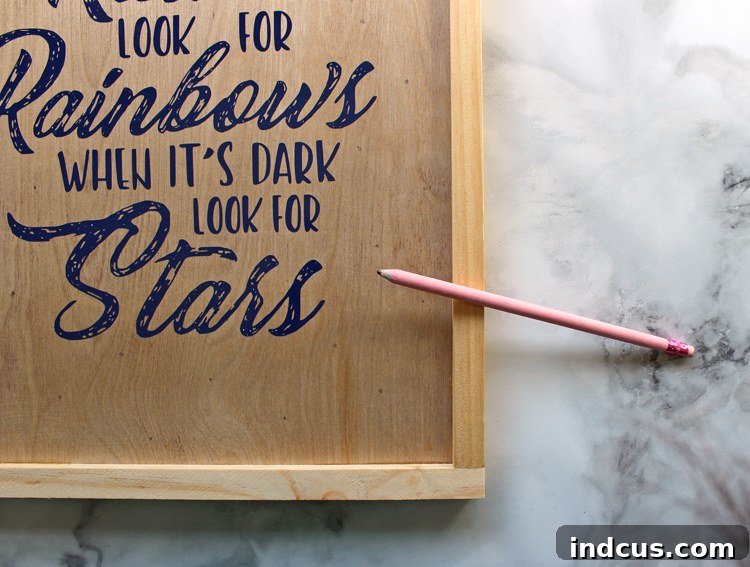
Step 4: Finish the Outer Frame (If Applicable)
If your sign has a separate outer frame, now is a great time to paint or stain it. This can add a lovely contrasting element or complement the background. For my sign, I applied a rich coat of navy blue to the frame, then delicately whitewashed over it. This technique added depth and character, giving it a beautifully aged, farmhouse-inspired look. You can experiment with dry brushing, distressing with sandpaper, or layering different colors to achieve your desired effect.
Step 5: Drill Holes for the Lights
Safety is paramount in this step. Always wear protective eyewear before operating a drill. Select a drill bit that precisely matches the diameter of your LED light bulbs. It’s crucial that the lights fit snugly into the holes, staying in place without falling out, but also without requiring excessive force. Before drilling into your sign, *always test your chosen drill bit on a piece of scrap wood*. This allows you to verify the fit and adjust if necessary. Once you’re confident in your drill bit size, carefully drill holes at each of your pencil marks. Go slowly and maintain a steady hand to avoid splintering the wood. If splintering occurs, a small piece of painter’s tape over the drill site can sometimes help for subsequent holes.
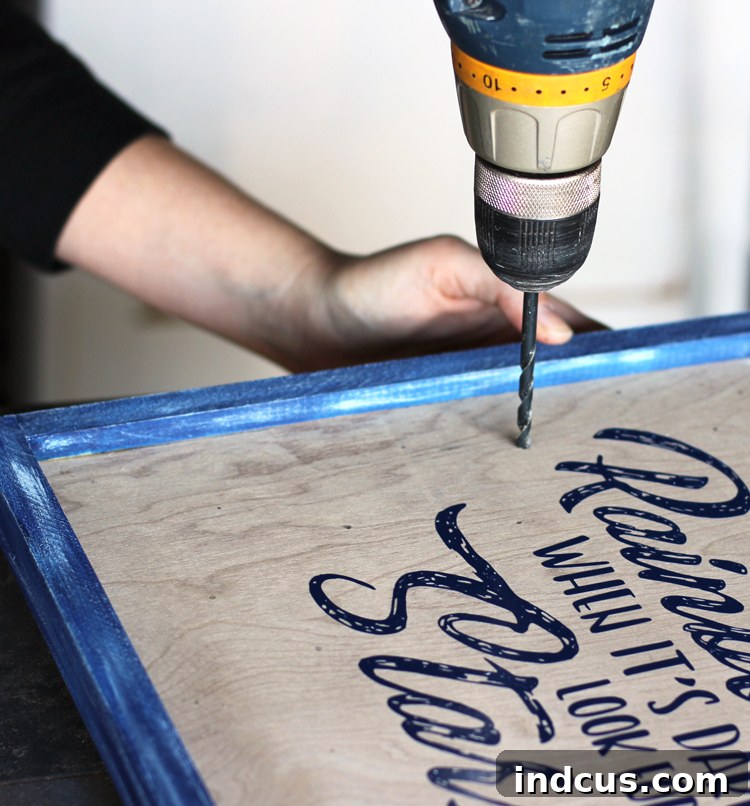
Take your time with each hole, ensuring clean entry and exit points to preserve the sign’s finish.
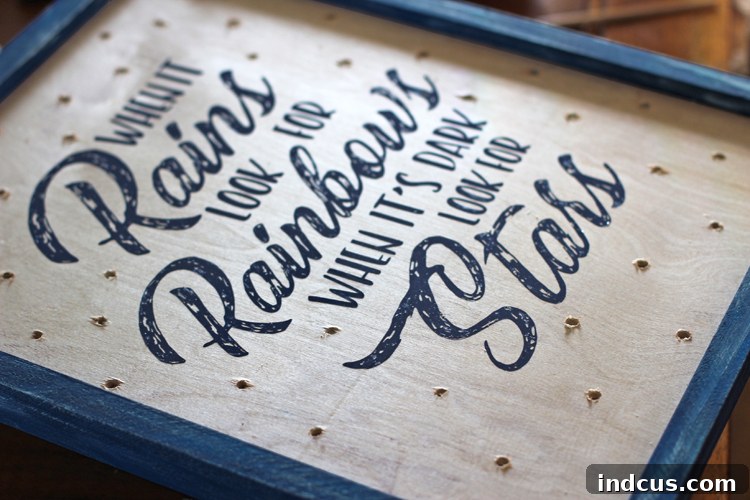
Step 6: Insert the Twinkle Lights
Now for the magical part! Starting from the back side of your sign, carefully poke each individual LED light bulb through its designated hole to the front. Ensure the bulb head is flush with the front surface of the sign. As you go, manage the excess wire on the back of the sign to keep it as tidy as possible. If you have a long strand, you might need to loop and secure sections of wire to prevent tangles and ensure a neat finish.
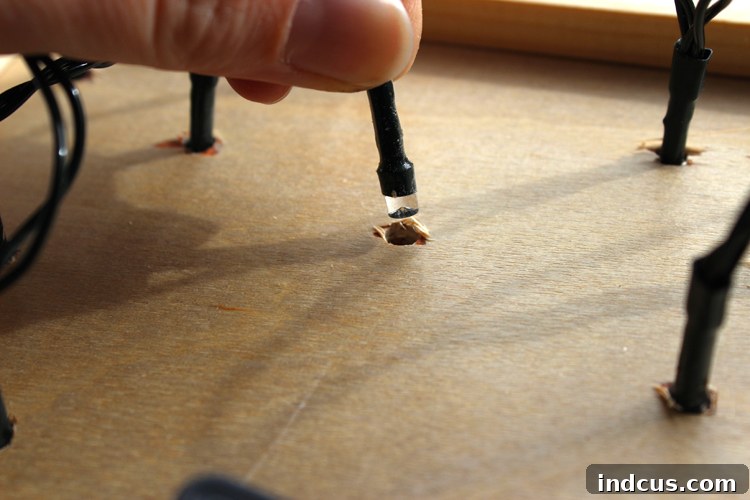
Step 7: Secure the Battery Pack
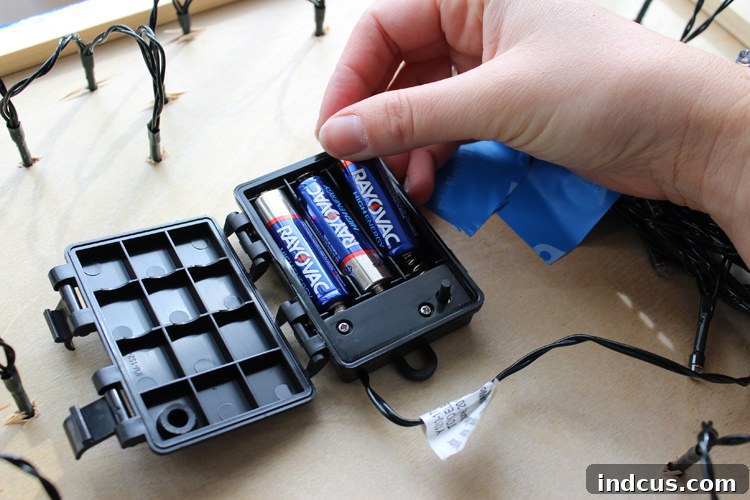
Once all your lights are in place, insert the batteries into their case. Locate a discrete spot on the back of your sign to secure the battery pack. Use strong adhesive tape, such as heavy-duty double-sided tape, hot glue, or even Command Strips, to attach it firmly. The key here is to secure it in a way that allows you to easily access the battery pack for future battery replacements without damaging the sign or the wiring. Neatly tape down any remaining loose wires on the back to prevent snags and maintain a clean appearance.
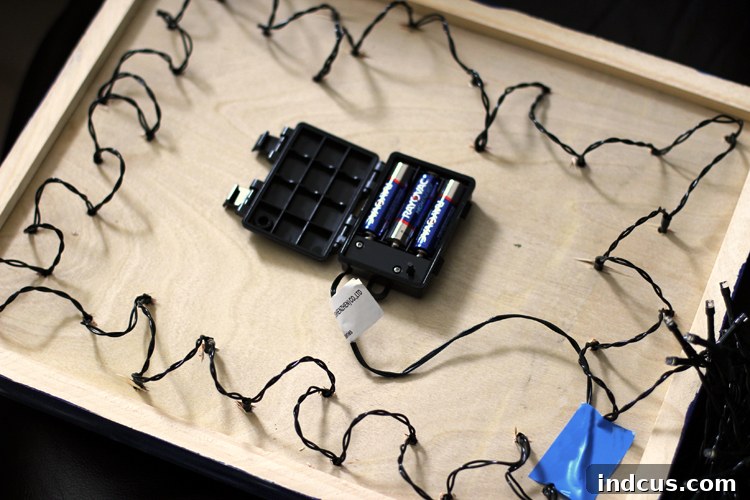
And there you have it! All that’s left is to flip the switch and revel in the enchanting, magical glow of your brand new, handmade lighted farmhouse sign. This project is not only incredibly satisfying to create but also adds a unique and personalized touch to any room. Imagine it gracing your entryway, illuminating a cozy reading nook, or adding a festive sparkle to a holiday display. These lighted signs also make exceptional, heartfelt gifts that truly stand out.
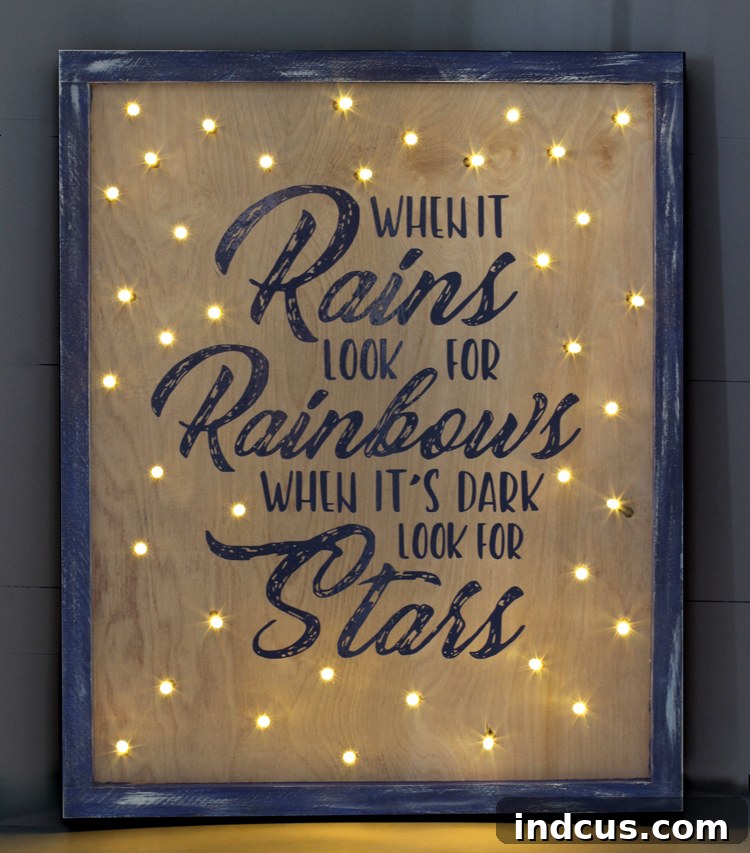
Experiment with different quotes, paint colors, and distressing techniques to match your evolving style. Whether you choose an inspirational message, a family name, or a seasonal greeting, the added twinkle of LED lights will undoubtedly elevate your creation. Happy crafting!







