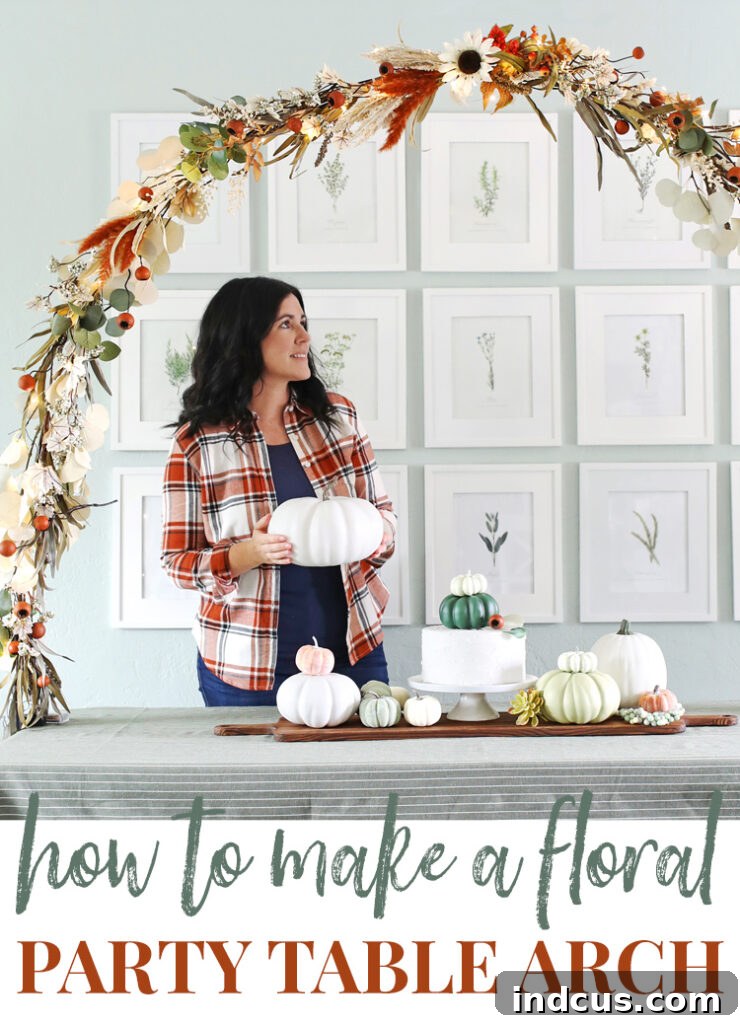
Create a Breathtaking DIY Tabletop Floral Arch: Your Ultimate Party Decoration Guide
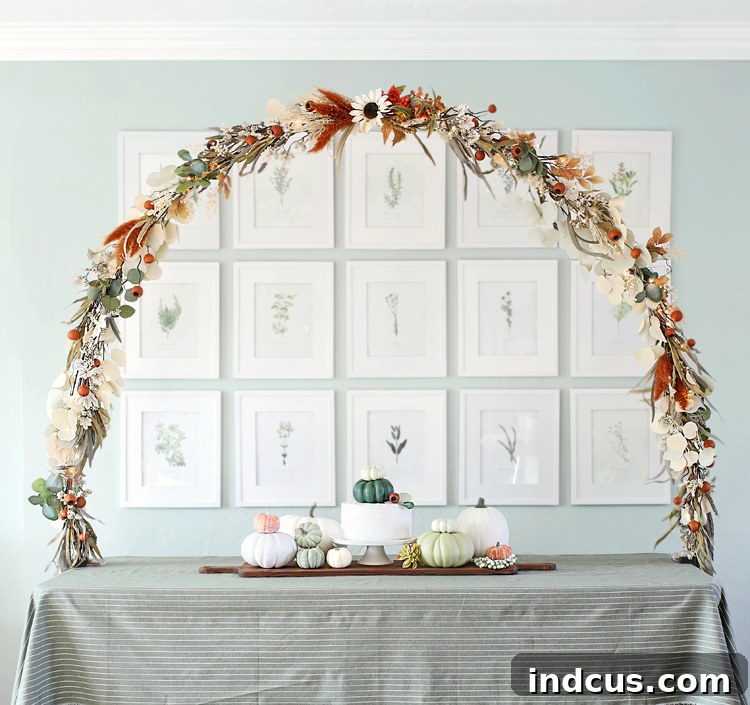
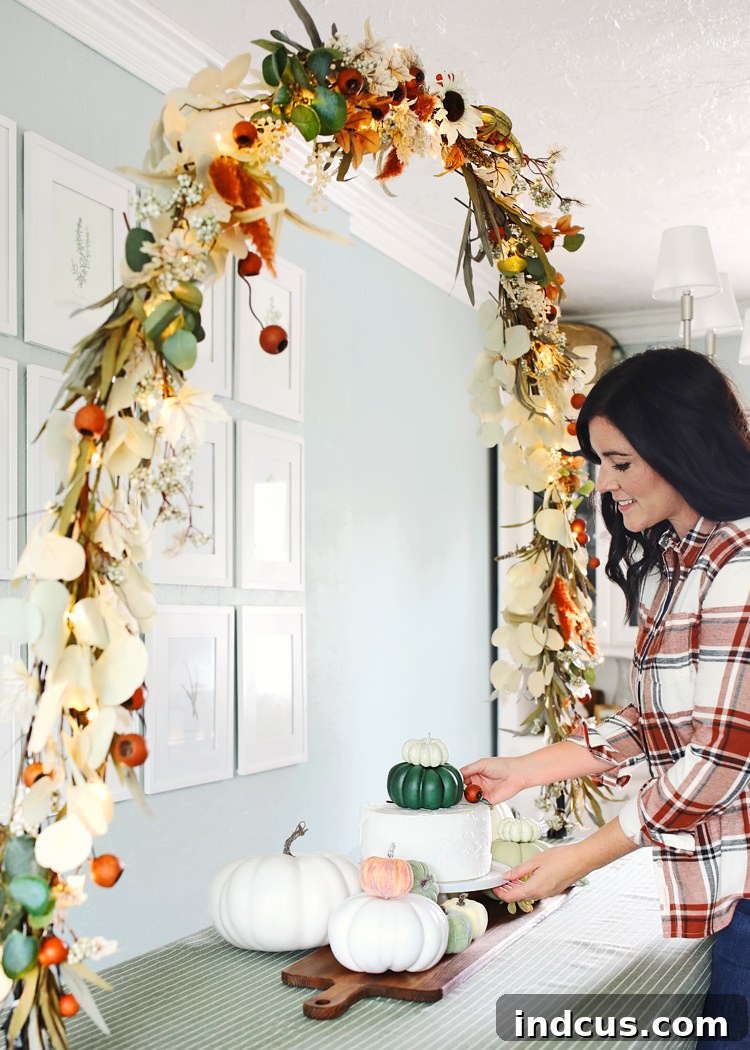
Are you searching for a truly unique and show-stopping decoration to elevate your next event? Look no further! Today, we’re thrilled to share an incredibly gorgeous DIY project: a magnificent floral arch designed to attach directly to your table. This elegant centerpiece is perfect for transforming any space, whether it’s the head table at a wedding, the buffet at a bridal shower, a birthday celebration, a baby shower, or a festive holiday gathering. Its adaptability is one of its greatest strengths – simply swap out the floral elements, and you can effortlessly tailor it to any season, theme, or special occasion. Imagine the enchanting ambiance a Christmas-themed version would create!
For this tutorial, we’ve styled our arch with a sophisticated autumn palette, featuring neutral fall florals in soft creams, crisp whites, serene sage greens, and just a few delightful pops of warm orange. The result is an absolutely captivating and refined autumn vibe that we are utterly smitten with. Ready to impress your guests and add a touch of professional elegance to your party? Let’s dive into the step-by-step process of how to craft this beautiful decoration yourself!
Why Choose a DIY Tabletop Floral Arch?
Beyond its undeniable beauty, a DIY tabletop floral arch offers numerous advantages for event planners and hosts:
- Unforgettable Focal Point: It instantly draws the eye, serving as a stunning backdrop for photos and conversations.
- Customization Galore: Unlike pre-made decorations, you have complete creative control over colors, flowers, and themes. Match it perfectly to your event’s aesthetic.
- Cost-Effective Elegance: Achieve a high-end, professionally decorated look without the hefty price tag often associated with custom floral arrangements.
- Versatile for Any Occasion: From intimate dinner parties to grand celebrations, this arch can be adapted for any scale or type of event.
- Space-Saving Solution: By utilizing vertical space above the table, it leaves valuable surface area free for food, drinks, or gifts.
- Reusable and Sustainable: With proper care, your arch kit can be dismantled and reused for countless future events, making it an eco-friendlier choice.
Essential Materials You’ll Need
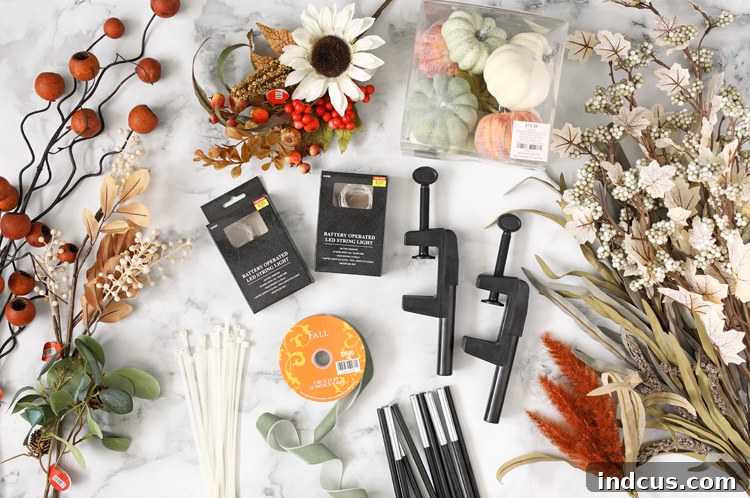
Gathering your supplies is the first exciting step. Here’s a comprehensive list to ensure you have everything on hand for your DIY floral arch. Remember, feel free to substitute florals to match your desired theme!
- Floral Stems & Greenery:
- Fig Berry Spray (adds texture and earthy tones)
- White Sunflower and Orange Berry Mini Spray (provides pops of color and classic autumn charm)
- Green and Gray Berry Spray (excellent for filling and adding varied green hues)
- Beige Eucalyptus Stem (offers a soft, neutral base and elegant drape)
- Beige Berry and Maple Leaf Bush (combines foliage and berries for rich texture)
- Burnt Sienna Sorghum Pick (adds height and a distinct rustic touch)
- White Berry and Brown Leaves Pick (delicate accents for contrast and detail)
- Eucalyptus Pick (essential for foundational greenery and aroma, if real)
- (Pro Tip: Purchase a variety of sizes and textures. Look for sales at craft stores or consider ordering in bulk online.)
- PARTY ARCH CLAMPS + POLE KIT (The essential framework for your arch; ensures stability and ease of assembly.)
- White Zip Ties (Your secret weapon for quick and secure floral attachment. Consider a pack with various lengths.)
- Black Duck Tape (Crucial for reinforcing the pole connections and preventing any unexpected collapses.)
- Fairy Lights(Two Sets recommended for ample illumination and sparkle. Choose battery-operated for convenience.)
- Wire Cutters (Indispensable for trimming floral stems and zip ties for a clean finish.)
Initially, I considered using elegant ribbon to camouflage the black metal pole, perhaps a gorgeous sage green velvet ribbon. However, once the florals were attached, I realized it wasn’t necessary, as the greenery beautifully concealed the structure. So, that lovely ribbon can now be saved for another exciting project!
And for those curious about the table styling, the foundational element is this charming Olive Woven Striped Duck Cloth Fabric tablecloth. Beneath the seasonal pumpkin centerpiece, a rustic wood charcuterie board adds another layer of warmth and texture.
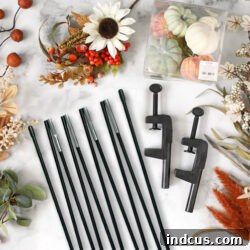
Recommended Arch Kit
For robust and reliable support, we highly recommend this Party Arch Clamps + Pole Kit. It’s the same kit used in this tutorial, ensuring a secure and beautiful foundation for your floral masterpiece.
This versatile arch kit isn’t just for florals! I’ve personally used it for various other events, demonstrating its incredible reusability. For another creative idea, you can see how I transformed it into a vibrant tabletop balloon party arch here.
Step-by-Step Instructions: Crafting Your Floral Arch
Follow these detailed steps to assemble your stunning tabletop floral arch. Precision and creativity will be your best allies here!
Step 1: Secure the Arch Clamps to Your Table
Begin by preparing your table. If desired, lay down your chosen tablecloth, ensuring it’s smooth and perfectly positioned. Next, take your arch clamps and attach one to each end of the table. Position them carefully over the tablecloth, making sure they are evenly spaced for visual balance and securely tightened. A stable foundation is key for your arch’s integrity, so double-check that the clamps won’t shift during your event.
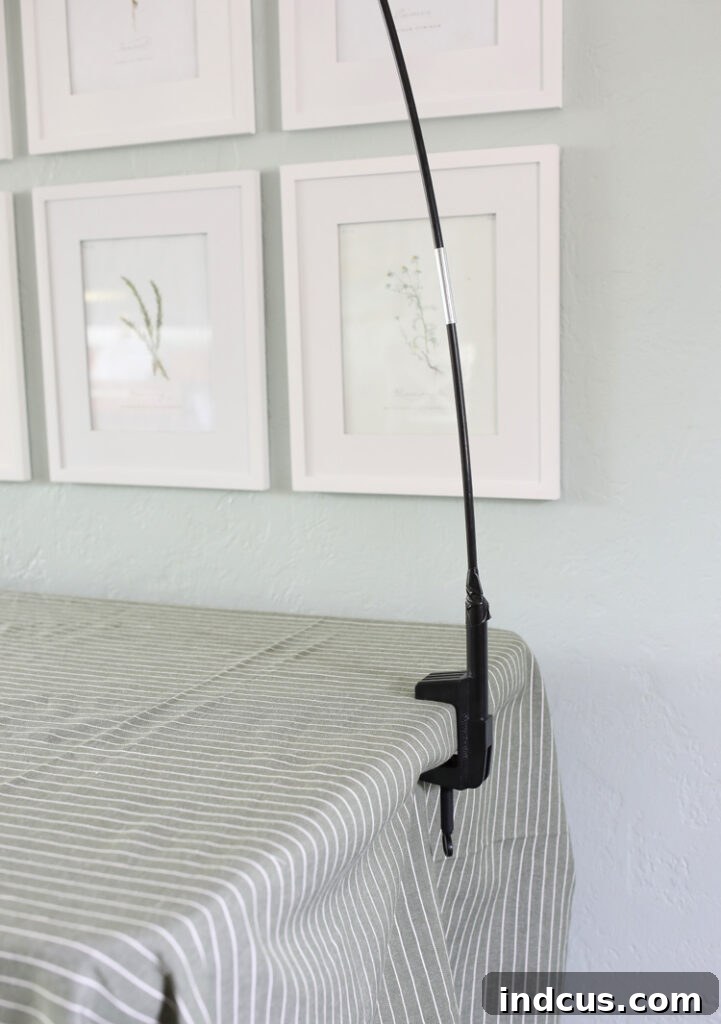
Step 2: Assemble and Secure the Arch Pole
The arch pole typically comes folded for easy storage. Unfold it completely, similar to how you would assemble tent poles, until it forms a single, long, curved rod. Carefully insert each end of this rod into the designated holes in the clamps you just secured. Once both ends are in place, firmly secure these connections with black Duck Tape. This step is critical; you absolutely don’t want the poles popping out in the middle of your party! The duct tape provides extra reinforcement, giving you peace of mind.
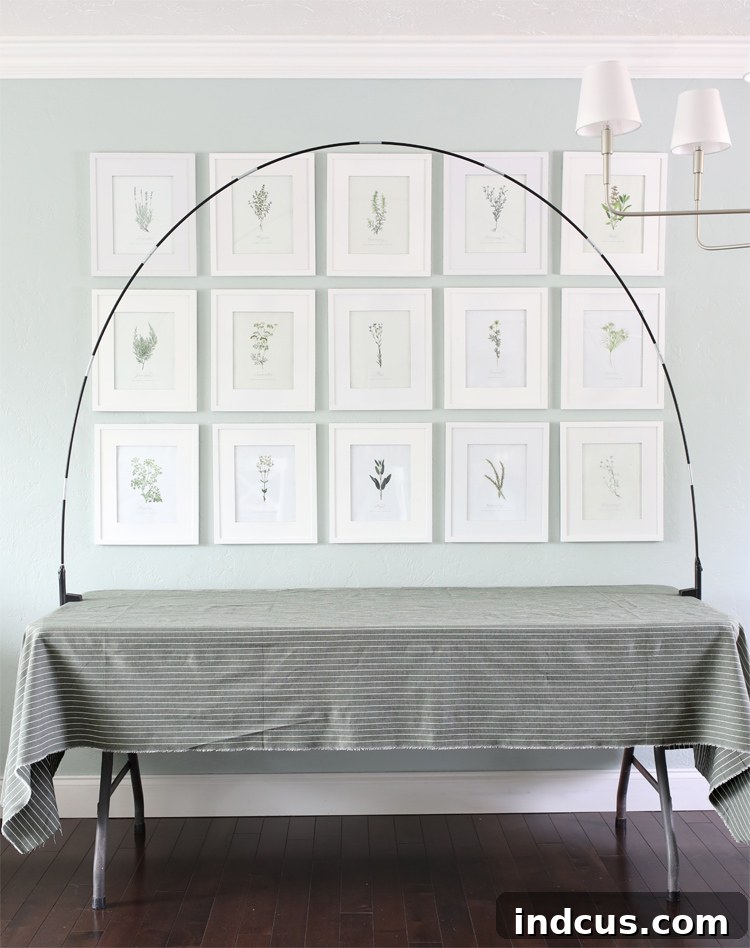
Step 3: Begin Attaching Your Floral Stems
Now for the creative part! Start attaching your selected floral stems to the arch using white zip ties. While florist wire is an option, zip ties are incredibly handy, easy to use, and provide a strong hold, making them highly recommended. Begin by layering your greenery to create a lush base, then add your larger focal flowers, and finally fill in with smaller blooms, berries, and textured picks. Remember, you can use your wire cutters to snip bushier floral stems into several smaller pieces. This allows you to spread these smaller elements throughout the arch, achieving a more balanced, natural, and full look. Work in sections, stepping back frequently to assess the overall shape and density, ensuring an even distribution of colors and textures.
Step 4: Weave in the Enchanting Fairy Lights
Once your florals are mostly in place, it’s time to add a magical glow with fairy lights. Take your two strands of lights and begin weaving them throughout the floral arrangement. The goal is to make the wire as unnoticeable as possible, allowing only the delicate lights to shine through. I typically place the battery packs discreetly near the clamps on either end of the table, then weave the strands towards the middle of the arch, ensuring an even spread of light. This technique provides a warm, inviting sparkle that truly enhances the arch, especially as evening approaches.
Step 5: The Final Touches – Trim and Admire!
With all your florals and lights securely in place, take one last look at your masterpiece. Once you are completely satisfied with the arrangement and fullness of your floral arch, use your wire cutters to meticulously trim off all of the excess zip tie tails. This final step gives your arch a clean, polished, and professional appearance, removing any distractions from the beautiful design. Then, with a proud flourish, turn on those fairy lights and prepare to admire the truly stunning display you’ve just brought to life. Pictures, honestly, don’t do it justice; it is absolutely breathtakingly pretty in person.
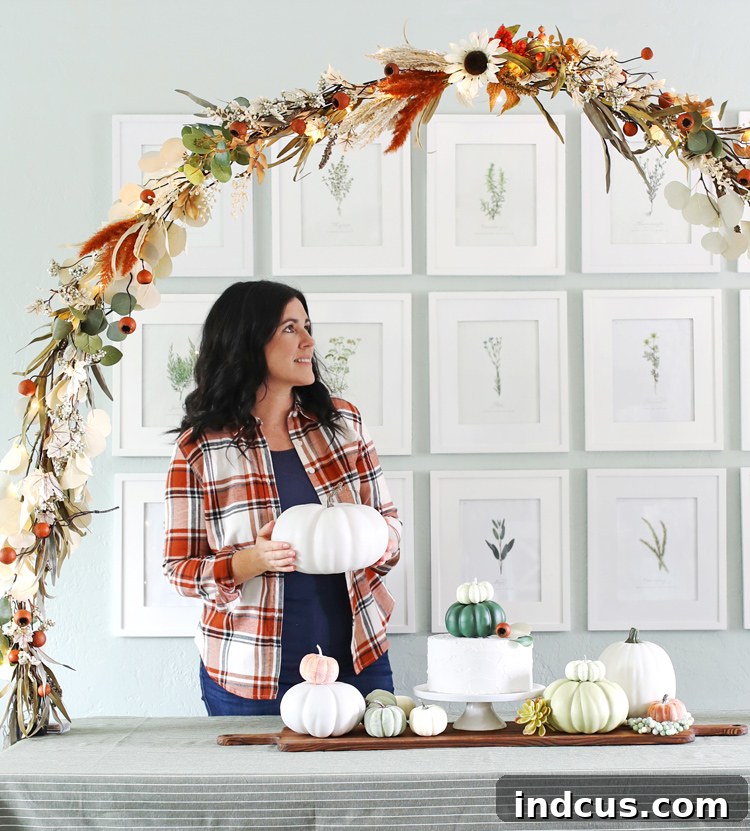
Customization Ideas for Every Theme and Season
The beauty of this DIY tabletop arch lies in its incredible versatility. Here are some ideas to inspire your next themed creation:
- Weddings & Bridal Showers: Use white and blush roses, eucalyptus, and delicate baby’s breath for a classic romantic look. Add pearls or sheer ribbon for extra elegance.
- Baby Showers: Incorporate pastel blues or pinks, soft greenery, and perhaps some whimsical elements like small stuffed animals or ribbons.
- Birthday Parties: Match the colors to the birthday person’s favorite hues or the party theme. Bright, bold flowers for a festive vibe; elegant blooms for a sophisticated celebration.
- Holiday Gatherings:
- Christmas: Red berries, pine cones, evergreen branches, and sparkling silver or gold accents.
- Thanksgiving: Our featured fall florals (deep oranges, rusts, browns, creams), mini pumpkins, and wheat stalks.
- Easter/Spring: Pastel tulips, daffodils, cherry blossoms, and delicate greenery.
- Seasonal Themes:
- Summer: Bright sunflowers, daisies, vibrant gerbera daises, and lush green leaves.
- Tropical: Hibiscus, monstera leaves, orchids, and bright, exotic birds of paradise.
- Rustic Chic: Wildflowers, burlap ribbon, twine, and natural wood elements.
Tips for a Flawless Floral Arch
- Plan Your Layout: Before attaching anything, lay out your florals on a flat surface to visualize your design and ensure you have enough variety and quantity.
- Start with Greenery: Always build your base with greenery. This creates fullness and helps to hide the arch pole effectively.
- Vary Textures & Sizes: Mix different types of flowers and foliage to create visual interest and depth. Don’t be afraid to cut larger bushes into smaller pieces.
- Work from the Ends In: Starting from both ends and working towards the middle can help ensure symmetry and balance.
- Take Breaks: Step back frequently to view your progress from a distance. This helps catch imbalances or areas that need more attention.
- Test Lights Early: Before securing all your florals, test your fairy lights to ensure they work and are evenly distributed.
- Consider Faux vs. Real: Artificial flowers offer durability and reusability. If using real flowers, plan for them to be fresh on the day of the event and consider methods for keeping them hydrated.
Frequently Asked Questions (FAQs)
- Q: How long does it take to create this floral arch?
- A: The assembly of the pole and clamps takes about 10-15 minutes. The floral arrangement can take anywhere from 1 to 2 hours, depending on your design complexity and how many florals you’re using. All in all, plan for 2-3 hours for a relaxed crafting session.
- Q: Can I use real flowers for this arch?
- A: Absolutely! If using real flowers, you’ll need floral foam cages or water tubes to keep them fresh. Secure these to the arch first, then insert your fresh blooms. Be mindful of the weight and ensure the arch remains stable.
- Q: Is the arch kit reusable?
- A: Yes! The arch kit is designed for multiple uses. Simply dismantle it carefully after your event, store it, and bring it out for your next celebration. This makes it a fantastic investment for frequent entertainers.
- Q: What if my table is a different size?
- A: Most standard arch kits are adjustable in width. Always check the product specifications of your chosen kit to ensure it accommodates your table’s dimensions. For longer tables, you might consider using two kits positioned side-by-side or a longer, custom pole if available.
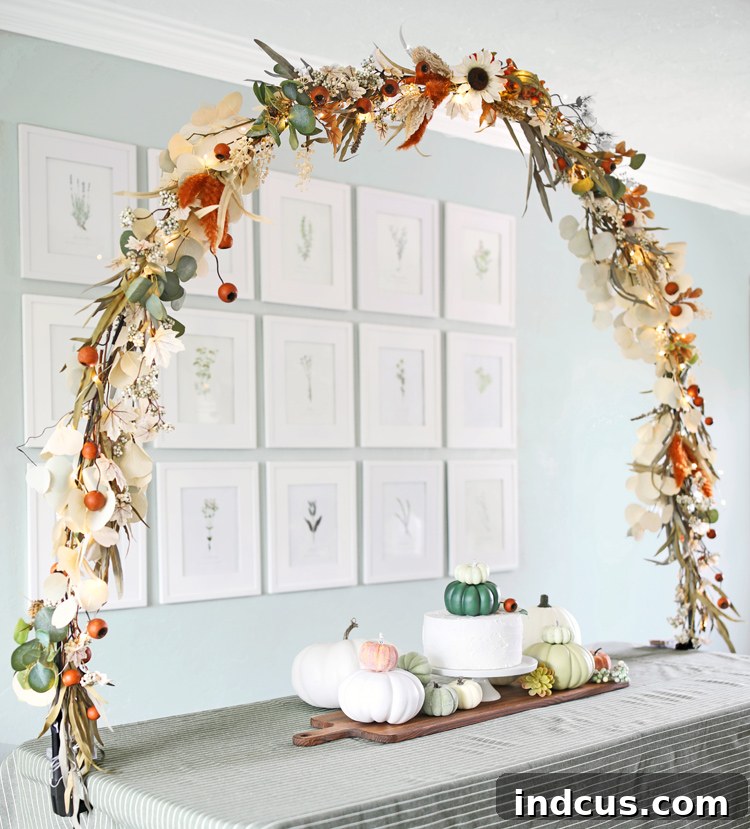
Sophisticated, utterly unique, endlessly customizable, and providing an incredible visual impact for your budget – it’s safe to say this DIY tabletop floral arch is essentially the quintessential party decoration. It transforms an ordinary table into an extraordinary focal point, creating lasting memories for you and your guests.
Video Tutorial (Coming Soon!)
Watch a quick video demonstrating the entire process, from assembly to the final floral touches. This visual guide will make crafting your own arch even easier!
Loved this creative idea? Don’t forget to Pin it to save it for your next celebratory project and share the inspiration!