
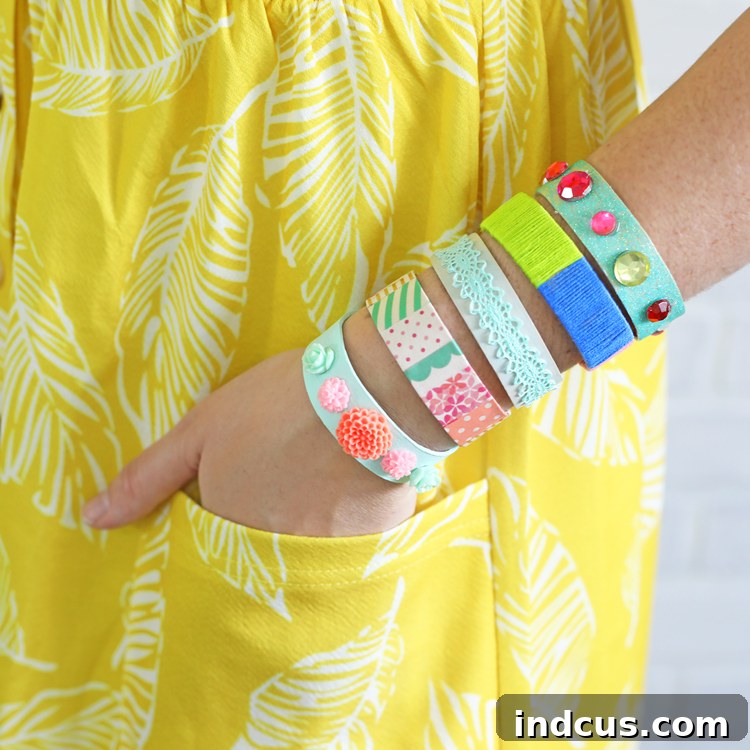
DIY Popsicle Stick Bracelets: A Fun and Creative Craft for All Ages
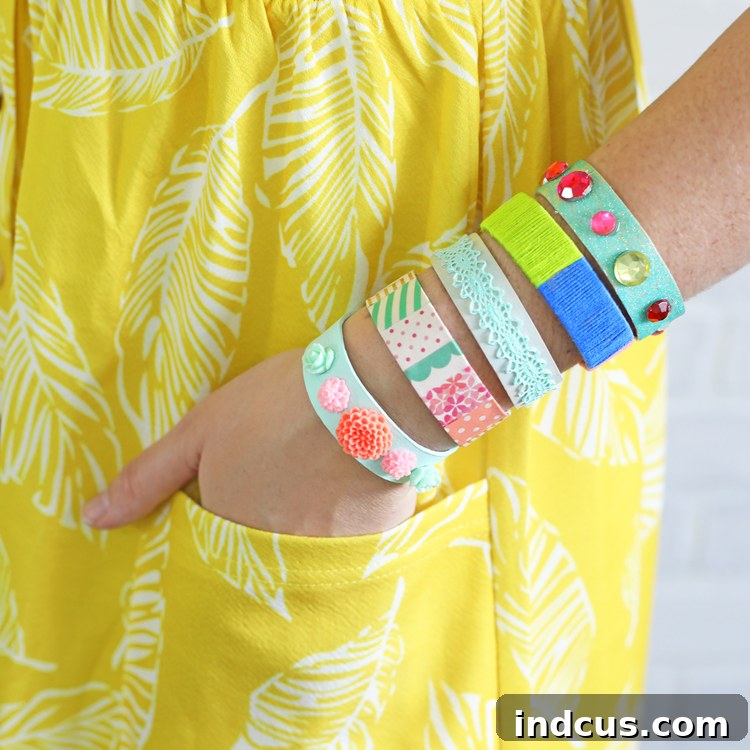
Unlock a world of creativity with one of the most simple yet satisfying DIY projects around: crafting unique bracelets from ordinary jumbo popsicle sticks. This ingenious and incredibly budget-friendly craft is a fantastic activity for kids, tweens, teens, and even adults looking for a relaxing, screen-free pastime. Imagine transforming plain wooden sticks into stylish, personalized cuff bracelets – the possibilities for decoration are truly as boundless as your imagination!
Popsicle stick bracelets offer more than just a fun crafting session. They encourage fine motor skills, patience, and artistic expression. Whether you’re planning a summer activity, a rainy-day project, a birthday party craft, or simply looking for a thoughtful handmade gift idea, these DIY bracelets are a perfect choice. Dive into this guide to learn how to expertly bend and beautifully embellish these simple wooden wonders.
Materials You’ll Need for Your DIY Bracelets
One of the best aspects of this craft is the minimal and inexpensive supply list. Most items can be found around your home or at any craft store.
- Jumbo Wooden Craft Sticks: Opt for the wider, longer sticks (often labeled “jumbo” or “craft sticks”). These provide more surface area for decoration and are generally sturdier, making them less prone to snapping during the bending process. We recommend having plenty on hand, as some might break or not bend perfectly.
- Sturdy Jar or Cup: A straight-sided, sturdy glass jar, mug, or heat-resistant cup is essential. Its diameter will determine the final shape and size of your bracelet, so consider different wrist sizes when choosing. A wider jar will result in a larger bracelet.
- Hot Water: Access to very hot water is crucial for softening the wood. This can be from a kettle, a pot on the stove, or even a very hot tap. Adult supervision is highly recommended when handling hot water.
- Embellishments and Decorating Supplies: This is where the real fun begins! Gather a diverse array of materials to bring your bracelets to life. Consider options like:
- Washi Tape: Comes in endless patterns and colors, easy to apply and remove.
- Glitter: Fine, chunky, iridescent – pair with craft glue for dazzling effects.
- Embroidery Thread or Yarn: For wrapping, weaving, or creating intricate patterns.
- Rhinestones, Gems, and Sequins: Add sparkle and dimension with craft glue.
- Buttons: Small, flat buttons can create interesting textures and patterns.
- Acrylic Paint: Offers solid colors, patterns, abstract designs, or even miniature scenes. Tempera paint works too for a less permanent finish.
- Stickers and Decals: Simple, quick, and effective for adding themes or characters.
- Lace or Ribbon Scraps: For elegant or whimsical touches.
- Permanent Markers or Paint Pens: For detailed drawings, lettering, or outlining.
- Mod Podge or Clear Varnish: To seal painted or glittered designs and provide durability.
- Craft Glue (PVA glue) or Hot Glue Gun: For attaching embellishments. Adult supervision for hot glue.
Step-by-Step Guide to Making Popsicle Stick Bracelets
Step 1: Soften the Wood with Hot Water
The first and most critical step is to make your jumbo popsicle sticks pliable. Carefully immerse the wooden sticks into a sturdy container filled with very hot water. Allow them to soak for at least 30 minutes, or even longer if the wood feels particularly stiff. The heat and moisture work together to soften the wood fibers, making them flexible enough to bend without snapping. You’ll know they’re ready when they start to feel noticeably less rigid and can be gently flexed. It’s always a good idea to soak more sticks than you intend to use. Despite careful handling, some sticks may still snap or break during the bending process due to natural imperfections in the wood, especially if it’s your first time trying this craft.
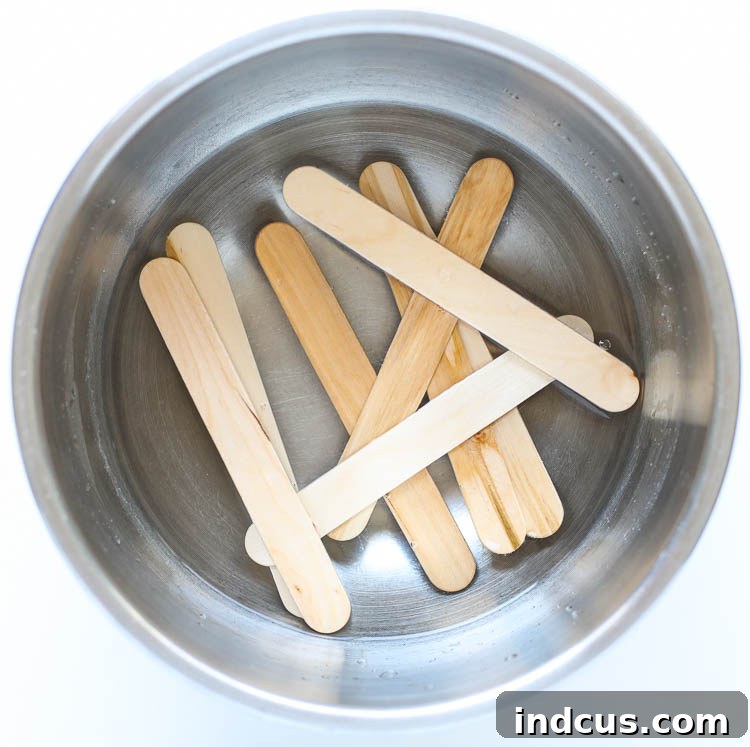
Step 2: Gently Test and Bend the Sticks
Once the soaking time is complete, carefully remove a stick from the hot water. Test its pliability by gently trying to bend it between your fingers. The wood should feel soft and forgiving, not rigid. If the stick is still too stiff and you feel resistance that might lead to a snap, don’t force it. Return it to the hot water and let it soak for another 15-30 minutes, or consider refreshing the water with a fresh batch of hot water to ensure maximum heat. Patience here is key to preventing breakage. Once pliable, slowly and evenly apply pressure along the length of the stick, gradually coaxing it into a curved shape.
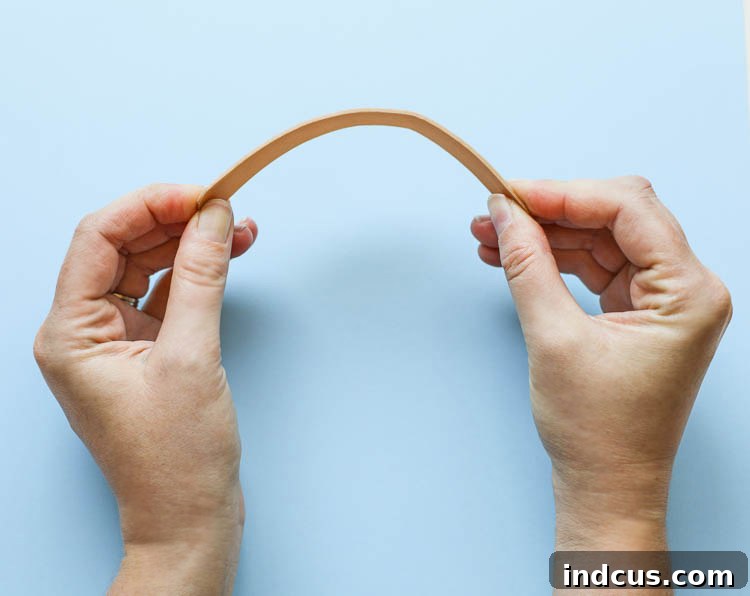
Step 3: Shape the Bracelet in a Jar
With the stick now flexible, it’s time to give it its permanent cuff shape. Carefully bend the softened popsicle stick to fit inside your chosen sturdy, straight-sided cup or jar. The stick should conform to the inner curve of the container, holding its shape without needing to be forced. If the stick doesn’t quite reach the bottom or seems too long, you can trim a small amount from each end with strong scissors or craft knife before it dries. Select a jar with a diameter that corresponds to the desired wrist size – a smaller jar for a tighter fit on a child’s wrist, and a wider one for an adult. You can place multiple sticks in one jar, as long as they don’t interfere with each other’s curve.
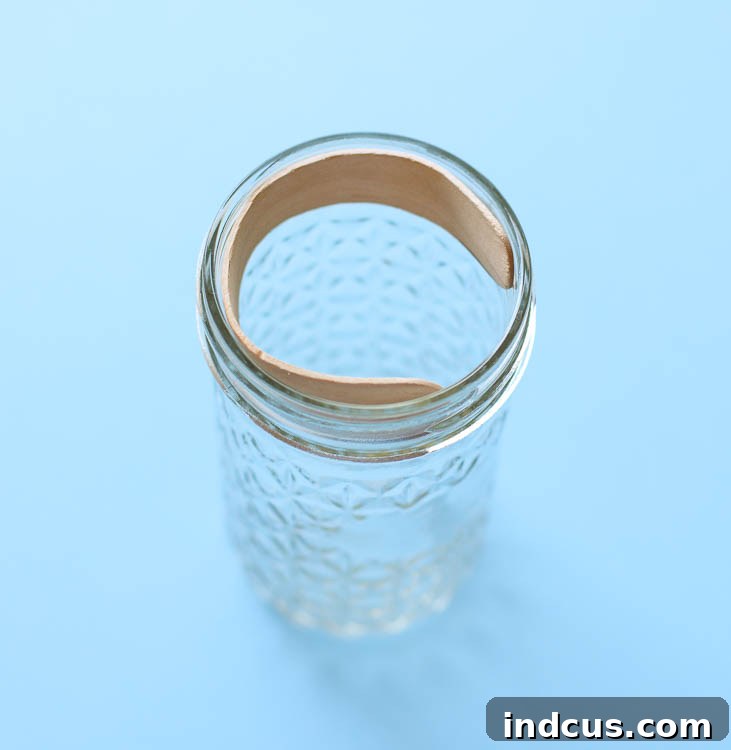
Step 4: Allow the Sticks to Dry Completely
Once your popsicle sticks are perfectly shaped within their jars, the next crucial step is to let them dry completely. This process allows the wood fibers to “set” in their new curved form. For the best results and to prevent any warping or cracking, it is highly recommended to let the sticks air dry overnight, or even for 24-48 hours in a cool, dry place. Patience is a virtue here, as rushing this step can compromise the final shape and durability of your bracelet.
If you’re in a hurry and used an oven-safe jar, you *can* attempt to speed up the drying process by baking the sticks in the oven at a low temperature, around 200°F (93°C), for about 20-30 minutes. However, this method carries a higher risk of warping, cracking, or even scorching the wood, especially if the temperature is too high or the sticks are left in for too long. For consistently smooth and perfectly shaped bracelets, air drying is undoubtedly the superior method.
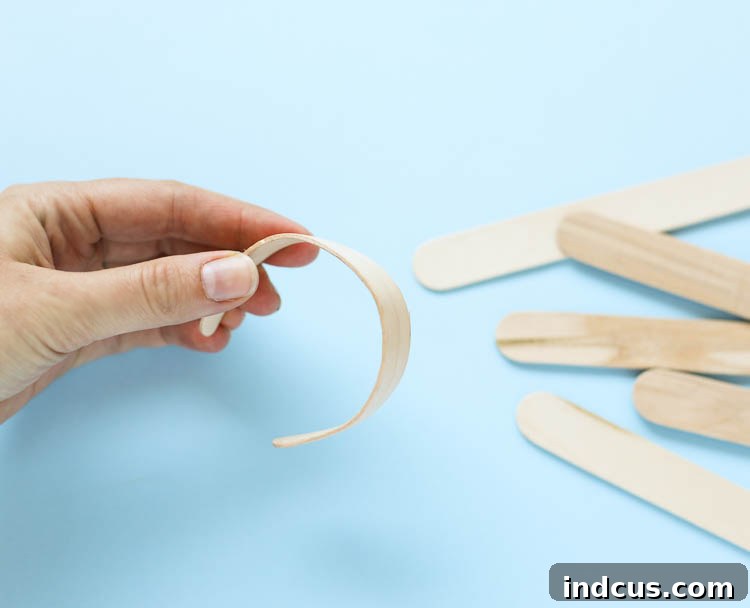
Step 5: Decorate and Personalize Your Bracelets!
Now for the most exciting part: bringing your plain wooden cuffs to life with color, texture, and sparkle! The possibilities for embellishment are truly limitless, allowing you to create unique pieces that reflect your personal style or make thoughtful gifts. Here are some detailed ideas to inspire your decorating process:
- Paint Power: Acrylic paints are excellent for a durable finish. You can paint solid colors, create stripes, polka dots, abstract patterns, or even intricate designs. Use paint pens for fine details. Once the paint is dry, apply a coat of Mod Podge or clear craft varnish to seal the color, protect the surface, and give it a glossy or matte finish.
- Washi Tape Wonders: Washi tape is incredibly versatile. Apply strips horizontally, vertically, or diagonally. Layer different patterns and colors for a unique look. You can also cut washi tape into shapes or use it to create geometric designs. It’s easy to reposition if you make a mistake, making it perfect for kids.
- Glitter Glamour: For a dazzling effect, apply a thin layer of craft glue (PVA glue) to the bracelet, then sprinkle glitter over it. Tap off the excess. For a more intense sparkle, repeat the process after the first layer dries. Seal with a layer of Mod Podge mixed with glitter, or a clear spray sealant to prevent glitter from flaking off.
- Thread and Yarn Art: Wrap embroidery thread or thin yarn tightly around the bracelet. You can use a single color for a minimalist look or alternate colors to create stripes or ombre effects. Secure the ends with a dab of strong craft glue. You could even try simple macrame knots for a textured, bohemian vibe.
- Rhinestone and Gem Embellishment: Use small craft rhinestones, flat-backed gems, or sequins to add sparkle and dimension. A strong craft glue or a hot glue gun (with adult supervision) works best for securing these. Arrange them in patterns, spell out initials, or create a mosaic effect.
- Button Beauties: Flat, small buttons can be glued onto the bracelet for unique textures and designs. Mix and match sizes and colors, or choose buttons with interesting patterns.
- Natural Touches: Small dried flowers, leaves, or even tiny shells can be glued onto the bracelet for an organic, nature-inspired look. Seal them carefully with Mod Podge to protect them.
- Decoupage: Use small cutouts from magazines, fabric scraps, or patterned paper. Apply Mod Podge to the bracelet, place the cutout, and then apply another layer of Mod Podge over the top to seal it in place.
- Adding Ties or Charms: For a more secure fit, you can carefully punch small holes into the ends of each stick using a hand drill (adult supervision) or a strong hole punch. Then, thread a piece of elastic cord, ribbon, or leather string through the holes to tie the bracelet onto the wrist. You can also attach small charms to these ties or directly to the bracelet for an extra touch of personalization.
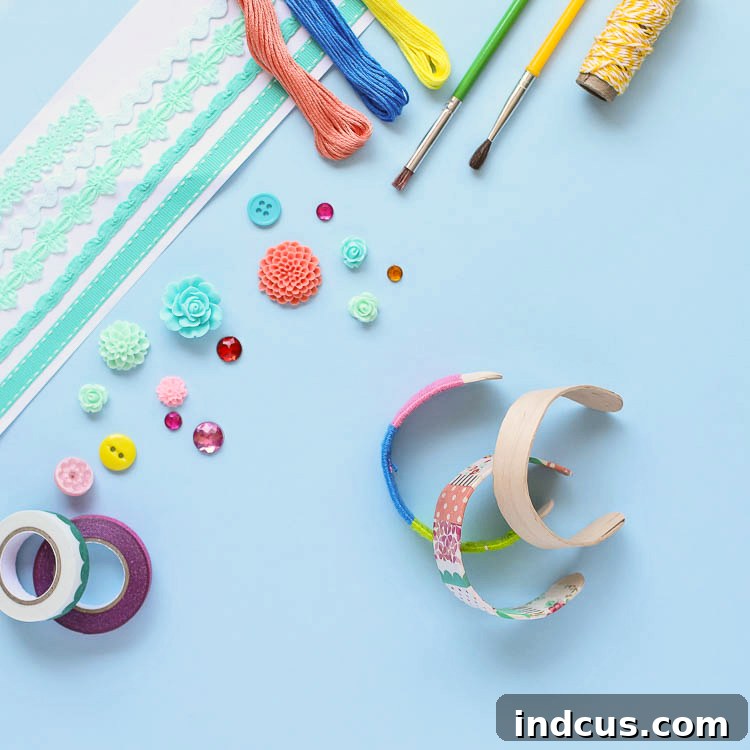
Tips for Success and Safety
- Adult Supervision: Always supervise children when working with hot water, sharp tools, or hot glue guns.
- Experimentation: Don’t be afraid to try different embellishment techniques and combinations. There’s no right or wrong way to decorate!
- Patience Pays Off: Allow adequate soaking and drying time. Rushing these steps can lead to frustration and broken sticks or warped bracelets.
- Batch Crafting: If you’re making multiple bracelets (e.g., for a party or gifts), soak and shape several sticks at once to save time.
- Protect Your Workspace: Lay down newspaper or a craft mat to protect your surfaces from water, paint, and glue.
- Clean Up: Clean brushes and tools immediately after use, especially with acrylic paints and glues.
Benefits of This Easy DIY Craft
Beyond the sheer fun, making popsicle stick bracelets offers numerous advantages:
- Boosts Creativity: Encourages imaginative thinking and artistic expression.
- Develops Fine Motor Skills: Bending, painting, and applying small embellishments enhance dexterity.
- Teaches Patience: The soaking and drying stages require waiting, fostering patience in crafters.
- Affordable Fun: Uses inexpensive materials, making it accessible for everyone.
- Reduces Screen Time: Provides a engaging, hands-on alternative to digital entertainment.
- Personalized Gifts: Handmade bracelets make incredibly thoughtful and unique presents for friends and family.
- Eco-Friendly Potential: If you collect and reuse sticks from actual popsicles (after thorough cleaning), it’s a great way to upcycle!
Creative Ideas for Your Popsicle Stick Creations
Once you’ve mastered the basic technique, you can take your popsicle stick bracelets to the next level with themed designs:
- Seasonal Bracelets: Think vibrant colors for summer, earthy tones for autumn, festive glitter for holidays, or pastels for spring.
- Friendship Bracelets: Make matching sets for your best friends, each reflecting their personality.
- Party Favors: A fantastic and unique take-home craft for birthday parties or sleepovers.
- Charity or Fundraising Items: Design and decorate bracelets to sell for a good cause.
- Storytelling Bracelets: Use charms and colors to represent a favorite book, movie, or personal memory.
- Wearable Art: Create mini masterpieces that you can proudly wear on your wrist!
For those who prefer a visual guide, here’s a short video tutorial that walks you through the entire crafting process, including a variety of inspiring decorating ideas to get you started on your creative journey.
Don’t forget to save this fantastic idea for your next craft session! Pin the image below to your favorite DIY or craft board and easily find it whenever inspiration strikes.
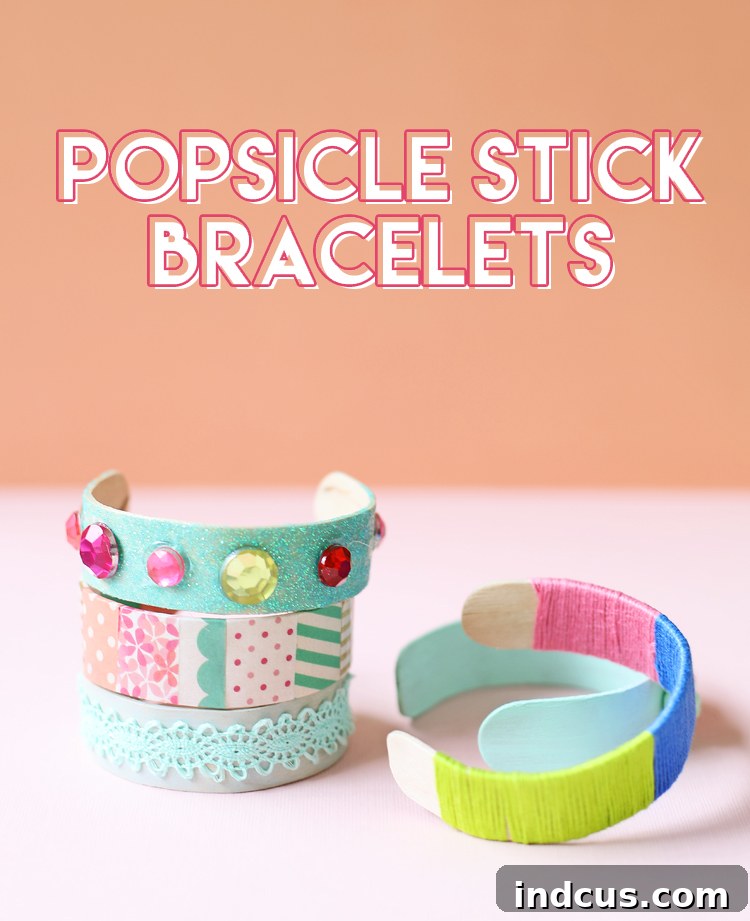
Creating popsicle stick bracelets is a wonderfully rewarding craft that combines simplicity with endless possibilities for customization. It’s a testament to how humble materials can be transformed into something truly special with a little creativity and patience. So, gather your supplies, follow these easy steps, and start crafting your own unique collection of wearable art today!







