
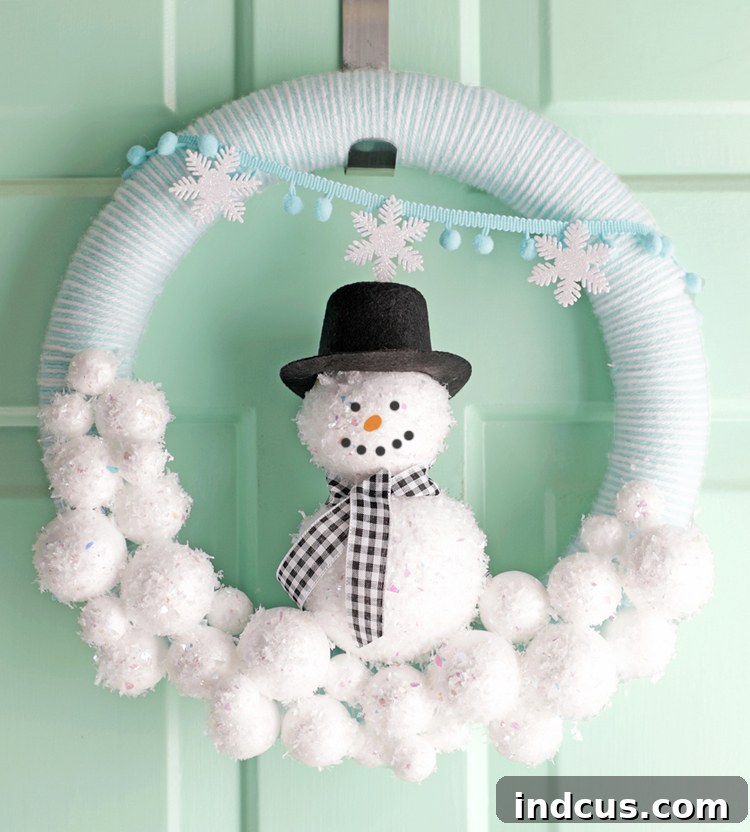
Craft Your Own Enchanting DIY Winter Snowball Wreath
A Step-by-Step Guide to Cozy Yarn and Sparkling Snowman Magic
As the days grow shorter and the air turns crisp, the festive spirit of winter begins to sweep in. While Christmas brings its own unique charm, a truly versatile piece of winter decor can beautifully bridge the gap between holiday cheer and the serene months of January and February. That’s precisely what this delightful DIY snowball winter wreath offers – a captivating blend of coziness, sparkle, and undeniable charm that extends far beyond the Christmas season.
Imagine your front door adorned with a handcrafted masterpiece, featuring a soft yarn base, whimsical glittery snowballs, and the undeniable star of the show: an endearing snowman nestled right in the center. This project is not only incredibly fun to make but also allows for immense personalization, ensuring your wreath is as unique as your home. It’s perfect for adding a warm, welcoming touch to your entryway or bringing a touch of winter wonder to any room inside your house.
Ready to bring this vision to life? Let’s dive into the simple steps to create your very own stunning winter snowball wreath. You’ll be amazed at how easily you can transform simple materials into a breathtaking piece of seasonal art. (Please note: some affiliate links are included below to help you find the exact materials used in this project.)
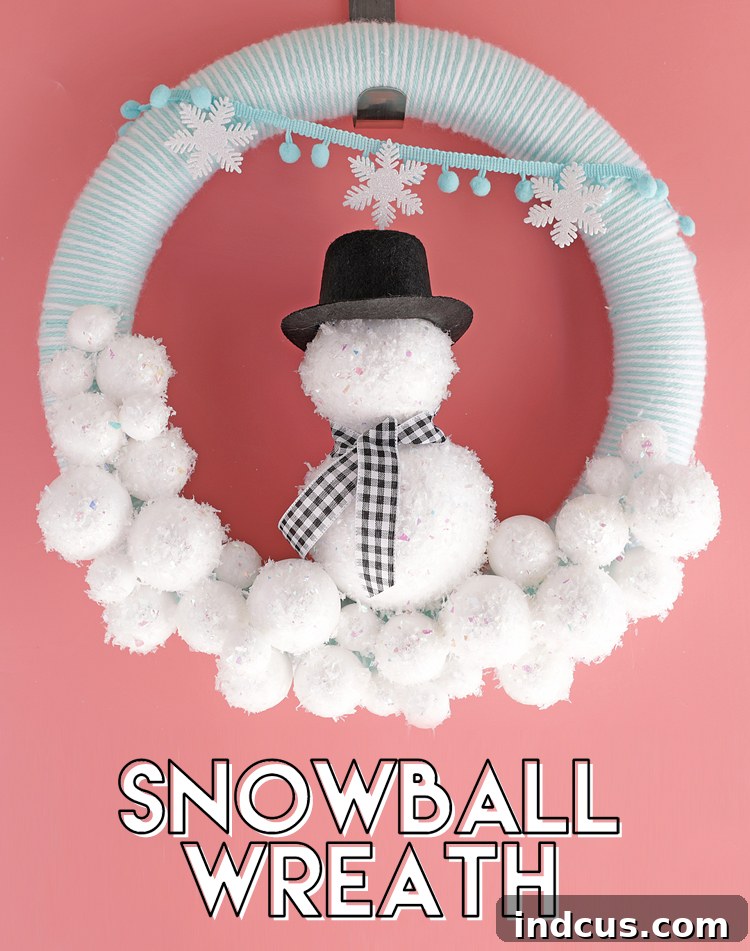
Gather Your Essential Crafting Supplies
Before embarking on any DIY adventure, gathering all your materials is key to a smooth and enjoyable crafting experience. For this project, we’ve carefully selected items that are easy to work with and contribute perfectly to the whimsical winter aesthetic. Most of these can be found at your local craft store or ordered online. Don’t be afraid to experiment with colors and textures to truly make this wreath your own!
Materials Needed:
- 14-16 Inch Foam Wreath Form: This will be the sturdy foundation for your wreath, providing the perfect shape to build upon. The size is versatile for most doors.
- Foam Balls (Various Sizes):
- 4 inches: For the snowman’s body, providing a substantial base.
- 2.875 inches: For the snowman’s head, proportioned perfectly for the body.
- 2 inches: For larger individual snowballs, adding dimension to the wreath.
- 1 inch: For smaller snowballs, filling in gaps and adding intricate detail.
- Snowman Hat: A miniature felt top hat adds instant personality and classic snowman charm.
- Plaid Ribbon: To create a cozy scarf for your snowman and potentially a hanging loop for the wreath. Choose a winter-themed pattern.
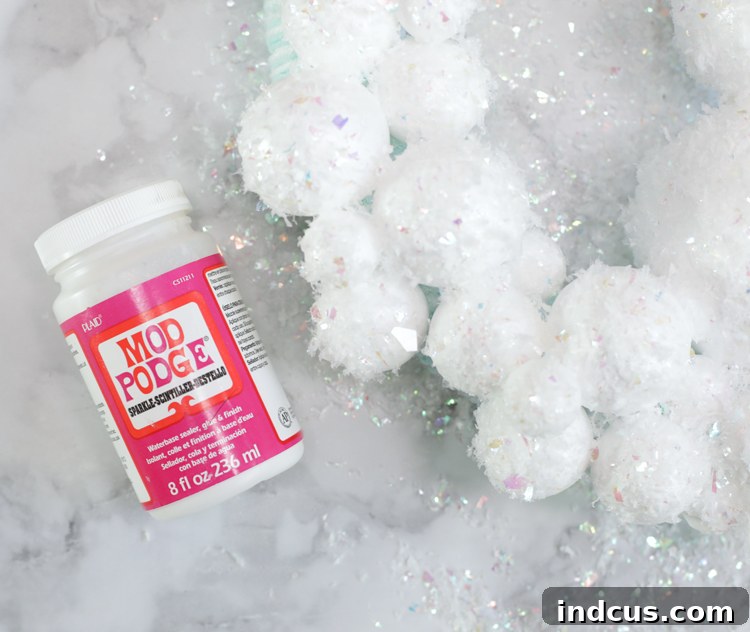
- Mod Podge: Essential for adhering the glitter snow and creating a durable finish on your foam balls.
- Yarn: A chunky, soft yarn (white, cream, or light blue works wonderfully) to wrap the wreath form, creating a warm, inviting base.
- Pom Pom Trim: Adds a playful and soft texture, perfect for accenting the wreath or the snowman.
- Mini Snowflakes: Small, sparkling snowflakes to enhance the winter wonderland effect.
- Hot Glue Gun + Glue Sticks: Your primary tool for securely attaching most elements of the wreath. Always exercise caution when using a hot glue gun.
- Glitter Snow or Glitter + Epsom Salt: The key ingredient for those sparkling, frosted snowballs. Epsom salt offers a more textured, realistic snow effect when mixed with glitter.
Step-by-Step Wreath Crafting Instructions
Creating this winter snowball wreath is a deeply satisfying process, blending simple techniques with creative flair. Take your time with each step, enjoy the transformation, and remember that perfection isn’t the goal – unique handmade charm is!
For a visual walkthrough, you can watch the short video tutorial below which demonstrates how all the elements come together. It’s a great way to see the techniques in action before you begin.
-
Step 1: Wrap Your Wreath Form with Yarn
Begin by taking your foam wreath form and covering it entirely with your chosen yarn. This step creates a wonderfully soft, cozy base for your wreath. Start by securing one end of the yarn to the back of the wreath form with a dab of hot glue. Then, tightly wrap the yarn around the form, overlapping slightly with each pass to ensure full coverage and no foam peeks through. You can use a single color for a classic look or combine two complementary colors for added visual interest, as demonstrated in the example. To add more texture, you could also consider wrapping with fabric strips or even wide ribbons, securing them with hot glue at the beginning and end.
Pro Tip: To avoid bulky spots, try to keep the yarn wrapping as even as possible. Secure the end with another small dab of hot glue on the back of the wreath once fully covered.
-
Step 2: Construct the Snowman’s Body and Head
Now it’s time to bring your adorable snowman to life! Take the 4-inch foam ball (the snowman’s body) and generously apply hot glue to one side. Carefully press this onto the lower center part of your yarn-wrapped wreath form, holding it in place until the glue sets firmly. Next, prepare the 2.875-inch foam ball (the snowman’s head). For a more stable and seamless connection, it’s helpful to cut a small, flat section off the bottom of the head ball. This flat surface will sit much better on top of the larger body ball. Apply hot glue to this flattened area and carefully attach it centrally on top of the snowman’s body.
Safety Note: Hot glue guns can get very hot. Always be cautious and use a silicone finger protector if you have one.
-
Step 3: Arrange and Attach Additional Foam Snowballs
With your snowman firmly in place, it’s time to add the surrounding “snowballs” that give the wreath its full, whimsical texture. Take your remaining 2-inch and 1-inch foam balls and begin hot gluing them onto the yarn-covered wreath form. The key here is to create a pleasing, random pattern. Vary the sizes and placement to create visual depth and interest, ensuring they surround the snowman without overcrowding him. Aim for a balanced look, distributing the foam balls somewhat evenly around the entire wreath form, leaving no large empty spaces.
Design Tip: Before gluing, you can loosely arrange the foam balls on the wreath to visualize your layout and make adjustments until you’re happy with the composition.
-
Step 4: Apply Glitter Snow for a Sparkling Finish
This step is where the magic truly happens, transforming plain foam balls into sparkling snowballs! Using a brush, apply a thin, even layer of Mod Podge onto a small section of a foam ball. While the Mod Podge is still wet, liberally sprinkle your glitter snow (or a mixture of glitter and Epsom salt for extra texture) over the glued area. Gently tap off any excess. Work in small sections, ball by ball, or even half a ball at a time, to prevent the Mod Podge from drying before you have a chance to cover it with snow. Continue this process until all foam balls, including the snowman’s body and head, are thoroughly coated and shimmering. Allow ample time for the Mod Podge to dry completely.

The process of brushing Mod Podge onto foam balls and sprinkling them with glitter snow. Alternative Idea: For a subtle, frosted look, you can use fine white glitter mixed with a touch of iridescent glitter. For a more rustic, icy effect, the Epsom salt mix is fantastic.
-
Step 5: Dress Your Snowman with Hat and Scarf
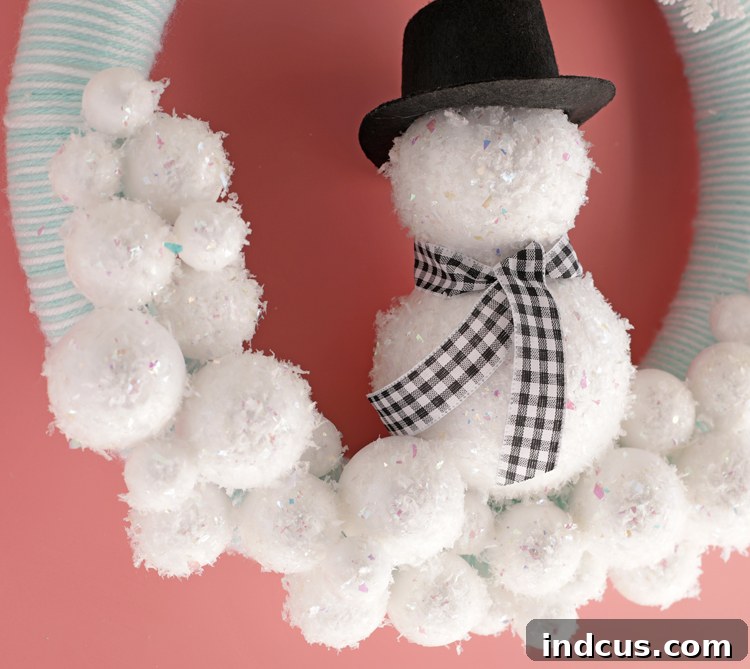
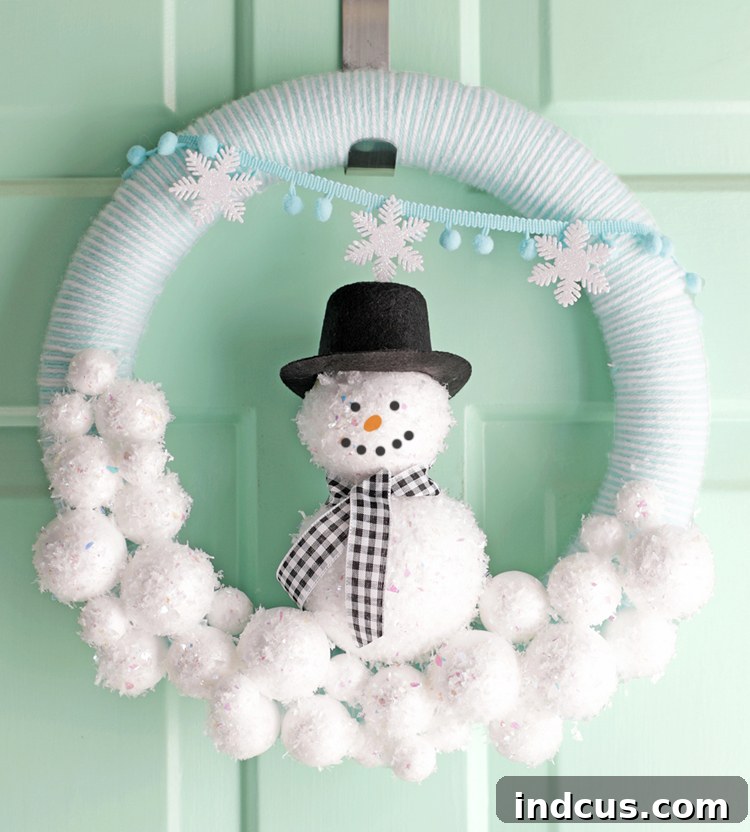
Now, let’s give your snowman his charming attire! Take the miniature top hat and apply a ring of hot glue around its brim. Carefully position it on top of the snowman’s head, slightly to one side for a playful tilt, and press gently to secure. Next, cut a length of your plaid ribbon to serve as the snowman’s scarf. Wrap it around the “neck” where the head meets the body, tying it in a simple knot or bow, or simply securing the ends with small dabs of hot glue on the back of the snowman. This adds a wonderful pop of color and character.
The snowman on the DIY winter wreath adorned with his cute hat and a festive scarf. -
Step 6: Add Festive Embellishments and Garland
This is the stage where you truly personalize your wreath with festive accents. Take your pom-pom trim and hot glue it across the top of the wreath, creating a soft, decorative garland. You can drape it loosely or glue it more tightly, depending on your desired look. Then, carefully hot glue the mini snowflakes onto various foam snowballs, or along the yarn-wrapped sections, scattering them for a natural, falling snow effect. Don’t stop there! Consider adding other fun decorations like small bells, faux berries, tiny pinecones, or even small wooden letters to spell out a sweet winter message like “Let it Snow” or “Welcome” along your garland. Let your imagination guide you!
-
Step 7: (Optional) Give Your Snowman a Face
While the snowman is adorable even without a face, adding one can truly bring him to life! This step is completely optional, as some prefer a more minimalist look. If you choose to add a face, you have many creative options:
- Eyes: Use small black buttons, beads, or even googly eyes for a whimsical touch.
- Nose: A tiny piece of orange felt or a small twig can make a perfect carrot nose.
- Mouth: Small black beads or pins arranged in a curve can form a charming smile.
Experiment with different placements and materials to create a unique expression that suits your snowman’s personality. Remember, there’s no right or wrong way – just whatever suits your fancy!
The finished snowman wreath, ready to bring winter charm to your home.
Personalize Your Winter Wonderland Wreath
The beauty of DIY crafts lies in their limitless potential for personalization. While this guide provides a fantastic blueprint, there are countless ways you can adapt and change this idea to reflect your unique style and preferences. Perhaps you prefer a different color palette – icy blues and silver for a frosty theme, or warm browns and creams for a rustic winter feel. You could incorporate natural elements like small pinecones, dried orange slices, or cinnamon sticks for a more organic touch and delightful aroma.
Consider changing the central figure as well. Instead of a snowman, perhaps a miniature reindeer, a glittery star, or even a bundle of faux frosted branches. The foam balls can be painted different colors, or you could wrap them in fabric scraps for a textured look. The possibilities are truly endless, making each wreath a unique expression of its creator.
This project is more than just creating a decoration; it’s about embracing the joy of crafting and adding a personal touch to your home. If you embark on this creative journey and make your own version of this wreath, I would absolutely love to see your finished masterpiece! Please don’t hesitate to share a picture with me. It’s always inspiring to see how different people bring their own creativity to a project, and it truly never gets old for me.
We are a wonderful little community of craft lovers here, so feel free to reach out with any questions, share your tips, or simply connect. Happy crafting, and may your winter be filled with warmth, beauty, and handmade cheer!
Caring for Your Handmade Wreath
To ensure your beautiful DIY winter snowball wreath lasts for many seasons, a little care goes a long way:
- Indoor Use Recommended: While sturdy, this wreath is best displayed indoors or in a well-protected outdoor area (like behind a storm door or under a deep porch) to shield it from harsh weather elements like heavy rain, snow, or direct sunlight, which can fade colors or damage materials.
- Gentle Cleaning: If dusty, gently use a soft brush or a hairdryer on a cool, low setting to blow away dust. Avoid harsh chemicals or wetting the wreath.
- Storage: When the season ends, store your wreath in a sturdy box in a cool, dry place to protect it from crushing and dust. You might want to wrap it lightly in tissue paper.







