
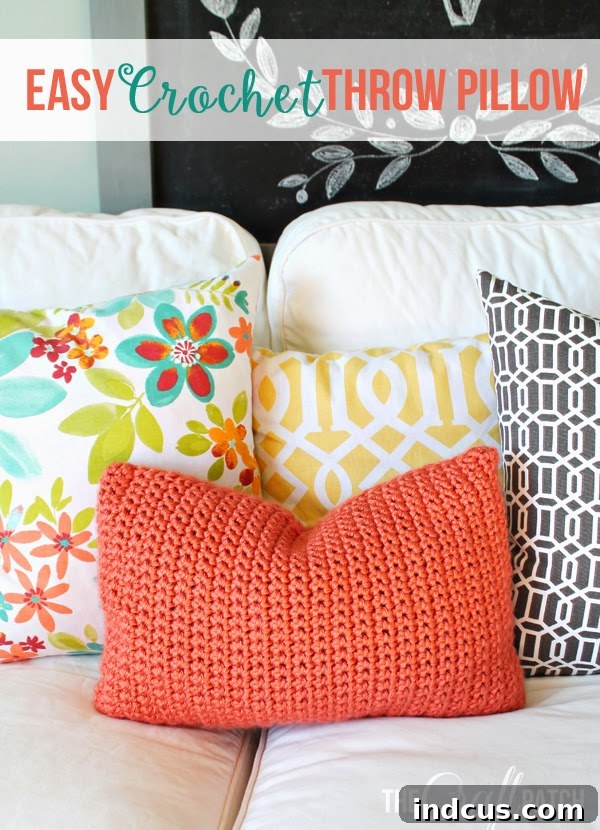
Master the Art of Crochet: Create Your First Easy Throw Pillow
Are you ready to embark on a delightful crochet journey? There’s no better way to dive into the world of yarn and hooks than by creating something beautiful and functional for your home. This comprehensive guide will walk you through crafting a simple yet stunning crochet throw pillow, a perfect project for absolute beginners. If you’ve mastered the basics of chaining, single crocheting, and turning your work, you already possess all the skills needed to complete this satisfying piece of handmade home decor.
Creating your own throw pillows allows for endless customization and adds a personal touch to any living space. This particular easy crochet pillow pattern is designed for speed and simplicity, ensuring a rewarding experience even for those new to the craft. Forget complex stitches or intricate shaping; we’re focusing on foundational techniques to build your confidence and help you produce a stylish item you’ll be proud to display.
Essential Materials for Your Crochet Pillow Project
Before we begin, let’s gather our supplies. One of the joys of crochet is that it requires relatively few tools, making it an accessible hobby. For this quick crochet project, you’ll need the following:
- Yarn: Two skeins of Caron Simply Soft in Persimmon. Caron Simply Soft is an excellent choice for beginners due to its smooth texture, which makes stitches easy to see, and its incredible softness, perfect for a cozy throw pillow. You can, of course, choose any color that complements your home decor. For a vibrant statement piece, stick with a bold hue like Persimmon; for a more subdued look, opt for neutrals or pastels.
- Crochet Hook: A Size N (10.0 mm) crochet hook. Using a larger hook like an N hook allows you to work up your project quickly, which is incredibly satisfying for beginners. It also creates a looser, more pliable fabric, ideal for a comfortable pillow.
- Finishing Needle: A large-eye blunt needle (also known as a tapestry needle or yarn needle). This tool is essential for weaving in ends neatly and seaming your pillow, ensuring a professional finish.
Technique Spotlight: Crocheting with Two Strands of Yarn
A key technique that makes this beginner-friendly crochet project extra special and quick is working with two strands of yarn simultaneously. This method is incredibly simple: instead of using just one strand, you’ll take one yarn end from each of your two skeins, hold them together, and crochet as if they were a single, thicker piece of yarn. This offers several fantastic benefits:
- Increased Thickness and Texture: Using two strands creates a much thicker, more substantial fabric, giving your pillow a luxurious, chunky feel.
- Faster Progress: A thicker yarn means your project grows much faster, which is incredibly encouraging for beginners. You’ll see your pillow take shape in no time!
- Unique Aesthetic: It produces a distinct, almost rustic texture that adds character and visual interest to your finished piece. If you use two different colors, it creates a beautiful marled effect.
Step-by-Step Crochet Instructions: The Pillow Panel
Now for the truly easy and satisfying part: crocheting the main panel of your pillow! Don’t let the simplicity fool you; this method creates a beautiful, cozy rectangle that forms the core of your DIY crochet pillow. The repetitive nature of single crochet makes it a meditative and relaxing process, perfect for unwinding.
1. Starting Your Project: The Foundation Chain
Using your two strands of yarn held together and your Size N crochet hook, begin by making a slip knot and then:
- Chain 25. The chain (ch) stitch is the foundation of almost all crochet projects. To make a chain, yarn over (yo) and pull through the loop on your hook. Repeat this 25 times. Be careful not to pull your chains too tightly, as it will make working into them difficult later. Counting your chains carefully is crucial for an even base. This foundation chain will determine the width of your pillow.
2. Building Your Fabric: Single Crochet Rows
Once your foundation chain is complete, you’re ready to start forming the body of your pillow with single crochet (sc) stitches:
- Single crochet in the second chain from the hook, and in each chain across. This will be your first row of single crochet. At the end of the row, you should have 24 single crochet stitches.
- Chain 1 and turn your work. The chain 1 at the beginning of each row acts as a turning chain, giving your hook the necessary height to start the next row. Turning your work ensures you crochet back and forth, creating flat fabric.
- Single crochet in each stitch across. Repeat this process for a total of 50 rows. Take your time to ensure your stitches are consistent in tension and that you are crocheting into every stitch. This consistency is key to achieving straight edges and a beautiful, uniform fabric for your home decor crochet piece. Counting your rows helps maintain the correct dimensions. You’ll soon notice the beautiful texture emerging as you build up the rows.
3. Finishing the Panel: Tying Off
After completing all 50 rows of single crochet:
- Tie off. To tie off, cut your yarn, leaving a tail of about 6-8 inches. Yarn over your hook one last time and pull the tail completely through the loop on your hook, pulling firmly to secure the knot. This creates a neat and secure end to your crocheted panel.
Congratulations! You’ve just created a large, beautiful rectangle of crocheted fabric. This simple piece is the foundation of your cozy throw pillow.
That’s truly it for the crocheting part! You’ll now have a generously sized rectangular piece of fabric, roughly 12 inches by 24 inches, or a size that fits comfortably around a standard throw pillow insert. The beauty of this simple crochet pattern is its forgiving nature; exact measurements aren’t as critical as consistent stitch work.
Assembling Your Crochet Throw Pillow: The Finishing Touch
Now comes the magical part: transforming your crocheted rectangle into a plush, inviting throw pillow. This step is just as straightforward as the crocheting itself and requires minimal sewing skills.
1. Folding and Inserting the Pillow Form
To begin, lay your crocheted rectangle flat. If you’re using a standard 12×12 inch pillow form, fold your rectangle in half so that the shorter ends meet, creating a double-layered square. The approximate finished dimensions of your single crochet panel (when flattened) should be around 12 inches wide and 24 inches long. When folded, it will create a 12-inch by 12-inch square, perfectly sized for a common pillow insert. Carefully insert your pillow form or stuffing into the folded fabric. Ensure the pillow form is centered and snug, filling out the corners nicely.
2. Sealing the Sides with a Whip Stitch
With your pillow form securely inside, you’ll now close up the three open sides. This is where your large-eye blunt needle comes in handy. You’ll use a technique called the whip stitch, which creates a strong yet virtually invisible seam.
- Prepare your yarn: Cut a long piece of extra yarn (about 3-4 feet long) from one of your skeins. Thread this yarn through your large-eye blunt needle.
- Start stitching: Begin at one corner of the open sides. Push your needle through both layers of crochet fabric from back to front. Pull the yarn through, leaving a tail of about 6 inches to weave in later.
- Execute the whip stitch: Insert your needle into the next stitch on both layers, always going in the same direction (e.g., from back to front), and wrap the yarn around the edge. Pull your yarn through, drawing the two edges together. Repeat this motion, working your way down the edge. Each stitch should be placed close to the previous one, ensuring a neat and secure closure. This method effectively “whips” the two edges together.
- Continue around: Work your way along all three open sides, ensuring you’re catching stitches from both the front and back layers of your crocheted fabric. Aim for consistent tension to keep your seam smooth.
- Secure and weave in: Once you’ve stitched all three sides closed, tie off your yarn securely and use your blunt needle to weave in all remaining yarn tails discreetly into the fabric. This creates a professional and clean finish, ensuring your pillow lasts.
And just like that, your beautiful, handmade cozy crochet pillow is complete! Isn’t it amazing how a simple rectangle of single crochet can transform into such a lovely and functional item? The seam is practically invisible, giving your pillow a polished, store-bought look that belies its handmade origins.
Personalize Your Crochet Pillow: Beyond the Basics
This easy crochet throw pillow is more than just a project; it’s a canvas for your creativity. The beauty of this design lies in its simplicity, making it incredibly versatile for customization. I absolutely adore this pillow—the rich, vibrant Persimmon color is scrumptious, and the chunky texture, achieved by using two strands, is exquisitely soft and inviting.
Creative Customization Ideas:
- Color Play: As I plan to do next, experiment with adding stripes! By switching out colors every few rows (or half the rows for a symmetrical look), you can create stunning visual effects. Imagine a multi-colored pillow that perfectly matches your living room!
- Yarn Choices: While Caron Simply Soft is fantastic, don’t hesitate to explore other worsted-weight or bulky yarns. A wool blend could add extra warmth, or a cotton yarn could make it more suitable for warmer climates.
- Embellishments: Add tassels to the corners for a bohemian vibe, fringe along the edges for extra texture, or even crochet appliques (like flowers or geometric shapes) onto the finished pillow for a unique touch.
- Different Sizes: Adjust the starting chain and the number of rows to create pillows of varying sizes. Want a long lumbar pillow? Chain more! Need a smaller accent pillow? Chain fewer and adjust the rows accordingly.
- Gift Giving: Handmade crochet pillows make thoughtful and personal gifts for housewarmings, birthdays, or holidays. Everyone appreciates a cozy, custom-made item!
Conclusion: Your Crochet Journey Has Just Begun!
This beginner crochet tutorial for a simple throw pillow is designed to be a springboard into the wonderful world of crochet. It proves that with just a few basic stitches, you can create something truly beautiful and practical. The sense of accomplishment you feel when you complete a project like this is truly unparalleled.
So, grab your hook, choose your favorite yarn, and get ready to add a touch of handmade charm to your home. This quick and easy crochet project isn’t just about making a pillow; it’s about discovering the joy of creation, the relaxation of repetitive stitching, and the pride of saying, “I made this!” Happy crocheting!







