
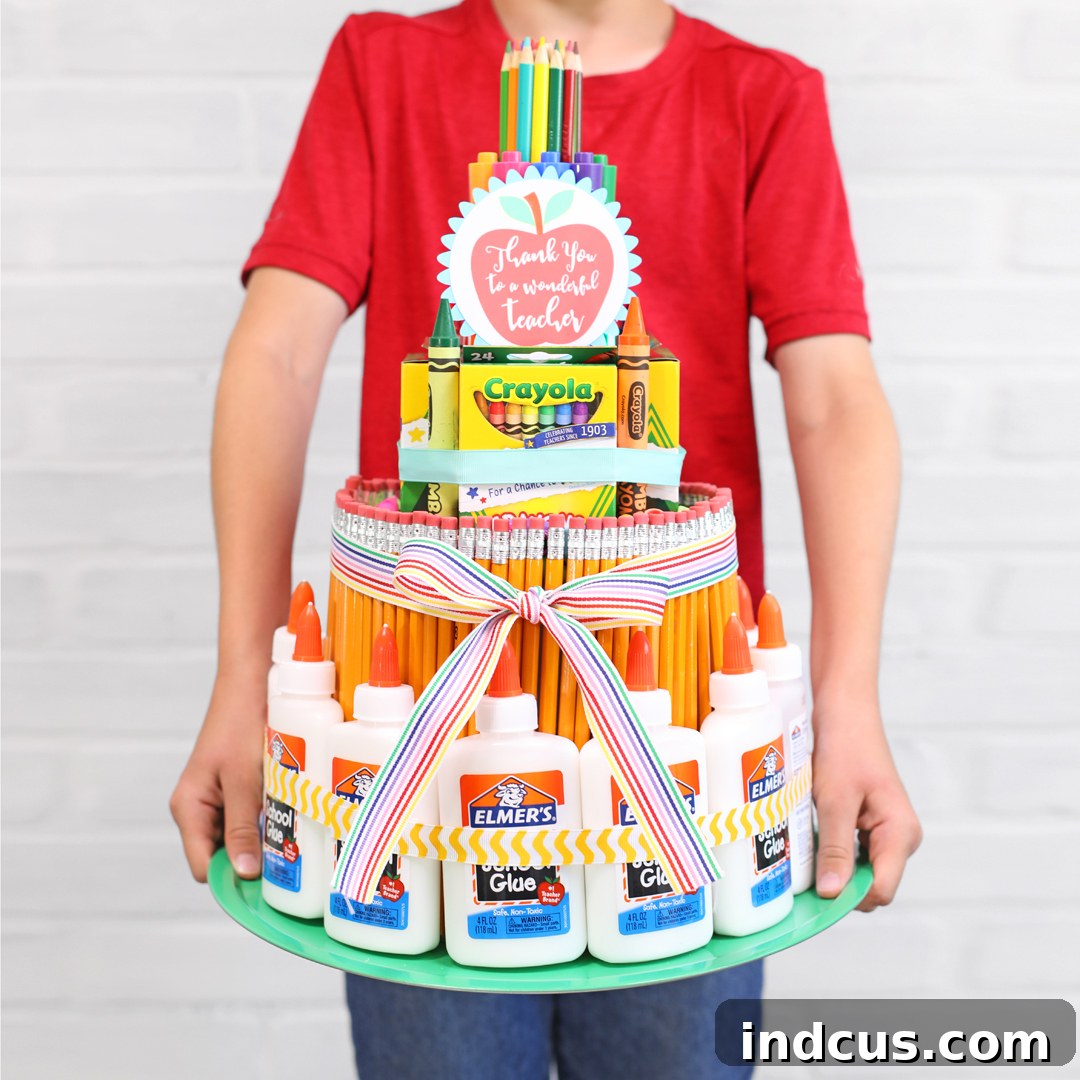
Craft the Perfect School Supply Cake: A Thoughtful Gift for Teacher Appreciation or Back-to-School Season!
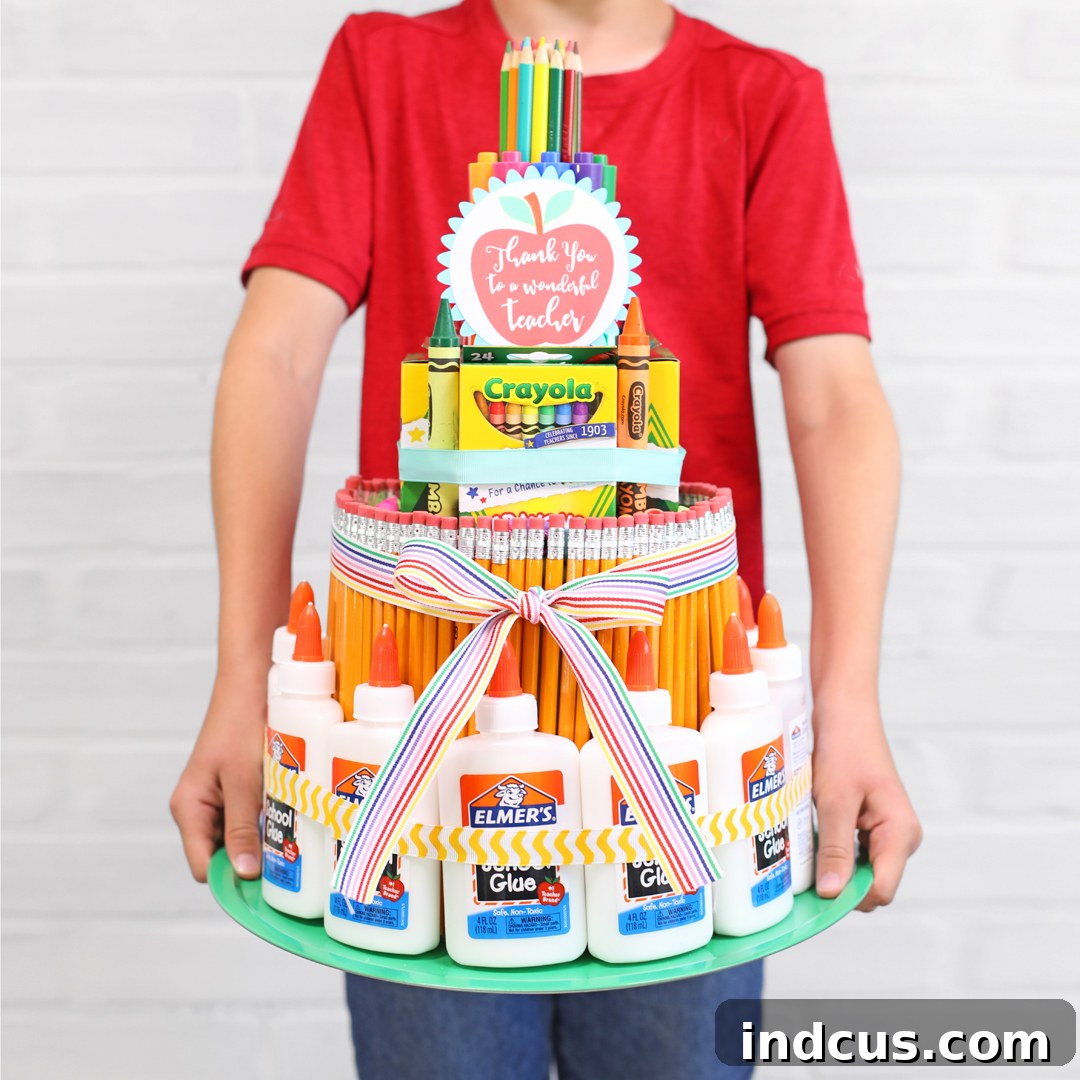
As the leaves begin to turn and the scent of crisp autumn air fills the atmosphere, a familiar excitement starts to build: it’s time to prepare for the new school year! Whether you’re welcoming students back to the classroom or expressing heartfelt gratitude during Teacher Appreciation Week, there’s no better way to make a memorable impression than with a beautifully crafted school supply cake. This year, I embarked on creating one of these unique and incredibly practical gifts, and the experience was as rewarding as the final product. It’s more than just a gift; it’s a vibrant, useful centerpiece packed with everyday classroom essentials that teachers truly appreciate.
When I conceptualized this project, I had a few specific goals in mind to ensure the gift was both impressive and functional:
- Unwavering Stability: The cake needed to be robust enough to be transported without fear of collapse, ensuring it arrived intact and ready to delight its recipient.
- Budget-Friendly Foundation: I wanted to minimize costs on the structural components, allowing more of the budget to be allocated towards the actual school supplies – the items teachers need most!
- Visually Striking & Abundant: It had to be tall, bursting with color, and thoughtfully packed with as many useful school supplies as possible, creating a true treasure trove for the classroom.
The result? A magnificent school supply cake that exceeded all my expectations! By investing only a few dollars in the foundational materials, I was able to splurge on a fantastic assortment of crayons, pencils, glue, and markers, making this an incredibly valuable and cherished gift.
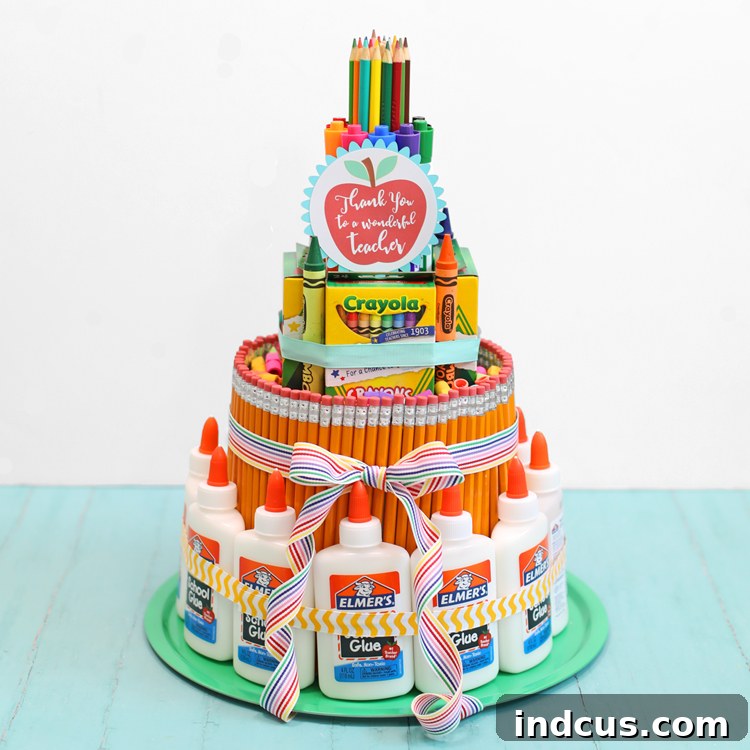
Why Choose a DIY School Supply Cake for Teachers?
In a world of mass-produced gifts, a handmade school supply cake stands out as a beacon of thoughtfulness and practicality. This isn’t just another trinket that will sit on a shelf; it’s an immediate infusion of essential tools for the classroom. Teachers often spend their own money on supplies throughout the year, making a gift like this not only appreciated but genuinely helpful. It’s a creative way to show your appreciation, offering a visually stunning presentation of items that will be put to good use from day one. Plus, the process of creating it is an enjoyable craft project in itself!
Imagine the joy on a teacher’s face when they receive a multi-tiered “cake” brimming with colorful pencils, fresh glue sticks, and vibrant markers. It’s a powerful statement that you understand and support their dedication to education. This customizable gift allows you to tailor the contents to a specific teacher’s grade level or known preferences, making it even more personal and impactful. From the sturdy base to the tower of writing instruments, every element is designed for maximum utility and visual appeal.
Gathering Your Essentials: Materials for Your School Supply Masterpiece
To embark on your own school supply cake creation journey, meticulous preparation is key. Below is a comprehensive list of materials, divided into structural components and the fun, functional school supplies. Remember, sourcing budget-friendly items for the structure allows you to maximize your investment in quality classroom essentials.
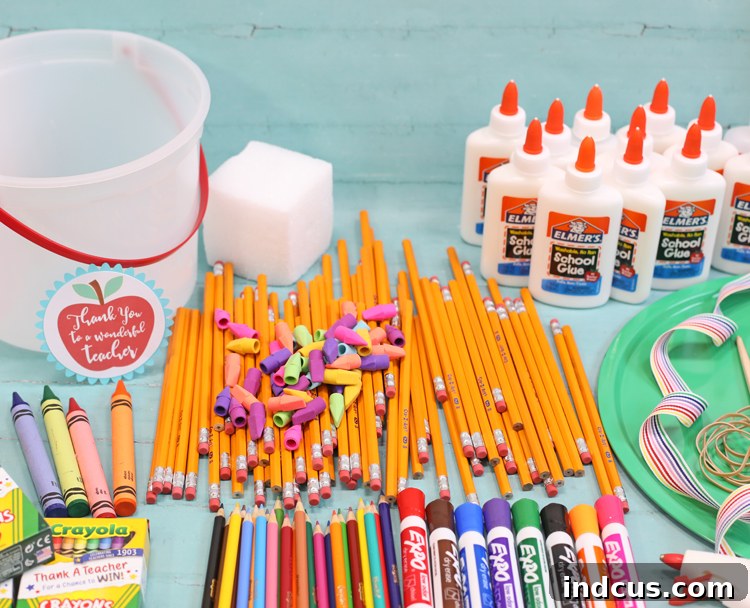
Structural Supplies (The Foundation of Your Cake)
- Metal Pizza Pan: This serves as the sturdy base for your entire cake. Look for inexpensive options at dollar stores or discount retailers. Its flat surface provides stability, ensuring your creation won’t tip over.
- Spray Paint: Choose a color that complements your school supplies or the school’s colors. This is for aesthetics and protection of the pizza pan.
- Clean, Empty Ice Cream Bucket (or similar plastic container): This forms the core of your first tier. Ensure it’s clean and dry. A one-gallon size works well.
- Rubber Bands (various sizes): Essential for securing bundles of pencils, crayons, and markers around your structural elements. Have a good assortment on hand.
- Ribbon: Used to decorative cover the visible rubber bands, adding a polished and festive touch to your cake. Select vibrant, school-themed colors.
- Hot Glue Gun + Glue Sticks: Your primary tool for securely attaching structural elements and some supplies. Safety first when using hot glue!
- 4″ Foam Cube (or cylindrical foam block): This will create the second tier of your cake, providing a stable platform for additional supplies. Floral foam or craft foam works perfectly.
- Dowel or Wooden Chopstick: A crucial central support for the upper tiers, ensuring vertical stability.
- Printable Teacher Thank You Tag: The personalized touch that makes your gift extra special.
School Supplies (The Delicious “Filling” of Your Cake)
This list is a fantastic starting point, but feel free to customize it based on your teacher’s specific needs, grade level, or personal preferences. Opt for a variety of colorful and commonly used items:
- 4 Boxes of Crayons (24-count or larger): A classroom staple, perfect for adding a burst of color.
- 4 Jumbo Crayons: Great for younger students or for a more prominent visual element on the cake.
- Approximately 75 Pencil Top Erasers: These small, colorful erasers are always in demand and can fill gaps beautifully.
- Approximately 75 Pencils (standard #2 or mechanical): The absolute backbone of any classroom supply stash. Stock up!
- 11 Bottles of School Glue (liquid or glue sticks): From art projects to everyday repairs, glue is indispensable.
- 24 Colored Pencils: Essential for art, diagrams, and creative expression.
- 10 Expo Markers (dry erase markers): A lifesaver for whiteboards and presentations, particularly for middle and high school teachers.
- Consider adding: Scissors, rulers, sticky notes, small notebooks, highlighters, hand sanitizer, tissues, small packs of play-doh, or even a mini stapler.
School Supply Cake Tutorial: A Step-by-Step Guide to Crafting Joy
Ready to assemble your magnificent school supply cake? Follow these detailed instructions to create a sturdy, beautiful, and incredibly useful gift. While we’ve outlined each step in detail, we also recommend scrolling to the bottom of the post to watch a quick video tutorial, bringing this fun project to life in under a minute!
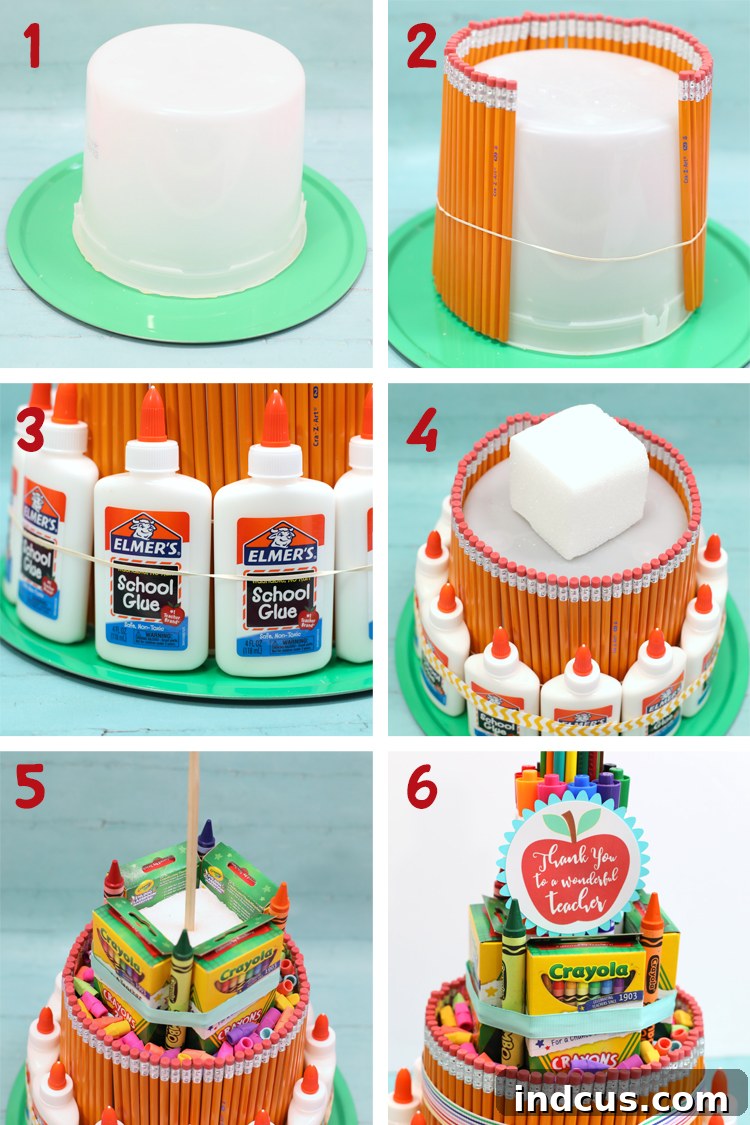
Step 1: Preparing Your Base
Begin by spray painting your metal pizza pan. Choose a well-ventilated area and apply several thin, even coats for a smooth, professional finish. Allow the paint to dry completely according to the manufacturer’s instructions – this is crucial to prevent smudging later. Once dry, retrieve your clean, empty ice cream bucket. Apply a generous bead of hot glue to the rim of the bucket and carefully center it upside down onto the painted pizza pan, pressing firmly to ensure a strong bond. This forms the stable base and core of your first tier.
Step 2: Building the First Tier with Pencils
Place a large rubber band snugly around the center of the upside-down ice cream bucket. Start inserting pencils vertically, one by one, around the perimeter of the bucket, tucking them under the rubber band. Arrange them closely together, ensuring they are evenly spaced and standing upright. Continue adding pencils until the entire surface of the ice cream bucket is completely hidden, creating a solid, uniform wall of pencils. This forms the vibrant first layer of your cake.
Step 3: Securing and Adding Glue Bottles
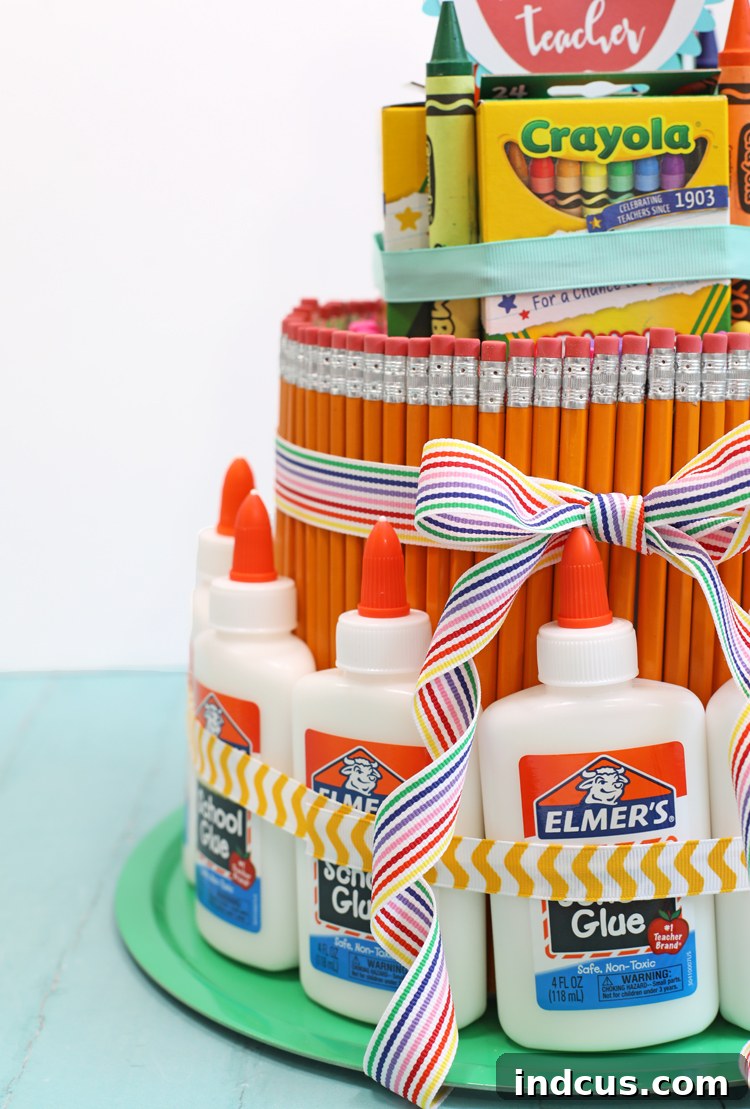
Once all pencils are in place and the bucket is concealed, add another rubber band around the pencils to secure them even more firmly, ensuring they won’t shift during transport. Next, take your bottles of school glue. Arrange them around the bottom edge of the pencil-covered tier, creating a second, wider layer at the base of the cake. You can secure these with another rubber band, or for extra stability, a small dab of hot glue on the bottom of each bottle to the pizza pan, being careful not to obscure the pan’s finish.
Step 4: Creating the Second Tier Foundation
Carefully apply hot glue to one side of your 4-inch foam cube. Center and firmly attach the foam cube to the top of the ice cream bucket (which is now hidden by pencils). Press down gently but firmly to create a secure bond. This foam cube will serve as the core for your cake’s second, slightly smaller tier.
Step 5: Filling the Second Tier
Place crayon boxes around all four sides of the foam cube, creating a colorful square. Secure these boxes with a rubber band around the perimeter of the foam cube. For added visual interest and stability, place one jumbo crayon in each of the four corners formed by the crayon boxes. Now, fill in any remaining gaps or empty spaces around this layer with your pencil top erasers. These small erasers are excellent for adding texture and color while filling in awkward spaces. Finally, push a dowel or wooden chopstick firmly into the center of the foam square, ensuring it stands straight and provides a central anchor for the top tier.
Step 6: Assembling the Top Tier and Finishing Touches
Gather your colored pencils and arrange them vertically around the dowel, securing them tightly with a rubber band. Next, take your Expo markers and arrange them around the colored pencils, securing them with another rubber band. Once all the layers are assembled and secured, it’s time for decoration! Take your chosen ribbon and carefully wrap it around all visible rubber bands, hot-gluing the ends to secure them. This hides the bands and adds a beautiful, cohesive finish. Finally, attach your free printable “Thank You” design to the dowel or a prominent spot on the cake.
Personalizing Your School Supply Cake: The Thoughtful Touches
The beauty of a DIY gift lies in its potential for personalization. For the thank you tag, print your chosen design onto white cardstock for durability and a professional look. Cut around the circular design, and for an extra touch of flair, consider adding a scalloped matte in a complementary color, as I did with a lovely blue. You can also customize the tag with the teacher’s name or a personal message. Beyond the tag, think about the teacher’s favorite colors, their grade level (e.g., more crayons for kindergarten, more pens for high school), or even small treats they might enjoy, carefully tucked within the supplies.
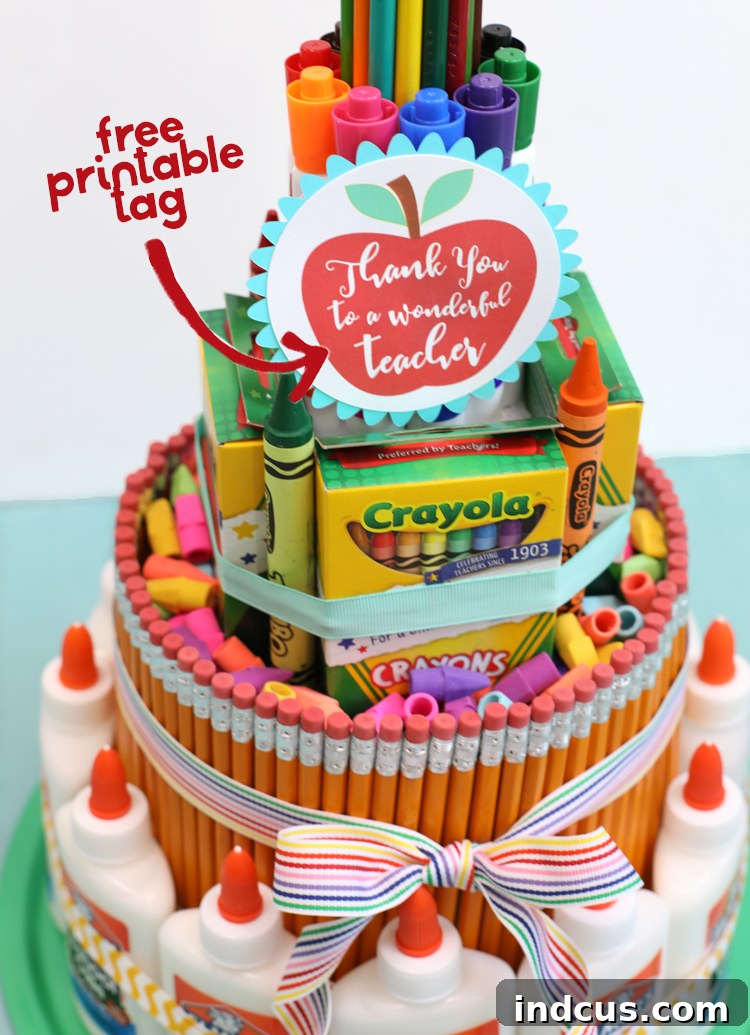
For those who prefer a visual guide, here’s the quick video tutorial to show you exactly how this school supply cake comes together. Watching the assembly in motion can often clarify steps and inspire your own creative touches!
The Enduring Charm of School Supplies and Appreciation
This heartwarming project invariably brings to mind that iconic line from the movie You’ve Got Mail, which beautifully encapsulates the nostalgic charm and simple joy associated with the back-to-school season:
“Don’t you love New York In the Fall? It makes me want to buy school supplies. I would send you a bouquet of freshly sharpened pencils if I knew your name and address.”
There’s something uniquely comforting and inspiring about new school supplies – the crisp pages of a fresh notebook, the vibrant colors of new crayons, and the satisfying scent of freshly sharpened pencils. It symbolizes new beginnings, endless possibilities, and the tools for growth and learning. Gifting a school supply cake is akin to presenting a bouquet of these inspiring items, thoughtfully arranged to bring a smile to a deserving teacher’s face.
While we may still be enjoying the last blissful days of summer, the back-to-school rush, Teacher Appreciation Week, and the need for fresh classroom essentials will be here before we know it. Being prepared with a thoughtful, handmade gift like this school supply cake not only alleviates a small burden for teachers but also shows immense gratitude and support for their incredible work.
Don’t wait for the last minute! Start planning your school supply cake today and bring a touch of joy and practicality to a special educator. Want even more creative ideas to celebrate and thank the amazing teachers in your life? Click here for a round-up of the cutest teacher appreciation gift ideas!







