
Master the Art of Braiding a Graduation Ribbon Lei: Your Ultimate Step-by-Step Guide
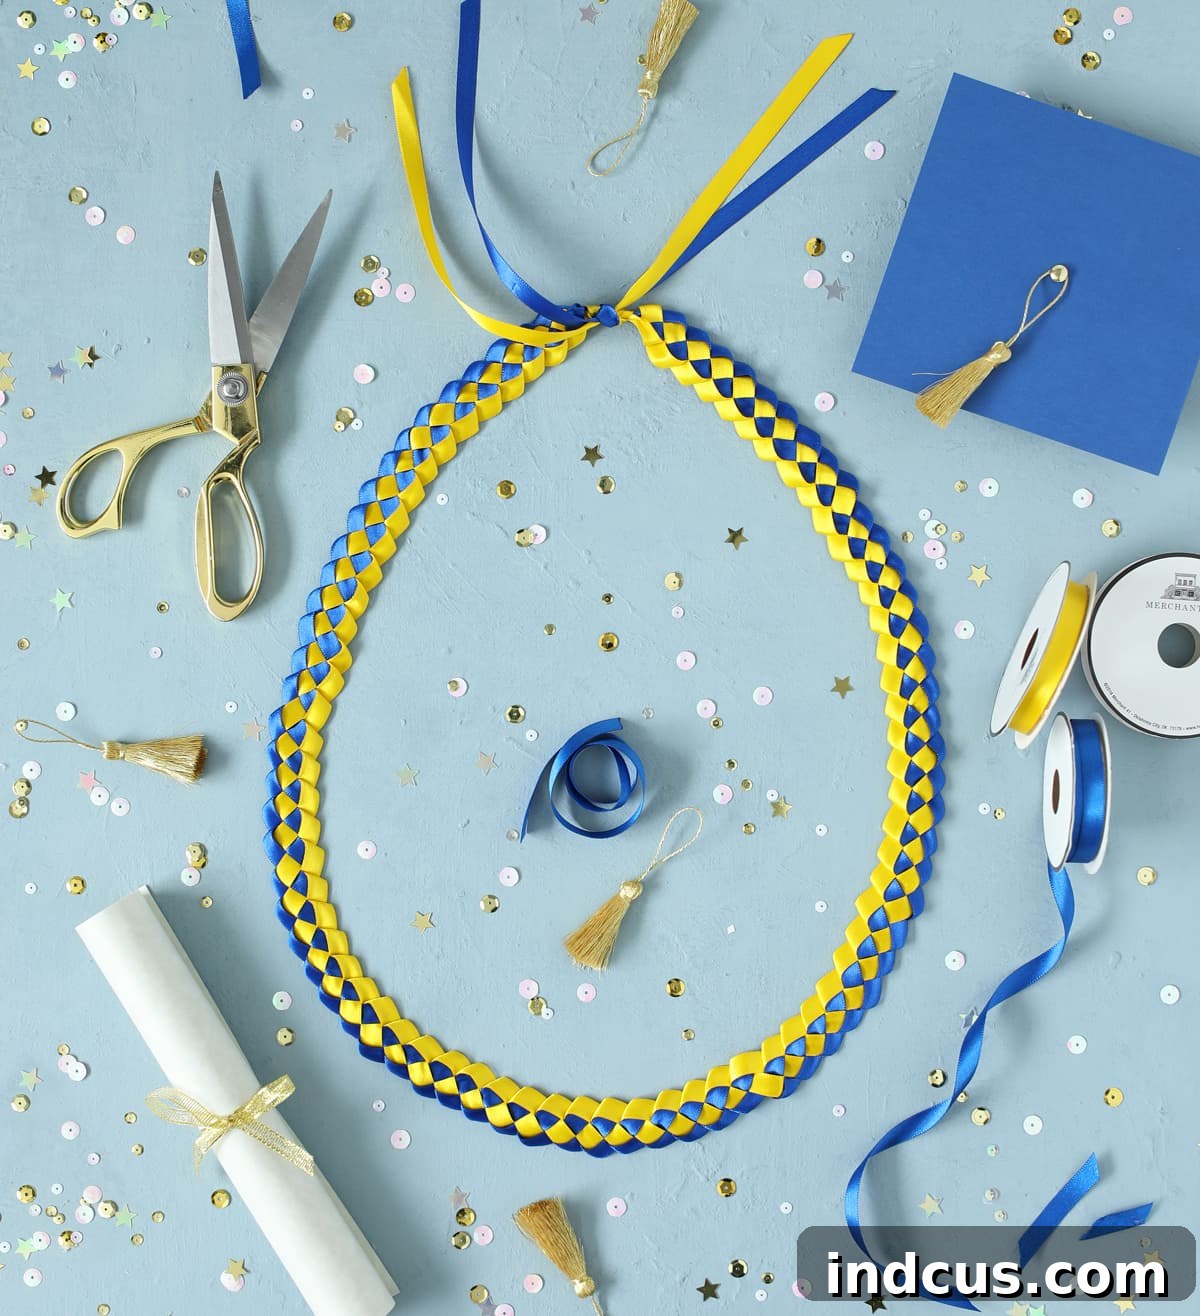
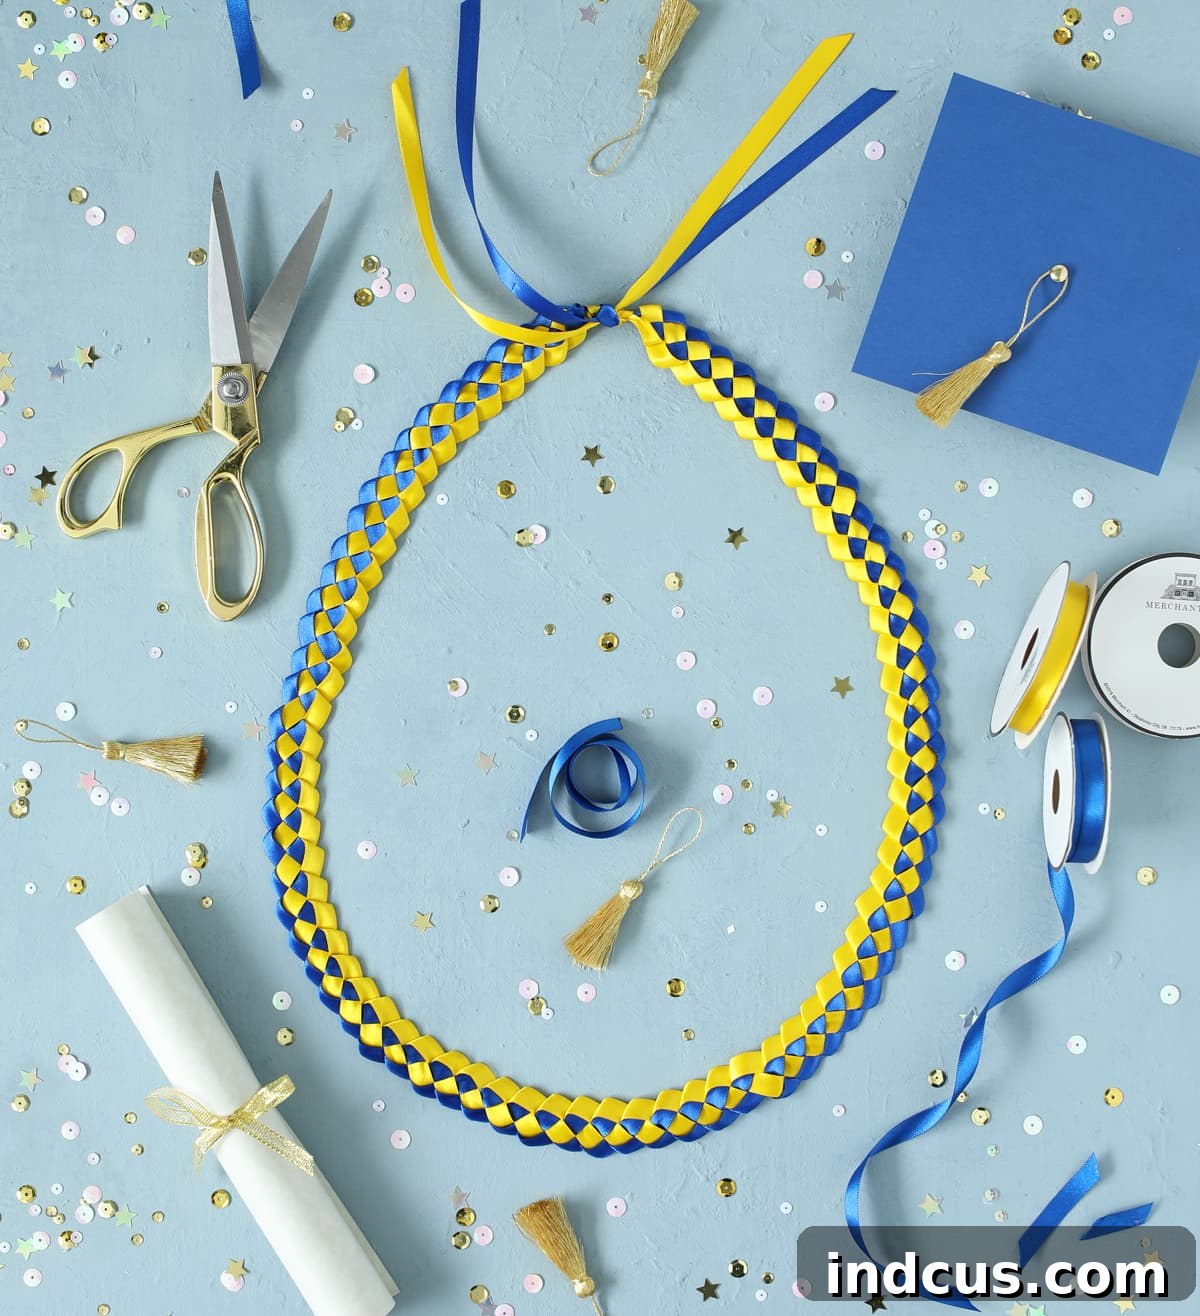
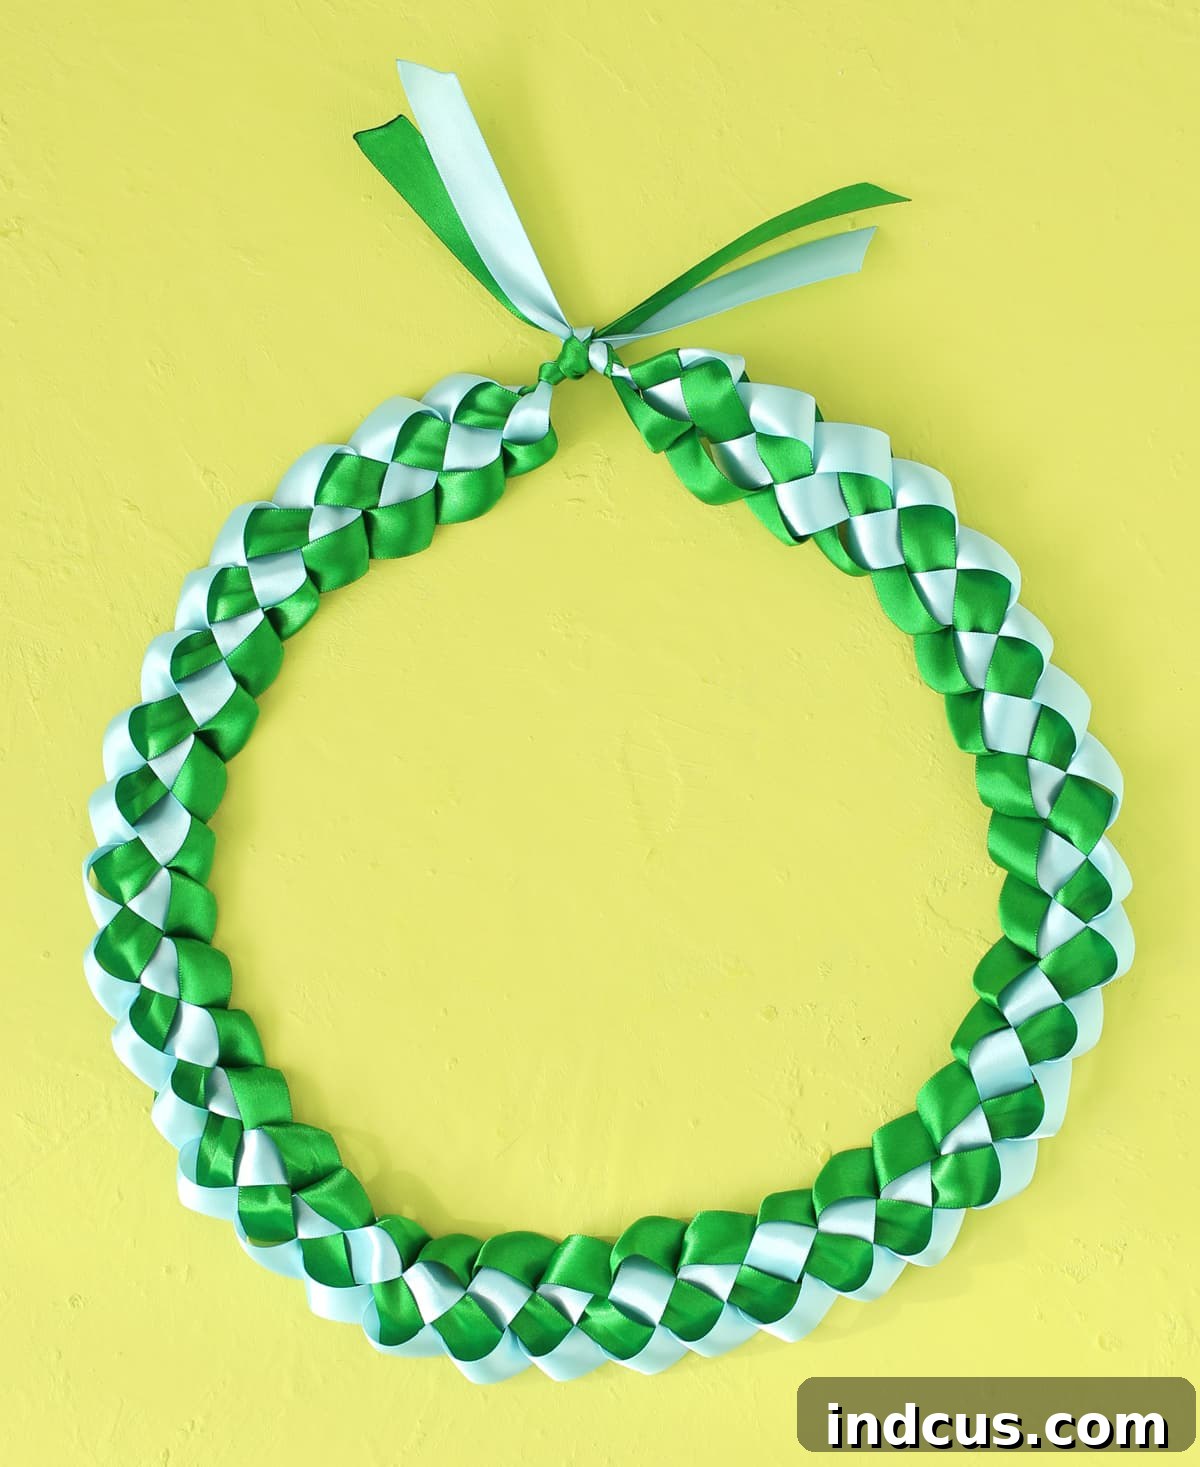
There’s nothing quite like seeing your loved one don a traditional ribbon lei on their graduation day. These vibrant, intricate accessories are more than just decorative; they symbolize hard work, success, and the bright future ahead. When my daughter celebrated her high school graduation, I was captivated by the exquisite satin ribbon leis adorning many graduates. They looked incredibly complex, almost impossible to recreate without expert skills. However, I discovered a delightful secret: crafting these gorgeous braided ribbon leis is a surprisingly accessible and incredibly rewarding DIY project.
If you’re looking for a unique, heartfelt gift for a graduate this year, learning how to make a ribbon lei is an absolute must. Trust me, you can do this! This comprehensive guide will walk you through every single step, from selecting your materials to tying off your beautifully finished lei, ensuring you create a cherished keepsake that will be remembered for years to come. Prepare to impress your graduate with a personalized, handmade token of your love and pride.
Why Craft Your Own Graduation Ribbon Lei? The Personal Touch
Choosing to DIY a graduation ribbon lei offers a multitude of benefits beyond just saving money. While store-bought leis can be beautiful, a handmade lei carries an unmatched sentimental value. Here’s why making your own is such a special endeavor:
- Unforgettable Personalization: You can meticulously choose colors that represent the graduate’s school, favorite sports team, future college, or even their personality. Add charms, beads, or embroidered details to make it truly one-of-a-kind.
- A Gift from the Heart: A handmade lei is a tangible expression of your love, effort, and pride. It shows the graduate how much you care, making their special day even more memorable.
- Cost-Effective Celebration: Crafting a lei yourself is often significantly more affordable than purchasing a pre-made one, especially when you can take advantage of craft store sales for ribbon and supplies.
- Therapeutic Crafting Experience: The braiding process can be meditative and enjoyable. It’s a fantastic way to relax and focus while creating something beautiful.
- Custom Fit and Style: You have complete control over the length, thickness, and overall aesthetic, ensuring the lei perfectly complements the graduate’s gown and stature.
Essential Supplies for Your Braided Ribbon Lei Project
Gathering your materials is the first exciting step in bringing your ribbon lei to life. While the list is short, selecting the right items will significantly impact the quality and beauty of your finished lei.
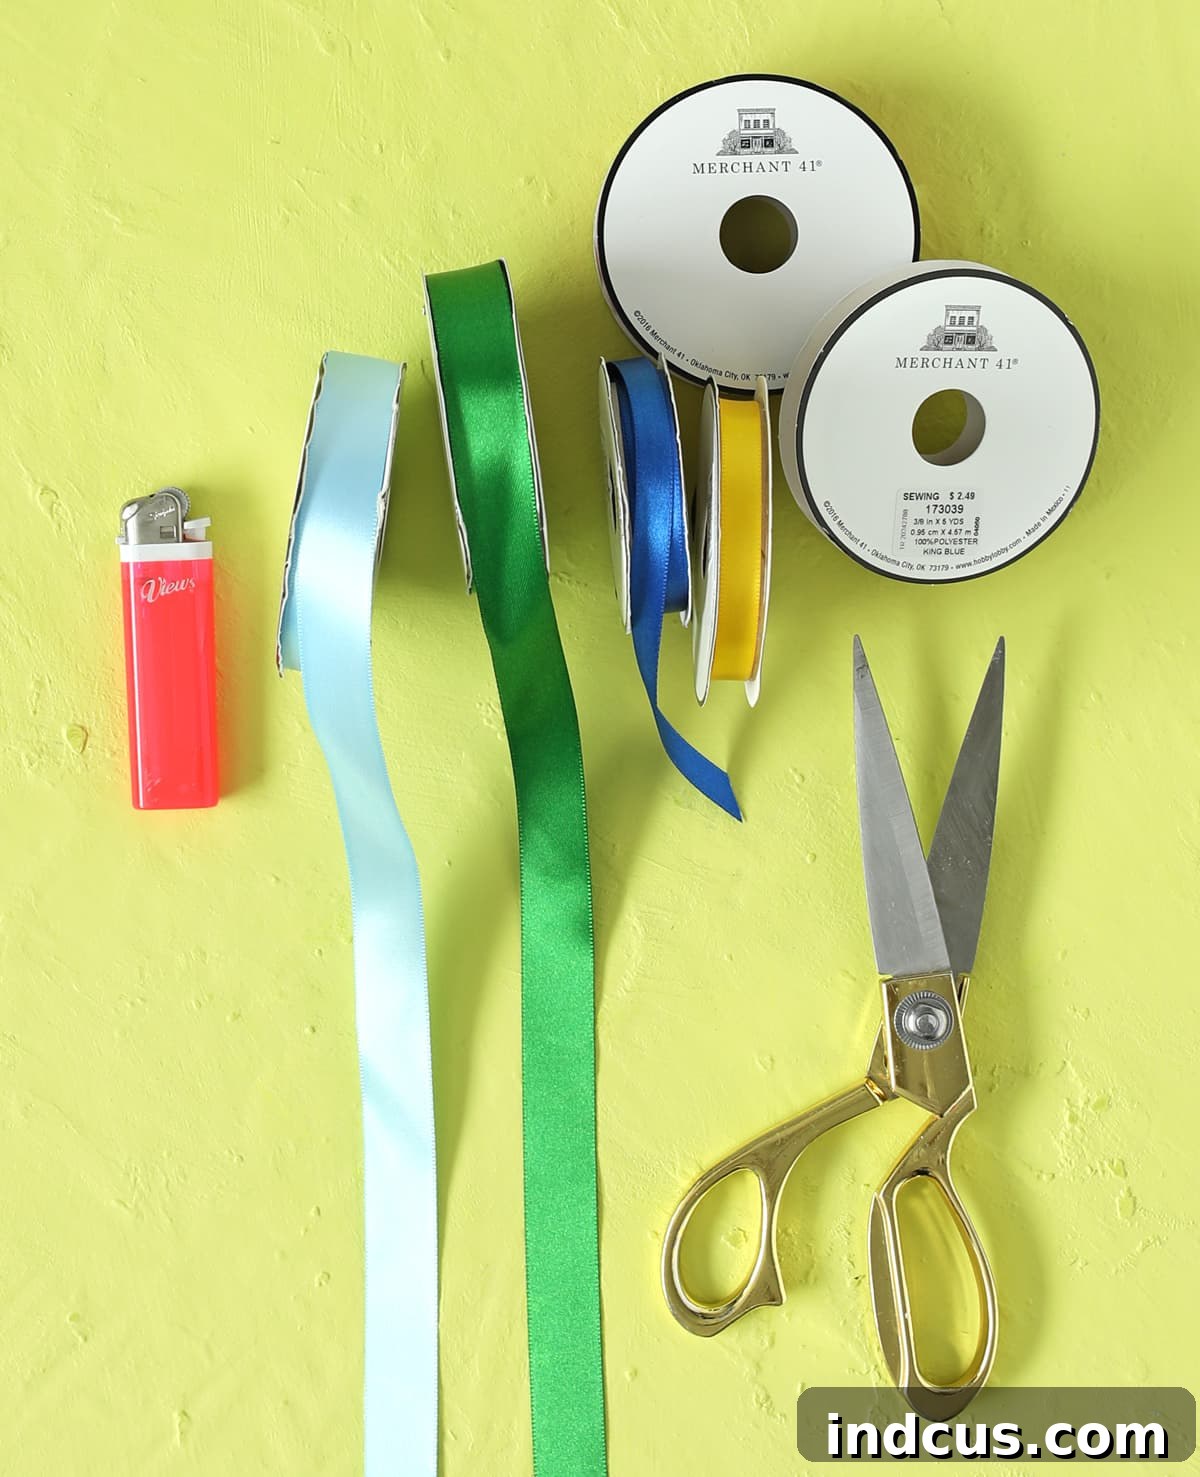
Materials You’ll Need:
- 3/8 Inch Double-Face Satin Ribbon in Two Colors: You’ll need approximately 5 yards of each color, ideally reflecting your graduate’s school colors or their favorite hues.
- Sharp Scissors: Essential for clean cuts and neat finishes.
- Lighter: Used to gently seal the ribbon ends, preventing fraying and ensuring your lei lasts. Exercise caution when using.
A Few Important Notes About Your Ribbon Selection:
- Where to Buy: Craft stores like Hobby Lobby and Michaels are excellent sources for a wide variety of satin ribbons. For example, Hobby Lobby offers 5-yard packages, often at great sale prices, while Michaels provides larger 15-yard spools, giving you extra ribbon for more elaborate bows or future projects. Online retailers like Amazon also have extensive selections.
- Ribbon Type Matters: While other ribbon types can be used, double-face satin ribbon is highly recommended. Its smooth, luxurious texture and subtle sheen truly elevate the finished lei, making it shimmer beautifully under the stage lights. The double-face aspect means both sides are glossy, so you won’t have to worry about a dull reverse side showing.
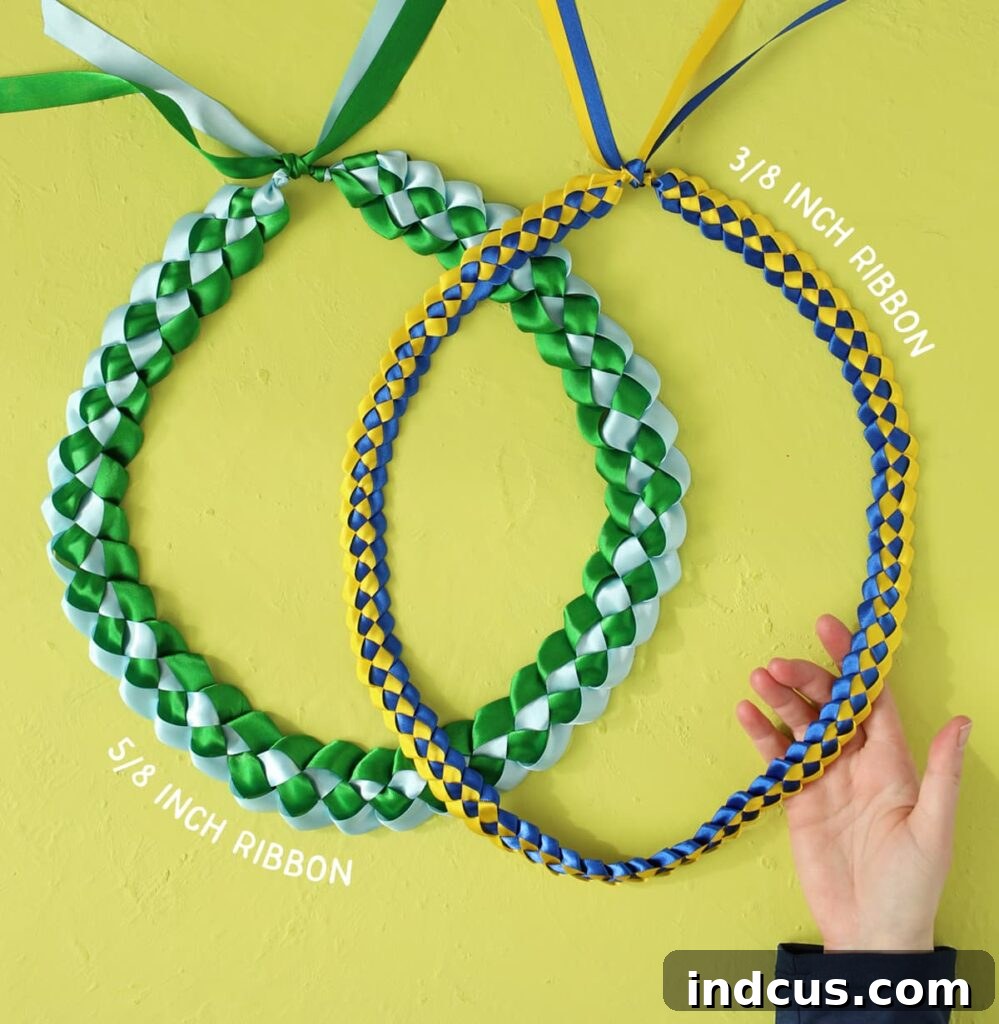
- Choosing the Right Width: For beginners, the 3/8 inch width is ideal. It’s pliable and easy to handle, allowing you to master the braiding technique without frustration. While 5/8 inch ribbon also creates a lovely lei, it can be slightly trickier to manage, resulting in a shorter finished product due to the wider loops. Starting with the narrower ribbon ensures a smoother learning curve and a satisfying result.
- Length and Width Comparison: Be aware that the wider the ribbon, the shorter your final lei will be. This is because each loop consumes more ribbon. The 3/8 inch ribbon typically yields a standard lei length suitable for most graduates.
Step-by-Step Instructions: Crafting Your Braided Ribbon Lei
The magic of creating a braided ribbon lei lies in its repetitive yet mesmerizing pattern. While photos provide excellent guidance, watching a video tutorial alongside these instructions will make the process incredibly clear. It’s a craft that truly “clicks” once you see the movements in action, so don’t hesitate to refer to the embedded video below for visual clarity.
Step 1: Prepare Your Ribbons and Start the Knot
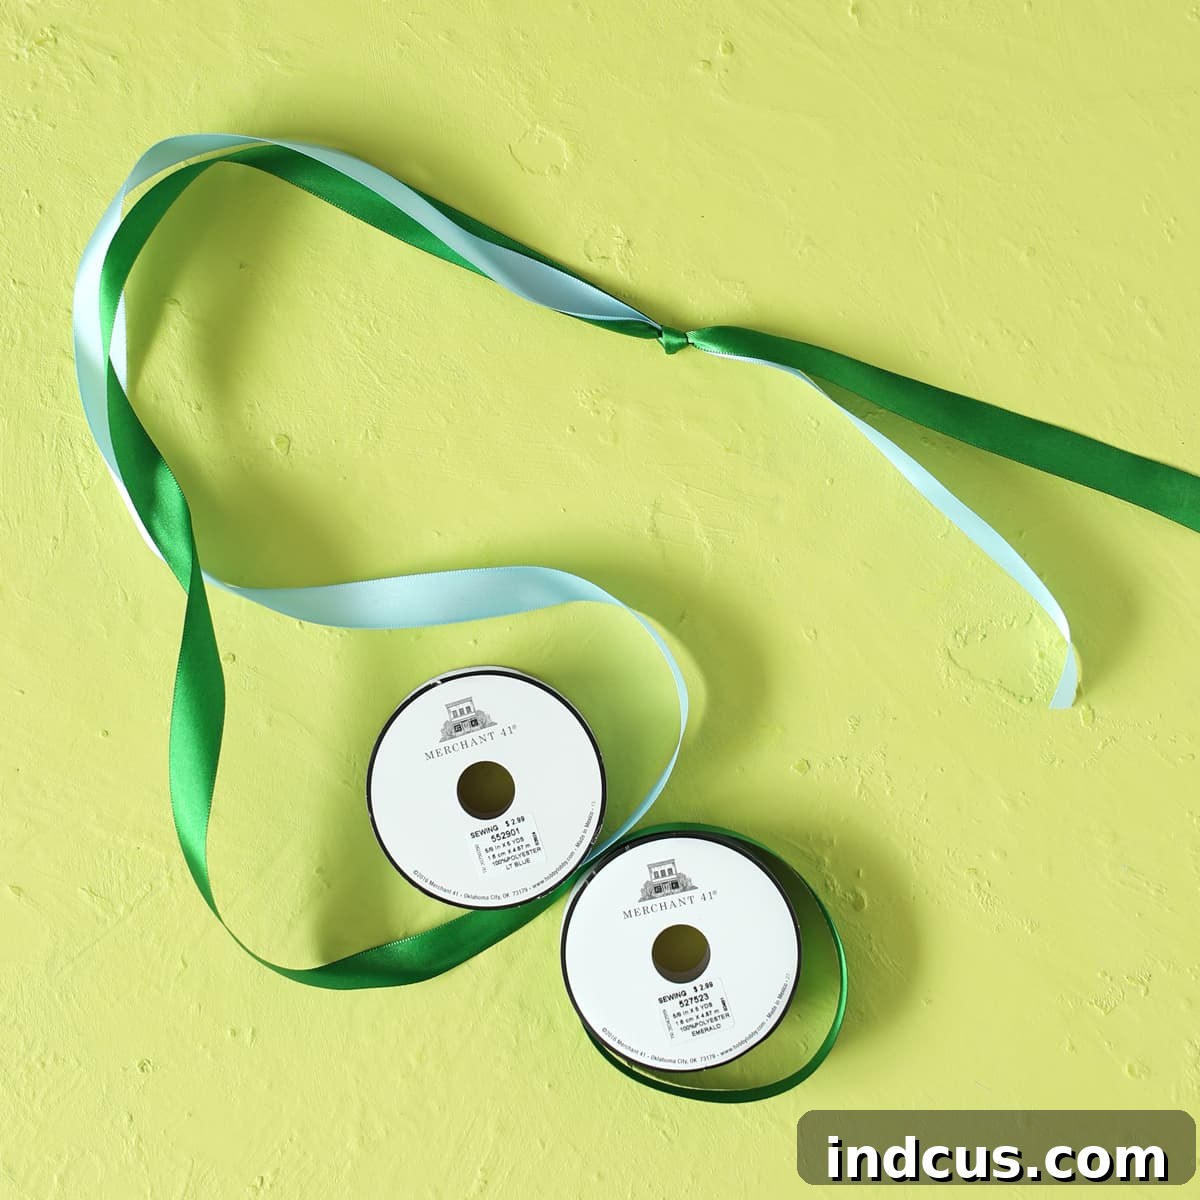
Begin by aligning the ends of both ribbon spools perfectly. Measure about 8 inches from the aligned ends and tie a secure, simple knot. This initial knot creates a foundational loop for your lei. An important tip: keep the ribbons attached to their spools for as long as possible. This prevents tangling and makes the braiding process much smoother as you work with the long lengths.
Step 2: Form the First Loop
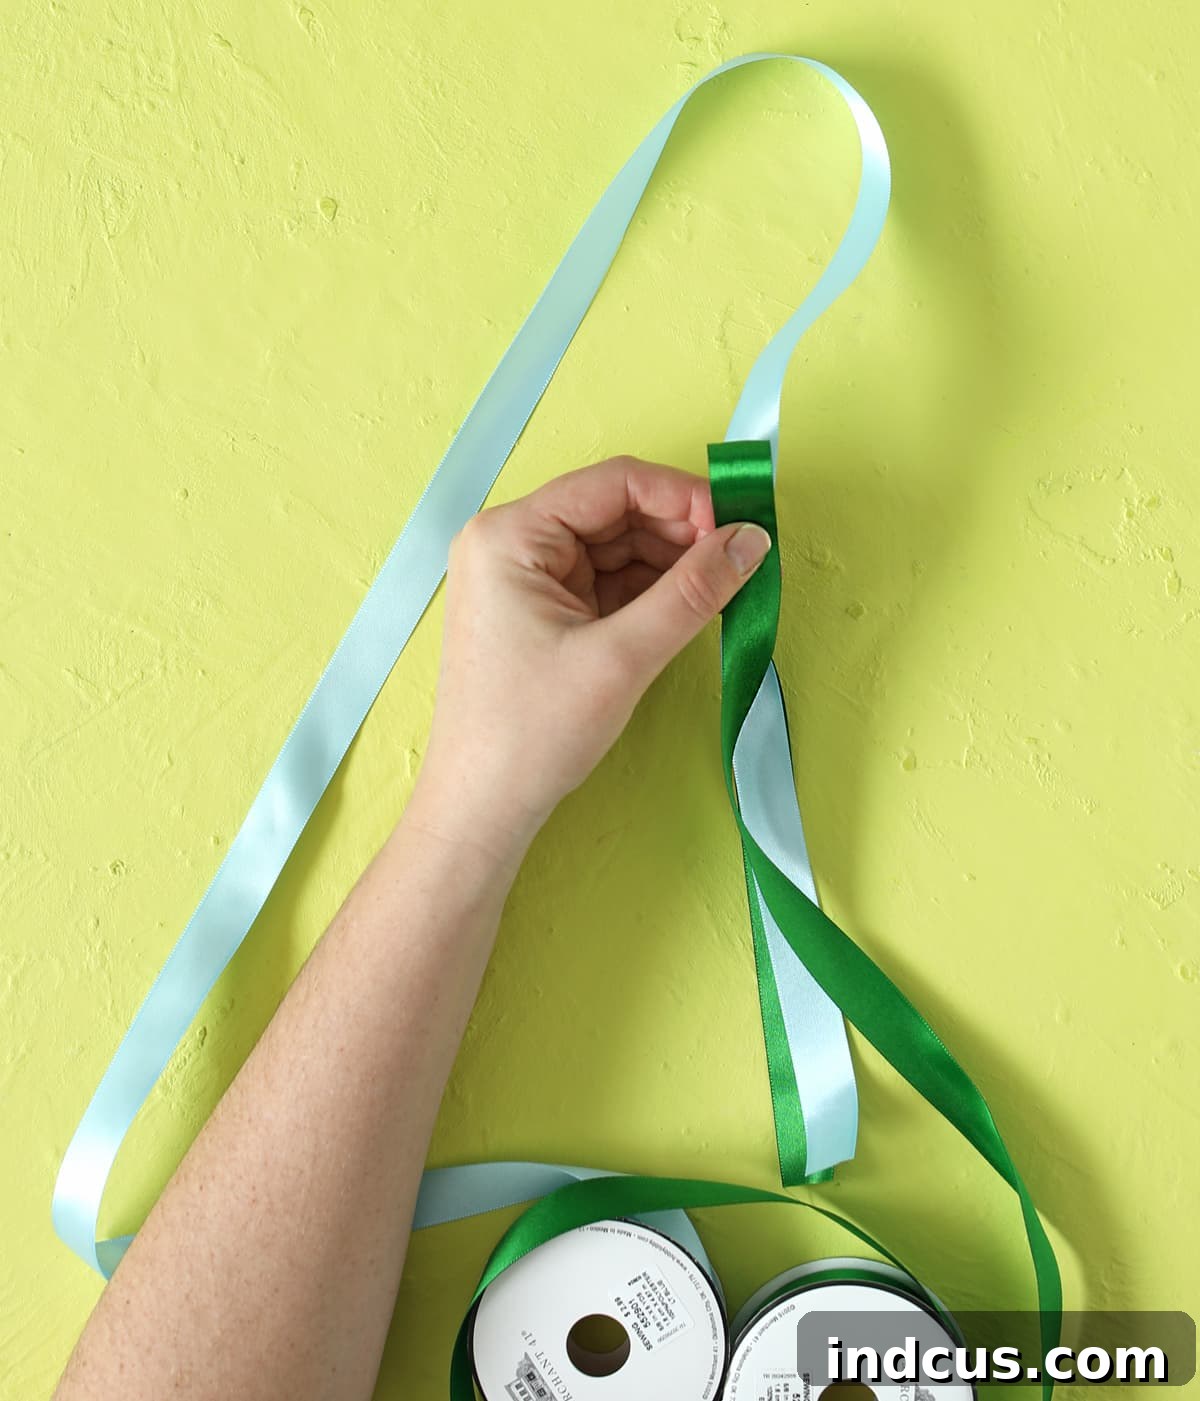
Take one of your ribbons (for instance, the green one in the example) and create a small, neat loop. This is a crucial detail: always loop the ribbon towards you, not away. This consistent directionality is key to forming the correct braided pattern and ensuring a uniform look for your lei. This first loop will serve as the anchor for the subsequent braiding.
Step 3: Wrap the Second Ribbon
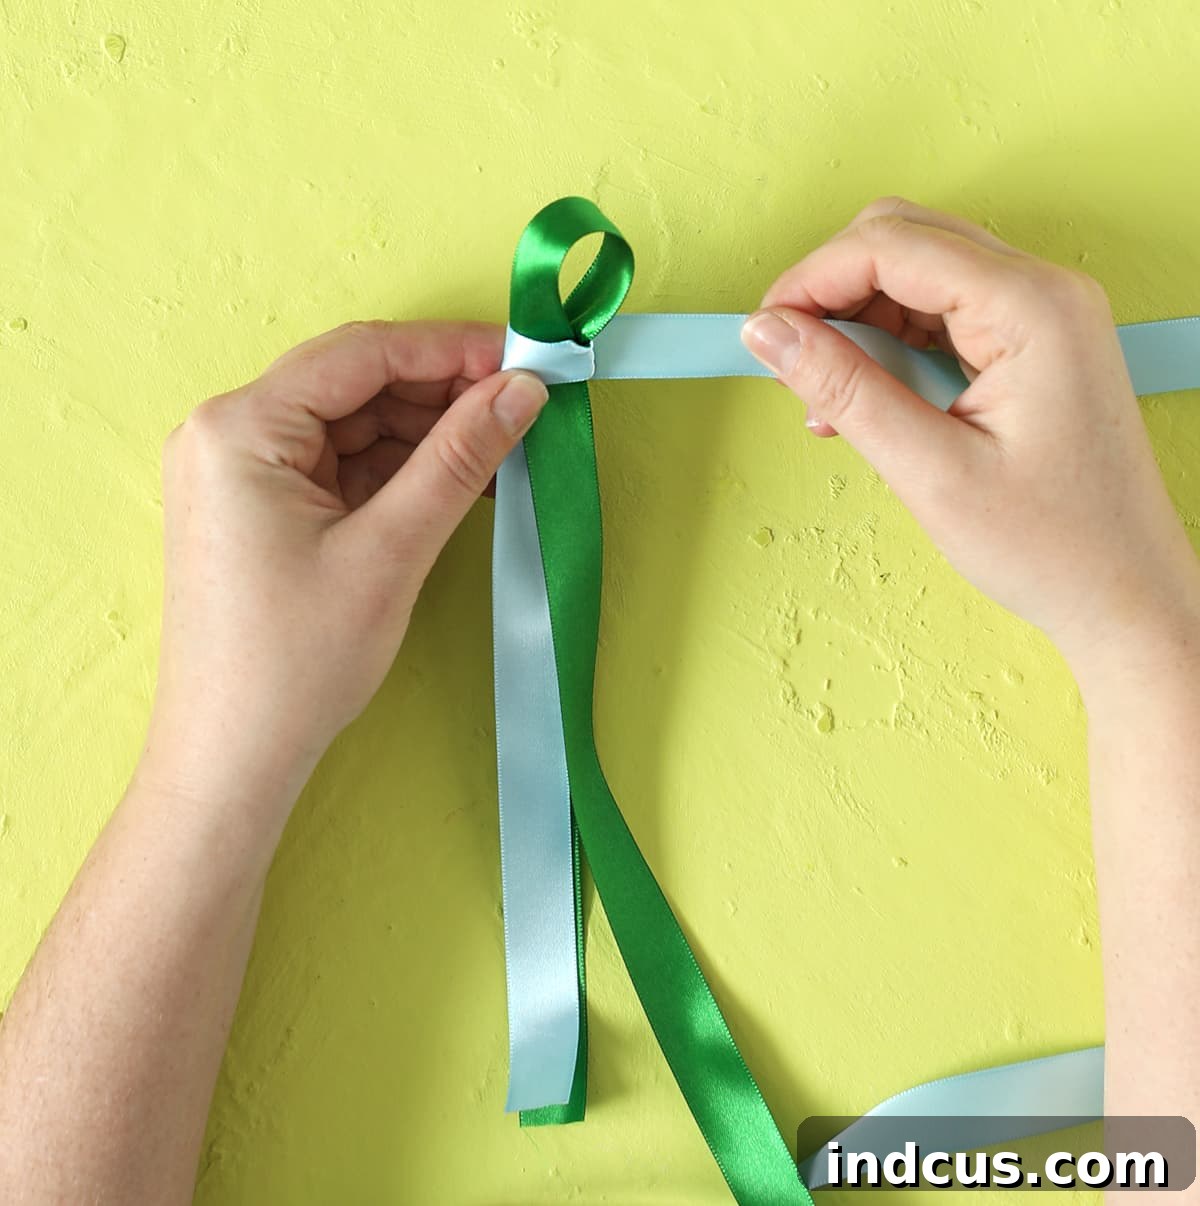
Now, take your second ribbon (the blue one in the example). Wrap it clockwise around the base of the first loop you just created (the green one), positioning it snugly just above the initial knot. This action secures the first loop and sets up the next stage of the braid, intertwining the two colors.
Step 4: Create the Second Loop
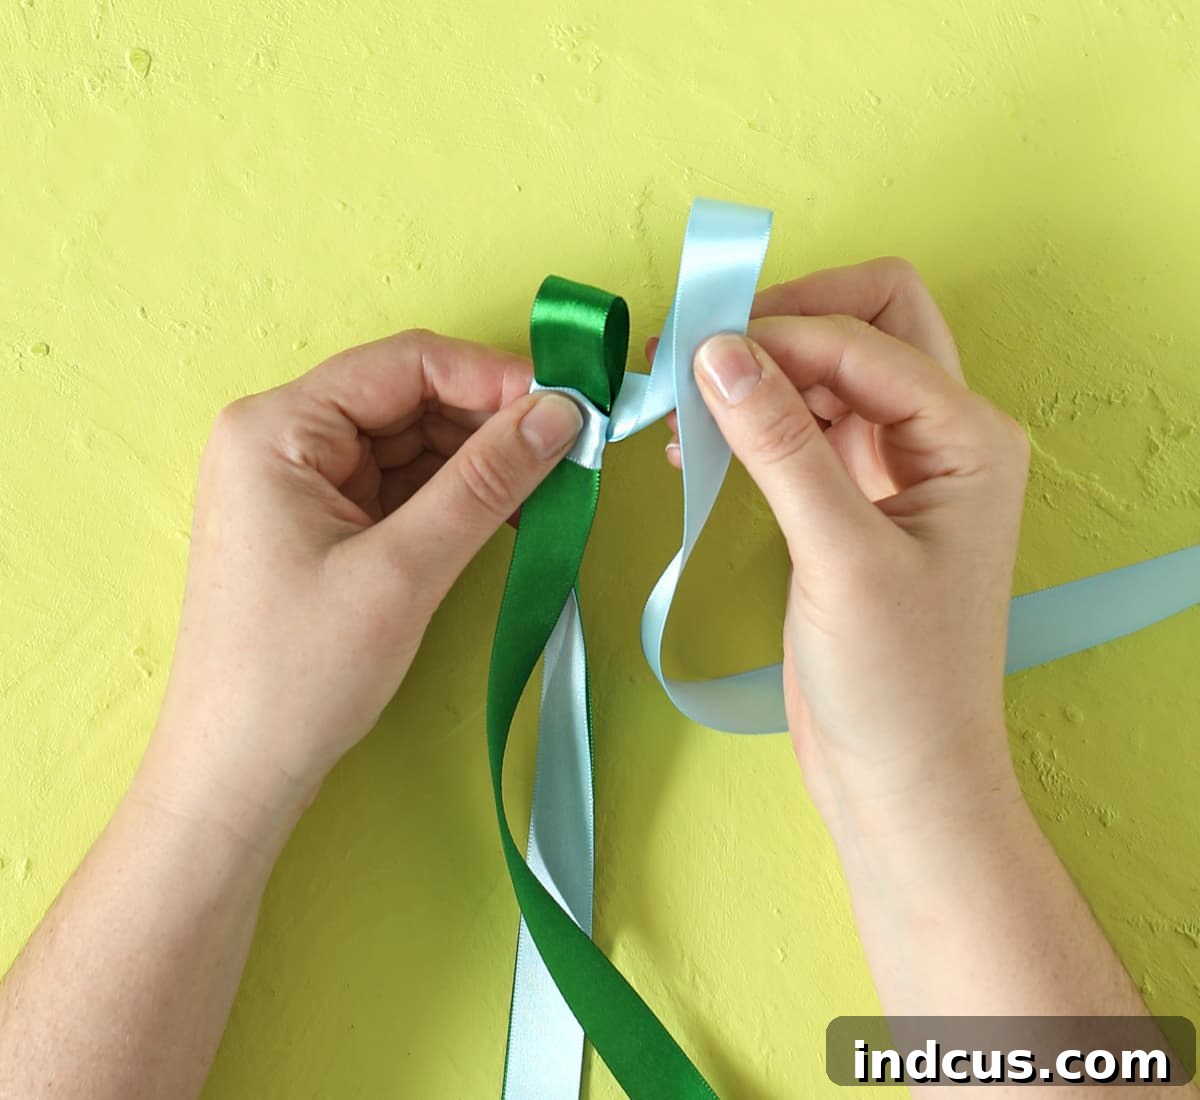
With the second ribbon (blue), form another loop, again ensuring that the long, working end of the ribbon is facing towards you. Consistency in looping direction is paramount for maintaining the integrity and neatness of your braid. This blue loop will now be ready to interlock with the green one.
Step 5: Interlock the Loops
Gently slide the newly formed blue loop through the first green loop. This is where the braiding truly begins, as the two colors start to weave together. Take your time to ensure the loops pass through smoothly without twisting or snagging.
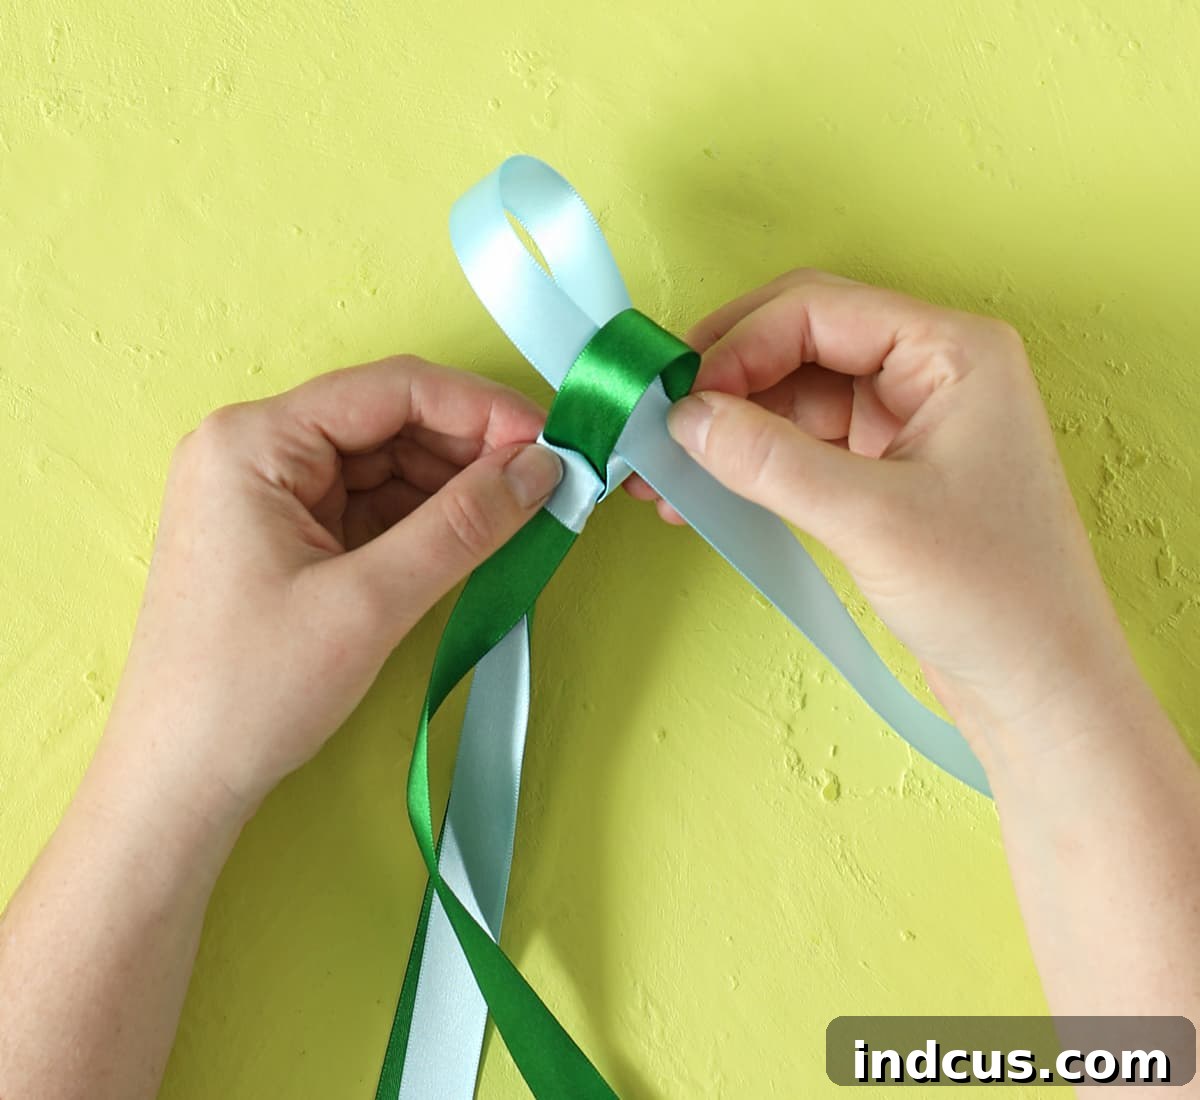
Step 6: Achieve the Perfect Tension
Once the blue loop is through the green, carefully pull the green ribbon until it lies flat and smooth. The key here is to achieve the right tension: not too loose, which creates unsightly “bubbles,” and not too tight, which causes the ribbon to pucker or bunch up. Aim for a consistently even tension to create a beautiful, uniform braid. This step often requires a bit of practice, so don’t be discouraged if it takes a few tries.
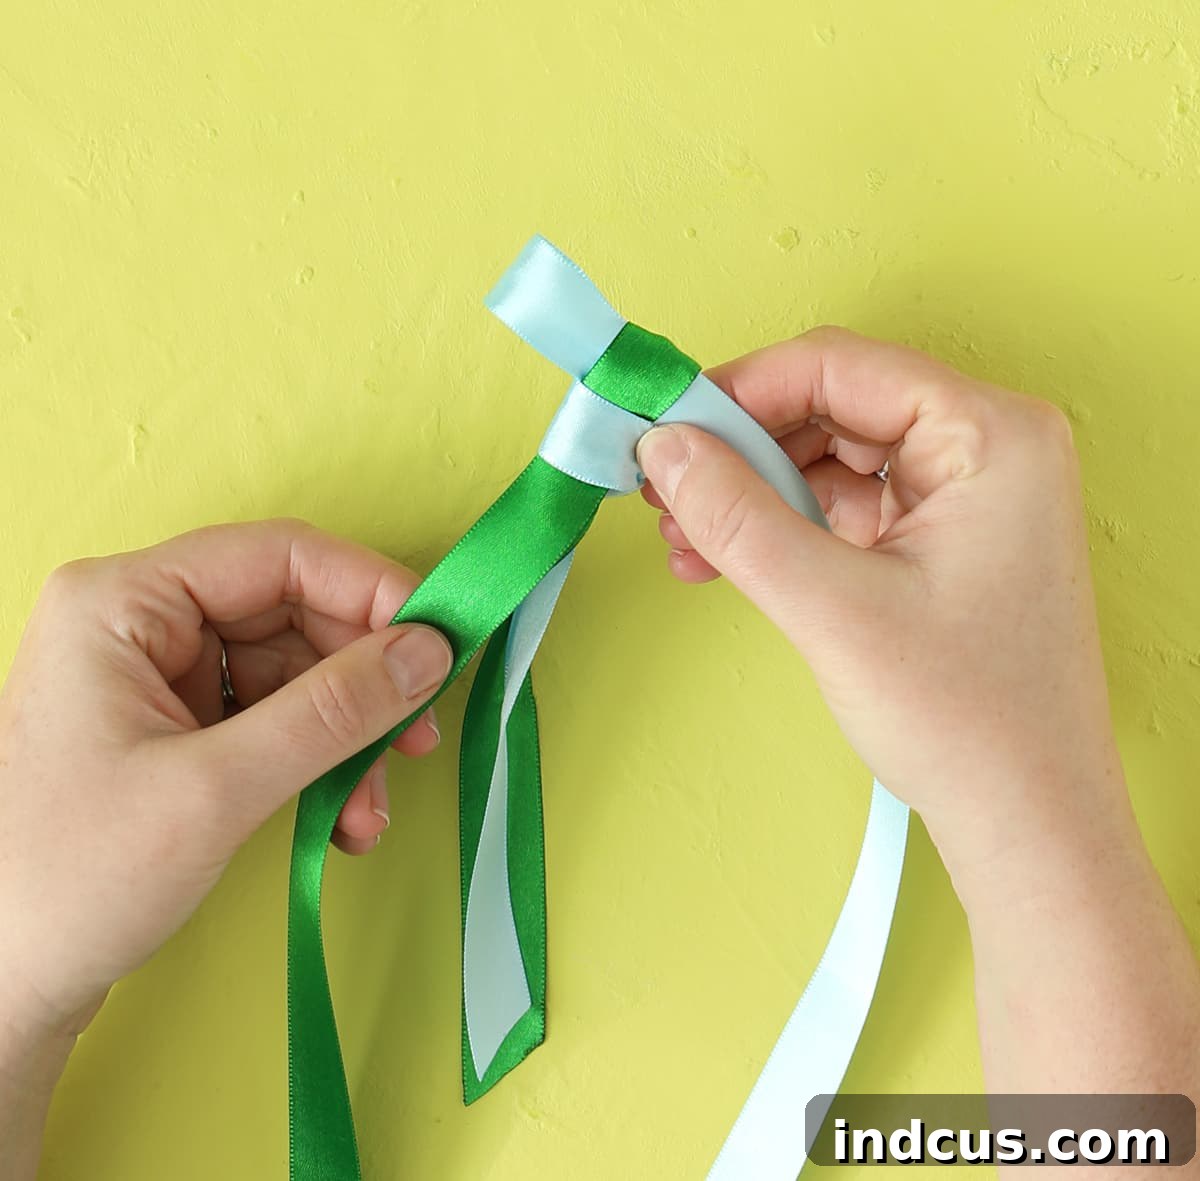
Step 7: Repeat the Braiding Pattern
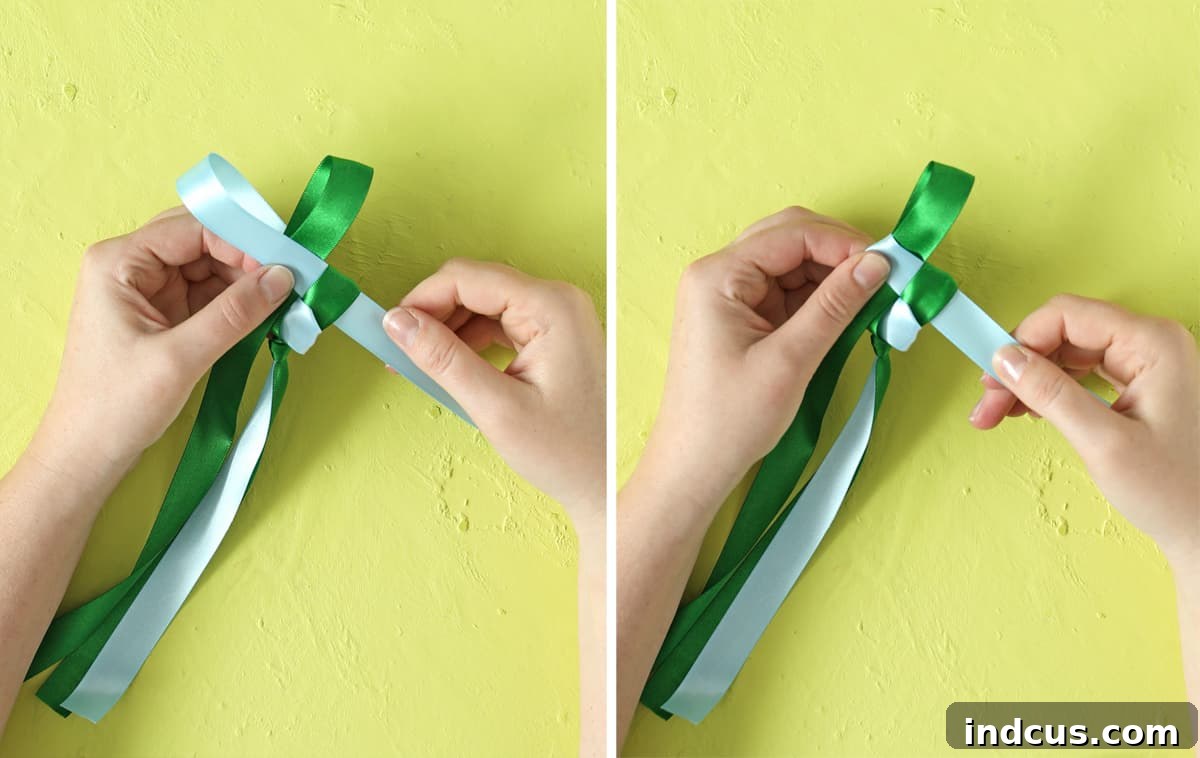
Now, you simply repeat the sequence. Form a loop with the active ribbon (which will now be the green one, as the blue loop is now the “active” one through which the next loop will pass), slide it through the existing loop, and then pull the previous ribbon to tighten. The pattern is always: create a loop with one color, pass it through the loop of the other color, then pull the other color tight. Continue this rhythmic process, alternating colors, ensuring consistent tension with each stitch. This repetition is where the magic of the braid truly develops.
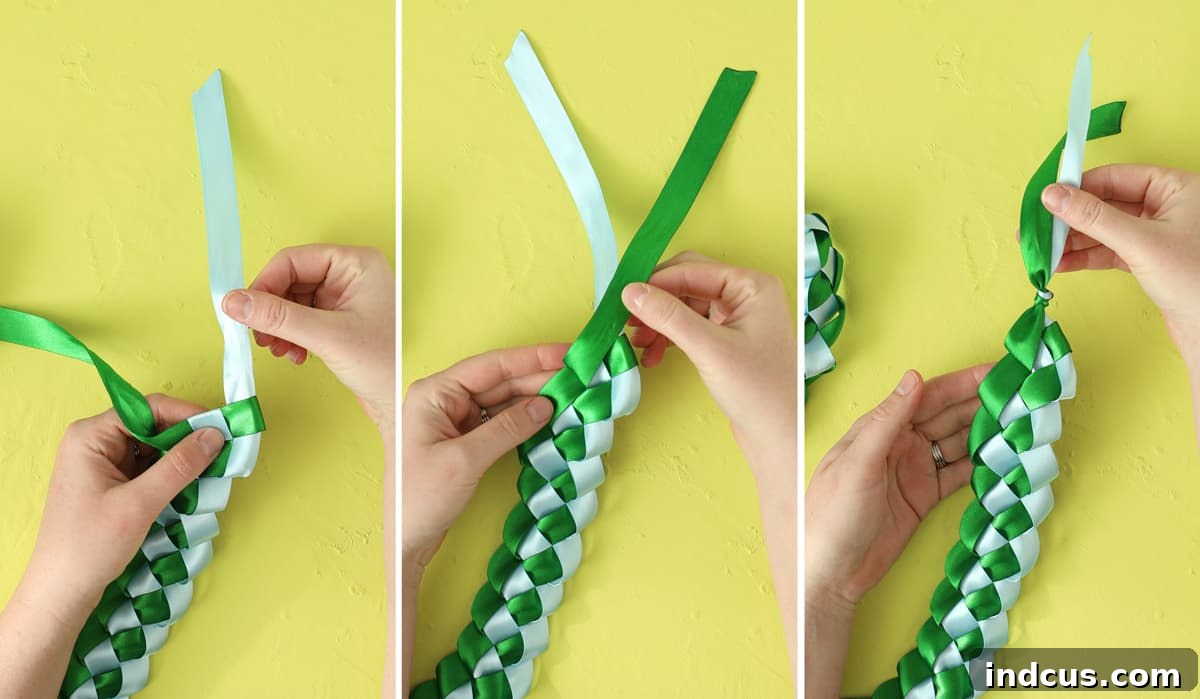
Step 8: Finishing the Braid
Continue braiding until you are about 8-10 inches from the end of your ribbons. To neatly finish the lei, create one final loop, pass it through the last active loop, and instead of pulling it tight, pull it all the way through, creating a tail. Then, tie a firm, secure knot as close as possible to the woven section. This secures the braid and prevents it from unraveling. Use your lighter to carefully seal the raw ribbon ends to prevent fraying, but do so away from the lei itself to avoid accidental scorching.
Step 9: Connect and Celebrate!
Finally, bring the two ends of your beautifully braided lei together. Tie the initial 8-inch tails and the finishing tails securely together, forming a complete circle. Trim any excess ribbon and gently seal the ends once more with the lighter for a polished look. Your magnificent, handmade ribbon lei is now complete and ready to be presented to your deserving graduate!
Showcasing Variations and Adding Unique Embellishments
Once you’ve mastered the basic braiding technique, a world of creative possibilities opens up. Experimenting with different ribbon widths, textures, and color combinations can lead to a diverse array of stunning leis, each with its own unique charm. Here are just a few examples of the versatility you can achieve:
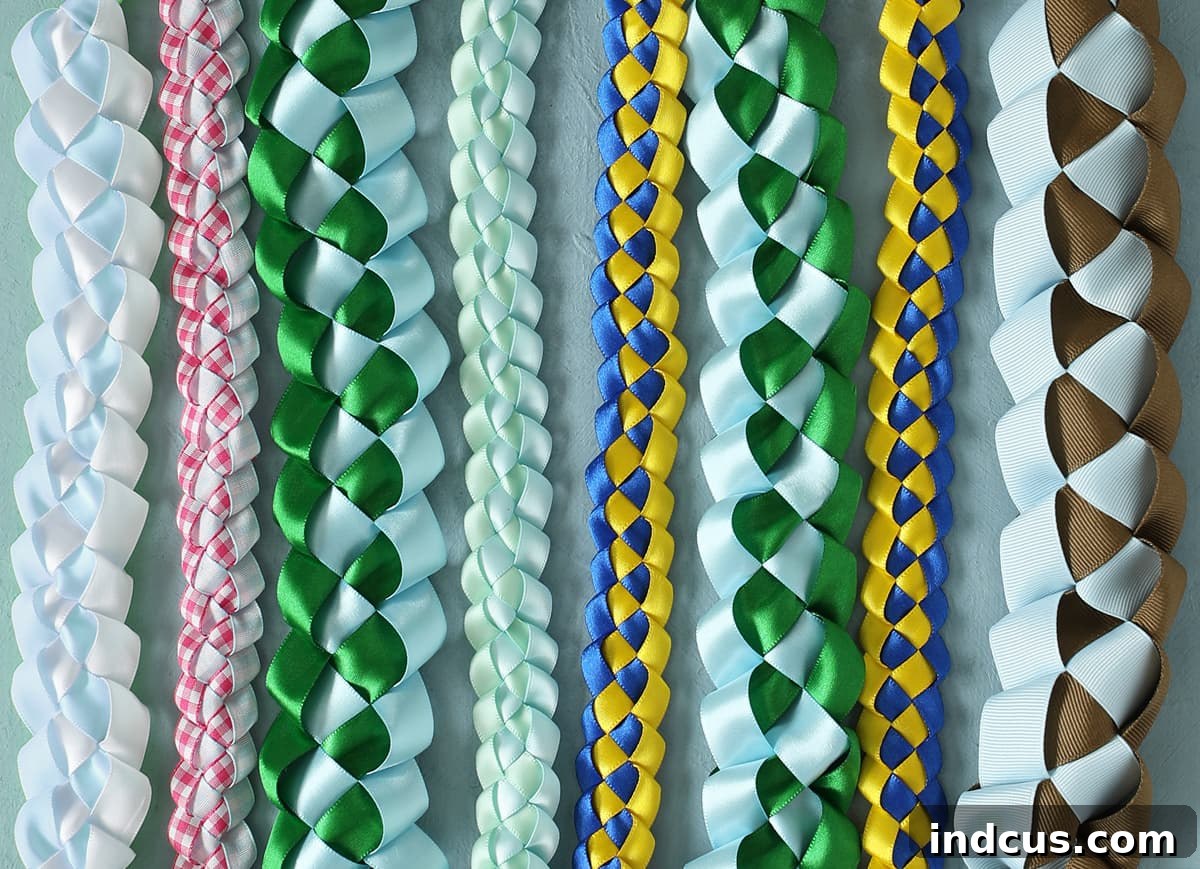
Aren’t these variations captivating? Each lei tells a different story, making them truly special. Beyond the braid itself, adding thoughtful embellishments can elevate your lei from beautiful to breathtaking, making it a truly personalized keepsake for your graduate.
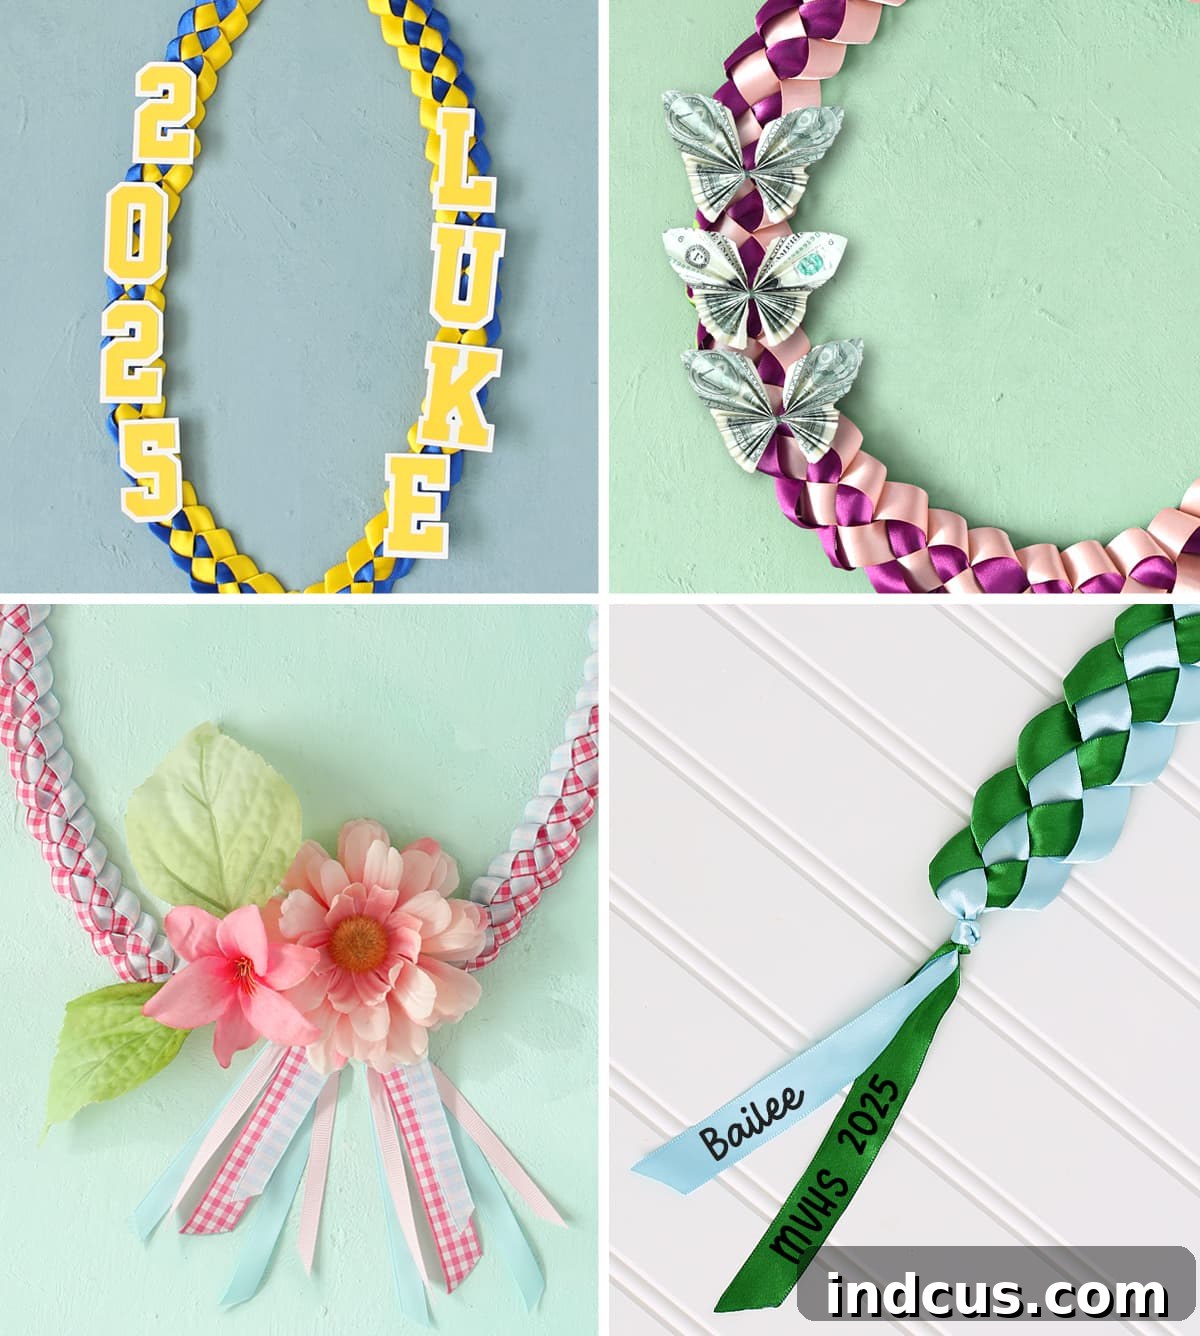
Inspiring Graduation Lei Accessory Ideas:
- Varsity Letter Patches: For a collegiate and sporty vibe, attach small varsity letter patches. 1-2 inch letters work best with 3/8-inch ribbon. Simply hot glue or stitch them on.
- Money Butterflies: Fold currency into elegant money butterflies and delicately wire them onto the lei for a celebratory and practical touch.
- Floral Arrangements: Create a small cluster of faux or fresh flowers (ensuring they can withstand the day’s heat) and securely attach them as a focal point.
- Personalized Ribbon Tails: Use iron-on vinyl to add the graduate’s name, graduation year, school motto, or a heartfelt message to the dangling ribbon ends. Learn how to apply vinyl to ribbon here.
- Money Fans: Another creative way to incorporate currency, folded money fans can be easily attached throughout the lei.
- Decorative Medallions: Small medallions or charms, perhaps related to their achievements or future plans, can be effortlessly added.
- Handmade Ribbon Rosettes: Elevate your lei with elegant, professional-looking ribbon rosettes, adding volume and sophistication.
- Charming Accents: Consider whimsical additions like a tiny graduation rubber duck or miniature caps and diplomas for a touch of fun.
Remember to secure all embellishments firmly using hot glue, needle and thread, or floristry wire to ensure they stay in place throughout the graduation ceremony.
DIY Graduation Ribbon Lei Video Tutorial
For those who benefit from visual learning, this video tutorial is an invaluable resource. Watch the step-by-step process in real-time, allowing you to pause, rewind, and follow along at your own pace. It beautifully demonstrates the looping and tightening techniques that are crucial for a flawless braided ribbon lei.
Conclusion: Your Handmade Masterpiece Awaits!
Congratulations! You’ve just received a master class in creating a beautiful, personalized graduation lei from ribbon. Having reviewed detailed photos and watched the comprehensive video tutorial, you are now equipped with all the knowledge and confidence to embark on this rewarding craft project. It might seem intricate at first, but with a little practice and patience, you’ll find the rhythm of the braid and create something truly special.
Imagine the joy and surprise on your graduate’s face when they receive a handcrafted lei made with love. This isn’t just a decoration; it’s a cherished symbol of their achievement and your unwavering support. So, gather your ribbons, follow these steps, and create a memorable keepsake that celebrates this incredible milestone. You absolutely can do it! For another fantastic graduation gift idea, explore our tutorial on making a delightful candy and money graduation lei.







