Mastering the Art of Paper Snowflakes: A Comprehensive Guide to Folding and Cutting Beautiful Designs
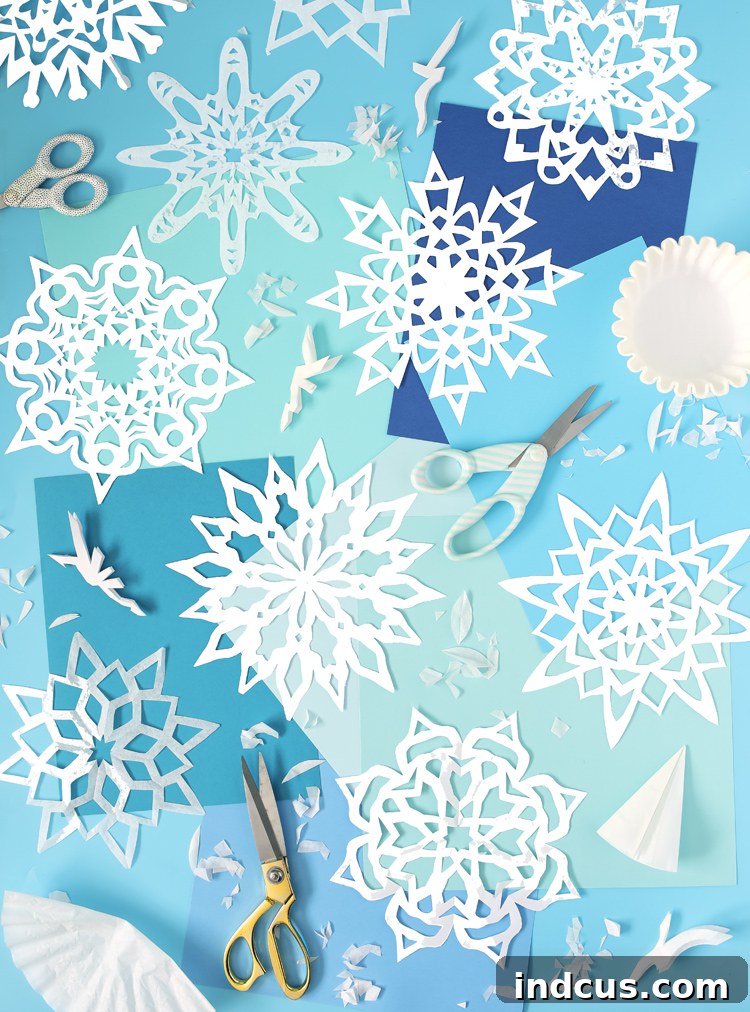
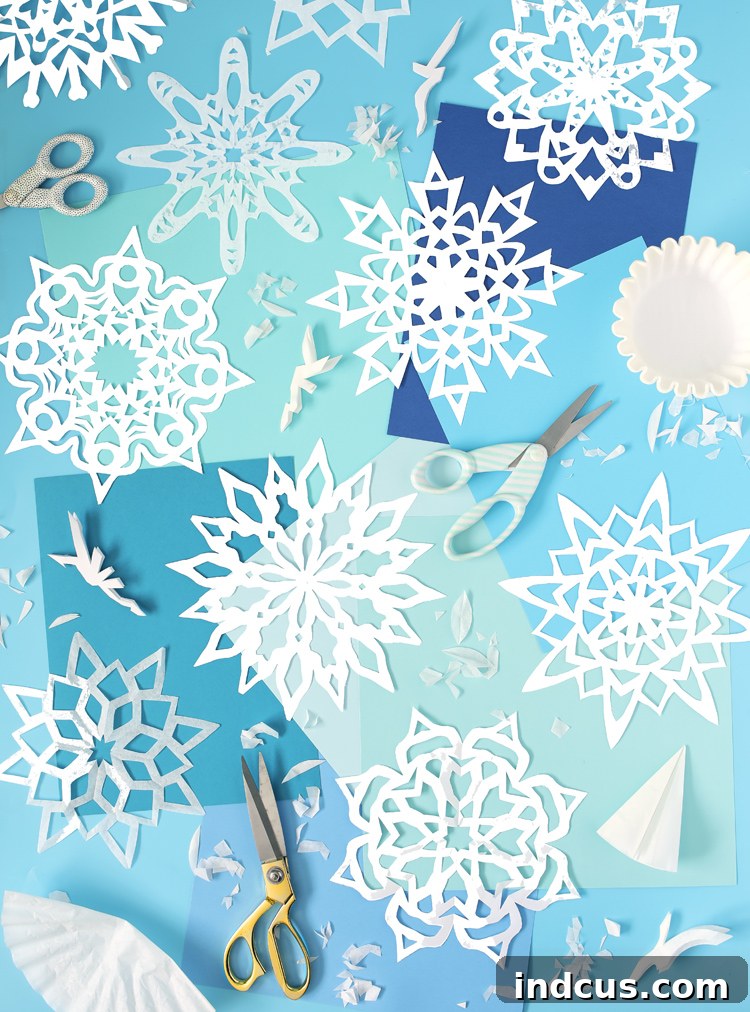
There’s a unique magic in transforming a simple sheet of paper into a delicate, intricate snowflake. Making paper snowflakes is a timeless winter craft, cherished by families and enjoyed by all ages. It’s one of my absolute favorite simple craft activities, and watching the excitement on my kids’ faces as they unfold their creations is truly priceless. The big reveal, when each unique design emerges from the folds, is a moment of pure joy. Best of all, this delightful Christmas and winter craft is incredibly affordable and accessible, requiring only a sheet of paper and a pair of scissors. Forget fancy printable templates, special origami paper, or expensive materials – simplicity is key here!
Whether you’re looking for a fun activity to do with children (ideally age 4+ who can safely use scissors) or seeking a mindful, creative outlet for yourself, paper snowflakes offer endless possibilities for artistic expression. Each snowflake you create will be wonderfully unique, just like real ones, bringing a touch of winter wonder into your home. This guide will walk you through everything you need to know to create stunning paper snowflakes, from selecting the right paper to intricate cutting techniques and inspiring display ideas.
Choosing the Best Paper for Your DIY Snowflakes
The type of paper you choose can significantly impact the ease of folding and cutting, as well as the final look of your snowflake. While you can technically use almost any paper that can be folded into a perfect square, some types are much more beginner-friendly and yield better results.
For most of my paper snowflake projects, I prefer using the cheapest, thinnest white printer paper. Its light weight makes it easy to fold multiple times without creating excessive bulk, and it cuts smoothly, even through several layers. This makes it ideal for achieving intricate designs without straining your scissors or hands. Another fantastic option, especially for creating delicate, lace-like snowflakes, is coffee filters. They are incredibly thin and soft, making them exceptionally easy to fold and cut. Plus, a giant pack of coffee filters is usually very inexpensive, making them a budget-friendly choice for mass production. The only slight drawback with coffee filters is their delicate nature; they can tear easily if you’re not careful during folding or cutting. This tutorial will demonstrate how to make paper snowflakes using both standard printer paper and coffee filters, so you can see the slight differences and choose what works best for you.
Don’t limit yourself to just white paper! Experimenting with different paper types can lead to some truly unique and beautiful snowflakes. Consider wrapping paper for festive patterns and colors, wax paper for a translucent effect, or even vellum for a sophisticated, frosted appearance. Glitter paper can add a sparkling touch, while adhesive vinyl or sticker paper (with the backing still on) offers a stiffer medium that holds its shape well. Get creative and see what amazing designs you can unfold! Just ensure the paper isn’t too thick, as cutting through multiple layers can become challenging.
Step-by-Step Guide: How to Fold Paper Snowflakes (Eight-Sided Designs)
The folding technique is the foundation of a symmetrical and beautiful paper snowflake. This method will result in an eight-sided snowflake, a classic and universally loved design. Precision in your folds will lead to a more balanced and visually appealing final product.
Step 1: Create a Perfect Square. Begin with a standard sized 8.5×11 inch piece of paper. Take one corner and fold it diagonally across the paper, aligning the edges to form a large isosceles triangle with two equal sides. This action will leave a rectangular strip of excess paper along one edge. For a cleaner start, you can cut off this excess paper now to create a perfect square. Alternatively, to save time, I often skip this initial trim and simply cut off the extra paper during the first design cuts. For beginners or younger crafters, cutting off the excess upfront might be easier to manage and ensure a clean starting square.
Step 2: First Triangle Fold. With your square piece of paper (or the large triangle you just formed), fold the triangle in half once more. Bring the two sharp points of the triangle together, aligning all edges carefully. Press firmly along the crease to ensure a crisp fold. This will give you a smaller, more manageable triangle.
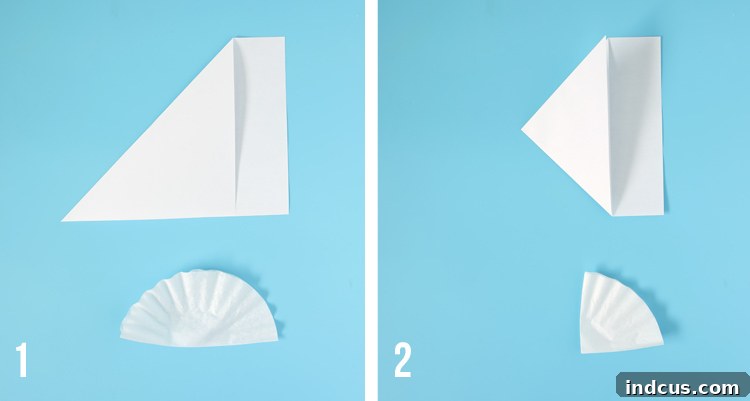
Step 3: Establish a Center Crease. Fold the triangle in half again, and then immediately open it back up. This brief fold isn’t meant to be permanent but rather to create a light center crease. This crease will serve as a crucial guide for the subsequent, more complex folds, helping you maintain symmetry.
Step 4: Fold One Side to the Center. Now, take one of the outer sides of your triangle and fold it inwards. Align its edge precisely with the center crease you just made in Step 3. It’s vital that the tip of your triangle (the innermost point) remains sharp and perfectly aligned with all the new folds. A neat point ensures a perfect center for your snowflake.
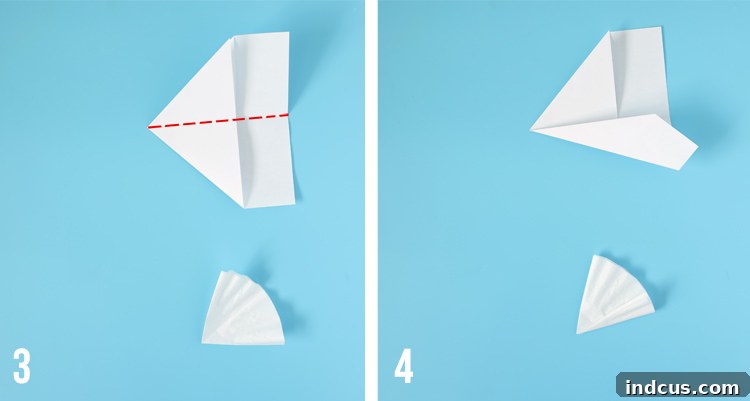
Step 5: Fold the Other Side. Repeat the process from Step 4 with the other outer side of your triangle. Fold it over, ensuring its edge also lines up perfectly with the center crease. At this point, you should have two folded edges that touch each other precisely at the pointed end of your triangle, creating a more angular, fan-like shape.
Step 6: Final Fold for Intricacy. Carefully fold both sides of your paper together, aligning all layers as evenly as possible. Press down firmly along all the fold lines to ensure they are sharp and secure. For exceptionally crisp folds, you can even use a bone folder or the back of a spoon. The firmer the folds, the easier it will be to cut through the multiple layers accurately.

NOTE: If you chose to skip trimming the extra paper in Step 1, you will now have several layers of paper along one edge that aren’t part of your main folded triangle. Before you start cutting, gently feel through the folded layers to locate this innermost edge. It’s crucial to start your design below this edge; otherwise, cutting through it indiscriminately will disrupt the symmetry and structure of your snowflake. This particular consideration only applies when using printer paper or similar rectangular sheets, as the edges of a coffee filter naturally align perfectly after folding.
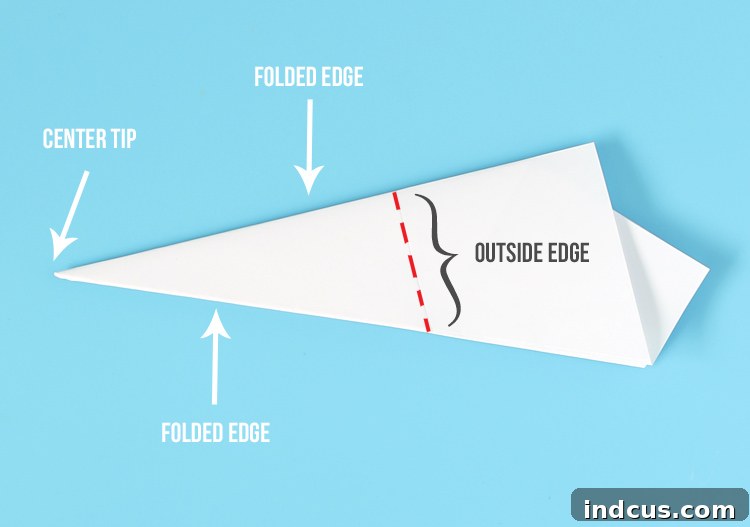
Unleashing Creativity: How to Cut Paper Snowflakes
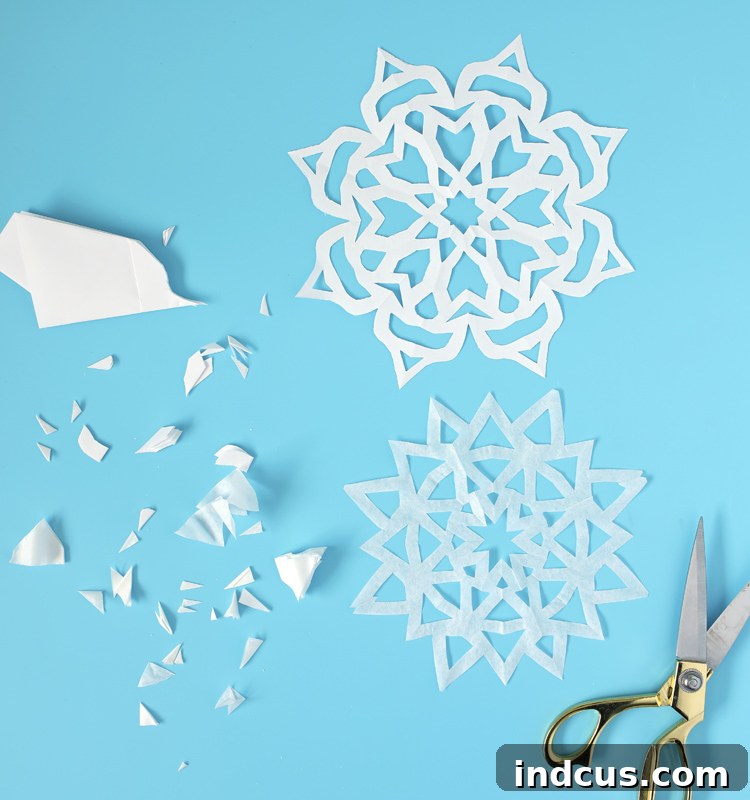
Once your paper is meticulously folded, it’s time for the most exciting part: cutting! This is where your creativity truly shines, as there are no strict rules, only guiding principles. Remember, the widest part of your folded triangle will form the outside edge of your snowflake, while the sharp tip will be its intricate center. I typically like to begin by shaping the outside edge, then gradually working my way inwards, adding details.
The primary “rule” to keep in mind for structural integrity is to only cut all the way through the triangle along its outside edge and at the very tip (the center point). If you make a cut that extends completely from one side to the other in the middle section of your folded triangle, you’ll end up creating a large, unwanted hole that separates parts of your snowflake, rather than forming a cohesive design. Aim for connected patterns and leave enough paper between cuts to maintain strength.
Experiment with different types of cuts: small snips, long curves, sharp zig-zags, tiny triangles, or half-circles. Each cut contributes to the unique pattern that will emerge when you unfold your creation. Think about negative space – the shapes you cut out will define the positive space of your snowflake. Don’t be afraid to take risks; the beauty of paper snowflakes lies in their individuality and the element of surprise!
Here are two examples of folded paper with various cuts I made:

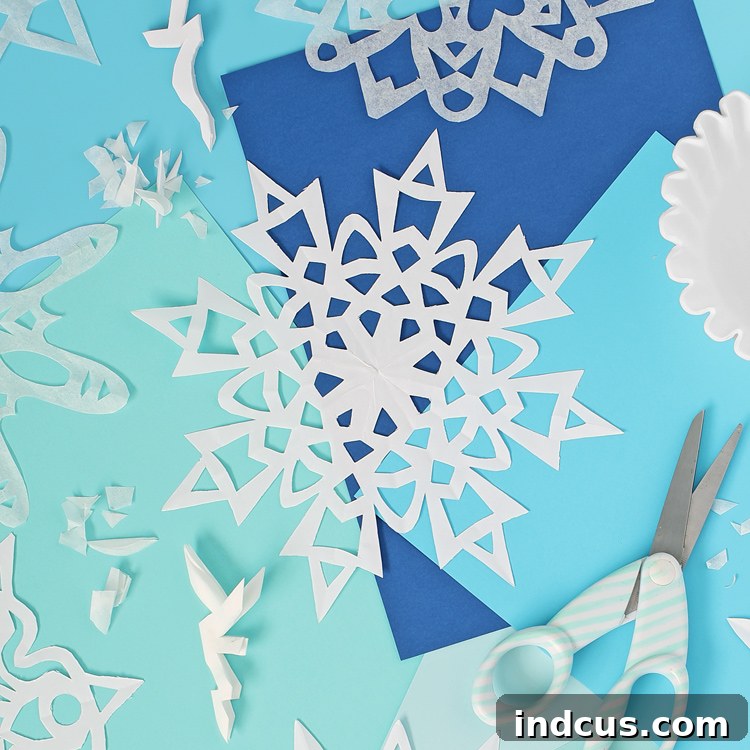
… and behold their stunning transformations once unfolded!
It’s genuinely such a blast! I seriously adore crafting paper snowflakes, and I hope you will too.
Pro Tips for Cutting The Best Paper Snowflakes
- More is More: For truly detailed and intricate designs, don’t be shy with your scissors. Cut out a significant portion of the paper. You want lots of tiny holes, intricate patterns, and only a delicate skeleton of paper left. The more you cut, the more elaborate your snowflake will be.
- Deep Outer Edge Designs: If you only add a few shallow notches to the outside edge of your folded triangle, your unfolded snowflake will primarily retain a circular shape. To achieve more dynamic and interesting outlines, make deep, bold cuts along the outer edge. Think about sweeping curves or sharp angles that will create a unique silhouette.
- Symmetry is Key: Every cut you make along the folded edges of your triangle will be perfectly mirrored when the paper is unfolded. This is the magic of paper snowflakes! Just like cutting a half-heart on a folded paper creates a perfect heart, your cuts along the symmetry lines will create recurring patterns. Embrace this inherent symmetry to design captivating repeats.
- Experiment Fearlessly: This entire process is about discovery and fun! Don’t be afraid to try different cuts, shapes, and patterns. Since the materials are so inexpensive, there’s absolutely no pressure to be perfect. Each “mistake” is just an opportunity for a new, unexpected design. Just keep trying things and seeing how they turn out – you might surprise yourself!
- Consider Your Tools: While basic craft scissors work fine, a smaller pair of detail scissors or even a craft knife (for adults only, with a cutting mat) can help achieve more precise and intricate cuts, especially in tight corners.
- Flatten for Presentation: After you’ve carefully unfolded your magnificent snowflake, it might have some slight creases from the folding process. To achieve a perfectly flat display, you can place it gently between the pages of a heavy book for a few hours. For an even crisper finish, you can carefully iron your snowflake on a low setting, placing a thin cloth over it to protect the paper. This extra step truly makes your snowflakes look polished and professional.
Exploring Six-Sided Snowflakes: A Different Geometric Beauty
While the eight-sided snowflake is a wonderful classic, for those who love to explore all possibilities and add even more variety to their winter decor, learning to make a six-sided snowflake is a fantastic next step. If you’re content with the simplicity of the eight-sided method, feel free to skip ahead. However, for the eager crafters who want to try all the things, this variation offers a different kind of symmetrical beauty.
Real snowflakes in nature typically have six sides, making this design particularly authentic. The folding technique for six-sided snowflakes is quite similar to the eight-sided method but diverges at a critical point, leading to a different number of radial arms. Below, you can see a comparison photo of two snowflakes, one with six sides and one with eight. I made a conscious effort to cut the design in a very similar fashion for both, allowing you to clearly observe the distinct geometric differences that arise from the initial folding technique.
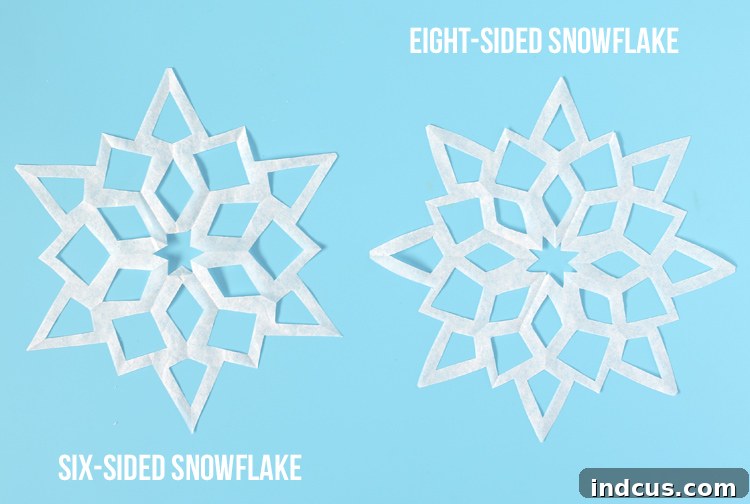
Both types are undeniably beautiful, each with its own charm and intricate appeal. So, why choose one when you can master both? Incorporating both six-sided and eight-sided designs into your collection will add an incredible depth and visual interest to your paper snowflake displays. Let’s dive into the slightly modified folding technique for these naturally inspired, six-sided wonders.
Crafting Authenticity: How to Make Six-Sided Snowflakes
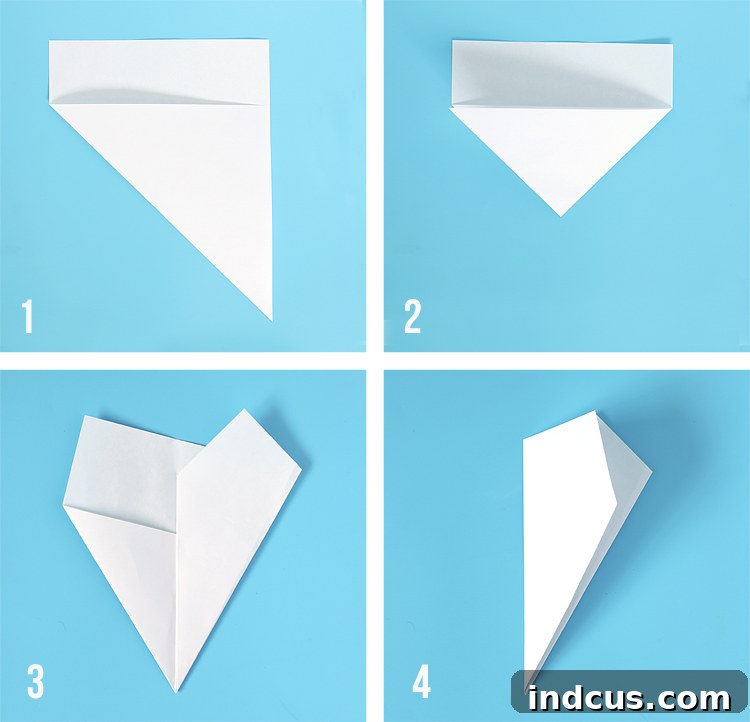
Achieving the elegant symmetry of a six-sided snowflake involves a slightly different initial folding sequence compared to its eight-sided counterpart. Pay close attention to these steps to ensure your final design mirrors the beauty of real snowflakes.
Step 1: Form the Initial Square. Just as with the eight-sided method, start with a standard rectangular piece of paper. Fold one corner up diagonally until the edges align, forming a large triangle and leaving an excess strip of paper. You can cut off this excess paper now to create a perfect square, or save it to trim later with your design cuts. A precise square is essential for symmetrical results.
Step 2: Fold the Triangle in Half. Take the square (now folded into a large triangle) and fold it in half again. Bring the two sharp points of the triangle together, ensuring all edges are perfectly aligned. Press firmly to create a crisp crease. This will give you a smaller, denser triangle, which is the base for your six-sided design.
Step 3: Divide into Equal Thirds (First Fold). This is where the six-sided folding diverges significantly. Imagine dividing your triangle into three equal sections from the tip. Take one side of the triangle and fold it inwards. The goal is to make this fold such that the edge aligns approximately with one-third of the triangle’s width, originating from the tip. Precision here will contribute to true six-sided symmetry. It might take a few attempts to get it just right – practice makes perfect!
Step 4: Complete the Thirds Fold (Second Fold). Now, take the remaining un-folded side of the triangle and fold it over the section you just folded in Step 3. Again, aim for precise alignment, so all three “thirds” of your original triangle are now neatly layered on top of each other, forming a single, narrow, elongated triangle. Press firmly along all creases to secure the layers. You are now ready to cut your six-sided masterpiece!
Watch and Learn: Paper Snowflakes Video Tutorial
Sometimes, seeing the process in action makes all the difference. For visual learners, I’ve included a helpful video tutorial that guides you through the folding and cutting steps. This can be particularly useful for understanding the exact movements and alignments for crisp, beautiful snowflakes.
Creative Ways to Display Your Paper Snowflakes
Once you’ve accumulated a delightful stack of beautifully unique paper snowflakes, the fun doesn’t end there! There are countless imaginative ways to display them, transforming your space into a winter wonderland. Here are some inspiring ideas compiled from fellow creative friends online, designed to showcase your intricate paper creations:
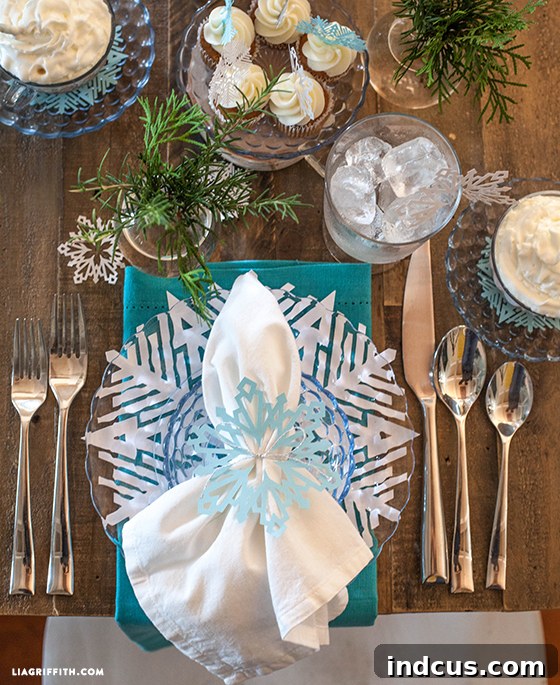
Elegant Table Settings: Elevate your winter dining experience by layering a delicate paper snowflake underneath a clear glass plate. This simple yet sophisticated touch adds a beautiful, frosty accent to each place setting, perfect for holiday brunches or festive dinners.
Snowy Window Garlands: Create a charming and ethereal window decoration by stringing your snowflakes together with fluffy white pom-poms. This creates a delightful snowy illusion, whether hung vertically as a curtain or horizontally as a festive garland across the top of your windowpane.

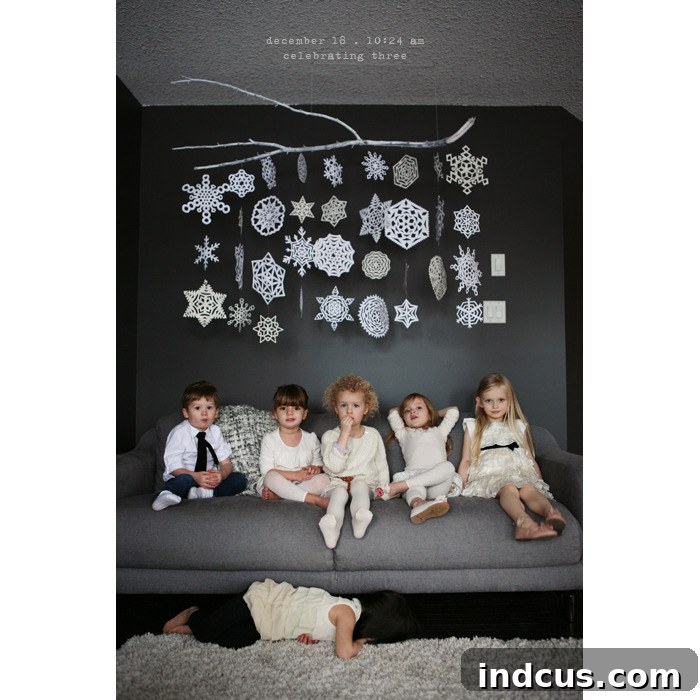
Boho Winter Mobile: For an artsy and rustic vibe, attach your paper snowflakes to fishing line or delicate white thread. Tie these strands to a natural branch, creating a beautiful hanging mobile that brings a touch of nature indoors. This makes a stunning centerpiece or corner accent.
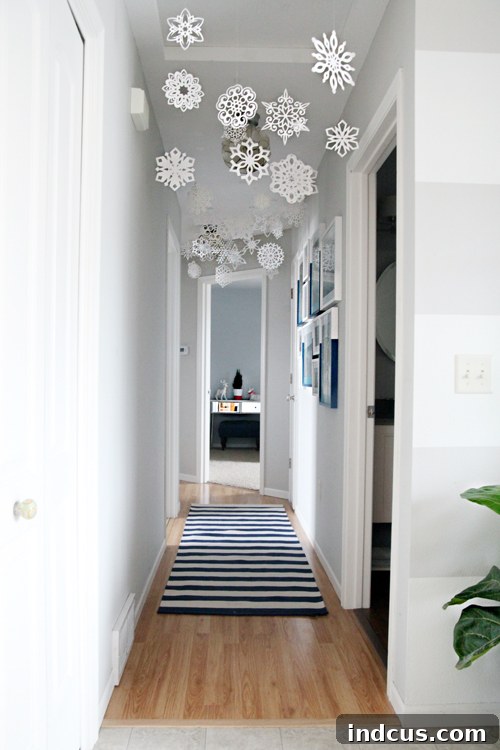
Ceiling Cascade: Create a magical, falling snow effect by attaching multiple snowflakes to varying lengths of white thread or fishing line. Securely tape these strands to your ceiling at different heights in a hallway or over a dining table. The subtle movement will captivate and enchant!
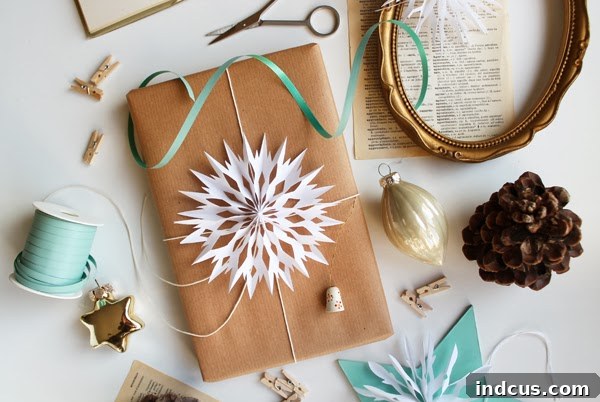
Handmade Gift Toppers: Add a heartfelt, artisanal touch to your holiday presents by using a favorite paper snowflake as a unique gift topper. It’s an eco-friendly and personalized alternative to traditional bows, showing extra care and creativity.
Window Wonderland: Perhaps the simplest and most impactful display method of all is to simply tape your paper snowflakes directly onto your windows. Arrange them individually or in clusters. The best part? They look absolutely stunning from both inside your home and for passersby outside, catching the light and creating beautiful shadows.

So there you have it – a comprehensive guide to everything you need to know to create the most beautiful and intricate paper snowflakes. I truly hope you found this paper snowflakes tutorial helpful and inspiring. The joy of crafting these delicate wonders is immeasurable, and I encourage you to embrace the process, experiment with designs, and fill your home with these charming handmade decorations.
For another incredibly fun winter paper craft idea, be sure to check out these giant paper bag stars. I even created mine to light up at night, and they are truly stunning, adding a warm, inviting glow to any space.
Happy crafting, and may your winter be filled with beautiful, handmade snowflakes!
Like this idea? Pin it to save it for later and inspire others!