
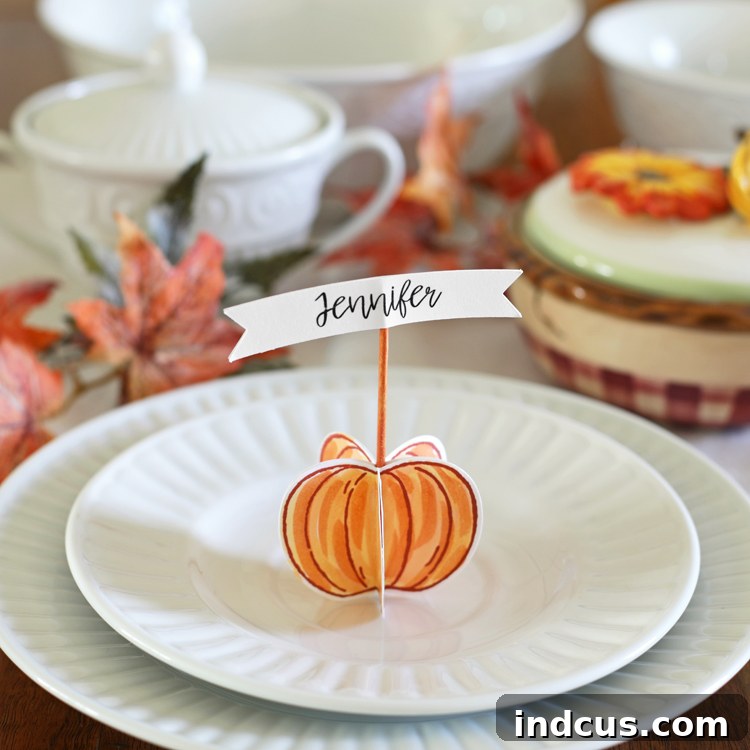
Elevate Your Thanksgiving Table: Charming Stamped Place Cards & Food Labels
This Thanksgiving, ditch the store-bought decorations and infuse your holiday table with a heartwarming, handcrafted touch that truly speaks volumes. There’s something incredibly special about adding personalized elements to your festive spread, transforming a simple meal into an extraordinary celebration. After all, Thanksgiving is arguably the biggest, most anticipated culinary event of the year for many, so why not make every detail shine with unique charm?
Today, we’re thrilled to guide you through two fantastic DIY projects designed to make your Thanksgiving table unforgettable: adorable name cards and practical, yet elegant, food labels, all brought to life with the magic of rubber stamps. These crafts are not only simple and enjoyable to create but also promise to leave a lasting impression on your guests, showing them just how much thought and love you poured into the occasion.
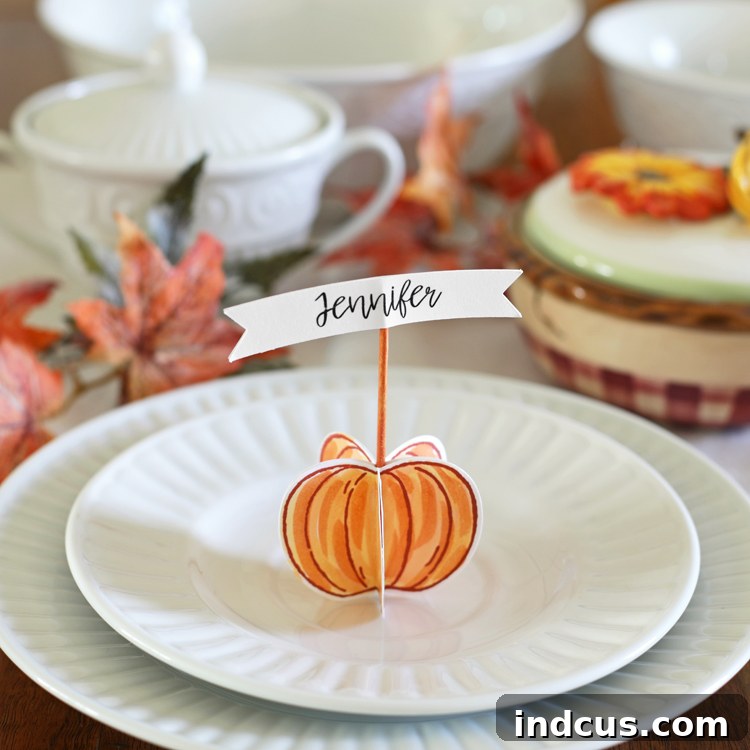
This post is proudly sponsored by Stampin’ Up!, a brand synonymous with quality crafting supplies. All project ideas, vibrant photos, and enthusiastic opinions shared here are entirely our own.
Why Choose Handmade Thanksgiving Decor?
In an age of mass-produced items, handmade decorations stand out. They tell a story, evoke warmth, and add a layer of authenticity to your holiday gathering. Crafting your own Thanksgiving place cards and food labels offers numerous benefits:
- Personalized Touch: Tailor each card to reflect your unique style and the individual personalities of your guests.
- Memorable Experience: Guests will appreciate the effort and creativity, often taking their place cards home as a cherished keepsake.
- Cost-Effective Elegance: Achieve a high-end look without breaking the bank. Crafting supplies often go further than pre-made decor.
- Family Fun: Involve loved ones in the crafting process, creating new holiday traditions and shared memories.
- Creative Outlet: It’s a wonderful way to express your creativity and unwind before the holiday rush.
Gathering Your Essential Crafting Supplies
To embark on these delightful Thanksgiving projects, you’ll need a few key items. We’ve selected high-quality Stampin’ Up! products known for their vibrant colors and excellent performance, ensuring your crafts look professional and polished. Having all your materials ready before you begin will make the crafting process smooth and enjoyable.
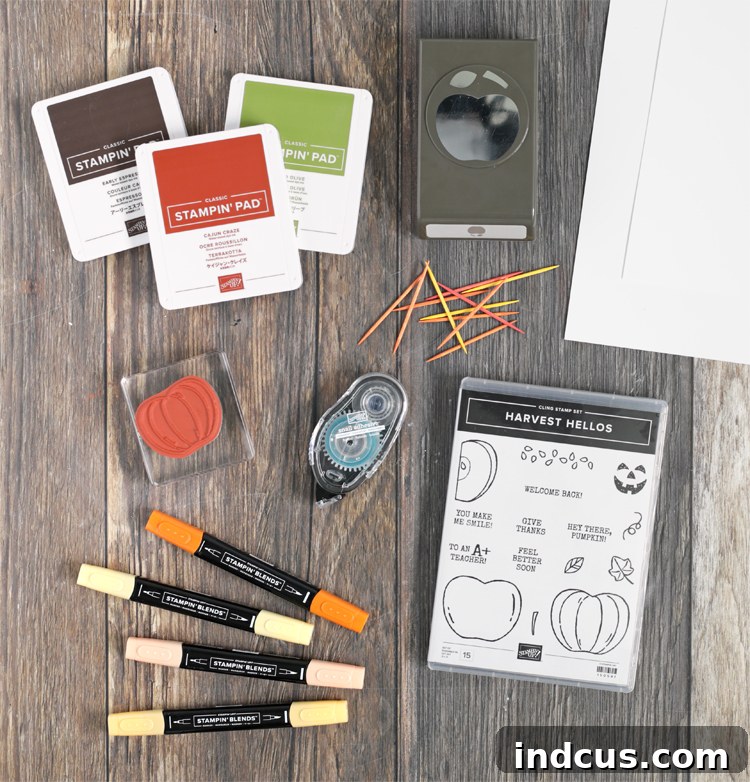
Materials You’ll Need:
- Hello Harvest Stamp Set: This versatile set is perfect for fall and Thanksgiving, featuring beautiful pumpkin and apple images, along with coordinating sentiments. Its detailed designs are ideal for creating a rustic yet elegant aesthetic.
- Ink Pads: Choose classic autumn hues to capture the essence of the season. We recommend:
- Cajun Craze: A rich, burnt orange reminiscent of falling leaves.
- Old Olive: A deep, natural green perfect for stems and leaves.
- Early Espresso: A dark, earthy brown for outlines and adding depth.
- Apple Builder Punch: While designed for apples, this punch is surprisingly versatile and perfectly cuts out our stamped pumpkin images, saving you time and ensuring uniform shapes.
- Whisper White Cardstock: A crisp, heavy-duty cardstock that provides an excellent surface for stamping and coloring, making your designs pop.
- Snail Adhesive: A fast and easy-to-use adhesive for securing cardstock layers together.
- Stampin’ Blends Markers: These alcohol-based markers are fantastic for achieving smooth, blended color and adding depth to your stamped images, giving them a beautiful, watercolor-like finish.
- Clear Stamping Block: Essential for mounting your cling stamps and ensuring even pressure for a perfect impression every time.
- Wooden Toothpicks or Small Wooden Dowels: These will form the delicate stands for your 3D place cards.
To help you visualize the entire process, we’ve prepared a comprehensive video tutorial. However, for those who prefer to follow along at their own pace, we’ve also meticulously detailed each step below.
Project One – Crafting Delightful Thanksgiving Place Cards
These charming 3D pumpkin place cards are sure to be a conversation starter and a delightful welcome for each of your Thanksgiving guests. Follow these steps to create your own personalized table markers:
Step 1: Stamp Your Pumpkin Images with Precision. Begin by firmly pressing your pumpkin stamp from the Hello Harvest set onto the Cajun Craze ink pad, ensuring even coverage. Then, carefully stamp the image onto your Whisper White Cardstock. For each individual place card, you will need a total of five pumpkin impressions. Stamp them strategically across your cardstock, leaving enough space between each for easy cutting later.
Step 2: Bring Your Pumpkins to Life with Color. Now for the fun part: coloring! Using your Stampin’ Blends markers, gently color in each stamped pumpkin image. This was my inaugural experience with these particular markers, and I was genuinely impressed! The alcohol-based ink seamlessly blends together, allowing you to achieve a soft, almost watercolor-like effect with remarkable ease. Experiment with lighter and darker shades of orange or even a touch of brown to add dimension and realism to your pumpkins. The beauty of these markers lies in their forgiving nature, making blending accessible even for beginners.
Step 3: Punch Out Your Perfectly Shaped Pumpkins. Once your pumpkins are beautifully colored, it’s time to punch them out. To utilize the Apple Builder Punch effectively, first, cut the section of cardstock containing your colored pumpkins into manageable strips. This allows the punch to reach each image accurately. Carefully align the punch over each pumpkin and press down firmly to create perfectly cut shapes. This method ensures uniform pumpkins, which are crucial for assembling your 3D design.
Pro Tip from Experience: When I initially tackled this project, I made the mistake of cutting out the stamped pumpkin images *before* coloring them. I quickly realized that coloring them while they were still part of a larger sheet of paper was significantly easier and resulted in a cleaner finish. So, learn from my experience and color first, then punch!
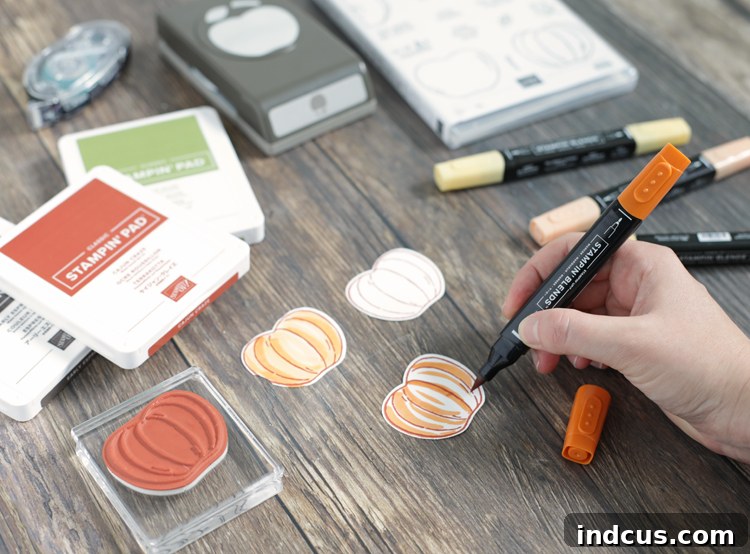
Step 4: Constructing the 3D Pumpkin Effect. Take each of your five punched-out pumpkin shapes and carefully fold them exactly in half. Ensure the fold lines are crisp and precise. Next, apply a thin line of Snail Adhesive along one half of a folded pumpkin. Adhere it to the half of another folded pumpkin. Repeat this process, joining all five folded pumpkin halves together. As you connect them, they will naturally begin to form a beautiful, dimensional pumpkin shape. The goal is to create a full, rounded pumpkin that stands on its own.
Step 5: Adding the Name Card and Final Touches. Carefully push a wooden toothpick or a small wooden dowel into the top center of your newly formed 3D pumpkin. If you find it needs extra stability, a tiny dab of strong liquid glue at the base of the toothpick can help secure it in place. Then, prepare small rectangular pieces of cardstock for your name cards. Hand-letter or print the names of your guests onto these cards. Once the names are ready, glue each name card securely to the very top of the toothpick. Voilà! You now have an enchanting, personalized place card ready to adorn your Thanksgiving table.
Visual Guide: Stamped Thanksgiving Place Card Tutorial
Project Two – Crafting Charming Food Label Cards
Beyond individual place settings, elegant food labels are a game-changer, especially for buffet-style Thanksgiving meals. They not only add a refined touch to your spread but also serve a practical purpose: clearly identifying each delicious dish. Nobody wants to accidentally scoop up sweet potato casserole when they were eyeing the mashed potatoes, or mistake a savory pie for a sweet one. (Wink, wink – we’ve all been there with the blueberry vs. cherry pie dilemma!) These cute little tented cards will guide your guests with ease and style.
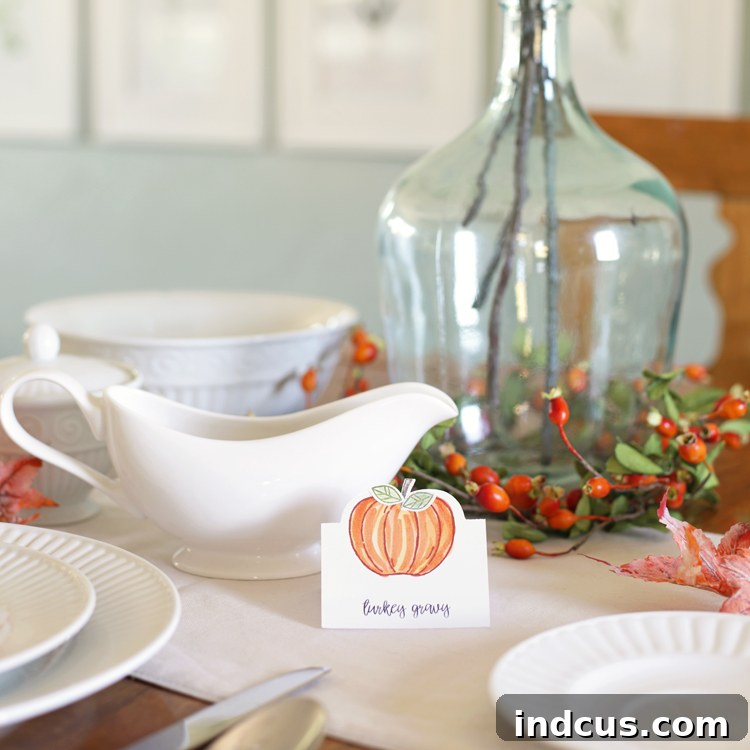
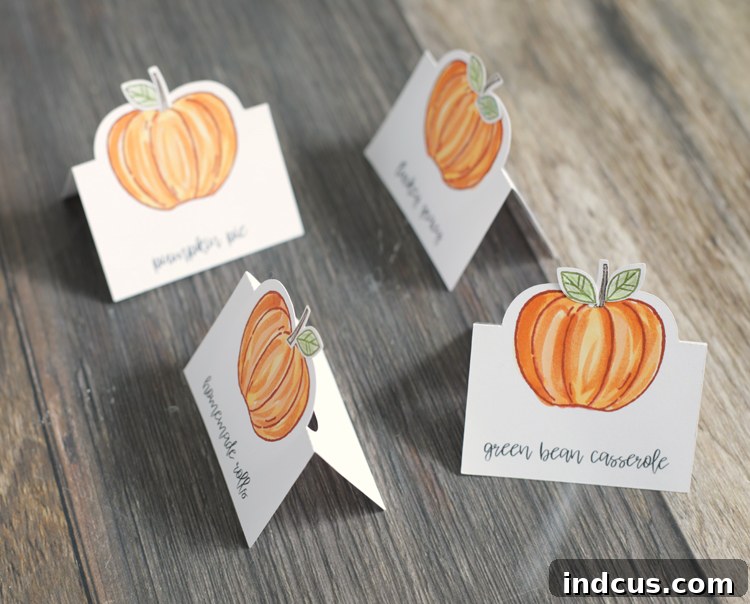
The pumpkin images for these food labels are created with the same stamping and coloring techniques used for the place cards. However, instead of building a 3D pumpkin, you’ll stamp the image directly onto pre-cut tented label cards. This time, we’re adding an extra layer of detail: using the Old Olive ink pad, stamp the delicate leaf and stem images from the Harvest Hellos set directly above your colored pumpkins. This small addition provides a beautiful, finished look that truly enhances the autumnal theme.
To make creating these food labels incredibly simple, we’ve designed a complimentary SVG cut file specifically for tented cards that perfectly frames the pumpkin stamp. You’ll find the download link at the bottom of this post. Simply download the file, open it in your preferred cutting machine software (like Silhouette Studio or Cricut Design Space), and cut out as many cards as you need. This method ensures consistent sizing and a professional finish. Once cut, you can proceed to stamp your charming pumpkins onto each card. A great bonus: these SVG-cut cards can also double as name cards, allowing for a perfectly coordinated look across your entire Thanksgiving table – a seamless design choice that will surely impress your guests!
Embracing Versatility: Beyond Thanksgiving
It’s worth noting the incredible versatility of the Harvest Hellos stamp set and this SVG file. The same stamp set contains images for creating adorable Jack-O-Lanterns and apples, both of which fit perfectly within the dimensions of the provided SVG cut file. This means your crafting investment extends far beyond Thanksgiving! You can easily adapt these projects for a spooky Halloween party, create thoughtful teacher appreciation luncheon decorations, or even make charming fall festival tags. Hurray for versatile crafting supplies that spark creativity all season long!
Visual Guide: Stamped Food Label Cards Tutorial
Download Your Free Thanksgiving Tented Food Labels SVG Cut File Here!
Tips for a Seamless Thanksgiving Crafting Experience
To ensure your crafting journey is as enjoyable and stress-free as possible, consider these helpful tips:
- Set Up Your Workspace: Dedicate a clean, well-lit area for your crafting. Lay down some protective paper to prevent ink stains.
- Practice Makes Perfect: If you’re new to stamping or blending, do a few practice runs on scrap paper. This helps you get a feel for the stamps and markers before working on your final pieces.
- Involve the Family: These projects are simple enough for older children or other family members to help with coloring or stamping, turning crafting into a fun group activity.
- Batch Process: Work in stages. Stamp all your pumpkins first, then color them all, then punch them out. This can be more efficient than completing one card at a time.
- Don’t Rush: Give yourself ample time before Thanksgiving. Crafting should be relaxing, not a last-minute chore.
- Personalize Names: For your place cards, consider using a nice fine-tip marker for guest names, or even printing them out on clear labels for a polished look.
Conclusion: A Thanksgiving Table Adorned with Love
By investing a little time and creativity, you can transform your Thanksgiving table into a beautifully curated space filled with personal touches. These stamped place cards and food labels are more than just decorations; they are expressions of warmth and hospitality that will be deeply appreciated by your guests. Imagine the smiles as friends and family discover their charming pumpkin place card or easily identify their favorite dishes thanks to your elegant labels.
We hope these project ideas inspire you to embrace the joy of handmade decor this holiday season. Dive into the world of stamping with Stampin’ Up! and discover how simple it is to add a truly unique and memorable flair to your Thanksgiving celebration. Happy crafting, and may your holiday be filled with warmth, gratitude, and beautiful handmade moments!
This post is sponsored by Stampin’ Up! All opinions are my own. If you’re eager to explore more about these incredible products or delve deeper into the art of stamping, we highly recommend connecting with a Stampin’ Up! demonstrator. You can effortlessly locate one in your area by visiting www.stampinup.com and clicking on the convenient “Find a Demonstrator” button. They are a fantastic resource for tips, workshops, and all your crafting needs!







