Today, I’m absolutely thrilled to share one of my all-time favorite beginner knitting patterns with you: an incredibly versatile and stylish pair of fingerless mitts. These aren’t just any ordinary hand warmers; they are a staple I believe everyone needs in their wardrobe. I’ve personally crafted several pairs, and I wear mine constantly—whether I’m typing away at my computer, practicing the piano, or simply texting on my phone. They offer the perfect balance of warmth and freedom, keeping my hands cozy while ensuring my fingers remain agile and unrestricted. Seriously, once you make a pair, you’ll wonder how you ever lived without them!
Why Knit Your Own Fingerless Mitts? The Joy of Handmade Warmth
There’s a unique satisfaction that comes from creating something beautiful and functional with your own hands. This pattern for fingerless mitts is not only incredibly rewarding but also remarkably approachable for knitters of all skill levels, especially beginners eager to tackle their first in-the-round project. Beyond the joy of crafting, making your own mitts allows for complete customization. You can choose your favorite colors, select the perfect fiber for your needs, and even adjust the length to suit your personal style. Imagine a pair perfectly matched to your winter coat or a vibrant set that adds a pop of color to your daily outfits. They also make thoughtful, handmade gifts that truly show you care, spreading warmth and comfort to friends and family.
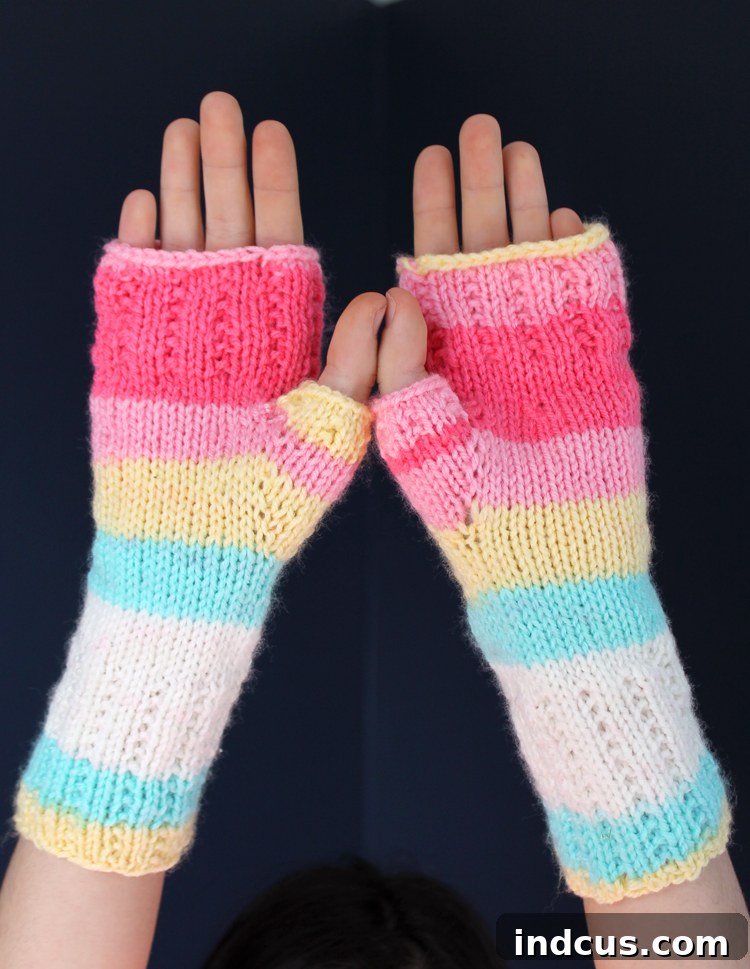
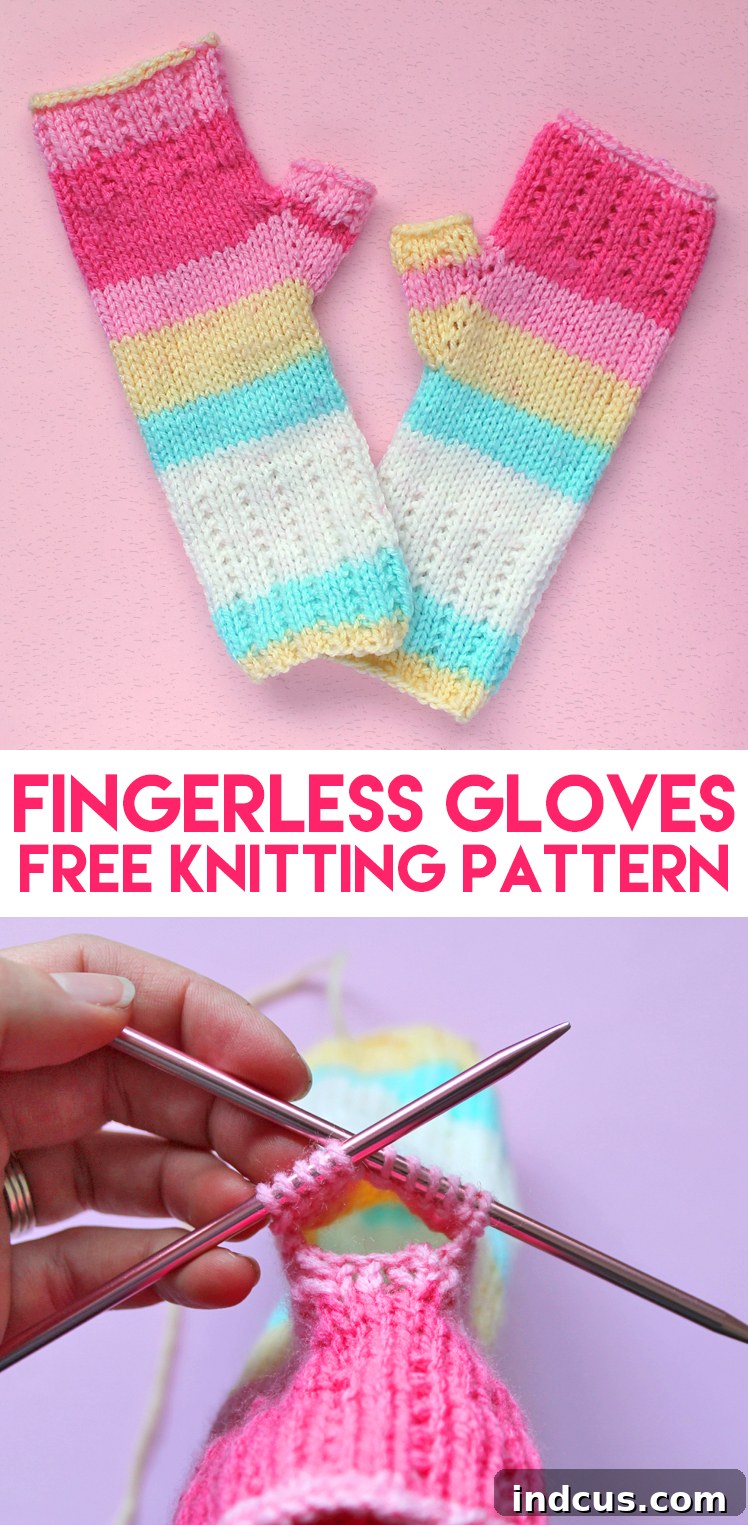
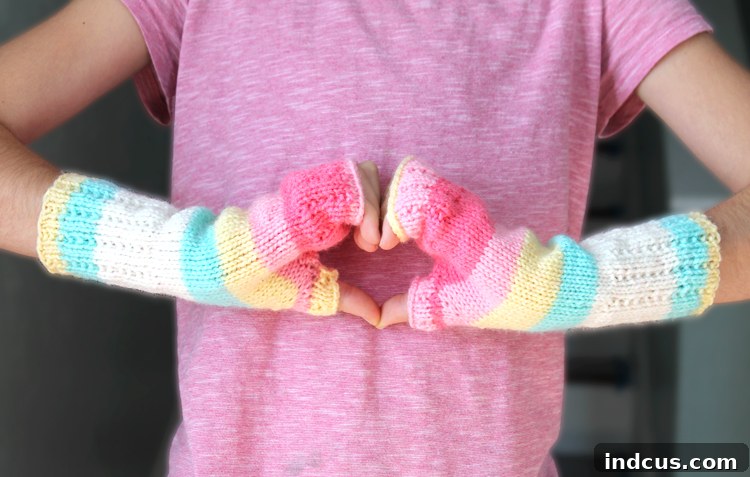
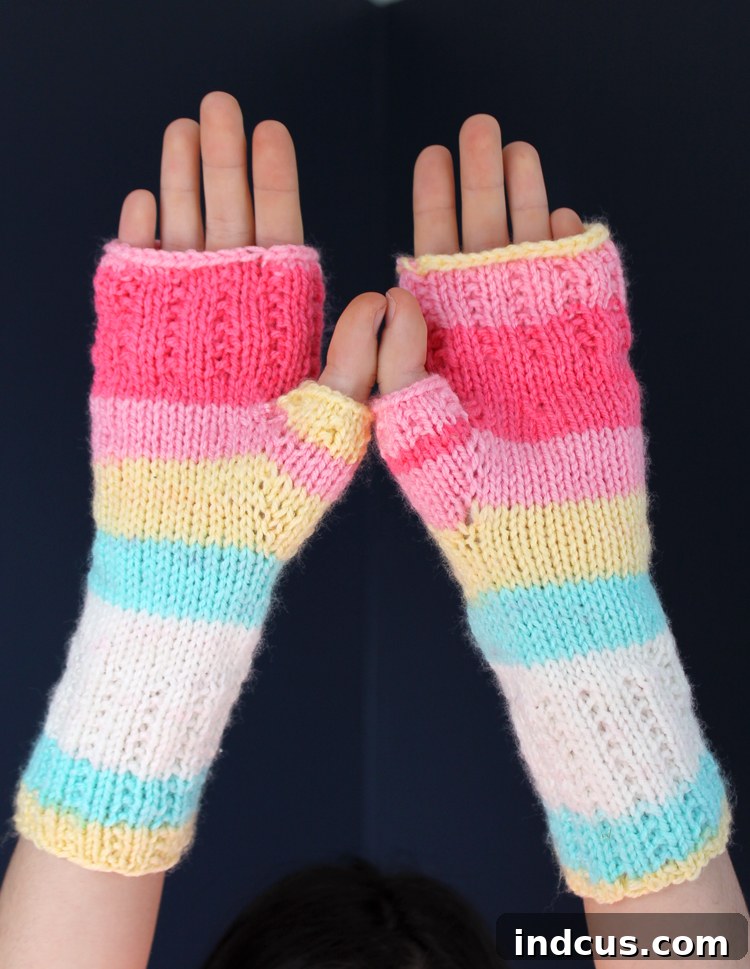
I’ve made a vibrant, striped version that my tween daughter absolutely adores:
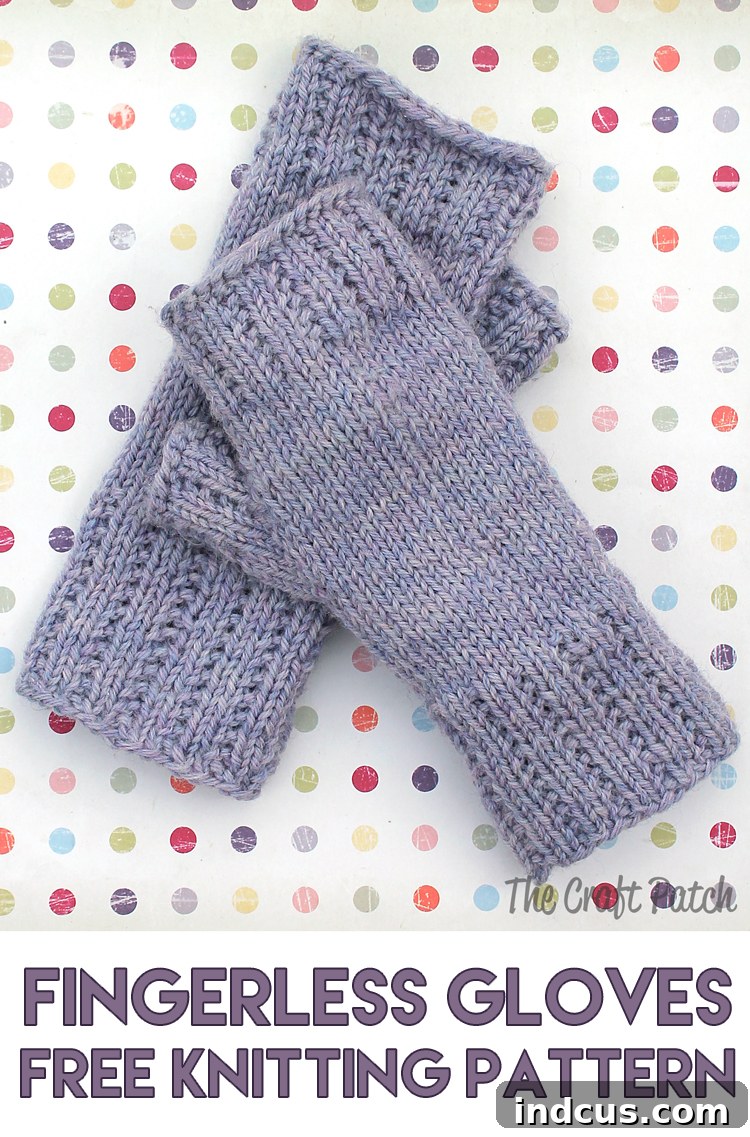
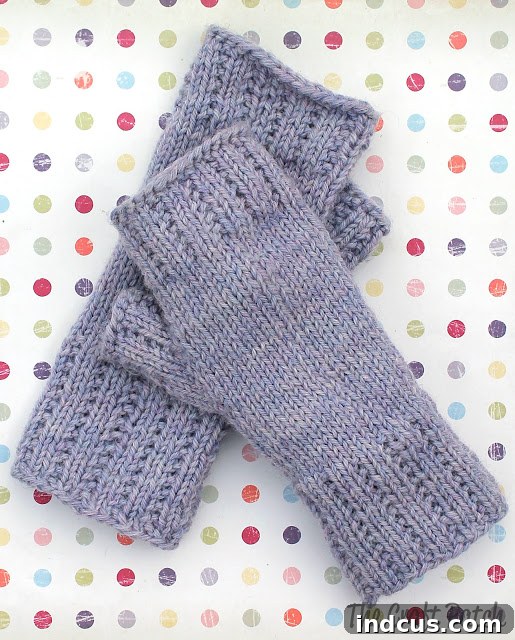
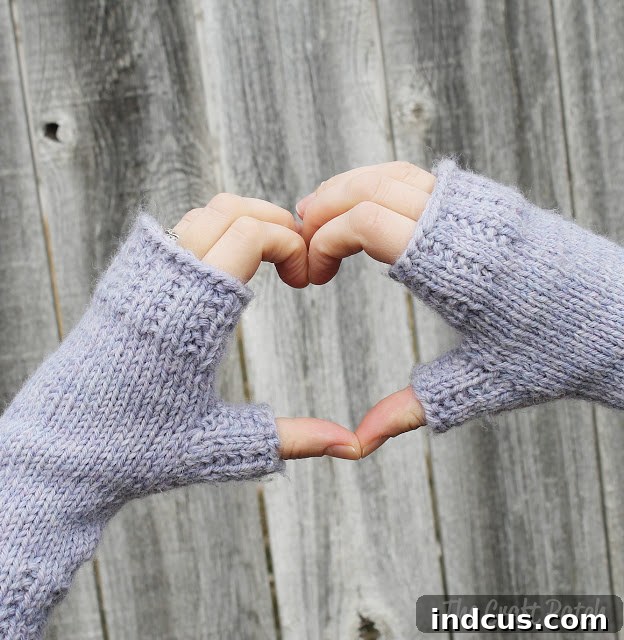
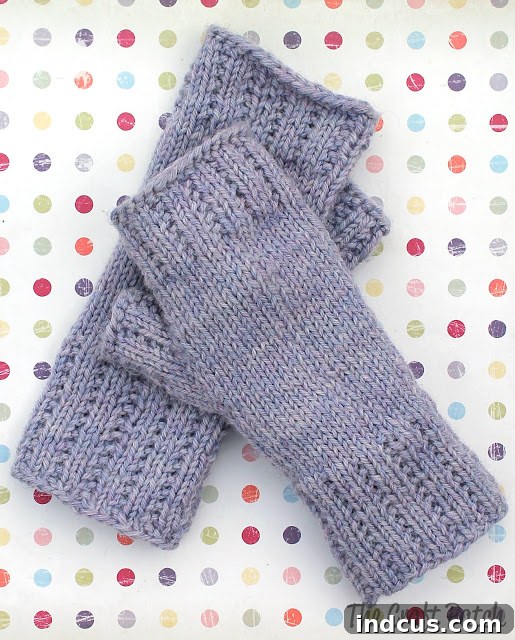
For myself, I indulged in a luxurious lavender merino wool pair that feels incredibly soft against my skin:
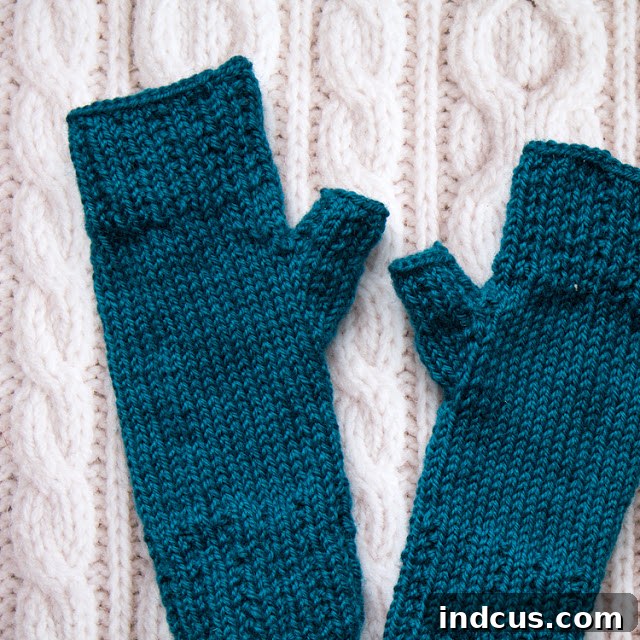
And for my sister, I crafted a beautiful teal wool pair, which quickly became her go-to accessory:
Choosing the Perfect Yarn for Your Fingerless Mitts
The success and longevity of your knitted fingerless mitts largely depend on your yarn choice. This is where investing a little extra truly pays off. While it might be tempting to opt for cheaper alternatives, “junky yarn” can quickly lead to disappointment. If a yarn feels scratchy (I’m looking at you, some basic acrylic brands!), it will irritate the delicate skin on your wrists, making your beautiful mitts uncomfortable to wear. Similarly, inexpensive yarns often pill quickly, losing their aesthetic appeal and looking worn out after just a few uses. For a project you’ll love and wear frequently, splurging on quality yarn is absolutely worth it. It’s an investment in comfort, durability, and the overall enjoyment of your handmade item. Below, I’ll share some specific recommendations and discuss what makes them suitable for this easy fingerless mitts pattern, focusing on worsted weight yarns which are ideal for beginners due to their manageability and good stitch definition.
Recommended Yarns and Their Qualities for Knitting Fingerless Gloves
Cascade 220 Merino Wool (Lavender Heather)
The lavender mitts I made for myself are crafted from Cascade 220 Merino Wool yarn in Lavender Heather. This yarn is a dream to work with and wear. Merino wool is renowned for its exceptional softness, warmth without bulk, and breathability, making it ideal for items worn close to the skin. The subtle color variations in the Lavender Heather shade add a beautiful depth to the finished fabric, giving it a sophisticated, handcrafted look. I’ve been incredibly impressed with how well these mitts have held up over time. Despite wearing them almost daily throughout the winter, they still look practically new, with no significant pilling or loss of shape. This yarn is a true favorite and, in my opinion, well worth the cost for its superior quality and longevity. I highly recommend it for any project where comfort, luxurious feel, and durability are key, especially for items like knitted hand warmers.
Paton’s Classic Wool Worsted (Teal)
The striking blue fingerless gloves featured above were made using Paton’s Classic Wool Worsted. While I initially purchased this yarn at Joann, it can also be found on Amazon via this link. This yarn offers a fantastic balance of quality and accessibility, making it a popular choice among knitters. While perhaps not as incredibly soft as the luxurious Cascade Merino, it’s still very pleasant to wear and knit with, providing excellent warmth. Paton’s Classic Wool is known for its beautiful stitch definition, which really allows the broken rib stitch to shine, and it possesses a lovely sheen that gives projects a polished, refined look. It’s an excellent choice if you’re looking for a dependable worsted weight wool that’s a step up from basic acrylics but might be easier to find or more budget-friendly than premium merino. It performs admirably and creates durable, warm hand warmers perfect for daily wear.
Lion Brand Self-Striping Yarn (Tutti Frutti)
The colorful striped mitts for my daughter were made with Lion Brand Self-Striping Yarn. These mitts turned out undeniably cute, and the automatic color changes are certainly appealing, especially for children’s items or when you want a vibrant look without managing multiple yarn balls. However, I’ve noticed that these gloves have started to pill a bit more quickly due to my daughter’s frequent use. While visually charming, for a project where I invest my time knitting, I prefer a yarn that will withstand extensive wear and maintain its appearance over a longer period. If durability is your top priority, especially for frequently worn items like knitted fingerless gloves, you might consider a more hard-wearing wool or a high-quality wool blend for your self-striping needs, or choose a different worsted weight yarn and add stripes manually for better control over the material quality and longevity.
Essential Tools for Your Fingerless Mitts Project
Beyond your chosen yarn, a few key tools will make your knitting journey smooth and enjoyable. This beginner knitting project primarily uses Double Pointed Needles (DPNs), which are essential for knitting small circumferences like mitts, socks, and hats in the round without seams. You’ll also need some scrap yarn for holding stitches, and a large eye needle for finishing. Having these items ready before you begin will ensure a seamless crafting experience.
Materials Needed for Your Easy Fingerless Mitts
- Worsted Weight Yarn (approximately 150-200 yards per pair, depending on length and gauge)
- For luxurious softness: Cascade 220 100% Merino Wool in Lavender Heather or similar high-quality merino.
- For accessible warmth: Paton’s Classic Wool Worsted in your favorite color.
- For self-striping effect (with durability consideration): Explore sturdier self-striping wool blends or consider manual color changes with a preferred worsted wool.
- Size 7 Double Pointed Needles (DPN’s) – a set of 4 or 5 is ideal for comfortably distributing stitches.
- Scrap yarn in a contrasting color (essential for holding thumb stitches safely).
- Large Eye Needle (also known as a tapestry needle or darning needle, invaluable for weaving in ends and tidying up).
- Scissors (for cutting yarn).
- Stitch marker (optional, but highly recommended for marking the beginning of rounds, making it easier to keep track).
Understanding the Stitches: A Quick Glossary for Beginners
Before we dive into the pattern, let’s briefly review the stitches and techniques you’ll be using. This easy fingerless mitts pattern utilizes fundamental knitting stitches, making it perfect for those new to knitting in the round. Familiarizing yourself with these abbreviations and their actions will build your confidence and help you follow the pattern effortlessly.
Stitch Abbreviations Explained for Your Fingerless Mitts Knitting Project
Broken Rib Stitch: This beautiful texture is created by alternating knit and purl stitches in a specific way. You Knit all stitches on even-numbered rows (or rounds when working in the round). On odd-numbered rows/rounds, you K2, P1 across. This creates a lovely, subtle ribbing that lies flatter than a traditional K2P2 rib and offers a pleasing visual interest without being overly complex. It’s a fantastic alternative to classic ribbing for cuffs and edges, providing both elasticity and a unique texture for your hand warmers.
m1r (Make 1 Right): This is a right-leaning increase. To perform an M1R, you pick up the bar that lies between the stitch you just worked and the next stitch, from back to front, and then knit into the front of that picked-up bar. This creates a new stitch that slants slightly to the right, often used symmetrically with M1L for shaping like a thumb gusset, making for a smooth and clean increase.
m1l (Make 1 Left): This is a left-leaning increase. For an M1L, pick up the bar between the stitch you just worked and the next stitch, from front to back, and then knit into the back of that picked-up bar. This creates a new stitch that slants slightly to the left, perfect for creating a clean, symmetrical increase that mirrors the M1R, ensuring balanced shaping.
sl (Slip): To slip a stitch means to move it from the left-hand needle to the right-hand needle without working it (i.e., without knitting or purling it). You can slip purlwise (inserting needle as if to purl) or knitwise (inserting needle as if to knit), but for this pattern, unless otherwise specified, slip knitwise (which is the default and creates a slightly tighter edge).
psso (Pass Slipped Stitch Over): This technique is often used in combination with slipping stitches to create a decrease. After you slip a stitch and then knit the next stitch, you pass the slipped stitch over the knitted stitch and off the right-hand needle. This reduces your stitch count by one and creates a decorative, left-leaning decrease.
k2tog (Knit Two Together): A basic right-leaning decrease. To perform k2tog, simply insert your right-hand needle into the next two stitches on the left-hand needle as if to knit, and knit them together as one stitch. This reduces your stitch count by one and is a fundamental skill for shaping in knitting patterns.
Let’s Start Knitting: Your Step-by-Step Fingerless Mitts Pattern
Now that you have your materials and understand the basic stitches, let’s embark on knitting your very own pair of fingerless mitts! This tutorial guides you through each section, from the cozy cuff to the perfectly shaped thumb gusset and top. Remember, knitting is about enjoyment, so take your time and savor the process. Don’t be afraid to make mistakes; they are part of learning! I’ve also included visual aids with corresponding images to help you along the way, making this a truly easy fingerless mitts pattern to follow. For those who prefer a concise, printable version, a PDF of this pattern will be available at the end of the post, allowing you to skip ahead if you wish.
The Cuff: Starting Your Fingerless Mitts
Cuff Construction
First, you will need to **Cast on 34 stitches** using your preferred cast-on method. Once your stitches are on the needles, carefully **divide them evenly onto three DPN’s**. The goal here is to distribute them roughly equally, so you’ll have approximately 11-12 stitches on each needle. Once divided, carefully **join to work in the round**, ensuring that your stitches are not twisted around the needles. This is crucial for creating a seamless tube for your cuff. After joining, you will effectively have 33 stitches remaining on your needles (the initial join consumes one stitch).
Next, you’ll **work in broken rib stitch** to create the bottom cuff. This stitch offers a beautiful texture and elasticity, perfect for a comfortable cuff that hugs your wrist without being too tight. For the striped gloves shown, I knit approximately 24 rounds to create extra-long, cozy cuffs. However, you can certainly do fewer rounds (e.g., 16-20 rounds) for a shorter, but still nicely sized cuff. Experiment with what feels best for your personal style and desired warmth.
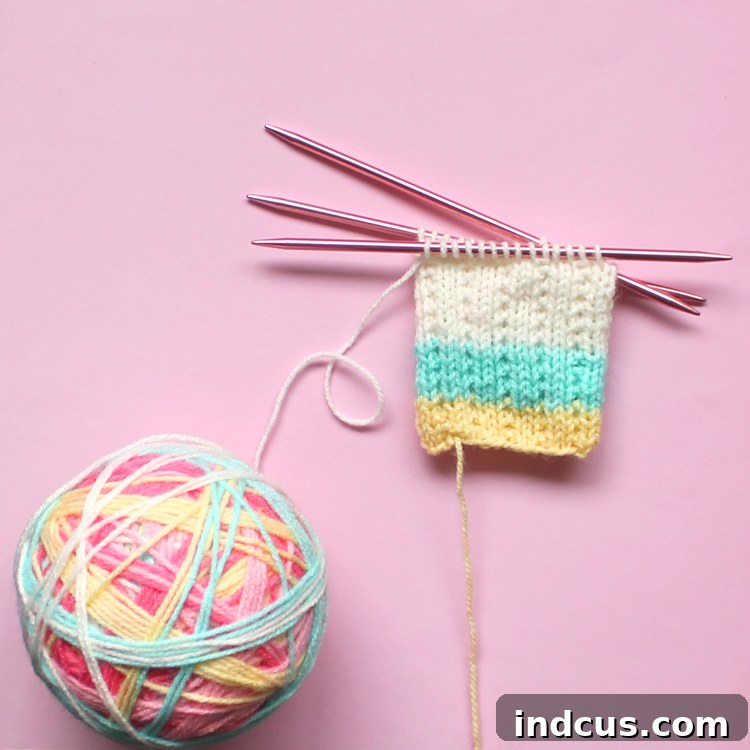
After completing your broken rib cuff, **switch to a plain knit stitch** (knit every stitch in every round) for about 1.5 inches, which usually translates to approximately 10 rounds, depending on your individual gauge. This smooth section forms the main body of the mitt before the thumb gusset begins, offering a clean canvas for the next stage of shaping.
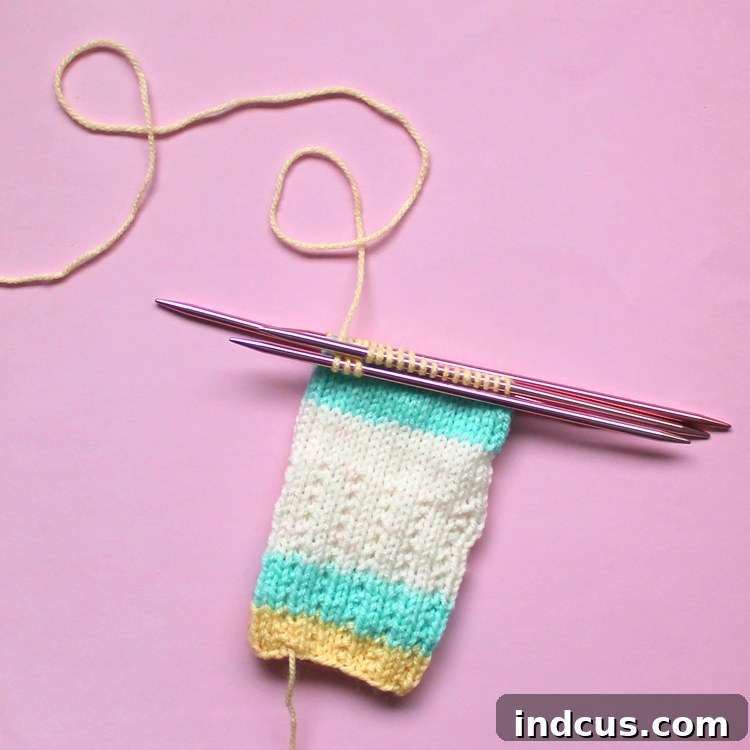
This image illustrates what knitting in the round on double pointed needles looks like, giving you a visual guide as you progress through the body of your fingerless mitts. It demonstrates how the stitches are distributed across the needles to form a seamless tube:
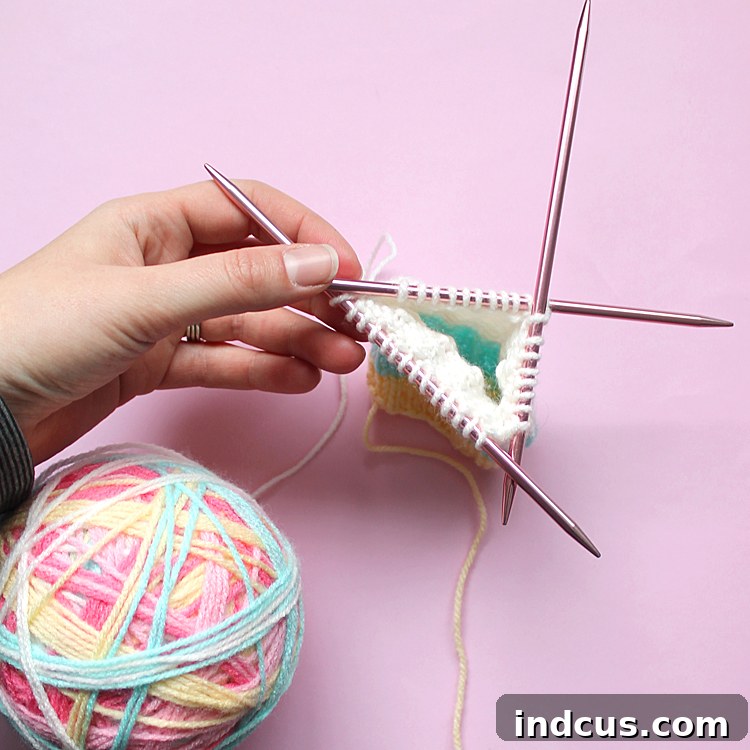
Crafting the Thumb Gusset for Comfort and Fit
Thumb Gusset Creation
The thumb gusset is a strategically shaped section that creates extra room for your thumb, ensuring a comfortable and well-fitting fingerless mitt. We’ll be using M1R and M1L increases to gradually expand this section in a symmetrical fashion.
Rnd 1: Start by making a right-leaning increase (M1R), then knit 1 stitch (K1), followed by a left-leaning increase (M1L). After these increases, knit around the remaining stitches until you reach the end of the round. This establishes the beginning of your thumb gusset, creating the first two increase stitches.
All Even Rounds: For all subsequent even-numbered rounds (Rounds 2, 4, 6, 8, 10), simply knit every stitch around. This allows the increases from the odd rounds to stand out and form the characteristic widening ‘triangle’ shape of the gusset, adding volume gradually.
Rnd 3: M1R, K3, M1L, knit around. Notice how the number of knit stitches between the increases grows by two in each odd round, systematically expanding the gusset.
Rnd 5: M1R, K5, M1L, knit around.
Rnd 7: M1R, K7, M1L, knit around.
Rnd 9: M1R, K9, M1L, knit around. At this point, your gusset should be quite distinct, with 11 stitches formed between the two M1 increases.
This image shows the process of making an increase for the thumb gusset section, illustrating how the shaping begins to create the necessary room for your thumb:
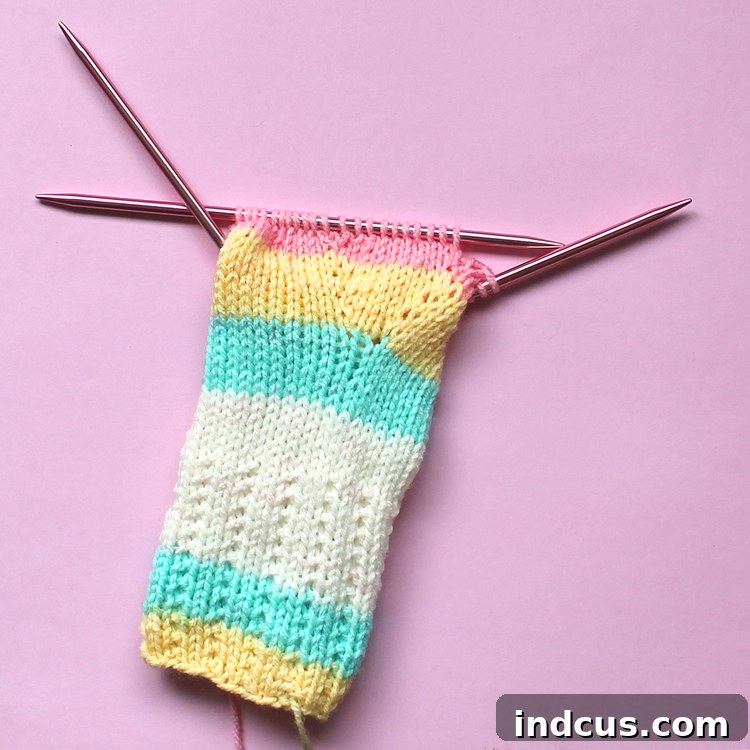
Rnd 11: This round is critical for separating the thumb stitches and creating the main thumbhole. Take a scrap of contrasting yarn and, using a large eye needle or an extra DPN, thread it through the 11 stitches that form the “triangle” of your gusset. These are the stitches between your last M1R and M1L. Slip these 11 stitches onto the scrap yarn and securely tie or knot the ends so they don’t unravel. Next, **cast on 4 new stitches** immediately after the last gusset stitch you worked, effectively creating a bridge of stitches over the gap where the thumb stitches were. Then, **join and continue to knit around** the main part of the glove, leaving the 11 stitches on the scrap yarn completely alone for now. This crucial step effectively creates the thumbhole for your fingerless mitt.
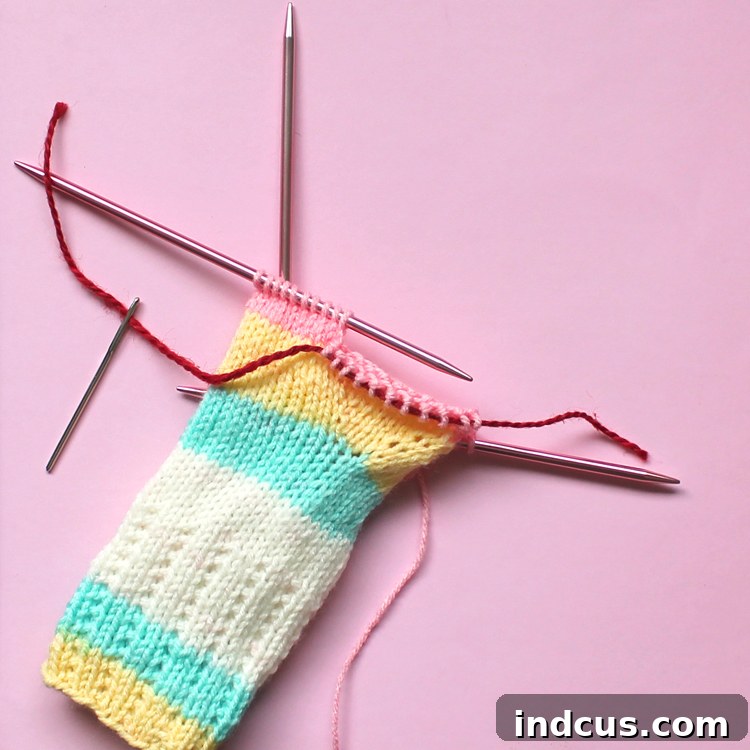
The Top Section and Finishing the Main Body of Your Mitts
Top Section Work
Rnd 12: Knit around until you reach the last 6 stitches before the beginning of the round marker (or where the thumb gusset started, if you’re not using a marker). Perform a decrease sequence to shape the top of the hand: slip 1 stitch (sl1) knitwise, knit 1 stitch (k1), then pass the slipped stitch over (psso). This creates a neat, left-leaning decrease. Then, knit 3 stitches (k3), and finally, knit two stitches together (k2tog). You might need to move a stitch from the right-hand needle to the left to ensure you have two stitches available for the k2tog at the very end of the round. This helps subtly shape the top edge above the thumb opening for a more ergonomic fit.
Rnd 13: Knit around until you reach the last 5 stitches. Repeat a similar decrease sequence: sl1, k1, psso, then knit 2 stitches (k2), and finish with k2tog. Again, adjust stitches between needles if necessary to execute the final decrease smoothly. These two decrease rounds subtly reduce the circumference above the thumb, creating a snugger fit for your hand and a cleaner transition.
After these decreases, **knit 5 rounds** in plain stockinette stitch. This provides a short, smooth section before we transition to the top cuff of your fingerless mitts.
Now, **switch back to the broken rib stitch** for 12-14 rounds. This forms the decorative and slightly elastic upper cuff of your fingerless mitts, mirroring the bottom cuff and providing additional warmth and a finished look. The length here is adjustable based on your preference – more rounds for a longer upper cuff, fewer for a shorter one.
Finally, **bind off using a stretchy bind-off method**. A stretchy bind-off is absolutely essential for the top edge of your mitts, allowing them to comfortably fit over your hand without being too tight, while still maintaining their shape and preventing flaring. There are many methods for a stretchy bind-off; a common one involves knitting into the back loop of the second stitch before binding it off, or you can research Jeny’s Surprisingly Stretchy Bind-Off for a very elastic edge.
Finishing the Thumb: The Final Touch for Your Fingerless Mitts
It’s time to go back and finish up the thumb, giving your fingerless mitts their final, polished look. This part is surprisingly straightforward and brings your project to completion.
Carefully **divide the 11 stitches from the scrap yarn** onto two DPN’s. You’ll essentially be picking up these held stitches and getting them ready to knit. Distribute them evenly, typically with 5 or 6 stitches on each needle.
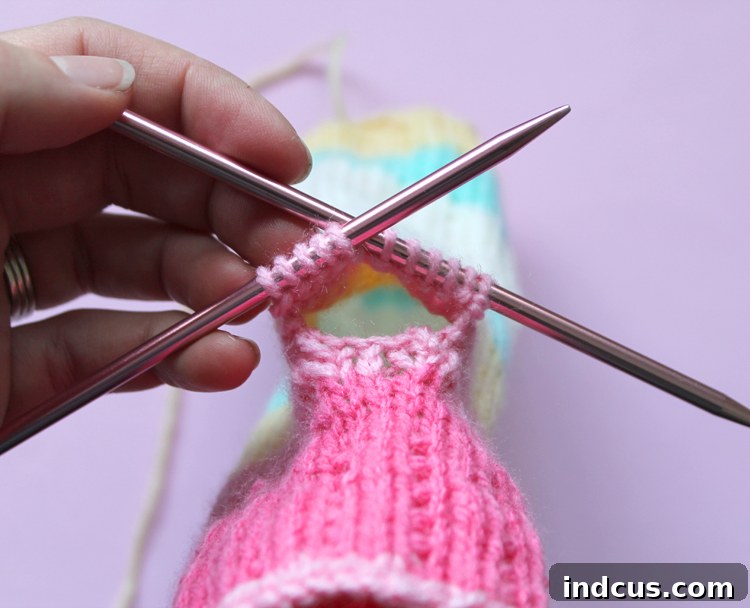
Using a third DPN, **pick up four new stitches** from the open edge of the work, specifically from the cast-on stitches you made during Rnd 11 of the thumb gusset section. These stitches bridge the gap and connect the thumb seamlessly to the main body of the mitt, closing any potential holes. You should now have a total of 15 stitches for the thumb (11 held + 4 picked up), ready to be worked in the round.
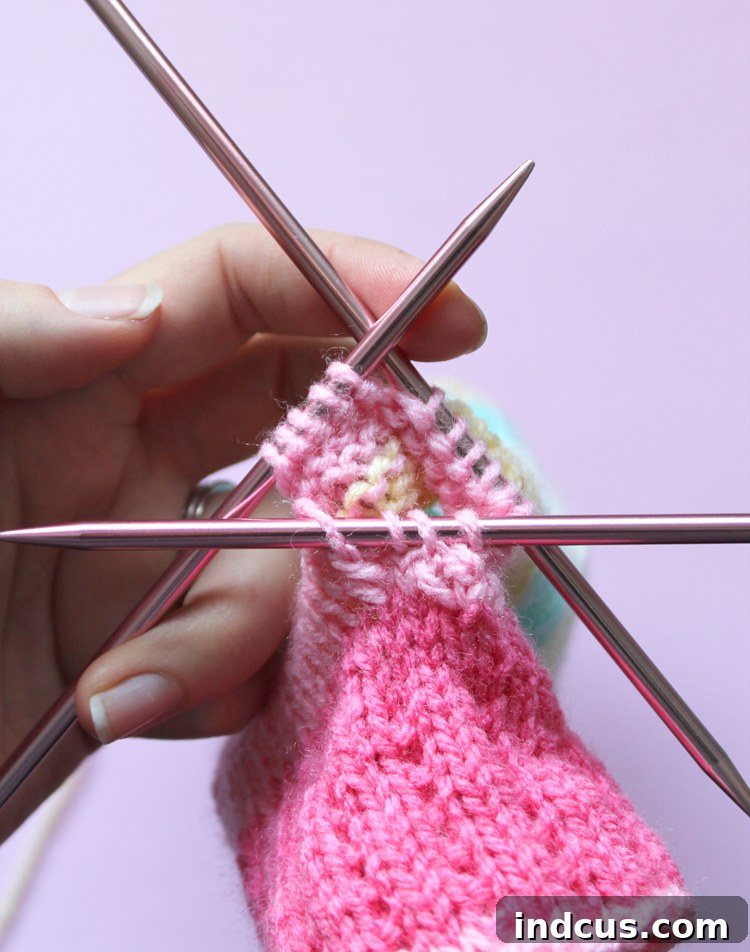
Once all thumb stitches are on your DPNs and you have joined to work in the round, **knit around in the broken rib stitch** for about 6 rows. This creates a small, neat cuff for the thumb, matching the main cuff and providing a comfortable, elastic finish to your fingerless mitts.
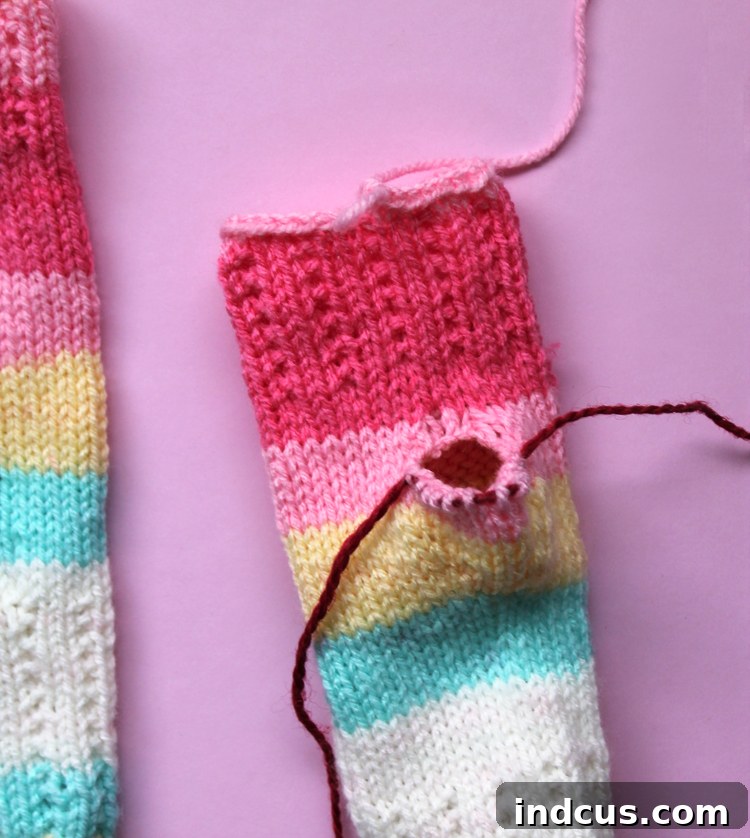
Finally, **bind off** the thumb stitches using your preferred method. After binding off, take a moment to **check for any small holes along the base of the thumb area**. These can sometimes occur where stitches were picked up or at the corners of the gusset. Use the cast-on tails (the beginning tail from your cast-on, or the tail from where you picked up stitches) and your large eye needle to “sew” them gently closed, creating a seamless and tidy finish.
Once one mitt is complete, **weave in all remaining ends** securely using your large eye needle. This is crucial for a professional look and prevents your knitting from unraveling. Then, simply **repeat the entire pattern exactly to make the second glove**, ensuring you have a perfectly matching pair of fingerless mitts!
Customizing Your Fingerless Mitts: Make Them Uniquely Yours
This beginner fingerless mitts pattern is a fantastic canvas for your creativity. Don’t hesitate to experiment with different ideas to make your mitts truly unique and reflect your personal style:
- Vary the Length: Adjust the number of rounds in both the bottom cuff and the top section to make them longer or shorter. A longer cuff can be folded over for extra warmth, while a shorter one offers a more minimalist look.
- Color Blocking: Instead of a single color, introduce stripes or blocks of contrasting colors. Change colors at the beginning of a new section (like transitioning from cuff to body) for distinct segments, or create thinner stripes for a playful look. This is a great way to use up leftover worsted weight yarn.
- Embellishments: Consider adding small decorative buttons, a simple embroidered design (like a initial or a small motif), or even a tiny decorative bead once your mitts are finished for an extra personal touch.
- Different Ribbing: While the broken rib is lovely, you could try a traditional K2P2 rib for the cuffs if you prefer that classic, very elastic look. Just remember to adjust your stitch count if needed for different rib patterns.
Caring for Your Hand-Knitted Mitts: Longevity Tips
To ensure your beautiful, handmade fingerless mitts last for years to come, proper care is essential, especially if you’ve chosen a wool yarn. Taking a little extra time for care will preserve their softness, shape, and overall appearance:
- Washing: Most wool yarns, particularly merino, prefer handwashing in cool water with a gentle wool-specific soap or shampoo. Fill a basin with cool water, add soap, gently submerge your mitts, and let them soak for about 15-20 minutes. Gently squeeze out excess water (do not wring or twist, as this can felt or stretch wool).
- Drying: Lay your mitts flat on a clean, dry towel, reshaping them to their original dimensions. Roll them up tightly in the towel to absorb more moisture, then unroll and air dry flat on a clean surface or a mesh drying rack, away from direct sunlight or heat, which can damage wool fibers.
- Storage: When not in use, store your mitts folded neatly to prevent stretching. If storing for extended periods (e.g., during summer), ensure they are completely clean and dry to deter pests like moths. You might consider using cedar blocks or lavender sachets for added protection.
Joyful Creations: See What Others Have Knit!
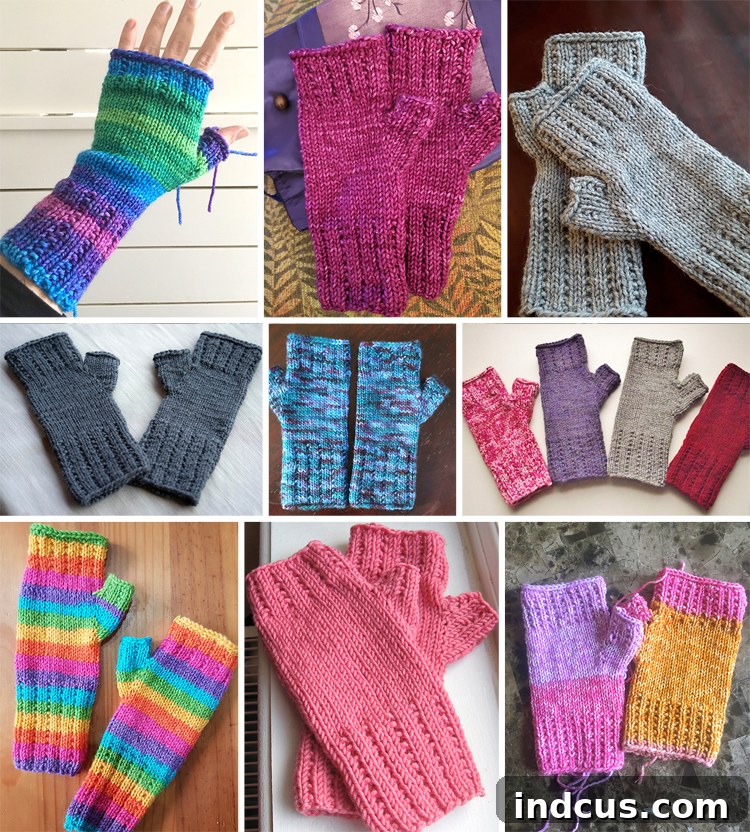
It brings me so much joy to see how many of you have embarked on this journey to create your own fingerless mitts using this pattern. Thank you for sharing your photos and showcasing your unique interpretations! It’s truly inspiring to see all the different yarn choices, color combinations, and personal touches applied to this easy knitting project. Your creations highlight the versatility and fun of this pattern, proving that even beginners can achieve stunning results!
To purchase a one-page, printer-friendly PDF version of this comprehensive fingerless mitts pattern, complete with stitch abbreviations and a streamlined format, please visit my Etsy shop.
If you’ve enjoyed this detailed fingerless mitts pattern and tutorial, I would be incredibly grateful if you could take a moment to pin one of the images below to your Pinterest board. Sharing helps other aspiring knitters discover and enjoy this fantastic and easy knitting project too! Thank you so much for your support and happy knitting!