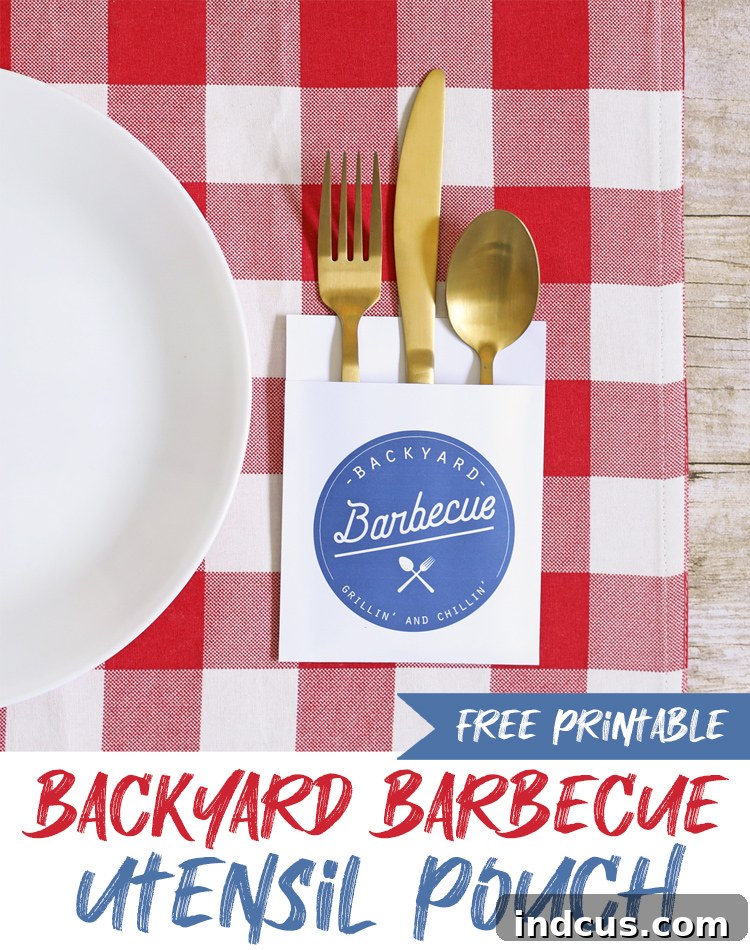
Elevate Your Outdoor Dining: Free Printable Backyard BBQ Utensil Pouches
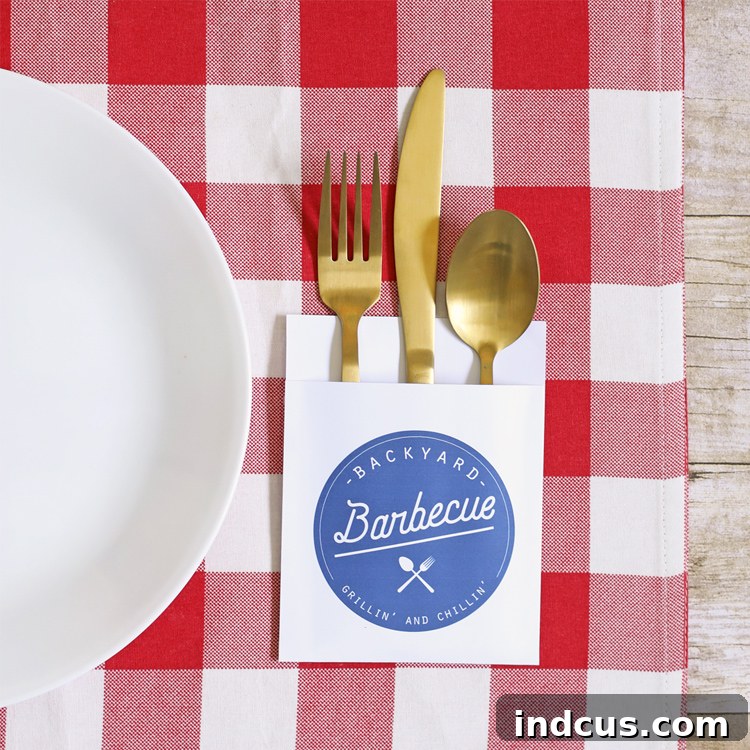
There’s nothing quite like the warmth of summer, the aroma of grilled food, and the laughter of friends and family gathered for a backyard barbecue. Hosting outdoor gatherings is one of life’s simple pleasures, but even the most relaxed events benefit from a touch of thoughtful organization and charming detail. That’s where our fantastic free printable utensil pouches come in! Designed to add both convenience and a delightful aesthetic to your next get-together, these DIY cutlery holders are an absolute game-changer for any host. Say goodbye to scattered silverware and hello to perfectly presented place settings that your guests will adore. This easy craft ensures your barbecue, picnic, or outdoor celebration runs smoothly and looks effortlessly chic.
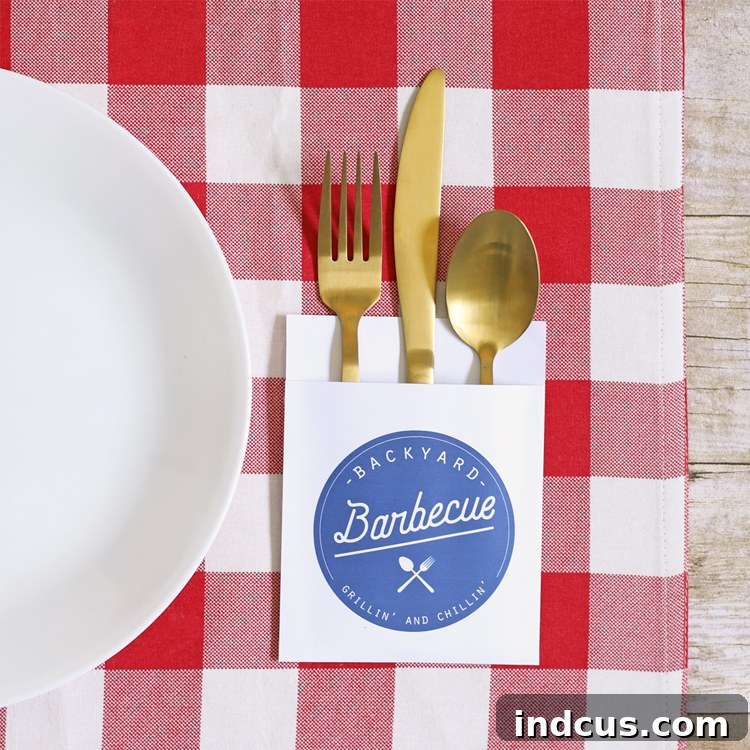
Imagine your guests effortlessly grabbing a perfectly coordinated set of fork, knife, spoon, and napkin, all neatly tucked into an adorable, themed pouch. Not only do these clever holders keep everything tidy and hygienic until mealtime, but they also significantly elevate your table decor. Forget the fuss of fumbling with loose cutlery; these pouches streamline your buffet line and add a personalized touch that shows you’ve thought of every detail. And the best part? They’re incredibly simple to make using our free printable design. Get ready to impress without the stress, making your outdoor dining experience truly memorable!
Why These Utensil Pouches Are Your Secret Weapon for Stress-Free Hosting
When planning a backyard barbecue, convenience and presentation are key ingredients for a successful event. Our printable utensil pouches offer a multitude of benefits that make them an indispensable addition to your outdoor entertaining arsenal:
- Unmatched Convenience: Guests can easily grab a complete set of cutlery and a napkin in one swift motion, perfect for a bustling buffet or casual table setting. This streamlines the dining process and keeps lines moving smoothly.
- Enhanced Hygiene: Keep your eating utensils clean and protected from outdoor elements, dust, and curious insects until they are ready to be used. This provides peace of mind for both you and your guests.
- Elevated Table Presentation: Transform ordinary place settings into charming, coordinated displays. These pouches add a decorative element that beautifully complements your party theme, making your table look professionally styled.
- Effortless Organization: No more unsightly piles of loose silverware tumbling over! These pockets keep everything neatly contained, reducing clutter on your serving station or dining table and making post-party cleanup significantly easier.
- Personalized Touch: While incredibly functional, these pouches also serve as a delightful decorative accent, showcasing your attention to detail and creative flair. They can be a conversation starter and add warmth to your gathering.
Whether you’re hosting a grand summer feast or an intimate family cookout, these utensil pouches are designed to simplify your hosting duties while making a big impact. They’re an affordable, quick, and stylish solution for anyone who loves to entertain outdoors and wants to add that special something to their event.
Gather Your Crafting Essentials: Materials Needed
Creating these delightful and practical utensil pouches is a straightforward process that requires just a few basic craft supplies. We’ve carefully selected materials that ensure both durability and a professional finish, making your DIY project both enjoyable and rewarding. Having these items on hand will make the assembly process incredibly smooth. Here’s everything you’ll need to gather before you start:
- White 8.5″x11″ Cardstock: Opting for sturdy cardstock over regular printer paper is absolutely crucial for the structural integrity and longevity of your pouches. Cardstock allows them to hold their shape, stand up to handling by guests, and provides a more premium, high-quality feel. Standard 65lb or 80lb weight cardstock works perfectly.
- Printable Design (Download at the end of this post): This is your key ingredient! Our exclusive, charming design provides all the necessary graphics and precisely marked cut/fold lines you’ll need. Make sure to download it and have it ready on your computer before you begin printing.
- Printer: A reliable inkjet or laser printer is essential for producing crisp, vibrant prints. Ensure your printer has sufficient ink or toner and is set to print at the highest quality available to capture all the intricate details of the design.
- Corner Rounder (Optional but Highly Recommended): While not strictly necessary for functionality, a corner rounding punch or tool will instantly give your finished pouches a polished, professional look. It softens the edges, adding a touch of elegance that mimics professionally manufactured items.
- Hot Glue Gun + Glue Sticks: A hot glue gun is the ideal adhesive for this project due to its rapid drying time and strong, instant bond. It allows for swift assembly, ensuring your pouches are securely fastened and ready for use in mere moments.
Step-by-Step Guide: Crafting Your Perfect Utensil Pouches
Now that you have all your materials ready and organized, let’s dive into the fun and creative part: assembling your beautiful utensil pouches! Follow these clear and simple instructions to create practical and aesthetically pleasing holders that will undoubtedly impress your guests and streamline your outdoor dining experience.
Step 1: Download, Print, and Prepare Your Design for Quality
Begin by accessing our exclusive printable design file; simply click the download link provided conveniently at the very end of this comprehensive article. Once the file is downloaded to your computer, open it and proceed to send it to your printer. It is absolutely vital to ensure you’re printing onto white 8.5″x11″ cardstock, as this material will provide the necessary durability and a high-quality, substantial finish that regular paper cannot match. For optimal visual results, take a moment to double-check your printer settings, making sure you select “best” or “photo” quality to capture all the vibrant colors and crisp details of the design. Crucially, avoid any automatic scaling; always print at 100% or “actual size” to guarantee the correct dimensions for perfect assembly.
Step 2: Precisely Cut Along the Guidelines for Clean Edges
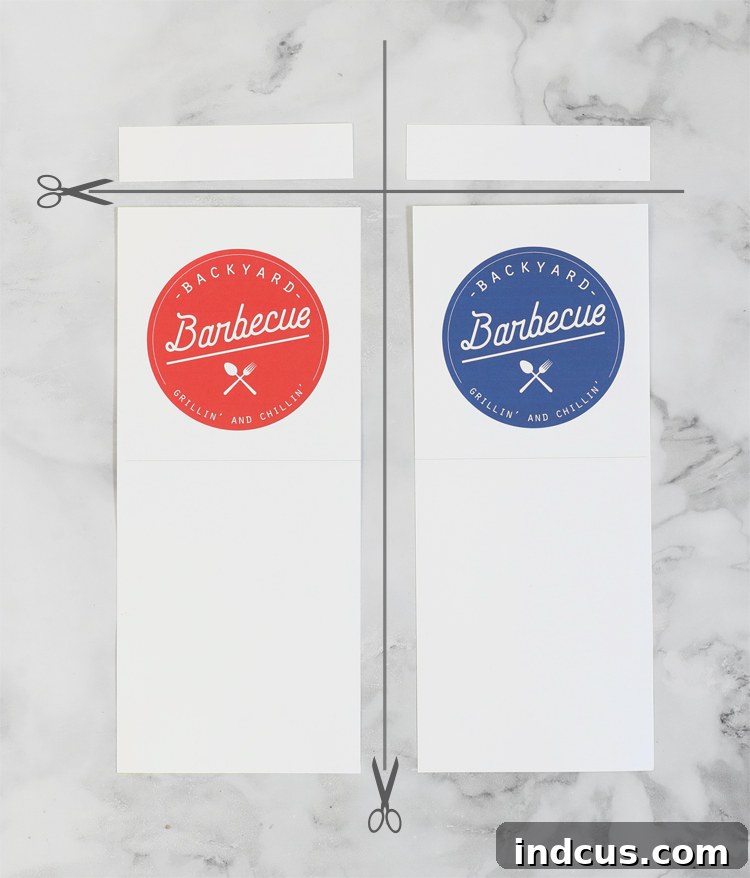
Once your delightful design has been printed, the next step involves carefully cutting along the faint gray lines that distinctly outline each individual pouch. Achieving precision during this step is paramount to ensure clean, sharp edges and an overall professional appearance for your finished product. You can achieve excellent results using a sharp pair of craft scissors. However, for even straighter lines, quicker work, and enhanced consistency, an ideal tool would be a paper trimmer or a craft knife paired with a self-healing cutting mat. Each standard letter-sized sheet of cardstock will efficiently yield two complete utensil pouches, allowing you to maximize your printing efforts and create multiple pouches with great efficiency.
Step 3: Score and Fold for a Crisp and Defined Finish
With your individual pouch shapes meticulously cut out, it’s now time to establish the fundamental pocket structure. Locate the remaining single faint gray line on your cutout. This clearly marked line precisely indicates where you need to fold the cardstock to form the base of your utensil pouch. For a truly crisp, professional, and unblemished fold, consider employing a scoring tool (like a bone folder) or even the back of a dull knife gently run along a ruler before physically folding. This technique creates a distinct crease, which prevents unsightly cracking in the cardstock and ensures your pouch folds perfectly straight and evenly. Carefully bring the bottom section upwards, taking care to align all edges precisely to create a neat, even, and consistent flap that will form your pocket.
Step 4: Secure the Sides to Form Your Functional Pocket
Now comes the exciting moment of assembly! With the bottom flap neatly folded up, your next task is to create the actual pocket that will hold the utensils. Apply a thin, yet consistent, bead of hot glue along the two distinct side edges of the folded flap. Exercise caution not to apply an excessive amount of glue, as any overflow could seep out and create a messy, undesirable appearance. Once the glue is applied, press the folded flap firmly onto the main body of the pouch, ensuring that all edges align perfectly for a seamless look. Hold for a few precious seconds until the hot glue rapidly sets, which happens remarkably fast, creating an instant bond. This action will securely seal the sides, forming a robust pocket ready to comfortably hold your utensils. Repeat this precise process for all your prepared pouches.
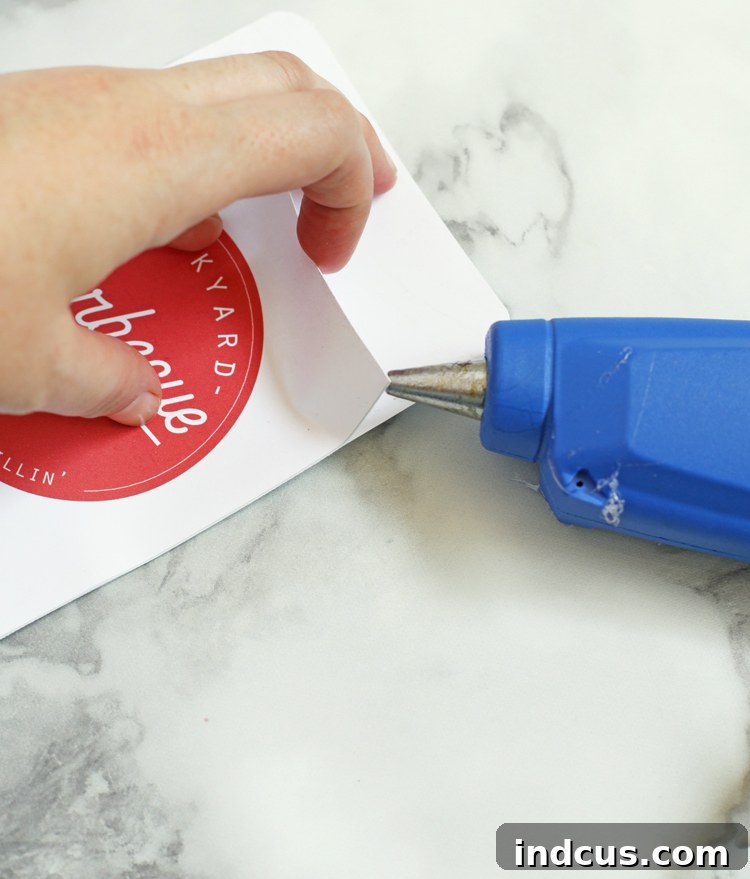
Step 5: Add a Professional Touch with Corner Rounding (Optional but Recommended)
This final embellishment step is entirely optional, but it truly works wonders in elevating the aesthetic appeal of your utensil pouches, transitioning them from a simple homemade item to a beautifully handcrafted chic creation. Using your corner rounding punch, carefully round off the top two edges of each pouch. This seemingly simple step softens the overall appearance, adds a refined and sophisticated touch, and expertly mimics the pristine finish often seen on professionally manufactured items. It is often these small, thoughtful details that make the most significant difference in the perceived quality and the overall aesthetic appeal of your finished craft project. Feel free to experiment with different rounding sizes if your punch offers various options to find the look you love most.
Styling Your Backyard BBQ: Filling and Arranging Your Pouches
Once your beautiful and functional utensil pouches are complete, it’s time to put them to their intended use and witness the instant polish they add to any meal! The sheer beauty of these holders lies in their versatility and the immediate charm they lend to your dining setup. Simply place a fork, a knife, a spoon, and a neatly folded napkin inside each individual pouch. Your party guests will undoubtedly be delighted by the thoughtful presentation and the ultimate convenience of grabbing a complete set of dining essentials all at once. It’s a simple, yet highly impactful, detail that significantly enhances their overall dining experience.
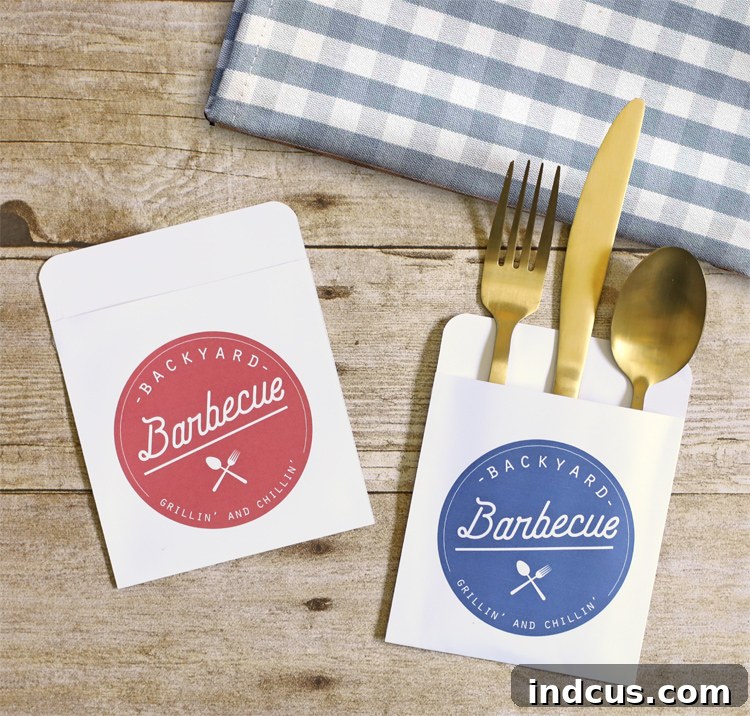
Consider arranging your perfectly filled pouches in a charming rustic basket or a decorative bin at the very end of your buffet line, allowing guests easy access. Alternatively, for a more refined and formal touch, you could elegantly place one on each guest’s plate as part of your table setting. You might even choose to tuck in a small personalized tag with a guest’s name, or a mini condiment packet (like ketchup or mustard) for an extra layer of convenience. These pouches aren’t just practical; they serve as a wonderful extension of your party’s theme and a heartfelt testament to your hospitality, creating a cohesive and inviting atmosphere.
Beyond the BBQ: Creative Uses and Customization Ideas
While these printable pouches are absolutely perfect and tailor-made for backyard barbecues, their utility and charm extend far beyond just summer cookouts! Their versatile design means they can be adapted for a multitude of occasions throughout the year. Consider incorporating them into your planning for:
- Picnics and Potlucks: Easily transport and distribute cutlery in a clean, organized, and stylish manner at any outdoor event, park gathering, or community potluck.
- Holiday Gatherings: Customize the look by printing on different colored cardstock or adding festive embellishments like ribbons, glitter, or small ornaments to perfectly match your holiday-themed celebrations, from Thanksgiving to Christmas.
- Buffet-Style Parties: Keep your serving area impeccably tidy and allow guests to serve themselves with utmost ease and elegance, whether it’s for a casual brunch or a more formal dinner party.
- Kid’s Parties: Make mealtime fun and manageable for younger guests! Fill them with kid-friendly utensils and perhaps even a small surprise treat or a coloring crayon to keep them entertained.
- Bridal Showers or Baby Showers: Choose elegant patterns or pastel cardstock to create sophisticated pouches that match your special occasion’s decor.
You can also personalize them further by adding decorative ribbons, twine, burlap, or even a small sticker featuring your event date, a monogram, or a guest’s initial. The possibilities are truly endless when it comes to making these practical pouches uniquely your own and perfectly aligned with your event’s distinct style and theme. Let your creativity soar and turn a simple printable into a personalized masterpiece!
Discover More Printable Pouch Designs for Every Season
If you’ve fallen completely in love with the undeniable charm and ingenious convenience of these barbecue utensil pouches, you’ll be absolutely thrilled to discover that we offer a fantastic variety of other delightful napkin and utensil pouch designs, specifically created for different holidays and special occasions! Expanding your collection of these versatile printables means you’ll always have the perfect, beautifully themed touch ready for any celebration you host throughout the entire year. These adaptable printables truly make party planning an enjoyable and effortless endeavor, regardless of the season, the holiday, or the specific reason for your gathering.
- Thanksgiving Utensil Pouch: Add a heartfelt touch of gratitude and warm, rustic charm to your autumn feast with these specially designed, cozy holders. Perfect for your holiday table.
- Valentine’s Day Utensil Pouch: Share the love with sweet, romantic, and charming designs, perfectly suited for a cozy dinner with your sweetheart or a festive celebration of affection with friends.
- St. Patrick’s Day Utensil Pouch: Bring a vibrant bit of luck and cheerful green spirit to your Irish-themed gathering with these festive, fun, and auspicious printables.
Make sure to keep a keen eye out for even more exciting and innovative designs to be added to our growing collection in the near future! This ensures that your table settings will consistently be seasonally appropriate, wonderfully stylish, and always ready to impress, no matter the event on your social calendar.
Loved this easy and charming DIY project? Don’t forget to pin it to your favorite Pinterest board, such as “Party Ideas” or “Summer Crafts,” to save it for your next backyard barbecue, outdoor entertaining, or general party planning inspiration! Share the crafty love with your friends and followers!