
Transform Your Old Jeans: A Creative Guide to DIY Denim Shorts & An Adorable Upcycled Skirt
As the seasons change and children grow, it’s a familiar sight for many parents: perfectly good jeans suddenly sporting unavoidable holes in the knees. What was once a staple in their wardrobe quickly becomes destined for the donation bin or, worse, the trash. But what if there was a way to rescue these beloved garments, giving them not just one, but two new leases on life? This guide will walk you through an incredibly satisfying and sustainable DIY project: transforming old, worn-out jeans into trendy shorts for yourself and a charming, playful skirt for a little one, all while embracing the principles of upcycling and creative reuse.
Upcycling denim is more than just a craft; it’s a movement towards more sustainable living. Every pair of jeans we repurpose saves resources, reduces waste, and allows us to express our creativity. Instead of discarding items that still hold value, we can reimagine them, turning potential waste into wonderful, practical new creations. Join me in turning those ‘holey’ problems into ‘wholly’ fantastic solutions and discover the joy of creating something unique from materials you already own!
The Inevitable: Worn-Out Jeans & The Spark of Upcycling Inspiration
If your household is anything like mine, the arrival of warmer weather often coincides with a sudden epidemic of knee-holes in every single pair of children’s jeans. It’s almost a rite of passage for active kids who spend their days exploring, playing, and making memories! While it might seem like a nuisance at first glance, this annual denim dilemma actually presents a fantastic opportunity for creativity and resourcefulness. With the school year winding down and summer just around the corner, what better time to grab those ‘beyond repair’ jeans and transform them into something perfect for sun-drenched days?
And it’s not just the kids! Adults, too, often find their favorite jeans developing wear and tear, particularly around the knees, or perhaps they’ve simply gone out of style or no longer fit quite right. Instead of lamenting the loss of a comfortable pair, I decided to embrace the change. My own jeans, after serving me well, were ready for a summer refresh. The decision was simple: cut them into stylish and comfortable shorts! But what to do with the substantial denim remnants? That’s where the real magic of denim upcycling comes in, turning what might be considered trash into a treasure.
This project began with a practical need for summer shorts and quickly evolved into a delightful discovery – a method to reuse the lower half of the jeans, transforming what would typically be discarded into a charming new garment. It’s about seeing potential where others might only see waste, and celebrating the ingenuity of handmade fashion. Let’s dive into how you can achieve this double transformation with ease!
Step 1: The First Denim Transformation – From Jeans to Custom Shorts
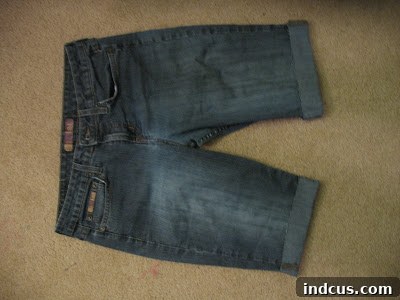
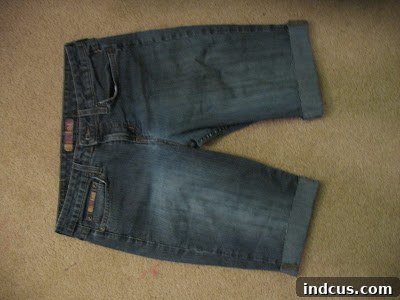
The first step in our exciting upcycling journey is a classic summer essential: converting long jeans into comfortable, stylish shorts. This process is straightforward, requires minimal tools, and offers immediate gratification. Whether for you or your active kids, a custom pair of denim shorts, perfectly tailored to your preferred length and style, is just a few snips away. This not only saves money but also ensures a perfect fit and a unique look.
How to Cut Your Jeans into Shorts: A Simple Guide
- Prepare and Try On: Begin by putting on the jeans you plan to cut. This is crucial for accurately determining the desired length. Stand in front of a mirror and decide exactly where you’d like your shorts to end. Consider different styles: ultra-short, mid-thigh, Bermudas, or even a knee-length cut.
- Mark Your Cut Line: Using tailor’s chalk, a washable fabric marker, or even a regular pencil, mark a line across each leg a little longer than your desired finished length. It’s always best to start longer, as you can always trim more off, but you can’t add fabric back once it’s cut! Account for any hemming or fraying you might want.
- Prepare for Cutting: Remove the jeans and lay them flat on a sturdy, even surface like a large table or the floor. Ensure both legs are perfectly aligned, one on top of the other, smoothing out any wrinkles or creases. This ensures an even cut on both sides.
- Precise Cutting: Carefully cut along your marked line. For a perfectly straight cut, it can be helpful to use a ruler as a guide. If you’re aiming for a raw, distressed hem, you can simply cut straight across. For a more finished, cuffed, or sewn hem, remember to leave an additional 1 to 2 inches of fabric below your desired final length for the hem allowance.
- Finishing the Hem (Choose Your Style):
- Raw Hem: For a trendy, effortlessly cool look, simply wash and dry your newly cut shorts. The edges will naturally fray, creating a stylish, distressed effect that is very popular. You can gently pull at threads by hand to encourage more fraying.
- Cuffed Hem: Fold the bottom raw edge of each short leg up once or twice to create a neat cuff. Press the cuff firmly with an iron for a crisp look. Secure the cuff in place with a few small stitches at the side seams using a needle and thread, or with your sewing machine for added durability.
- Sewn Hem: For a clean, professional finish, fold the raw edge of the shorts under by about 1/2 inch, press, then fold under again by another 1/2 to 1 inch. Press firmly and stitch along the folded edge with your sewing machine, matching the thread color to your denim.
And just like that, you have a brand new pair of comfortable and stylish shorts, perfect for all your upcoming summer adventures! But remember, the journey isn’t over. Do not toss those leftover denim pieces just yet. They are the key to our next delightful project and the heart of true denim upcycling.
Step 2: Giving Denim Scraps a Second Life – The Adorable Little Girl’s Skirt
Now, for the truly exciting and most creative part: transforming the often-discarded lower half of the jeans into something completely new and utterly adorable! This is where sustainable crafting truly shines, turning potential waste into a cherished, unique garment for a little one. It’s a wonderful way to extend the lifecycle of denim, reduce waste, and create something bespoke that won’t be found in any store. This project embodies the spirit of resourcefulness and personal touch.
Crafting an Upcycled Denim Skirt: A Detailed Step-by-Step Guide
This project is surprisingly simple, even for those with basic sewing skills. The beauty lies in its adaptability, the charming outcome, and the story behind it. Gather your sewing machine, thread, scissors, and a measuring tape, and let’s create!
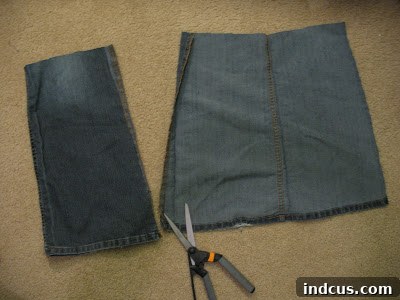
- Prepare the Denim Panels: Take the lower half of each jean leg you just cut off. Carefully cut along both the inner and outer side seams of each leg to open up the tubular fabric into flat, rectangular (or slightly tapered) denim panels. You will now have two distinct denim pieces, much easier to work with than the original leg sections. Press them flat with an iron to remove any creases.
- Find Your Pattern Skirt: Select an existing skirt belonging to your daughter (or the child you’re making it for) that fits well and has the desired length and shape. This will serve as your invaluable template. Lay this pattern skirt flat on top of one of your opened denim panels, aligning the grain.
- Cut the Skirt Pieces: Using the existing skirt as a guide, carefully cut around its perimeter. Remember to add a generous seam allowance (typically 1/2 to 5/8 inch) on the sides and bottom. Crucially, add a much larger allowance at the top (around 2-3 inches) for the elastic waistband casing. A clever trick here, as I discovered, is to strategically position the existing jean’s original outer side seam (which often has a more pronounced or decorative stitch) to run directly down the center of each new skirt piece. This adds a unique, ready-made design element to your upcycled skirt, giving it a professional, aesthetically pleasing, and charming finish. You’ll cut two identical pieces for the front and back of the skirt.
- Sew the Skirt Sides: Place the two denim skirt pieces right sides together, carefully aligning all edges. Pin along the side edges to hold them in place. Stitch them together using your chosen seam allowance. For durability and to prevent fraying, finish the raw edges of the seams. You can do this with a serger, a zig-zag stitch on your regular sewing machine, or by carefully trimming and pressing the seams open.
- Create the Elastic Waistband:
- Measure Elastic: Measure the child’s waist circumference or the elastic needed for the pattern skirt’s waist. Cut a piece of elastic to this measurement, adding about an inch for overlap to join the ends.
- Form the Casing: Fold down the top raw edge of the skirt by about 1/2 inch and press. Then, fold it down again by another 1.5 to 2 inches (depending on the width of your elastic) to create a casing for the elastic. Press firmly all around to create a crisp fold.
- Stitch the Casing: Stitch the casing, leaving a small opening (about 1-2 inches) at the back seam of the skirt. This opening will be used to thread the elastic.
- Insert Elastic: Attach a safety pin to one end of your cut elastic. Carefully thread the elastic through the casing, guiding the safety pin all the way around until it emerges from the opening. Ensure the elastic doesn’t twist inside the casing.
- Join Elastic: Overlap the ends of the elastic by about 1 inch and stitch them securely together, forming a loop. Try multiple passes with your sewing machine for extra strength.
- Finish Waistband: Gently pull the elastic fully into the casing. Stitch the opening closed using your sewing machine or a hand needle. Distribute the gathers of the fabric evenly around the waistband for a neat and comfortable fit.
- Hem the Bottom: To finish the bottom edge of the skirt, fold the raw edge up twice (e.g., 1/2 inch then another 1 inch), press firmly, and stitch to create a neat, durable hem. Alternatively, for a more relaxed or playful look, you can leave it raw and allow it to fray naturally, or gently fray it yourself for a soft, distressed finish.
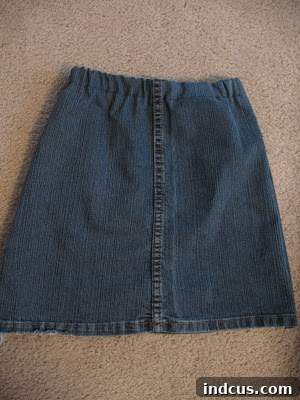
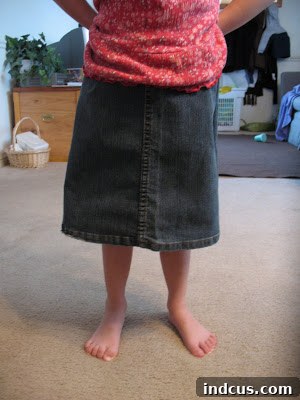
And there you have it! A perfect skirt that’s not only eco-friendly and budget-friendly but also incredibly cute and ready for all sorts of childhood adventures. Imagine it twirling in the yard, accompanying an ice cream cone licking session, or adding flair to a spirited game of hopscotch. It’s robust, comfortable, and absolutely one-of-a-kind, carrying a unique story within its stitches. The satisfaction of seeing a discarded item transformed into something so practical and adorable is truly unmatched.
The Joys of Repurposing: Why Upcycle Denim?
This simple project highlights the immense benefits of upcycling, especially with a versatile and durable material like denim. Denim is known for its strength, timeless appeal, and ability to withstand wear and tear, making it an ideal candidate for giving old garments a new lease on life. Embracing denim upcycling is a small step with a big impact.
Environmental Impact of Denim Upcycling:
- Waste Reduction: By repurposing old jeans, we actively divert textiles from landfills. Textile waste is a growing global problem, and giving garments a second life significantly reduces the volume of rubbish and the environmental burden associated with decomposition and incineration.
- Resource Conservation: Manufacturing new denim requires significant amounts of water, energy, and chemical dyes. Upcycling existing denim lessens the demand for new production, thereby conserving precious natural resources, including vast quantities of water.
- Reduced Carbon Footprint: Less manufacturing directly translates to fewer greenhouse gas emissions. By choosing to upcycle, you are contributing to a healthier planet and a more sustainable future.
Economic Benefits of DIY Denim Projects:
- Significant Cost Savings: Creating new garments or items from existing materials is considerably cheaper than buying new ones. This project, for instance, essentially yields two new, custom items for the price of none!
- Extended Lifespan: You get more utility and use out of your clothing items, maximizing their value and reducing the need for constant new purchases.
Creative & Personal Rewards of Upcycling:
- Unique, Custom Creations: Upcycled items often have a unique character, history, and story that mass-produced items lack. They are truly one-of-a-kind expressions of your personal style and creativity.
- Personal Satisfaction & Empowerment: There’s immense satisfaction and a strong sense of accomplishment in creating something beautiful and useful with your own hands, especially when you know you’ve contributed to a more sustainable lifestyle.
- Skill Development: DIY projects like this help hone valuable practical skills, including sewing techniques, problem-solving abilities, and fostering creative thinking.
Beyond Shorts and Skirts: Explore More Denim Upcycling Ideas
The beauty of denim is its incredible versatility and robust nature. Once you start upcycling, you’ll begin to see potential everywhere! Those remaining scraps, even smaller ones from your current project, can be transformed into a myriad of useful, decorative, and thoughtful items:
- Denim Patches & Repairs: Perfect for repairing other clothes, reinforcing worn areas, or adding a decorative, personalized touch to jackets, bags, or other jeans.
- Stylish Tote Bags or Pouches: The strength of denim makes it ideal for creating durable and fashionable bags for groceries, books, or everyday essentials.
- Cozy Quilts or Rugs: Cut denim into squares, strips, or other shapes and sew them together to create a unique, heavy-duty quilt, throw, or even a braided rug.
- Functional Coasters or Placemats: Small, sturdy pieces of denim are excellent for crafting rustic and absorbent coasters or placemats for your home.
- Durable Pet Toys: Denim’s toughness makes it a great material for creating long-lasting chew toys or tug-of-war ropes for your furry friends.
- Practical Storage Bins or Organizers: The stiffness of denim is perfect for creating structured containers for craft supplies, office items, or children’s toys.
- Fashion Accessories: Consider making denim headbands, bracelets, or even intricate denim jewelry.
Conclusion: Embrace the Upcycling Journey and Reignite Your Creativity
So there you have it. What once was a single pair of well-loved, but ultimately too-short or holiest-of-holies jeans, has now been transformed into not one, but two functional and fabulous items: stylish, custom-fit shorts for me, and an utterly charming, unique skirt for my little gal. It’s a powerful testament to the impact of creative thinking, resourcefulness, and the wonderful positive impact of repurposing.
This project is a perfect example of how small actions in our daily lives can lead to significant positive changes, both for our personal wardrobes and for the broader environment. It encourages us to look at “waste” differently, to discover the hidden potential in everyday items, and to appreciate the value of handmade goods. I just love a good repurpose, and I sincerely hope this detailed guide inspires you to grab those old jeans from the back of your closet and embark on your very own rewarding denim upcycling adventure!
Don’t just throw away; reinvent, repurpose, and rejoice in your unique, handmade creations. The next time you find a pair of worn-out jeans, see it not as an ending, but as a new beginning for a creative project!







