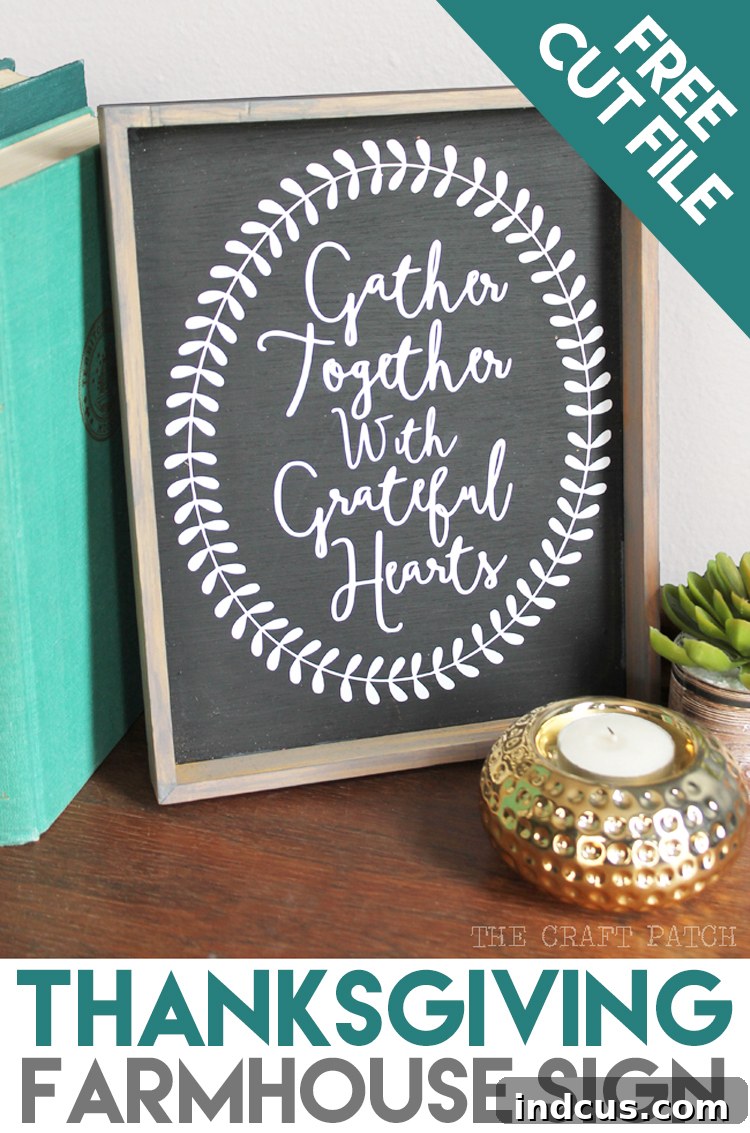
Craft a Stunning Farmhouse Thanksgiving Sign: Your Ultimate DIY Guide & Free Cut File
As the leaves turn golden and the air grows crisp, our homes naturally shift towards warm, inviting decor that celebrates the season of gratitude. There’s no better way to infuse your space with this heartwarming spirit than with a beautifully handcrafted sign. This comprehensive tutorial will guide you through creating your very own farmhouse-style Thanksgiving sign, a focal point that will undoubtedly spark conversations and bring a cozy, rustic charm to your autumn decorations. What’s even better? We’re providing a complimentary, exclusive cut file and a printable design to make this project absolutely effortless and enjoyable!
Farmhouse decor continues to captivate hearts with its blend of rustic simplicity, timeless appeal, and understated elegance. A DIY farmhouse sign allows you to customize every detail, from the color palette to the poignant message, ensuring it perfectly complements your unique home aesthetic. This particular project focuses on a gratitude-themed sign, ideal for Thanksgiving, but the versatile techniques you’ll learn can be applied to create personalized signs for any season, occasion, or just everyday inspiration.
Why Embark on This DIY Sign Journey?
Creating your own home decor pieces offers a unique sense of accomplishment and numerous benefits beyond just saving money. Here are a few compelling reasons to dive into this DIY project:
- Personalization Beyond Compare: Store-bought signs rarely capture your exact vision. With DIY, you choose the perfect size, colors, fonts, and message, making it truly unique to your home.
- Cost-Effective Decor: While initial tool investments might seem daunting, crafting multiple signs often proves more economical than purchasing high-quality, handcrafted alternatives. Plus, you get to reuse your tools for future projects!
- Unleash Your Creativity: This tutorial provides a framework, but you’re encouraged to experiment! Play with different paint finishes, distressing techniques, or even add embellishments to make your sign truly one-of-a-kind.
- Meaningful Gifts: A handmade sign, especially one centered around gratitude, makes an incredibly thoughtful and cherished gift for hosts, friends, or family during the holiday season.
- Boost Your Skills: Each DIY project helps you hone your crafting skills, building confidence for even more ambitious undertakings.
Ready to transform a simple piece of wood into a heartfelt statement of gratitude? Let’s gather our supplies and begin this rewarding creative endeavor.
Essential Materials for Your Farmhouse Sign
Before we dive into the creative process, gathering all your materials is crucial for a smooth and enjoyable crafting experience. Here’s a detailed list of what you’ll need:
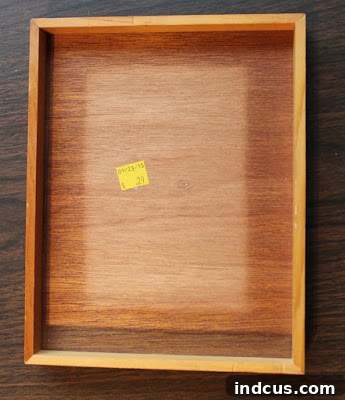
- Wood Sign Blank: This is the foundation of your project. You have a couple of excellent options:
- DIY Wood Frame: For those who enjoy woodworking, building your own sign from scratch offers ultimate customization. Check out these helpful tutorials for guidance: Tutorial 1: Building a Framed Sign and Tutorial 2: Painting & Framing a Wood Sign.
- Pre-Made Unfinished Wood Sign: A fantastic time-saver, these blanks come ready for painting and staining. They are available in various sizes, making it easy to find one that fits your space perfectly. We highly recommend these unfinished wood signs – they’re high quality and versatile for many projects.
- Painter’s Tape: Essential for creating crisp, clean lines and protecting areas you don’t want painted. Opt for a good quality tape that prevents bleed-through.
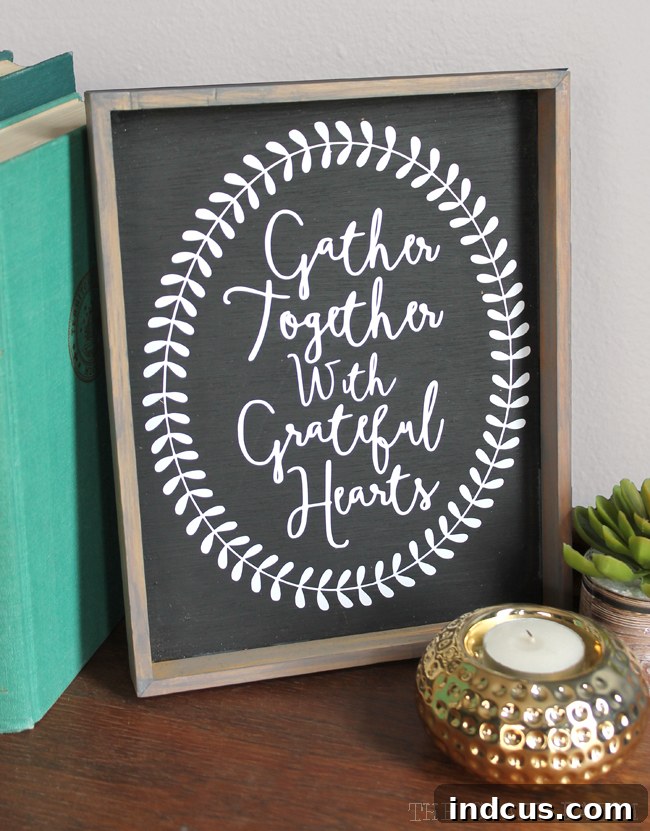
- Craft Paint: Choose your desired background color. Acrylic craft paints are affordable and come in a vast array of colors. Chalk paint is another popular option for its matte finish and excellent coverage, often requiring minimal prep. For this tutorial, black was chosen for a classic, high-contrast look.
- Wood Stain: If your sign has a natural wood frame or you wish to stain the entire piece before painting, a wood stain will enhance the wood grain and add a rich, rustic touch. Various shades are available, from light oaks to deep walnuts.
- Cutting Machine (e.g., Silhouette Cameo): A digital craft cutting machine is the heart of this vinyl project. The Silhouette Cameo is incredibly popular and user-friendly, allowing you to precisely cut intricate designs from adhesive vinyl. Other brands like Cricut also work wonderfully.
- Adhesive Vinyl: This is what forms your design. Permanent adhesive vinyl is recommended for signs to ensure longevity. It comes in a wide range of colors and finishes (matte, glossy, holographic). White vinyl was used for the example sign to stand out against the black background.
- Transfer Tape: Indispensable for lifting your cut vinyl design from its backing and accurately transferring it onto your sign. Sometimes referred to as “application tape,” it ensures your design stays perfectly aligned.
- Weeding Tools: While not strictly listed, a weeding hook or a sharp craft knife is incredibly helpful for removing excess vinyl from your intricate design.
- Plastic Scraper or Old Gift Card: Crucial for adhering vinyl firmly to your transfer tape and then to your wood sign, ensuring a smooth, bubble-free application.
Step-by-Step Tutorial: Crafting Your Farmhouse Thanksgiving Sign
Follow these detailed instructions to create a beautiful and professional-looking sign that will be the envy of all your guests. Remember to take your time with each step for the best results.
Step 1: Prepare and Protect Your Wood Sign
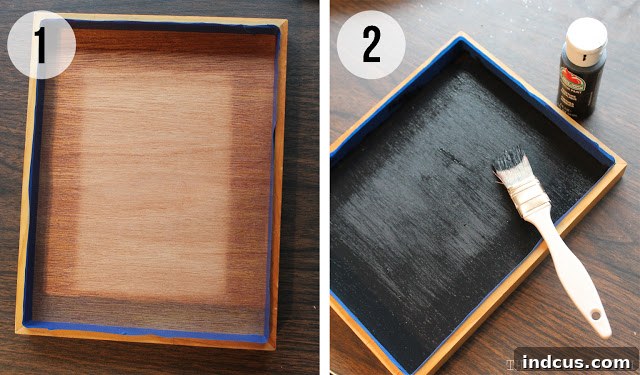
Begin by preparing your wood sign. If you’re building it, ensure all pieces are securely joined and sanded smooth. If using a pre-made blank with a frame, carefully apply painter’s tape along the inside edge of the frame to protect the natural wood. Press the tape down firmly to create a seal, preventing any paint from bleeding under. This meticulous taping ensures a crisp, clean border between your painted background and the beautiful natural wood frame.
Step 2: Paint the Background
Once the border is taped off, it’s time to paint the main background of your sign. Choose your desired color – the tutorial uses black for a striking contrast. Apply thin, even coats of craft paint. Depending on your paint and desired opacity, you might need two or three coats. Allow each coat to dry completely before applying the next. This prevents streaks and ensures a smooth, professional finish. For a distressed look, you can lightly sand areas after the paint dries.
Step 3: Design and Cut Your Vinyl Quote
Now for the magic of your cutting machine! Open the provided free cut file (available at the bottom of this post) in your Silhouette Studio software or equivalent. Ensure your design is sized appropriately for your sign blank. Load your chosen adhesive vinyl (white vinyl was used here) into your cutting machine. Adjust your blade settings according to your vinyl type and perform a test cut if you’re unsure. Cut out your gratitude-themed design with precision.
Remember, this free cut file is for personal use only. If you prefer a simpler approach, you can also download the printable design and frame it for instant decor:

Step 4: Master the Art of Weeding Your Design
Weeding is the process of removing the excess vinyl from your cut design, leaving only the letters and elements you want to transfer onto your sign. This step requires patience, especially with intricate designs. Use a weeding hook or a sharp craft knife to carefully peel away the vinyl that isn’t part of your final design. Work slowly, and cut off discarded pieces as you go to prevent them from accidentally re-sticking to your main design. Precision here ensures a clean, professional-looking outcome.
Step 5: Transfer the Design to Transfer Tape
Take a piece of transfer tape that is slightly larger than your vinyl design. Lay the transfer tape sticky-side up on your workspace. Carefully align your weeded vinyl design (still on its backing paper) over the transfer tape. Gently lay the vinyl design down onto the transfer tape. Using a plastic scraper or an old gift card, firmly rub over the entire design, pressing the vinyl onto the transfer tape. This ensures good adhesion. Slowly peel the vinyl’s backing paper away, leaving your design stuck to the transfer tape. If any part of the vinyl doesn’t stick to the transfer tape, lay the backing paper back down and rub again.
Step 6: Confirm Design Orientation (Important Check!)
Once your design is fully transferred onto the transfer tape, hold it up. If you look at the sticky side of the transfer tape with the vinyl on it, your image should appear reversed or backwards. This is normal and correct! It means it’s ready to be applied face-down onto your sign in the next step. Double-checking this step can save you from accidentally applying your text incorrectly.
Step 7: Apply Your Vinyl Design to the Wood Sign
This is the moment of truth! Carefully center your vinyl design (still on the transfer tape) onto your painted wood sign. Take your time to get the positioning just right before pressing it down. Once you’re happy with the placement, gently lay the transfer tape down onto the sign. Using your plastic scraper or old gift card, firmly rub across the entire surface of the design, ensuring every part of the vinyl adheres securely to the painted wood. Apply consistent pressure to avoid air bubbles and ensure strong adhesion.
Step 8: Reveal Your Beautiful Creation
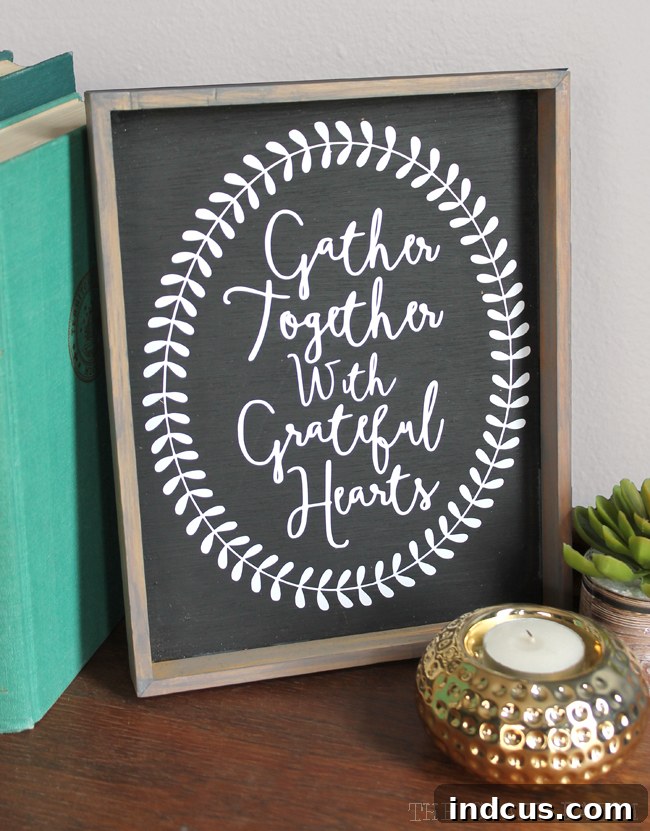
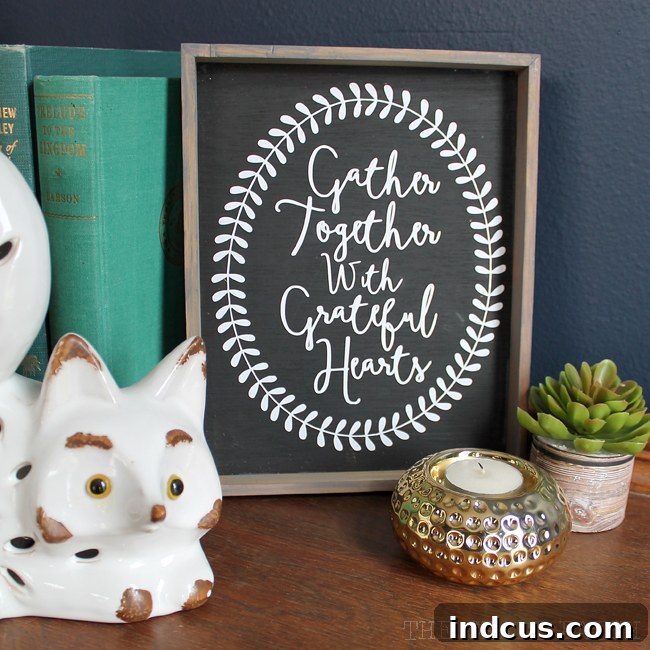
With the vinyl firmly adhered, it’s time for the grand reveal! Slowly and carefully peel away the transfer tape. Work at a shallow angle, pulling the tape back on itself. As you peel, keep your plastic scraper or gift card handy. If any part of the vinyl begins to lift with the transfer tape, gently press it back down onto the wood with your scraper before continuing to peel. Patience is key here to achieve a flawless application. Once the transfer tape is completely removed, carefully peel away the painter’s tape from the border of your sign. Stand back and admire your stunning, custom-made farmhouse Thanksgiving sign!
Enhancing Your Farmhouse Sign: Tips & Finishing Touches
Now that your beautiful sign is complete, consider these tips to elevate its longevity and style:
- Sealing for Durability: For added protection, especially if your sign will be in a high-traffic area or exposed to any moisture, apply a thin coat of clear sealant (e.g., Mod Podge, a clear acrylic spray sealant, or polyurethane). Ensure it’s compatible with both your paint and vinyl to prevent discoloration or peeling.
- Distressing for Vintage Appeal: If you desire a more aged, rustic look, gently sand the edges of your sign or lightly distress the painted surface with fine-grit sandpaper. You can also use a dark wax over chalk paint for an authentic antique finish.
- Hanging Hardware: Add sawtooth hangers or D-rings to the back of your sign if you plan to hang it on a wall. Ensure they are securely attached.
- Experiment with Colors: Don’t be afraid to deviate from the tutorial’s color scheme! Consider warm fall tones like burnt orange, deep reds, or forest greens for your background, or metallic gold vinyl for an elegant touch.
- Layering Vinyl: For more complex designs, you can layer different colors of vinyl. Just ensure each layer is pressed down firmly before applying the next.
Your handcrafted farmhouse Thanksgiving sign is more than just decor; it’s a testament to your creativity and a tangible expression of gratitude. It serves as a beautiful reminder of the blessings in your life, perfectly encapsulating the spirit of the season. Place it on your mantel, as a centerpiece on your dining table, or proudly display it by your entryway to welcome guests.
Get Your Exclusive Free Design File!
We’re thrilled to offer you the exact design file used in this tutorial, absolutely free! Whether you’re using a Silhouette Cameo, Cricut, or another cutting machine, this file will make your project a breeze. Simply click the button below to download the cut file and start crafting your gratitude sign today. We’ve also included a printable PDF version if you prefer to frame the design without vinyl.
We hope you thoroughly enjoyed this DIY farmhouse sign tutorial. Your new custom sign is sure to be a cherished piece of your Thanksgiving decor for years to come. Don’t forget to share your finished project with us on social media!
Loved this project? Pin it to your favorite DIY or Thanksgiving boards on Pinterest so you can easily find it again and inspire others!