
Crafting Joy: Three Effortless DIY Holiday Pillow Covers for a Cozy Christmas Home
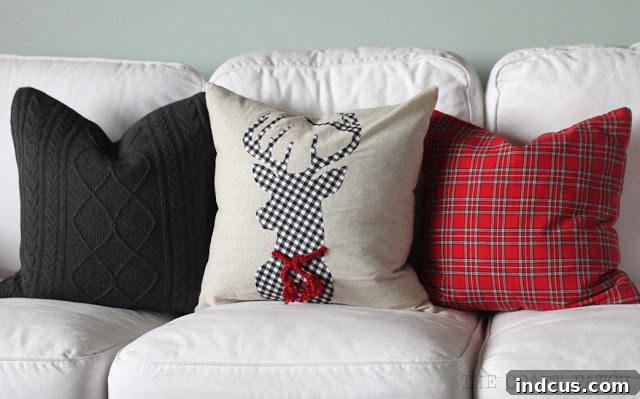
As the holiday season draws near, there’s a magical transformation that happens within our homes. Summer’s vibrant florals give way to the comforting embrace of winter textures and festive colors. This year, I decided to swap out my bright summer throw pillows for something more aligned with the cozy, spirited ambiance of Christmas – think rich textures, neutral tones, and playful pops of holiday red. And guess what? You don’t need to be a seasoned seamstress to achieve this! I’m thrilled to share with you three incredibly simple pillow cover projects that you can whip up in a single afternoon. These DIY holiday pillow covers are not just budget-friendly; they’re also a fantastic way to infuse your living space with personalized charm and warmth, making your home feel truly ready for the festive celebrations.
Before we dive into the specific projects, let’s gather a few basic supplies and consider some general tips that will help make your pillow-making journey smooth and enjoyable. You’ll typically need a sewing machine (though some steps can be hand-sewn), coordinating thread, fabric scissors, an iron, and of course, your chosen pillow inserts. Don’t be afraid to experiment with different fabrics and embellishments to truly make these projects your own!
1. The Upcycled Sweater Pillow: Effortless Texture and Warmth
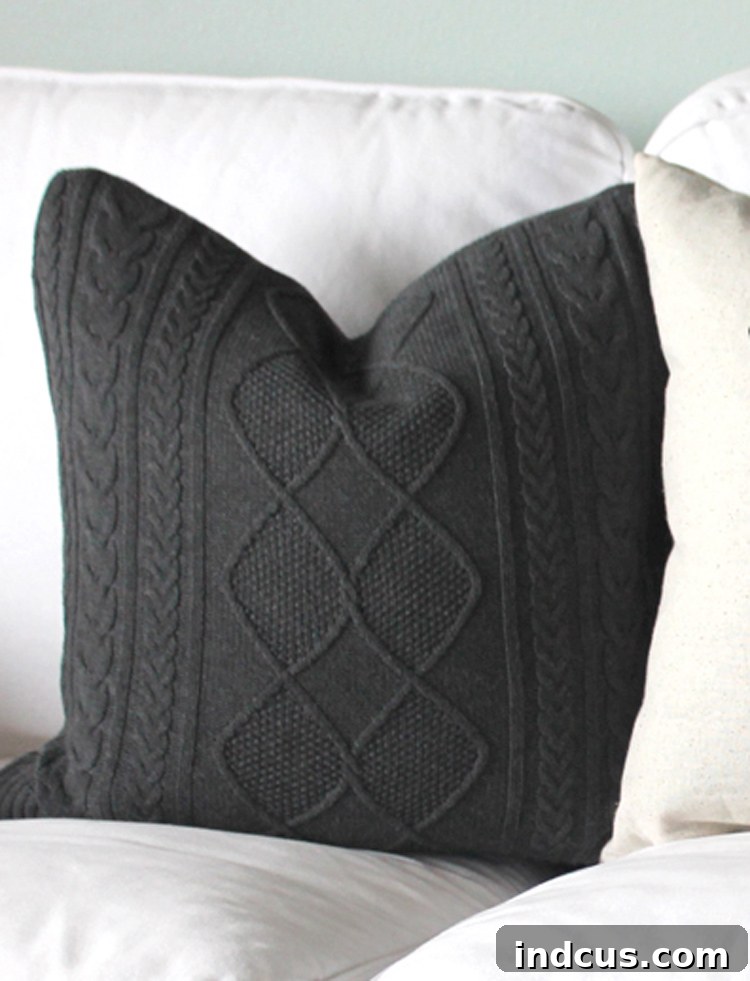
Who doesn’t love the feeling of a soft, chunky sweater on a cold winter day? Imagine bringing that same luxurious comfort to your couch! This sweater pillow project is an absolute dream for anyone looking for maximum impact with minimal effort. My secret weapon? A fantastic find from a local thrift store – a cozy gray sweater that was just begging for a second life. The beauty of this project lies in its simplicity and the inherent texture that a pre-made sweater provides. You get all the intricate cable knits or beautiful ribbing without having to pick up a single knitting needle!
To begin, select a sweater that has a good amount of body and an interesting texture. Look for wool, cashmere, or chunky acrylic blends. Ensure it’s clean and doesn’t have any major snags or holes. Once you have your perfect sweater, lay it flat and smooth out any wrinkles. Measure your existing pillow insert (or decide on your desired pillow size). You’ll want to cut a square or rectangle from the body of the sweater that is roughly the same size as your pillow insert, plus a seam allowance of about 1/2 inch on all sides. For example, if you have an 18×18 inch insert, cut an 19×19 inch square. If your sweater has a hem, you might be able to incorporate it as one of your finished edges, reducing your sewing. Cut carefully, using sharp fabric scissors, ensuring your lines are straight.
Next, place the two cut pieces of sweater fabric right sides together. Pin along three edges and partially down the fourth, leaving an opening large enough to insert your pillow form. Using your sewing machine, stitch along the pinned edges with a straight stitch, maintaining your 1/2-inch seam allowance. Backstitch at the beginning and end of your seams for extra security. Once sewn, trim the corners diagonally to reduce bulk, then turn the pillow cover right side out. Gently push out the corners to create a crisp shape. Insert your pillow form, then hand-stitch the opening closed using a ladder stitch for an invisible finish. This project took me less than an hour from start to finish, and the result is a gorgeously textured, irresistibly cozy pillow that instantly elevates any winter decor. It’s the perfect way to add that coveted hygge vibe to your home without breaking the bank or spending hours on complex crafts.
2. The Easy Plaid Deer Pillow: A Festive Applique Project
Nothing says “holiday cozy” quite like classic plaid, and when combined with a charming deer silhouette, you get an iconic Christmas accent that’s both rustic and chic. This plaid deer pillow is surprisingly simple to create, even for beginners, thanks to the magic of iron-on adhesive. It allows you to achieve a polished, store-bought look with minimal sewing.
- Prepare Your Template: The first step is to get your deer silhouette. You can download a ready-made deer template HERE. Print it out to your desired size; you might need to print it on multiple sheets and tape them together for a larger design. Alternatively, you can find various deer silhouettes online or even freehand your own if you’re feeling artistic.
- Apply Adhesive to Fabric: Select your plaid fabric for the deer. A black and white buffalo check or classic red plaid works beautifully for a festive touch. Cut a piece of your plaid fabric slightly larger than your deer template. Following the manufacturer’s instructions, iron a double-sided iron-on adhesive (such as this popular brand, readily available at craft stores) to the wrong side of your plaid fabric. Ensure the adhesive is securely bonded and let it cool completely.
- Trace, Cut, and Adhere: Once the fabric with adhesive is cool, trace the deer silhouette onto the paper backing of the adhesive. Carefully cut out the deer shape using sharp scissors. Take your time, especially around the antlers, to ensure clean edges. Peel off the paper backing to reveal the adhesive on the back of your plaid deer. Position the deer onto your pillow cover fabric (which can be a neutral linen, canvas, or even another plaid pattern for contrast). Once you’re happy with the placement, iron the deer appliqué onto the pillow fabric, again following the adhesive manufacturer’s instructions for temperature and pressing time. This creates a strong, no-sew bond.
- Craft the Scarf Embellishment: To add an adorable touch, create a miniature scarf for your deer. Cut two 6-inch lengths of red yarn – you can choose a chunky yarn for a more visible scarf. Braid or crochet these two lengths together to form a tiny scarf. If you’re not comfortable braiding or crocheting, a simple twisted rope from the yarn or a small piece of red felt cut into a scarf shape would work just as well.
- Attach the Scarf: Position the yarn scarf around the deer’s neck on the pillow cover. To attach it securely, use a fabric needle to poke small holes through the pillow fabric where you want the scarf ends to sit. Thread the yarn ends through these holes and either secure them with a dab of hot glue on the back of the pillow cover or hand-sew them down with a few stitches using coordinating red thread. This small detail adds so much character!
- Optional Durability Stitch: While the iron-on adhesive provides a good hold, for extra durability, especially if the pillow will see frequent use or washing, you can run a satin stitch (a close zigzag stitch) around the entire edge of the deer appliqué. This helps to prevent fraying and ensures the edges stay flat over time. For a seasonal pillow like this, which is typically used for only a month or two out of the year, I personally often skip this step, finding the adhesive sufficient for its intended use.
For the pillow cover itself, you have a couple of options. You can sew your own cover from scratch, which allows for full customization of fabric and size. However, to make this project even quicker and easier, consider purchasing a pre-made blank pillow cover. These are incredibly affordable and readily available online or at craft stores. For example, you can find a pack of two blank pillow covers for around $12 on Amazon, many of which come with convenient zipper closures. This saves you the time and effort of sewing the basic pillow form, allowing you to jump straight into the fun part: adding your festive deer appliqué!
3. The Plaid Cloth Napkin Pillow: The Ultimate Easy Sew
If you’re looking for the absolute simplest, fastest, and most budget-friendly way to create a holiday pillow, look no further than the cloth napkin pillow. This project is so straightforward, it almost feels like cheating! It’s perfect for beginners or anyone short on time but big on holiday spirit.
My inspiration for this pillow came from a delightful stroll through Hobby Lobby’s Christmas section, where I spotted some gorgeous plaid cloth napkins. They were on sale for half off, making each napkin a mere $1.50 – an unbeatable price for instant holiday decor! The beauty of using cloth napkins is that their edges are already hemmed, eliminating a significant step in the sewing process. All you need to do is connect them.
To make your own plaid cloth napkin pillow, first, select two matching cloth napkins. Look for festive patterns, especially buffalo check, tartan, or other holiday-themed plaids. Ensure they are of a good quality and size that will accommodate your desired pillow insert (standard dinner napkins often work well for smaller throw pillows). Once you have your napkins, place them right sides together, aligning all the edges perfectly. Pin along three sides, leaving one side open. Using your sewing machine, stitch along the three pinned edges with a straight stitch, about 1/4 to 1/2 inch from the edge. Backstitch at the beginning and end of each seam. Once sewn, turn the napkin pillow cover right side out, push out the corners gently, and insert your pillow form. Hand-stitch the remaining open side closed using a ladder stitch for a seamless finish. That’s it! You’ve just created a beautiful, custom holiday pillow in minutes.
This method isn’t limited to just cloth napkins. You can easily apply the same principle to other pre-hemmed textiles like tea towels, placemats, or even festive dishcloths. In fact, I recently shared a video on my Instagram showing how to make a pillow out of a placemat, which is another fantastic quick craft for adding seasonal touches to your home. The possibilities are endless when you start looking at everyday household linens with a crafter’s eye!
With these three simple pillow cover tutorials, my living room has been transformed into a haven of holiday comfort. I’m absolutely loving my cozy Christmas couch, complete with these handmade beauties. There’s nothing quite like curling up under that divine faux fur throw blanket (a treasure from Fred Meyer), sipping a warm mug of hot cocoa, and basking in the gentle glow of the Christmas tree lights, surrounded by decor that I’ve personally crafted. These projects are a testament to how small, thoughtful DIY touches can make a huge difference in creating a warm, inviting atmosphere for the holidays.
Whether you choose to upcycle a beloved sweater, create a charming plaid deer, or simply stitch together two festive napkins, each of these projects offers a delightful way to personalize your holiday decor. They are not only easy on your wallet but also allow you to express your creativity and add a unique, handmade touch to your home. These pillows also make wonderful, heartfelt gifts for friends and family during the festive season.
I hope these ideas inspire you to get crafting and bring some extra holiday cheer into your own home this year. Happy crafting and warm wishes for a joyful holiday season!







